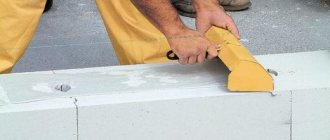
The solution on the walls is retained in the cells of the canvas and does not flow down. After the applied mixture hardens on the surface of the walls, a durable, durable coating is formed. A layer of plaster 10 mm thick can be dispensed with without reinforcement. For thicker coatings, installation of reinforcement is required.
Grid functions
Reinforcement is necessary to increase the adhesion strength of the solution to the base.
Not everyone knows how to plaster a brick wall to ensure strong adhesion of the materials. When treating walls made of brick, wood, or monoblocks, the plaster may not lie firmly and begin to crumble over time. This is due to insufficient thickness of the plaster coating, low degree of adhesion of the base and other reasons. The problem can be solved by using metal, plastic or fiberglass reinforcement.
Reinforcement of the plaster will ensure reliable adhesion of the mortar to the wall material
Technology
This technology itself is not very new: in old houses, especially wooden ones, you can often find walls covered with a lattice of thin wooden planks, on top of which plaster has already been applied. Now the choice of materials is much richer; it is not limited solely to wood.
Problems solved by reinforcement:
- The adhesion of the plaster solution increases.
- The coating becomes stronger. Having hardened in a single layer, the plaster turns into a monolithic layer.
- This method helps to some extent correct the master’s flaws. Even with an ineptly applied mortar, the reinforcing mesh will hold the plaster, preventing it from crumbling (read what to do if the plaster begins to crack and crumble here).
Advantages of mesh plaster
To renovate old and new homes, experts are increasingly choosing leveling with reinforcement.
The use of reinforcing structures provides a number of advantages:
- monolithic screed;
- high degree of adhesion to the base;
- uniform load distribution;
- protection against shrinkage cracking;
- increasing service life.
The use of reinforcing materials is recommended in case of repair of new buildings and facades prone to deformation.
Tasks of metal plaster mesh
Choose construction reinforcement mesh in. Our store offers for sale a large assortment of rolled metal for this purpose. Take advantage of the opportunity to buy material inexpensively, with delivery. And order the preferred type of product that matches the type of work, including wicker, woven, TsPVS, twisted mesh for screed and plaster.
The relevance of rolled metal for reinforcement does not decrease in construction, despite the widespread use of modern “lightweight” alternatives. When arranging concrete surfaces, laying walls, and other structures, including low-rise, architectural forms, only metal gratings can be used. They provide the object with the necessary strength and resistance to premature destruction.
Types of grids
Modern building materials are diverse. This rule also applies to reinforcement. It is made of metal, plastic, fiberglass.
Fiberglass
Fiberglass mesh is a fabric with small cells. It can withstand increased loads, is resistant to corrosion and chemicals. Fiberglass is used with any type of plasters.
Fiberglass meshes are far superior to plastic ones in their performance indicators.
Meshes are widely used for interior repairs. They are suitable for leveling in rooms with high humidity.
Experts recommend attaching fiberglass to flat walls.
Polymer
Polymer meshes are becoming more and more popular every year. Plastic is used to make them. It is universal in use. Suitable for indoor and outdoor work.
Polymer materials are lightweight and do not require complex fastening. A solution or liquid nails are enough to hold it in place. The advantages are environmental friendliness and low cost. Among the disadvantages is low strength. They are not reinforced with plastic if the layer is more than 6 millimeters.
For the production of plastic mesh, modern polymers are used, which are highly durable.
Metal
Metal mesh has become widespread in the decoration of facades of residential and industrial buildings. Galvanized wire is used for their manufacture:
- Woven fabric. It is produced in the form of a fabric made of thin wire. The standard cell size does not exceed 1 centimeter.
- Wicker (chain-link). It is obtained by weaving metal rods of greater thickness. The standard link size is 2 centimeters. It is widely used for finishing large areas.
- Welded fabric. Produced by spot welding steel rods. Supplied by cards. Requires large amounts of solution .
- Expanded metal. It is made by fragmentary cutting of sheet metal and its subsequent stretching. Suitable for strengthening thin layers of plaster.
The main advantage of metal mesh is its high reliability, the ability to correct large differences in the base, and resistance to the aggressive effects of the solution.
Woven metal mesh
Rabitz
Welded mesh fabric
Expanded mesh
Basalt
Basalt mesh has become widespread in the reinforcement of buildings made of foam blocks. Benefits include:
- low thermal conductivity;
- resistance to mechanical stress and chemicals;
- light weight;
- durability;
- environmental friendliness.
Basalt is not inferior in strength characteristics to metal reinforcement, but it is more durable and better resists corrosion.
Basalt mesh is more durable than metal mesh, because it is not subject to corrosion
Plastering the facade using a polymer mesh
Polymer reinforcement has a very valuable quality: it successfully resists deformation of the plaster layer.
Due to its chemical properties, it cannot react with oxygen, and therefore rust does not form.
The plastering work procedure is similar to the previous version. But there are also some features:
- Fastening is often carried out by pressing staples or nails into the plaster layer. For fixation, you can use a construction stapler if the wall material allows.
- The plastering process should begin not from the bottom, but from the middle of the polymer mesh. Then the plaster layer is distributed in each direction, gradually approaching the edges. The movements are performed in the same way as when gluing wallpaper, when the air is expelled from under it.
- It is necessary to carefully ensure that the mesh does not stretch during the finishing work. The polymer material is elastic, so you need to be careful when working so that it does not form bubbles.
Selection rules
The choice of reinforcing material depends on the type of work. To determine the appropriate type, a number of points are taken into account:
- Thickness of the finishing layer. Up to 3 centimeters, plastic or fiberglass is suitable; if the thickness is greater, only metal.
- Purpose of the premises. In places with high humidity, it is recommended to use only galvanized steel gratings.
- Type of plaster. If the solution is gypsum, then preference is given to plastic.
- Purpose. Serpyanka is used to reinforce joints and cracks. For finishing stoves and fireplaces - fiberglass or chain-link.
The choice also depends on the size of the cells and the thickness of the mesh itself.
Advantages of metal plaster mesh
Even in work on plastering surfaces, the relevance of metal products has not decreased at the present time. There is no alternative to it if a rough or decorative coating is being laid:
- thickness from 50 mm;
- on a base with pronounced relief;
- on the surface with the implementation of reconstruction work.
The use of mesh to reinforce the plaster layer provides several effects at once. It stabilizes the mortar layer and serves as its fixing frame, thereby imparting mechanical strength. As the layer dries, it does not allow it to shrink and distributes the volume evenly. This eliminates the occurrence of cracks when the mixture hardens.
In addition, metal mesh for plastering walls extends the time between repairs. Its price is incomparable with the cost of repairs, and repairs are required much less frequently, since the surfaces wear out with less intensity.
DIY mesh installation
Reinforced fabric is supplied to the market in reels. It is measured in linear meters. The fastening process has its own characteristics depending on the material.
Fiberglass
Fiberglass reinforcement is characterized by high strength and low weight. It does not require serious fasteners. Do-it-yourself installation of meshes begins with marking and cutting to the required size. The piece is attached around the perimeter. The central part is not fixed. It is held in place by a layer of solution .
When cutting, the piece is measured so that it covers the maximum area of the wall. It is not recommended to make multiple cuts. This negatively affects the strength of the plaster.
Fiberglass mesh is attached to the surface using a solution
Polymer
Polymers are not very heavy. They are suitable for applying a thin layer of plaster. They are mounted horizontally, from the ceiling. The overlap is no more than 15 centimeters. Fastening elements are located around the perimeter. The rest is securely held in place by a thin layer of plaster.
Metal
To attach metal reinforcement, dowels, self-tapping screws, metal mounting tape, and metal scissors are required. Progress:
| 1. The working surface is measured by determining its area. The required piece is cut from the roll. | |
| 2. The resulting canvas is degreased with solvent or gasoline. | |
| 3. Installation of the canvas starts from the top. The material is secured along its entire length with self-tapping screws and dowels. Under the hats use a lining - mounting tape or wide washers. | |
| 4. After the perimeter, the entire area is secured. The pitch depends on the thickness of the weave, but does not exceed 50 centimeters. | |
| 5. If the wall is large and one piece is missing, then the mesh is joined with an overlap of 10 centimeters. |
If the reinforcement is done correctly, then the canvas does not vibrate at points where fasteners are missing.
If installed incorrectly, voids may form, which will lead to peeling.
Finishing the wall with a gypsum-based composition
The use of gypsum as a basis for plaster composition has its own characteristics. Advantages of the material :
- Natural composition , does not harm the environment at all.
- Light weight . Any type of reinforcing material can be used.
- No shrinkage. The wall becomes smooth from the very beginning, there is no need to wait for hardening.
- Moisture resistance . Gypsum can be used in bathrooms, bathhouses and other rooms where the plaster will come into contact with steam or water. This is not recommended according to building regulations, but is acceptable.
- Plasticity . The composition is easy to apply, easily levels out any unevenness, and is suitable even for inexperienced plasterers.
There are also disadvantages:
- Gypsum hardens quickly, so it must be formed quickly.
- The material is quite expensive.
How to properly plaster reinforcing fragments with gypsum compound:
- The wall is thoroughly cleaned of traces of previous coatings. Degreasing with solvents (white spirit or similar) is used if necessary.
- The wall is drying out. Gypsum is moisture resistant, but does not like excess water at the time of application.
- Strengthening reinforcing mesh. For this, glue can be used (if the coating is thin-layer, light) or self-tapping screws on dowels (for thick layers).
- Plaster is applied. Since gypsum is a quickly hardening compound, application must be done quickly and in small areas.
- When the composition has hardened, but has not yet completely hardened, the sagging is removed. This is done using beacons (guides), manually aligning the wall by eye or using a tightly stretched thread.
- When the plaster has hardened, final grouting is carried out. If the plastering work was initially carried out efficiently, this can be avoided. If not, the surface is covered with a liquid creamy solution, which is manually brought to an absolutely even state using circular movements.
Attention
Gypsum plaster can be applied with or without beacons. But the latter method requires the highest qualifications from the master.
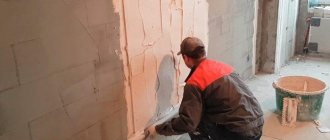
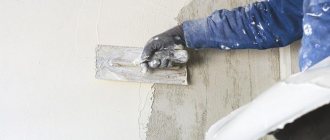
Preparing the wall for plaster and installing beacons
The preparatory stage occupies an important place in any repair work. The labor intensity of the finishing and the reliability of the adhesion of the material directly depend on the quality of its execution.
Preparation includes:
- stripping of old coating;
- removal of dust and dirt;
- alignment of chips, cracks and other defects;
- soil treatment.
Surface preparation includes cleaning, dust removal and priming
After all work has been completed, the reinforcing mesh is installed.
If the surface is uneven, experts recommend installing beacons. They facilitate the process of leveling the plaster.
Installation of metal profiles is carried out according to a certain scheme:
| 1. Determine the point with the smallest and largest deviation. | |
| 2. The outermost beacon is installed at the maximum height. Its position is checked with a level. Mortar patches are used for fastening. | |
| 3. Another profile is installed at the other end of the wall. A thread is pulled between them. | |
| 4. Mount the remaining guides. The thread allows you to maintain the correct position. The installation step is chosen to be smaller than the rule size. | |
| 5. The fastening straps are primed and left to dry for 12-24 hours. |
When all work is completed, proceed to plastering the surface.
Briefly about the main thing
The reinforcing mesh strengthens the plaster coating, prolongs its durability, and prevents the appearance of cracks.
The canvases are made of metal, basalt, fiberglass and polymers with cells of different shapes and sizes.
The purpose is determined by the strength of the reinforcing materials, their composition, and the parameters of the holes.
Installation is carried out using plaster mortar, hardware or using dowels.
Read later
We will send the material by email
Plaster technology
Plastering the walls on a grid is carried out in 2-3 layers. All work is performed with drying intervals:
| 1.First layer. It is thrown between the beacons without much alignment. The mixture is applied with sharp movements, slightly leveling with a spatula. Leave to dry and then cover with primer. | |
| 2. Second layer. Repeated plastering is carried out with a denser solution. The layer is applied from bottom to top. The material is thrown onto the wall and leveled according to the beacons. | |
| 3. The guides are removed after the 2nd layer has completely dried. The remaining grooves are sealed with the mixture. | |
| 4. Third layer. The plastering of the walls is completed by grouting with a liquid compound. It is applied in a circular motion with a trowel or trowel. |
Finishing allows you to get a smooth and reliable surface.
Features of finishing with gypsum plaster
Gypsum plaster is often used for interior finishing.
It is distinguished by its natural composition, lack of odor, and environmental friendliness. The advantages of the mixture include:
- light weight;
- no shrinkage;
- moisture resistance;
- plastic.
The material is easy to apply and is suitable for finishing rooms with high humidity. Disadvantages include high cost and drying speed.
Finishing with gypsum composition is carried out in compliance with the following technology:
| 1. The walls are thoroughly cleaned, removing the old coating. The surface is dried and primed. | |
| 2. A reinforcing mesh is fixed to the base. For fastening, liquid nails, glue or dowels are used. The type of fastening is chosen depending on the thickness of the wall. | |
| 3. The powder solution is applied according to the instructions. It is important to get a mass without lumps. Gypsum sets quickly, so the volumes of the mixture are small. | |
| 4. The surface is covered in small areas. For leveling, use a large spatula and a rule. | |
| 5. Sagging and small irregularities are removed until the plaster is completely dry. Quality is checked using a level, beacons or a tightly stretched thread. | |
| 6. Finish grouting is carried out after complete drying. |
You can plaster using beacons (layer thickness exceeds 3-4 millimeters) or without them (maximum thickness 2-3 millimeters).
For finishing on gypsum plaster, it is better to purchase thick vinyl wallpaper. For thin ones, additional putty and sanding are required.
Features of facade finishing
The finishing of the facade is carried out in compliance with all stages and does not differ from internal work:
| 1. The mesh is cut into pieces equal to the height from the foundation to the roof. | |
| 2. The reinforcement is secured to the primed base with self-tapping screws or plastic nails. The overlap between the canvases is 10 centimeters. | |
| 3. Beacons are installed on the walls. They contribute to better leveling of the mixture. | |
| 4. The first step is a cape. It is done with sharp movements from bottom to top. The starting coating does not require serious leveling. | |
| 5. After the cape has dried, apply a second coat. The plaster is applied with a trowel and carefully leveled using the rule. | |
| 6. After drying, the rules remove the beacons. The grooves are filled with plaster. | |
| 7. To obtain a smooth surface, make a third layer - rubbing. A liquid composition is used for it. |
Finishing wall putty or cladding with finishing material allows you to obtain a decorative, smooth surface.
Plastering the surface
At the final stage, the facade is finished with plaster using a grid; the technology involves applying the plaster mixture in 2-3 stages.
At the first stage, the surface is plastered in 2-3 layers with a composition suitable for the wall material. The initial coating is applied by spraying. The solution for throwing on the wall should have a creamy consistency. The applied composition is leveled with a wide spatula. The thickness of the layer when sprayed according to standards is up to 10 mm.
After the previous coating has dried, a thicker plaster is mixed - with the consistency of dough. The dense mass is applied to the surface with a trowel and carefully leveled with a rule that is pressed against the beacons and pulled across the surface. This layer should cover the reinforced mesh. After the solution has hardened, the profiles are removed and the grooves are sealed with thick plaster.
Finally, the dried surface is leveled. A liquid plaster solution is prepared, which is applied to the panel and rubbed using a trowel.
The technology is suitable for different surfaces (wood, concrete, brick) and various reinforcing materials.
Possible mistakes
Novice craftsmen often encounter mistakes that can lead to peeling of the solution and reduced surface quality:
- No primer. The primer increases the adhesion of the material. It must be used to ensure that the mortar adheres securely to the wall.
- Violation of proportions. Lack of water leads to increased density. Such plaster slides under its own weight and cracks.
- Adjustment of consistency with powder. The consistency of the working mixture should only be changed with water. To do this, it is administered in small portions, bringing it to the required volume.
- Refusal to reinforce joints and walls in new buildings. Joints made of different materials have different technical characteristics. They differ in behavior under changes in temperature and humidity. Therefore, cracks often appear at the joints. Reinforcement helps to avoid them.
- Incorrect position and fastening of the mesh. It is enough to secure the lightweight fabric around the perimeter. When using metal sheathing, fasteners are made over the entire area.
- Attaching beacons to a continuous layer. To install beacons, straps with a given pitch are used.
- Failure to comply with drying conditions. It is unacceptable to dry walls in direct sunlight, with a heat gun or at elevated temperatures. This leads to uneven drying of the mixture and cracking.
Drying the wall with a heat gun leads to uneven drying of the mixture and cracking
Frequent mistakes also include too thick a mixture, an excessively thick or thin application layer, and the use of low-quality materials.
Why reinforce plaster?
Due to its availability and low price, plaster is a fairly popular material for finishing buildings. But we must take into account that it is not applied equally conveniently to all surfaces. Facades made of wood, concrete and brick should be plastered using a special mesh.
The addition of this material provides the layers with high-quality adhesion and helps the finish last longer.
Facade plaster mesh significantly increases the strength of the prepared plaster mortar, which is especially valuable when working with large areas and transitioning from one material to another. Plastering the facade using mesh allows you to improve the effectiveness of work during the construction and finishing of new buildings, whose walls have been settling for some time.
Plaster layers can be reinforced using polymer, metal, fiberglass and other types of material. Its selection is determined by the characteristics of the application.
Recommendations from experts
It is possible to obtain a high-quality and reliable wall only if you follow advice from experts:
- Alignment. The walls should be carefully leveled. The level is checked using a plumb line or laser. The better the work is done, the better the finishing is.
- Taking into account the characteristics of materials. Compatible materials should be selected. Aggressive solutions are capable of dissolving the reinforcing structure.
- Taking into account the maximum load and possible shrinkage of the building. In the case of new buildings and facades that are severely deformed, it is recommended to use metal reinforcement.
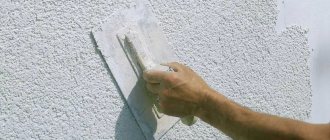
- Final revision. Plaster is not a finishing coat. To give it decorative properties and prepare it for subsequent finishing, it requires sanding and sanding.
Experts recommend that you sand the walls after applying plaster.
Reinforcing mesh is a necessary element for rough finishing of house facades and walls in new buildings. Its correct fastening and adherence to the technology of applying plaster allows you to create a reliable and strong coating that will last a long time.
Have you ever had to plaster walls using a grid? Share your life hacks in the comments.
Plastering walls
Fences with mesh are plastered in 2-3 layers.
The walls are plastered in several layers
The work is carried out in the following order:
- The first layer is applied using the cape method. The mortar collected on a trowel is thrown onto the fence with a sharp movement of the hand. To do this, use a mixture with a consistency reminiscent of liquid sour cream. This method of applying the solution allows you to obtain a dense, durable layer of plaster.
- After the first layer has “set”, the next layer of plaster is applied. The second layer is made from a denser mixture - a dough-like consistency.
- Plastering is done from bottom to top. The thrown solution from below is picked up with a rule and brought up. As the rule moves, it is slightly alternately shifted from side to side. This helps to distribute the mixture evenly over the wall surface.
- After the plaster has dried, the beacons are removed. The remaining clearings are sealed with mortar.
- At the end of the work, the surface of the walls must be grouted. To do this, take a liquid mixture. Using circular movements of a wooden grout or trowel, the liquid solution is rubbed onto the plastered wall, thereby finally forming the finished surface of the wall.
Instructions for use
For each type of mesh there are several technologies for attaching to the wall. Let's look at the most common ones.
Metal fittings
Metal reinforcement can be secured using:
- self-tapping screws;
- dowel-nails;
- staples
All operations are performed in the following sequence:
- the roll is unrolled and leveled;
- cut into pieces of the required size;
- cleaned of oil - this is recommended by building regulations. In practice, I have never seen anyone wipe it;
- markings are carried out for fastening hardware - the ideal option is 30 cm from each other (optimally 16 hardware per 1 m2). For “Chain-link” you can use 50 cm;
- holes for dowels are drilled;
- fasteners are hammered or screwed into the wall, but not completely;
- a mesh is stretched over the fasteners, with an overlap of 10-15 cm;
- the fasteners are driven tightly into the wall, but so that there is a gap of 2-3 mm between the mesh and the wall;
- beacons are mounted on the solution;
- plastering work is being carried out. First, the spray is applied, then the primer, and the coating finishes.
Lightweight reinforcing materials
Fiberglass and basalt mesh can be fixed in one way - submerged in a layer of mortar and covered with the same compound on top. Wall mounting with staples and hardware is also common. But why this is done is unclear. After all, only up to 8 mm of solution can be applied on top. And for such a thickness of gypsum plaster, reinforcement is useless.
The algorithm of actions for this technology is simple:
- the wall is stitched (what it is and how it’s done can be seen here);
- markings are applied for beacons;
- the locations of the dowels are marked;
- holes for fasteners are drilled;
- dowels are driven into the resulting holes;
- Screws are screwed in under the guides - all heads must be in the same plane;
- the mesh is cut to size with a margin of 10-15 cm for overlapping installation;
- a cement-sand mortar is prepared;
- the first layer of plaster is applied - sprayed - to the area under the first sheet;
- After leveling the spray, the mesh is attached to the solution. The hardware heads are carefully passed through the reinforcement cells;
- the mesh is covered with a thin layer of new solution or rubbed over with the already applied one;
- the spray is applied to a new area, after which the mesh is again attached to the solution with an overlap;
- after attaching the reinforcement, beacons are installed along the entire wall;
- primer is applied;
- reinforcement is carried out again;
- after the soil has dried, the plaster layer is covered with a cover;
- the wall is plastered.
Important: the reinforcing mesh sunk onto the spray can be fixed not with mortar, but with construction staples.
Polymer reinforcement
Plastic mesh is attached to the solution, but using a slightly different technology:
- the mesh is cut to size;
- a base (primer) layer of plaster is applied;
- the mesh is attached and pressed into the solution;
- using a spatula, the reinforcement is leveled, from the middle to the edges;
- the reinforcement is covered with a layer of putty.
Shingles
The rubbish is applied to the wall in 2 layers. For the first, lifestyle, thin, 3 mm thick and 25-30 mm wide slats are taken, for the second, weekend, thicker and wider slats are needed. They are packed crosswise at an angle of 45o relative to the floor. The technology is described in more detail here.
Which mesh is better for plastering facades?
When choosing a facade mesh, it is recommended to pay special attention to the breaking load indicator. If the surface to be plastered is smooth, then you can purchase a mesh with a value of 1800N. And when processing curved, uneven areas, where you need to create a thick layer of building mixture, you need to choose a mesh with 1300-1500N.
Fiberglass mesh is effectively used to create final cladding or finishing, where the thickness of the plaster coating should not be higher than 2-3 cm. It is also successfully used in the process of applying a rough coating.
With a plaster layer thickness of 30 mm or more, steel mesh is successfully used. You also need to take into account the factor that will interact with the reinforcing material. For example, when in contact with moisture, steel can be subject to corrosion, and this leads to the appearance of corrosion stains.
Plastic meshes are resistant to wet environments, but thermal effects lead to deformation of the material. Therefore, the material must be selected taking into account the general characteristics and application.
Fastening the mesh using technology
Reinforced material used for plastering walls and ceilings must be correctly attached to the base. Each type of cellular fabric is attached using the specified technology.
Some types of mesh cannot be stretched too much or allowed to sag. This can lead to serious consequences.
How to attach reinforced
Technique for fastening metal cellular fabric:
- First of all, measure the required size of the canvas from bottom to top.
- First, the material is fixed at the top. To do this, dowel-nails are fixed at the top corners. The corners of the mesh are placed on them and pressed with self-tapping screws.
- After which the same work is carried out below.
- On the ceiling, the operation is performed in the same way - first the corners are attached, then in the middle.
- The material must be fixed in the middle so that it is adjacent to the rough base in all places. If there is sagging, then the work will be in vain.
The metal sheet is tensioned without sagging.
How to attach a decorative plaster base
Decorative reinforcing fabric is attached using ordinary self-tapping screws.
They are not completely screwed into the rough base at equal intervals. A mesh is put on them and completely twisted into the base. Attention. The mesh should not be too tight, but there should not be any sagging.
There is an option for mounting on a mounting tape. However, there is a risk of the canvas tearing off the surface during plastering work.
Benefits of subsequent work
One of the main advantages is the application of the solution. And if the gypsum mixture fits well on the base, then it is difficult to work with cement material. It is the mesh with its cells that holds it on the surface until it hardens and does not shrink too much.
After the material has hardened, the plastered wall can be puttyed without fear. It can be painted and covered with decorative plaster. There is no threat that a crack will appear in the middle of the wall due to shrinkage of the house.
Laying tiles is also possible on a reinforced wall. The use of mesh provides surface rigidity for a long time.
Reinforced mesh should be used for plastering work. Each material – metal cells, polymer – has a specific application. By properly fixing the mesh and plastering the wall or ceiling, the surface will remain in its original form for up to 20 years.
How to properly plaster at home with your own hands
To independently understand how to plaster walls, you need to study the detailed technology of the work. Each composition has a drying time for the solution, rules for its preparation, and standards for coating formation. Any deviation may adversely affect the quality of the result obtained.
Detailed complete instructions for a beginner
When plastering walls with your own hands, you need to start by preparing the base. This will avoid unexpected cracks and peeling.
The next step involves inspecting the surface for damage and unevenness. First, they are removed, then beacons are installed and, if necessary, reinforcing mesh is attached. After this, they begin to level the surface.
Before each application of the solution, remove dust and debris and saturate the surface with a primer.
Installation of plaster mesh
Metal mesh should be used to cover concrete walls that have strong unevenness and protruding areas, areas where they meet wooden and metal surfaces, as well as surfaces that require a large thickness of plaster coating.
The use of plaster mesh provides the structural rigidity necessary in these cases. This mesh is made from round wire rod or woven from wire.