Hello readers of my blog! Today we will talk about plastering walls with your own hands. It would seem that the matter is not tricky, but when you are faced with this problem, you have to think about how to make plaster correctly, and how to choose materials. Thus, I decided that this article would be useful to someone, and I am devoting my efforts to this topic. In it I will answer a number of questions that will arise immediately before plastering, and some even after it.
This topic is quite broad, because before finishing, it is necessary to prepare the surface, but how to do this? And this is a separate topic. You can learn about all this in great detail in the article about preparing walls. In addition, by clicking on the link, you will have the opportunity to familiarize yourself in more detail with the selection of some materials.
Alignment of walls
You can make walls smooth in different ways. The result is better when plastering the walls along the beacons is used. This topic will be discussed in our article.
The plaster composition can be applied mechanically or manually. From an economic point of view, machine plastering of walls is justified for large volumes.
Modest scales can be leveled in the old “old-fashioned” way, that is, by hand.
All that remains is to decide: do the work yourself or entrust it to a specialist. At first glance, plastering walls using beacons with your own hands seems complicated and time-consuming. However, practice shows that, in general, there are no difficulties - the same plaster, you just need to figure out the installation of beacons.
Description of the material - why plaster is needed, what it looks like
Plaster is divided into two types - dry and monolithic. The first is a gypsum core covered on both sides with cardboard. The finished sheets are glued or fixed to the sheathing.
Monolithic (otherwise called wet) plaster is a mixture of several components.
What does this plaster consist of:
- binder;
- filler;
- various additives.
The latter from the list improve the ductility, moisture resistance, sound insulation and other qualities of the material.
What kind of wall plaster is used for its intended purpose:
- Regular – for preliminary preparation of the surface for painting and wallpapering.
- Special - for creating a heat-insulating, sound-insulating, fire-resistant, moisture-, acid- or X-ray protective layer.
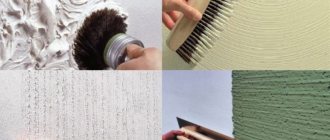
- Decorative – for finishing.
Decorative compositions include: flock, Venetian, structural, silk and textured plaster, such as “bark beetle”, “lamb”.
Plaster solutions are used for simple leveling of the base, improved finishing of facades, walls, ceilings and high-quality plastering. In the latter case, beacons are installed on the surface to eliminate their deviations from the vertical or horizontal plane.
Putty and plaster - what are these materials, what is the difference
Both finishing materials are designed to hide defects, but they have different functions.
putty
This is a paste-like mixture. The starting version contains sand granules. It is used to seal cracks and cracks, leveling a small area. Finishing putty creates a perfectly smooth surface when finishing. It is applied to plastered walls and plasterboard sheets.
Plaster - what is it?
This is a composition with a large-diameter filler, which allows you to apply a mixture up to 50 mm thick and eliminate significant deviations from the plane and unevenness.
Plaster is a building material that helps protect structures, hide seams, correct base errors, prepare it before finishing, and improve heat and sound insulation characteristics.
Both of these building materials complement each other. First, the base is leveled, for which inexpensive plaster is applied, and a layer of putty is placed on top of it and a smooth surface is created.
What tools and materials will be needed:
To plaster a wall, you should stock up on the following consumables and tools:
In addition, you need to take care of work clothes, protective gloves and a hat. The above list is quite large, but the main thing here is a hammer drill and a set of drills; everything else is not very expensive.
Construction level (it’s more convenient if it’s long), a trowel or spatula for spreading the mortar, a rule for leveling, fasteners (dowels + screws), a hammer drill, a grater to create smoothness, cords, beacons, pliers, mesh, primer, etc. ..
Plastering walls with your own hands is recommended only for those home craftsmen who have experience in finishing work.
If you do not have such experience, you should choose a small section of the wall or take a sheet of drywall and practice on it. If the result is far from the desired one, it is better not to try to save money, but to immediately contact a construction company. Others are advised to follow the instructions provided.
Plastering walls with your own hands can be done in two ways.
- In the first case, the solution is simply applied to the walls, after which it is leveled using the rule.
- In the second, before plastering the walls, paint beacons are installed or threads are pulled to indicate the level. This operation is only required in the case of very uneven walls. These two methods of plastering walls are considered the main ones, but each master can make small adjustments to the technology.
Since it’s all the same - yourself or the master
In repairs, the main thing is not the process, but the result, which may not be of particularly high quality if you deviate from time-tested technologies and dozens of masters, especially when plastering the walls with your own hands. The surfaces should be perfectly smooth, without flaws or deviations from the vertical. Therefore, we learn to give the room the correct geometry.
FAQ
Amateur repairmen and even novice professionals in the field of mechanized wall plastering initially ask many questions about the features and technology of machine plastering.
Professionals with many years of experience in the field of construction and finishing work answer the most common questions:
Gypsum plaster is modern, but cement plaster is outdated and not worth using?
Not at all. It’s just that different types of plaster compositions are good for different jobs. For example, cement plaster will not fail even in the bathroom or on the facade, while for rooms a gypsum mixture may be more convenient and have better properties.
They say that priming is not necessary; you can simply wet the surface before applying the solution so that the wall does not absorb moisture from the mixture. This is true?
To obtain a high-quality, durable plaster coating, it is better not to neglect the primer. Due to the soil, the plaster adheres more firmly to the surface, and when dry it is especially durable.
It is not necessary to do a multi-layer coating and wait for the layers to dry. Isn’t it easier to immediately apply a layer of the required thickness?
No, if a thick coating is required, it cannot be applied in one layer. It simply will not withstand the loads, it will crumble, crumble and crack.
Is it possible to add more water when preparing the solution to save the mixture?
No, this is unacceptable, you must strictly adhere to the proportions on the packaging. Otherwise, the plaster will lose all its meaning. Such a coating may not harden properly, float and run, even despite long leveling.
If you rent a plastering machine, you can do it alone. This is true?
No, It is Immpossible. The process of machine plastering should involve a minimum of 2, and preferably 3, people. One person cannot do it, the idea is a failure: a waste of a huge amount of money on unnecessary rental of expensive equipment.
Why is plastering walls with your own hands the best option?
The first thing that foremen of hired teams of craftsmen specializing in repairs suggest doing is preparing an estimate.
In this case, a significant part of the final amount will be the payment of workers, as well as the contractor’s share. In the best case, the cost of materials will need to be doubled, and presumably that’s how much it will cost you to hire a crew.
That is why quite simple plastering of brick walls with your own hands is much more profitable. But there is also a flip side to the coin - if you do not have experience, mistakes may be made with the result in the form of cracked walls and the need to start all over again, or call the same craftsmen. Not to mention wasted materials.
It follows that you need to study the finishing technique well, use the right tools and materials, and perform the stages of wall plastering only in the sequence that is suitable for the work you have planned.
And here’s the first piece of advice: purchase building materials in abundance, especially plaster mortar (or its components, if you mix it yourself), since layers of different compositions may not adhere well.
It is also better to take care of the tools right away so as not to interrupt the finishing process, which could have a negative impact on the quality.
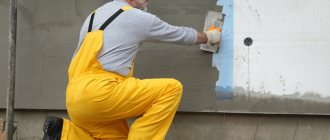
Plastering walls with your own hands: rules for spraying (with video)
Spray (or spray) is the lowest, rough layer of plaster, which should fill all surface irregularities. Following the basics of plastering technology, at this stage a special composition is applied to the surface to be treated by throwing or spreading it using various tools. The thick solution is usually spread, but for casting you can use a solution of any consistency. Throwing requires a certain skill and is not possible for every master, but only for those who have sufficient experience in plastering work.
According to the rules for plastering walls, the first layer is usually applied with a liquid solution of the material by casting. A trowel and a falcon are used for this.
When plastering surfaces with your own hands, the next layer can be applied by spreading. The trowel should be kept at a short distance from the plaster layer. A portion of the solution is applied to the surface and leveled. This can be done both vertically and horizontally.
For convenience, the falcon must be installed at an angle so that one of its sides is 10 cm away from the surface.
The other side can be pressed to the surface to the thickness of the applied layer.
In this case, the falcon moves from bottom to top as the solution is distributed, and its raised side approaches the surface to be treated.
For proper plastering, you need to level the applied solution using a trowel. To do this, press it against the surface of the wall or ceiling at a slight angle.
To correct small flaws made when applying the first layer, you need to take a rule, apply it to the beacons and level the solution, pulling it from bottom to top.
If excess solution appears, it should be removed.
To apply a thick layer of plaster, first make a rough outline without leveling, then you need to wait until it dries completely. And only after this, when doing plastering work with your own hands, you should apply the finishing solution and level it according to the beacons using the rule.
The higher the quality of the building's concrete surface or brickwork, the thinner the plaster layer can be.
In this case, the so-called thin-layer plaster is obtained: on concrete - up to 5 mm, and on brickwork - at least 5 mm. It is not recommended to apply layers thinner than 5 mm to brickwork, since the edges of the bricks will show through and cannot be hidden by either paint or whitewash.
The setting time of the solution depends on the composition of the solution. In addition, humidity, surface porosity, air temperature and the thickness of the applied layers are important. If you are using lime gypsum mortar, allow 7-15 minutes before applying each subsequent layer. If cement mortar is used, the waiting time is 2-6 hours. And when applying lime mortar, you only need to wait for a short order; you should not expect the layer to dry completely.
You can see how spraying is done when plastering walls with your own hands in this video:
Types of coatings
According to modern rules SNiP III-21-73, there are 3 types of coatings:
- Low quality. This type of plastering is suitable for finishing walls with your own hands in non-residential premises.
Permissible deviations vertically and horizontally are 3 mm per 1 meter. Also, for every 4 square meters, 3 smooth irregularities are allowed, the depth of which does not exceed 5 mm. Surfaces can be plastered with cheap starting solutions.
- Average quality. In this case, the requirements for surfaces are more stringent: vertical or horizontal deviations should not exceed 2 mm per 1 m.
As for smooth irregularities, their number is limited to 2, and their depth is 3 mm. This way you can plaster the facades.
- High quality. The requirements for this type of coating are the most stringent. Horizontal and vertical deviations should not exceed 1 mm per 1 m, and there can be no more than 2 smooth irregularities, while their depth cannot be more than 2 mm.
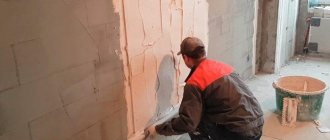
Brick walls
Such structures are usually finished with cement-based plasters.
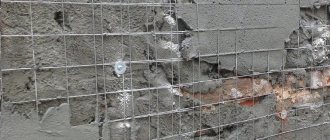
In some cases, a little lime is added to them to increase the plasticity and moisture resistance of the material. The thickness of the plaster layer on brick walls should not exceed 3 cm. It is also recommended to use reinforcing mesh to strengthen the layer.
If we are talking about facing bricks, then working with them is quite difficult. Its surface is very smooth, so the solution can fall off even if a reinforcing mesh is used. Such material must first be impregnated with special primers, and only then can finishing begin.
Internal plaster of aerated concrete/gas silicate walls
Aerated concrete and gas silicate blocks are used for residential and non-residential construction. They have good thermal insulation and sound insulation characteristics due to their porous structure. They are light in weight, which makes it possible to get by with a lighter foundation and lighter floors, ultimately reducing the cost of construction.
Features of aerated concrete walls
Taking into account the high vapor permeability of the material, plastering of gas silicate blocks should be carried out on the basis of mixtures that have similar or similar characteristics. It is necessary that the plaster layer absorbs moisture accumulating in the air and “gives it” to the wall, which will then remove the excess outside the room.
The blocks themselves, depending on the brand, can have up to 85% of air cells of the total volume. This ensures good heat and sound insulation properties of the material. But because of them, it is loose. Therefore, when choosing plaster for gas silicate blocks, you need to pay attention to the hardness and strength of the layer that will be obtained from the mixture.
Please note: internal plastering of aerated concrete must be carried out using mortar mixtures suitable for this material. This way you will prevent the occurrence of problems associated with the negative effects of high humidity.
How to plaster aerated concrete walls
How to plaster aerated concrete inside and outside the house? The choice of materials in both cases is the same, except that for street work you need compounds with increased frost and moisture resistance. There are only a few options:
- Cement-sand mortar. Plastering aerated concrete with such a mixture would not be a good idea, since its vapor permeability is lower compared to cellular concrete. This finish is suitable for rooms with minimal humidity, which is almost never encountered in practice.
- Cement-lime mortar. These are dry mixtures that contain cement and lime, filler (sand). The most popular of them are BaumitHandPutz and Uniplast.
- Gypsum plasters. Optimal in every way. They dry quickly, experience minimal shrinkage, and do not crack when dry. Their vapor permeability is also not very high, but they are well suited for dry rooms. Such compositions can also be used in the bathroom, but only subject to subsequent special treatment of the surfaces. compositions that counteract the effects of wet environments. There are many mixtures of this type: KNAUF, Plaster and others.
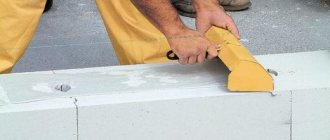
How to plaster walls made of aerated concrete
Rice.
3. Mechanized plastering of aerated concrete How to plaster aerated concrete and aerated concrete block indoors? The technology is not too complicated, but with features:
- The solution must be applied to a previously prepared surface. Preparation – filling joints and local leveling. Tile adhesive is best suited for this. You can use ordinary cement-sand plaster based on M400 cement.
- To increase strength, the main layer of plaster can be applied to a fiberglass reinforcing mesh. This is good protection against the appearance of cracks during drying and during the operation of the building.
- Work can be done manually or using mechanized plastering technology, which will increase speed, but will not degrade the final quality.
- You can work in conditions of normal humidity and temperatures above 10 degrees Celsius.
- Standard tools and devices for leveling are used - beacons, rules, trowels, graters, etc.
Estimation of the cost of plastering aerated concrete walls
Plastering walls made of gas silicate blocks is a service in demand now. But it is impossible to indicate exact values for the cost per square meter of plaster. It all depends on the region, prices of the selected team, brands and cost of purchased materials. An approximate calculation is as follows: per 1 sq. m. with a layer of 10 mm requires about 9 kg of mixture, both gypsum and cement-sand.
The first material is more expensive, the second is cheaper, but is better suited for walls made of gas silicate. You can save time and money by machine plastering. The cost per square meter will be lower compared to manual application.
Concrete walls
Smooth surfaces of this type are pre-treated with primers containing quartz sand or flour. This material increases adhesion and ensures tighter contact between the plaster and the wall.
To finish such surfaces, cement-based plasters are used, to which a little gypsum or lime-gypsum mixtures are added. For rough concrete walls, ordinary cement plasters without additional components are sufficient. The main thing is to treat them with “Betonkontakt” before plastering the surface yourself.
Cellular concrete walls
If the building was erected or insulated using gas or foam blocks, then plastering work will be quick and easy. At the preliminary stage, you will only need to treat the walls with deep penetration impregnation. Such surfaces can be plastered with gypsum plaster, concrete or lime mortars.
On a note! Currently, construction stores offer a wide range of plasters suitable for certain surfaces and operating conditions. Manufacturers indicate the proportions in which the mixtures need to be diluted and provide various recommendations for use, so there will be no problems with the choice.
Solution. How to make the right choice?
A solution for plastering cement-based walls is prepared as follows. Cement is mixed with sand in a ratio of 1/2. In addition, you can increase the amount of sand to 5 parts.
The composition is thoroughly mixed, then water is gradually poured into it. The solution should resemble dough.
To prepare cement-lime mortar you need cement with sand and lime. For one part of cement there are 6-8 parts of sand and up to 3 parts of lime.
First of all, cement and sand are mixed. Lime milk is poured into the resulting composition. All ingredients are thoroughly mixed together.
If the solution turns out to be too thick, you need to dilute it with water. After adding liquid, all ingredients must be mixed again.
If the walls are lined with facing bricks, their plastering should be entrusted to professional builders. Plaster does not adhere well to materials with a polished surface.
It will be difficult for a beginner without experience to properly plaster the surface. As a result, the plaster may peel off and fall off the wall in pieces. Professionals, in addition to their knowledge and skills, use reinforcement with a special primer.
If a smooth concrete wall is to be plastered, gypsum with quartz particles is added to the cement mixture. The latter give the surface the roughness necessary for good adhesion to the solution.
Lime-gypsum solution is prepared from gypsum (1 part) and lime (3 or 4 parts).
First, water is poured into the solution container, then gypsum is poured into it, and everything is thoroughly mixed. The consistency of the mixture should be semi-liquid. Lime is added and all parts are mixed again.
For a rough concrete wall, you can use “Betonokontakt”, and solutions are used on both cement and gypsum bases.
Before plastering, foam concrete walls are treated with deep penetration primers. You can choose gypsum or cement mortars at your discretion.
A photo of wall plaster demonstrates the best design ideas for the interior. The coating will be of high quality if you choose it wisely. You can consult with the manager of the hardware store.
The modern market offers a wide range of mixtures that are easy to prepare. To get the finished composition, you just need to mix them with water. An example of such a mixture is “Rotband”.
Plastering technology
To apply layers of plaster coating, use lime mortar, observing the following sequence of technological operations.
First, prepare the surfaces and hang them, then apply spray and primer and scatter the latter. After this, a covering layer is applied and the husks are trimmed. The work is completed by grouting the surface of the partitions, finishing the slopes and cutting out the ceiling rustics.
Plastering work should be carried out in rooms with an air temperature of at least +8°C, measured at a height of 0.5 m from the floor.
Preparation for plastering work
Before starting plastering work, it is necessary to prepare the floors. Install door and window blocks, glaze window openings. Install hidden electrical and low-current wiring, illuminate workplaces. Check the mechanisms at idle, carefully inspect the hoses, remove kinks and kinks and rinse with lime milk. Provide installations for communication between plasterers and the driver using light and sound alarms.
Before plastering, the surfaces of brick, stone, concrete and other structures are cleaned:
· from soot – by washing with a 3% solution of hydrochloric acid, followed by washing with clean water;
· stains of non-drying oils - by coating or a layer of greasy clay, followed by drying and cleaning (sometimes the process is repeated);
· dust, dirt, solution residues - treatment with steel brushes, hard brooms, steam blasting, and sometimes sandblasting. For sandblasting walls, an installation is used, consisting of a single-chamber or two-chamber apparatus, three-layer hoses, a nozzle and a compressor.
Surfaces that are not rough enough or contaminated with whitewash are treated with a notch. The notched surfaces are swept with a steel brush.
Concrete slabs are cut down using jackhammers or hand pneumatic hammers. For a small amount of work, concrete sagging is removed with blows of a plaster hammer. The surface is swept with a steel brush.
They install marks and install beacons, depending on the surface material, using different methods. For nailed surfaces, nails are driven into the seams of brickwork, gypsum concrete and wooden partitions and coated with lime-gypsum or gypsum mortar slightly above the nail heads. After setting, the solution is trimmed in the form of a truncated pyramid, cleaning it exactly to the level with the nail head.
For non-nailable surfaces - concrete, reinforced concrete - hollow gypsum marks in the shape of a truncated pyramid are used. Stamps are cast in an adhesive or fluoroplastic mold, designed for casting 20...40 pieces at a time.
Preparation and delivery of plaster mortar
The plaster mortar, prepared centrally, is delivered to the construction site by mortar carriers or specialized dump trucks and loaded into the hopper of the plaster station, then, pumped by a mortar pump, it is supplied through hoses to the floors.
Applying plaster layers
The preparatory layer (spray and primer) is applied over beacons made of lime-sand or cement-lime-sand mortars. The composition and brand of solution for the preparatory layer depend on the brand of solution of the covering layer and the nature of its processing and cannot be lower than the brand of the covering layer.
It is enough to filter solutions for spray and soil through a vibrating sieve of a solution transport unit with cells of 3x3 or 4x4 mm, which ensures uninterrupted operation of the pump valves and does not cause clogging of the nozzle.
The mobility of the solution for applying it using a nozzle is 6...12 cm along a standard cone. When using a non-compressor nozzle, the mobility of the solution should be within 10...12 cm.
The thickness of the spray layer on wooden surfaces is 9 mm, on brick, concrete and stone surfaces – 5 mm; the thickness of each soil layer is 7 mm for lime and lime-gypsum mortars and 5 mm for cement mortars.
The average total thickness of the spray and primer should not exceed 12 mm for simple plaster, 15 mm for improved plaster and 20 mm for high-quality plaster.
The soil is leveled, compacted well and scratched with horizontal wavy furrows 3...5 mm deep at a distance of 2...3 cm from one another. For 6...7 days, the preparatory layer is moistened (2...3 times a day), covering it from sunlight with matting moistened with water. The preparatory layer must be kept for at least 7... 12 days.
The covering layer is applied during mechanized plastering with a nozzle, and during manual plastering - with a ladle or trowel from a falcon. Before application, the solution is filtered through a mesh with 1x1 mm cells.
After leveling, the freshly applied coating layer is sometimes smoothed by hand with steel trowels, followed by filling and painting the surface.
The thickness of the covering layer for all categories of plaster should be no more than 2 mm.
The applied and leveled covering layer is kept until it partially sets (when pressed by hand, small indentations from the fingers should remain on the surface).
Layers of plaster are applied as follows: for lime-gypsum, lime-cement and cement mortars - after the previous layer has set; for limestone – after whitening of the previous layer. Freshly applied plaster is protected from getting wet, freezing, drying out, impacts and shocks.
Plastering window and door slopes
Finished surfaces must meet the requirements for high-quality plaster. The finishing of the slopes begins after plastering the walls in the room, installing wooden rules on metal clamps with driving pins into the masonry seams or freezing them with gypsum mortar. First, horizontal rules are established up to the upper slopes, fixing them at the same mark for all window openings of the same room. The same is done when finishing doorways. After plastering the upper slopes, the horizontal rules are removed and vertical rules are installed. The rules are set so that the size of the opening of the slopes is equal to 1/7...1/10 of its width.
For internal slopes, lime-gypsum or lime-cement mortar is used.
External flashings are made from cement mortar. To protect against cracks, the surface of the ebb is covered with damp sand or sawdust, maintaining their moisture for 2-3 days.
Quality control
Plastering work must be carried out in accordance with the requirements of the chapter of SNiP I-21-73 “Finishing coatings for building structures. Rules for production and acceptance of work."
Layers of plaster must be firmly connected to the surface of the structure being plastered.
Plastered surfaces must be flat, smooth, with clearly trimmed edges of corners, intersecting planes, without traces of a trowel, mortar drips, stains and efflorescence.
Cracks, bumps, cavities, rough surfaces, gaps (unplastered areas near window sills, trim, baseboards, heating appliances, etc.) are not allowed.
Deviations in the quality of plastered surfaces should not exceed the following values:
· surface irregularities (detected when applying a rule or template 2 m long) - no more than two in depth or up to 3 mm in height;
· deviation of the surface of walls (ceilings) from the vertical (horizontal) - I mm per I m of height (length), but not more than 10 mm over the entire height (length) of the room;
· deviation of husks, usenki, window and door slopes, pilasters, pillars from the vertical (horizontal) - I mm per I m of height (length), but not more than 5 mm per element;
· deviation of the width of the plastered slope from the design - 3 mm;
· deviation from a straight line within the limits between the angles of intersection of rods and bracing – 3 mm.
The quality of the finished mortars must meet the requirements of SN 290-74 “Instructions for the preparation and use of mortars”. Materials and products used for plastering work must meet the requirements of the relevant standards, as well as the instructions of the chapter of SNiP IB.2-69 “Inorganic binders and additives for concrete and mortars”.
Safety precautions
When carrying out plastering work, you should strictly observe the safety rules, guided by the current regulatory and instructional documentation, TKP 45-1.03-40-2006 “Labor safety in construction. General requirements” and TKP 45-1.03-44-2006 “Labor safety in construction. Construction production"
In addition, when performing plastering work, the following requirements must be observed:
— persons who have undergone safety training and production instruction directly at the workplace are allowed to carry out plastering work;
— internal plastering work should be performed from scaffolding or mobile tables;
— when performing work on flights of stairs, it is necessary to use scaffolding (tables) with support posts of different lengths installed on the steps; the working floor must be horizontal and have a fence made of railings and a side board;
— before the start of each shift, you should check the serviceability of the spreader pump, hoses and other equipment used for plastering work;
— operation of the mortar pump at a pressure exceeding that specified in the technical data sheet is prohibited;
— all work related to repair or internal inspection of the mortar pump, frequency converter and trowels should be carried out only with the power supply turned off; blowing compressed air hoses is allowed only after people have been removed from the danger zone;
— plasterers who apply plaster mortar to the surface using a nozzle and spray the mortar manually must have safety glasses;
— portable current collectors (tools, machines, lamps, etc.) used when performing plastering work must have a voltage of no more than 36 V;
— stay of more than 3 people in a drying room is prohibited.
Painting works
General information
Painting work is the final stage of all construction work. Painting work includes painting the surfaces of premises and facades with various paint compositions, which protect against premature wear and increase the service life of buildings and structures. Painting is carried out to improve the sanitary and hygienic conditions of premises, as well as for the decorative and artistic decoration of premises and the external appearance of buildings. Depending on the purpose of the building, as well as on the requirements for finishing, painting can be simple, improved, or high-quality in terms of complexity and quality of execution. The color category is provided for in the design solution.
Painting work consists of several operations, the number and nature of which depends on the type of painting, the paint composition used and the material of the surface to be painted (substrate). First, operations are performed to prepare the surfaces to be painted, then priming (priming), puttying, sanding, a second priming and painting. For large volumes of work, a set of operations is performed to prepare paint compositions for the selection of colors.
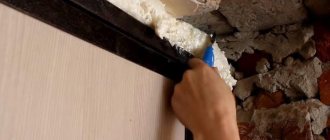
Preparing walls for plastering
There is nothing stopping you from covering the walls with a leveling solution by simply spreading it over the surface, but the result will be unpleasant, believe me. There will no longer be a plane as such; instead, your gaze will cling to the wavy surface. It’s a completely different matter if the walls are prepared for plastering according to all the rules.
To begin with, we chop off all unreliable fragments from the surface, be it sagging that can be present on both brickwork and concrete slabs, or peeling paint. Also compare the seams between the rows of bricks especially carefully, since they will interfere with determining the most
We drill holes in the upper right and left corners of the wall and screw screws into them using plugs.
We press the plumb line to one of them and determine the most protruding section on this line, after which we screw another screw into the lower part of the wall exactly vertically.
Using the attached rule and level, we make sure that the line between the heads of the screws is perfectly vertical; if there is a deviation, we tighten it with a screwdriver.
We repeat the operation at the other end of the room, after which we stretch the cords between the upper and lower screws, along which we screw in new screws at equal intervals, vertically from below and from above, also to the length of the rule.
When the marking of the future location of the beacons is completed, the cords can be removed. Now you need to clean the wall again, sweeping away any dust and crumbs remaining after drilling.
Then we take a primer, preferably deep penetration, and treat the entire surface well with a roller. If it is brickwork, the seams must be covered with the composition very carefully, due to the high degree of unevenness. We are waiting for the soil to dry.
Along the line between the screws positioned vertically in relation to each other, in several small portions, we apply plaster to the wall. We carefully press the profile beacon into them, pressing the rule edge along the entire length, and pressing on it until we hit the screws.
We press the profile beacon into the wall
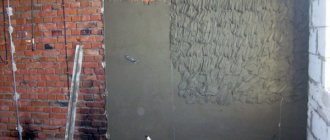
Prepared walls for plastering
Carefully coat the beacons with slightly spread thick plaster, trying not to catch the installed profiles.
It is very important that the distance between the beacons does not exceed the length of the rule, which should move as if on rails.
When everything is ready, we clean the wall of excess mixture that holds the profiles, especially from particles that are not held securely, after which we begin leveling the walls with plaster with our own hands. To do this, we take the same composition that we used earlier, only, of course, in a large container. This can be a cement-sand mixture mixed in proportions 1:3 or 1:4 with sand.
There are two points to consider.
- Firstly, the thicker the layer is planned, the larger the sand fraction should be.
- Secondly, the proportions of the solution for plastering walls must be precisely adjusted, since the more cement you add, the faster the mixture hardens and the more fragile the coating will be.
Main sequence of work
Traditionally, working with materials that, after installation, acquire their basic qualities during the drying process, requires strict implementation of all technological processes in strict adherence to sequence. Plaster, like concrete mortar, gradually gains strength during the drying process, forming a hard, even surface, but this can be the result of several sequential operations:
- Preparatory operations for installing electrical wiring, repairing large defects in masonry and cleaning the room from extraneous objects;
- Preparation of the wall surface - cleaning of dust, excess mortar, chipping of protruding parts of the masonry;
- Wetting the wall or applying a primer to improve the quality of the prepared surface;
- Surface marking for installing beacons on the main plane, adjacent walls, door and window openings;
- Fixation of beacons;
- Preparation of plaster mortar;
- Applying the solution to the wall, leveling the surface;
- Removing beacons, filling in recesses;
- Grout.
Depending on the quality of the wall and the material from which it consists, the volume of preparatory work and methods of preparation for plastering are determined. Different types of materials have their own specific surface preparation methods:
- Concrete blocks absorb water abundantly, while high-quality blocks have a smooth, rough appearance. Such walls must be coated with a primer to reduce moisture absorption, secured with a plaster mesh, or covered with a small layer of adhesive mixture for ceramic tiles. For large surfaces to be treated, to save money, notches are applied for better adhesion of the solution to the base.
- The brickwork must be cleaned of dust and moistened with plenty of water. On brickwork, as well as on walls made of concrete blocks, you can install a plaster mesh, which will significantly increase the strength of the plaster layer.
- The plasterboard surface is most often not subject to plastering with cement-lime mortar, but this possibility is not excluded, for example, in bathrooms, where high air humidity and a layer of additional protection are simply necessary for plasterboard. Before applying the solution, a primer is applied, this will ensure the necessary strength of the gypsum and protect it from the penetration of excess moisture.
- Cinder block, having a porous, rough surface, is excellent for applying plaster mortar, both cement-based and lime-based. The solution adheres well to the surface, quickly sets, and is easy to shape the surface.
- Wooden walls for plaster are pre-leveled, a plaster mesh is installed on them, and the wood is treated with a primer that protects the wood from natural pests.
- Natural stone walls are plastered after the mesh is installed. And the shell rock is pre-wetted abundantly with water.
Deep defects in surfaces are first repaired with ordinary cement mortar, and only after it has dried, plastering begins.
Marking
First, you should check the walls with a building level and find out the deviation; to do this, you need to apply it to different parts of the surface horizontally and vertically.
After this, you need to find all the bumps and depressions by applying the rule to the wall. Mark these defects with a marker or pencil. If the deviations are more than 3 cm, it is necessary to remove the bumps with a grinder and fill the depressions with putty.
Now you can proceed directly to marking for paint beacons. You should start from the corners of the room, stepping back 30 cm from them and drawing straight vertical lines from the ceiling to the floor. Then retreat 160 cm from the drawn line and draw the next one, and so on until the end of the wall.
After this, you need to decide on the length of the beacons. It should be taken into account that you should retreat 15 cm from the floor and ceiling and mark these points. Holes are drilled at the points and dowels with self-tapping screws are installed.
Then stretch the cord from corner to corner horizontally - near the ceiling and floor.
The result should be two parallel lines. The cord will intersect the remaining vertical lines; marks should be made at the intersections, holes should be drilled and dowels installed without self-tapping screws. The result should be two rows of holes running exactly along the same line.
Primer
This stage is mandatory, since the duration of operation of the future surface depends on it. The primer increases the adhesion of the wall, so the plaster will stay on it better and longer; in addition, primers can serve as antiseptics, improve surface ventilation and serve to remove dust.
Deeply penetrating compounds are used when finishing brick walls or surfaces made of cellular concrete; for smooth ones, you can get by with “Betonkontakt”.
The selected primer is poured into a paint container, and a roller or brush is dipped into it, then the tool is pressed onto a special surface on the container and the entire area is treated. After applying the first layer, you need to wait about 2-3 hours, then repeat the procedure and leave the walls to dry for 10-12 hours.
Types of plaster beacons
More recently, wooden slats served as a guide (they are still sometimes used on construction sites due to the possibility of repeated use and minimal cost). Such guides must first be well soaked in water so that they do not change their size when applying the solution. Or you can coat the surface with waterproof paint.
Modern samples - aluminum, steel, plastic guides with a height of 3 - 30 mm (depending on the thickness of the layer of plaster applied), and a length of 2.5 - 6 m.
Those similar to the letter “T” are used for flat surfaces, those similar to the letter “L” are used for external corners. There are also polyvinyl chloride (PVC) flexible arched corners. They are used for finishing arches.
As a rule, steel products cannot be reused, since after removal the profile turns out to be deformed. The exception is aluminum “ears” (more on this later).
There is another type of beacon - made of plaster mortar.
Along the markings, thrown around the perimeter, and then in the middle, rows of nails are driven in increments shorter than the size of the rule (you can also create a plane using a plumb line). The mixed mixture is poured onto the nails. As soon as it begins to harden, part of it is removed (head to top). The result is the so-called stamps.
The remaining distance between them is covered with a solution, applying the rule to two adjacent marks. As soon as the mixture begins to set, the rule is removed by first lightly tapping it with a hammer. It turns out to be an even strip, which is the lighthouse.
Plastering in this way is quite difficult - it is important that there is no excess mortar, because the accuracy of leveling depends on this. This method has a significant advantage - at the end of the work, the beacons do not need to be removed; they are notched and plastered. You can also make the guides horizontal (this option has recently been considered a more advanced method).
A few words about the cost
On average, a T-shaped beacon with a 6 mm profile costs 5 UAH, a 10 mm one can be purchased for 7 UAH. For a 3-meter corner profile in online stores they ask for about 5 UAH, a flexible arched corner - 6 UAH.
Materials and tools
Proper organization of the work process requires the presence in the arsenal of a certain set of tools to ensure that work is carried out with minimal interruptions.
During the work you will need:
- level, regular aluminum with bubble indicators, laser, of course more expensive, but also more versatile, especially if it gives several points and laser lines;
- hammer drill with a set of drills;
- dowels and wood screws for installing beacons;
- screwdriver, hammer, metal scissors;
- marking cord, plumb line, tape measure;
- rule;
- grout and steel iron;
- container for preparing the mixture;
- mixer or drill with an attachment for mixing the solution;
- wide paint brush;
- trowel and plastering ladle.
Consumables you will need:
- beacons;
- self-tapping screws + dowels;
- ready-made dry plaster mixture or the main components for preparing the mixture - lime or cement and sand.
For installation on walls made of high-quality masonry, standard 6-10mm beacons are usually used; this rating is quite sufficient for work. It is better to take plastic dowels, but it is recommended to use ordinary wood screws as the main element for leveling the plane; usually 45 or 60 mm are used for this.
Dry ready-made plaster mixture is better suited for interior work on a well-prepared wall surface; its properties allow it to be easily applied to large surfaces, and it sets and hardens relatively quickly, due to the presence of gypsum in the mixture. When preparing the mixture yourself, from individual elements, you need to prepare measuring cups and a container for preparing the mixture. Polymer additives should be used carefully so as not to deteriorate the quality of the mixture.
To work, you need a rule of two sizes - 2 meters long and 2.5 meters long. A long rule is necessary to align the screws over the entire height of the room (if the standard ceiling height of a residential building is taken). The smaller rule will be directly involved in the formation of the layer.
How to install beacons for plastering walls
Most often, two methods are used. Each has certain advantages and disadvantages. One is less expensive and more accurate, the other is faster.
Method 1: installing beacons using special fasteners
There are two types of fasteners.
- In the first case, these are plates with one fixed end and a cutout for a plug.
- In the second - the so-called “ears” - steel plates with side braces and a slot for a self-tapping screw (after installation, the “ears” are bent on the sides of the lighthouse).
Then everything is simple: fasteners are installed on leveled self-tapping screws (screws) and the beacons, cut so that they are 5–10 cm shorter than the height of the room, are snapped into place.
It takes no more than 15 minutes to install one unit. The installation process is simple, plus there is no need to wait for the solution to harden, which significantly saves time. In addition, as mentioned earlier, the guides, pulled out before the plaster has completely dried (it is removed with a narrow spatula), are wiped and used again.
Method 2: installation with gypsum mortar
Beacons are cut according to the height of the wall.
Prepare the batch according to the instructions (the viability of most mixtures does not exceed an hour, so you should not dilute a large amount).
Then it is evenly thrown along the marking (“flip flops” are thrown in increments of 30 cm).
Having applied the beacon, you need to press it along its entire length - drown it in the solution and reach the heads of the screws. Additionally, verticality is controlled by the level.
Wait for the solution to harden (to make it set faster, add building gypsum (alabaster), approximately 10% of the total mass).
The first beacon has been successfully installed. The rest are created in a similar way.
We figured out how to place beacons under plaster walls. Next comes the actual plastering process.
Plastering walls on beacons
It is recommended to fill the gaps in two stages (especially if the layer thickness is more than 3 mm).
The first layer is a rough cast, not reaching 5 mm to the level of the beacons.
We leave it as “bumps”. Cast as often as possible. Start at the bottom of the wall and move up.
The second layer is applied after the first has dried.
Now you need to protrude a few millimeters beyond the guides. Having thrown a certain area, wait for the solution to start setting. Then they take the rule and begin to level it - remove the excess, leaning the tool on two adjacent beacons.
Advice! The rule is moved from bottom to top, slightly swaying it from side to side (zigzag). The force is applied as close as possible to the beacons in order to avoid deflection of the plank and not to press the mortar with an “arc”. At the very end, it is carried out a couple of times in the opposite direction (from top to bottom) - this way the wall will turn out to be perfectly flat.
The cut solution is reused: mixed thoroughly, thrown into uneven areas (shells) and pulled together again. It is also useful for rubbing voids and gaps after removing profiles.
Guide profiles: remove or leave?
Let's figure it out together. There is information that beacons left in walls rust, creating original patterns that cannot be deduced in any way, and can cause cracking of the plaster. There are grounds for such unrest.
- Firstly, the material of the product itself may be of poor quality.
- Secondly, by running a rule over a galvanized profile, you can damage the protective layer, exposing the metal, which, when interacting with the environment, will lose its chemical properties.
- Thirdly, the humidity in the room plays an important role (the higher it is, the more likely it is for rust to appear).
As for cracks, expert opinions differ. Some argue that the plaster cracks when the beacons are removed, others - when they are present in the walls, for example, when the owners want to hang a picture. However, everyone agrees that this issue is secondary compared to the appearance of rust.
To summarize, we can say that there is no clear answer to remove or leave beacons. Among the ten professional plasterers we surveyed with an impeccable reputation, eight responded that they prefer to remove the guides in all cases, except when preparing for tiles or decorating with stone.
If you are still inclined to “leave the guides,” then choose aluminum or plastic ones - they do not rust. Also try to remember the approximate location, so as not to place mounts under shelves or pictures later.
The beacon is easy to make: we find the edge of the profile from below and pull it up. It is better to perform the operation before the plaster material hardens. The remaining strips are sealed with plaster and proceed to the last stage.
Grouting plaster
After the surface has dried, you need to go over it with a float and a sponge soaked in water. Rub gently in a circular motion. If you plan to lay tiles, then this operation is not necessary: the remaining unevenness and roughness will come in handy - you will get a stronger adhesion of the materials.
How much does it cost to plaster walls using lighthouses?
Before mastering a new technology, it is interesting to calculate how big the savings are.
In the construction services market, the price depends on the volume and thickness of the layer.
For a surface up to 30 mm thick they ask for 100 – 130 UAH. for 1 m2. Plastering complex geometric shapes and ceilings costs from 180 UAH.
per square. This does not include the cost of materials. We multiply it by our volumes - I think it’s worth the effort.
Congratulations, do-it-yourself wall plastering using beacons has been successfully completed! We sincerely hope that the instructions given in this article were useful. If you have any questions, we will be happy to answer them (contact us by phone or send a request by email).
Video
How to decorate walls with plaster
So, the paths for the rule have been laid, the soil covers every centimeter of the surface that we want to make flat and smooth, all that remains is to roll up our sleeves and get to work.
Many beginners wonder how to properly level walls with plaster and do not receive a clear answer from experienced craftsmen. Although there is nothing complicated in listing all the stages. Let's be consistent and consider the whole process in great detail.
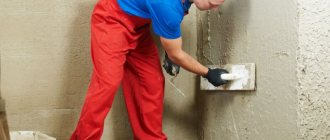
We take a spatula or trowel, whichever is more convenient for you, scoop up a small amount of the mixture and throw it at the wall with a whipping motion, as if trying to break through it with this lump.
The harder the captured portion hits the wall, the better it will adhere to the smallest irregularities on the surface. We thoroughly fill all the space between the beacons, without trying to level the composition. This technique of plastering walls is called spraying.
In principle, the first layer can also become the last if the unevenness is small and the beacons are not too high.
But if the thrown covering was not enough for it to align with the profiles, we repeat the procedure after the soil has set. It must be said that when the base is covered with a leveling compound, the technology for plastering brick walls is no different from working with a concrete base. As a result, you should reach the finishing plane when the mixture almost completely hides the beacon strips underneath.
When there is quite a lot of finishing composition on the wall, wait a while until it begins to dry out.
Then we take the rule, apply it tightly with its edge to the bottom of two adjacent beacons and move it up like on a sled. At this stage, finishing the walls with plaster yourself is carried out with the greatest expenditure of effort. When the ribs of the beacons appear from under the mixture, the coating should be completely leveled.
It is advisable to use a long rule to capture a couple of rows between profiles at once. More is unlikely to happen, since there will be too much difference in the degree of drying of the composition at opposite ends of the site. When all the walls take the proper form, we wait for the composition to set thoroughly.
But everything has hardened, even if not completely, but there is already some strength. Let's remember what to do after plastering the walls. It's time to get rid of the profiles embedded in the coating, unless, of course, you intend to leave them there forever.
The fact is that plaster absorbs moisture from the air well, but metal tends to rust, and corrosion sooner or later appears on the surface, be it wallpaper or “Venetian”. Therefore, we boldly cut the coating along the beacons with a spatula and, lightly tapping them with something weighty, we extract the “rails” that have served us so well for the rule. We cover the resulting gaps with the previously used composition using a spatula or trowel.
Now we take a grater, and, regularly moistening the surface of the walls, gently, in a circular motion, smooth out all the observed defects, of which there should not be so many. There is no need to press hard, your main goal is for all the irregularities left by the rule to disappear. Actually, this is the end of the master class on plastering walls; then you can move on to wallpapering or painting.
The third stage - applying plaster
Installing beacons is a complex and meticulous process, but if it is done correctly, further actions will be easier and the result will be excellent. The prepared solution is applied with a trowel using throwing movements on the wall between two beacons. For these purposes, you can use a large spatula or trowel. The level of the solution should be slightly higher than the location of the beacons.
Gently level the plaster using the rule from bottom to top. To do this, make progressive smooth movements from side to side, gradually lifting the rule upward. Remove excess solution from the tool with a spatula. Instead of the rule, you can use a wooden lath, but it must be perfectly level. And even this does not guarantee an excellent result.
If after tightening the mortar there are recesses left, after setting, throw plasters on them and tighten them again using the rule.