Hello readers of my blog! Today we will talk about plastering walls with your own hands. It would seem that the matter is not tricky, but when you are faced with this problem, you have to think about how to make plaster correctly, and how to choose materials. Thus, I decided that this article would be useful to someone, and I am devoting my efforts to this topic. In it I will answer a number of questions that will arise immediately before plastering, and some even after it.
This topic is quite broad, because before finishing, it is necessary to prepare the surface, but how to do this? And this is a separate topic. You can learn about all this in great detail in the article about preparing walls. In addition, by clicking on the link, you will have the opportunity to familiarize yourself in more detail with the selection of some materials.
Alignment of walls
You can make walls smooth in different ways. The result is better when plastering the walls along the beacons is used. This topic will be discussed in our article.
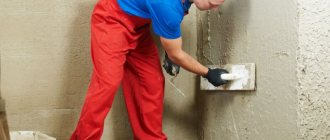
The plaster composition can be applied mechanically or manually. From an economic point of view, machine plastering of walls is justified for large volumes.
Modest scales can be leveled in the old “old-fashioned” way, that is, by hand.
All that remains is to decide: do the work yourself or entrust it to a specialist. At first glance, plastering walls using beacons with your own hands seems complicated and time-consuming. However, practice shows that, in general, there are no difficulties - the same plaster, you just need to figure out the installation of beacons.
How to plaster facade walls
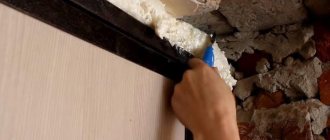
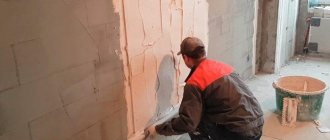
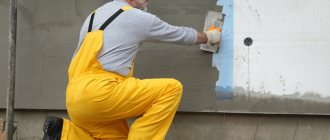
Plastering the walls of the facade is not much different from the technology inside the room. The difference is in the size of the walls, and the uselessness of lighthouses. The corners of the corners of the building and the window corners act as beacons on the façade of the cottage. We will pull the plaster along these corners. I’ll answer the question right away, “which plaster is better for the facade?” We use exclusively cement, it can be special for facades, or it can be universal. You cannot plaster the façade with gypsum materials! I allow lime plaster to be used only on the base of a building, where there are large differences and high humidity and serious reinforcement is required (although there are different cases, and many where this is not required).
The surface of the facade must be prepared. if your house is insulated, then it should already be covered with reinforcing mesh. All façade corners must be exposed and everything must be primed and dried. Now we mix the cement composition of normal consistency (so that it spreads well), preferably working in cloudy weather so that the solution does not dry out.
Apply the solution to the façade in a thick layer using a trowel 40-50 cm long. We pull together everything that was applied in the corners with the rule, the longer, the better. If there are no corners nearby, we tighten the large holes and smooth them out with the bulk of the mortar. wait until it dries a little and rub it with a foam grater (40-50cm long).
If you are asking the question “is it possible to plaster in the cold in winter?”, then the answer is definitely no! Even if there is a special plaster for working in cold weather, I personally do not recommend working outside in winter; plastering at 0 degrees is also impossible. after thawing, everything may fall off and lose its properties. You can plaster after +5 degrees, at least that’s what it says on the bags. But at night the temperature can drop lower, so do not take risks, but carry out work in good weather. Do not plaster in direct sunlight.
What tools and materials will be needed:
To plaster a wall, you should stock up on the following consumables and tools:
In addition, you need to take care of work clothes, protective gloves and a hat. The above list is quite large, but the main thing here is a hammer drill and a set of drills; everything else is not very expensive.
Construction level (it’s more convenient if it’s long), a trowel or spatula for spreading the mortar, a rule for leveling, fasteners (dowels + screws), a hammer drill, a grater to create smoothness, cords, beacons, pliers, mesh, primer, etc. ..
Plastering walls with your own hands is recommended only for those home craftsmen who have experience in finishing work.
If you do not have such experience, you should choose a small section of the wall or take a sheet of drywall and practice on it. If the result is far from the desired one, it is better not to try to save money, but to immediately contact a construction company. Others are advised to follow the instructions provided.
Plastering walls with your own hands can be done in two ways.
- In the first case, the solution is simply applied to the walls, after which it is leveled using the rule.
- In the second, before plastering the walls, paint beacons are installed or threads are pulled to indicate the level. This operation is only required in the case of very uneven walls. These two methods of plastering walls are considered the main ones, but each master can make small adjustments to the technology.
Since it’s all the same - yourself or the master
In repairs, the main thing is not the process, but the result, which may not be of particularly high quality if you deviate from time-tested technologies and dozens of masters, especially when plastering the walls with your own hands. The surfaces should be perfectly smooth, without flaws or deviations from the vertical. Therefore, we learn to give the room the correct geometry.
Layer thickness for different types of surface
When plastering work is carried out, experienced craftsmen take into account the type of base. On wooden, concrete walls, as well as OSB surfaces, layers of different thicknesses are laid to create an equally even coating.
Brick
Not all craftsmen know how to properly plaster a brick wall to ensure a durable coating. Brick walls are characterized by a certain relief, since all elements are held together with cement mortar. This in turn affects the thickness of the plaster. The minimum value is 5 mm. Applying a layer with a smaller thickness is unjustified, since it will not be possible to achieve a flat surface. If the bricks are not initially laid completely evenly, then a thicker coating will be required.
Optimal parameters vary from 20 mm to 25 mm. If necessary, the thickness can be increased to 5 cm.
Optimal thickness parameters for brick walls vary from 20 mm to 25 mm
Concrete
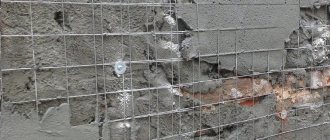
It is customary to cover concrete walls with plaster in order to improve heat and sound insulation. Such surfaces are initially flat, which is more relevant to new buildings. Serious defects are extremely rare. A layer of 2-5 mm is sufficient for leveling. If there are large protrusions, it is better to cut them off with a grinder.
For significant unevenness, the maximum limit is from 50 mm to 70 mm, depending on the specific complexity of the situation. After concrete plastering, the surface must be reinforced with reinforcing mesh.
To level concrete walls, a layer of 2-5 mm is enough
Aerated concrete blocks
Walls made of aerated concrete, like ordinary concrete, themselves have a flat surface. However, the material is noticeably inferior in strength to brick and concrete. For this reason, a large mass of the mixture has a destructive effect on the walls. The minimum cover value is about 5 to 10 mm. The maximum values vary depending on the nature of the work:
- for interior finishing – up to 20 mm;
- during facade treatment – no more than 15 mm.
If you lay the construction mixture in thicker layers, this risks cracking the coating. In the worst case scenario, ignoring the standards leads to the destruction of surfaces made of aerated concrete blocks.
Thickness of application on aerated concrete for internal finishing is up to 20 mm, for external finishing up to 15 mm
Wooden surfaces
Wood is poorly suited to plastering due to the low adhesion of the material to such a surface. Wood is characterized by disintegration and also soaking under the influence of large amounts of moisture. Because of this, not every train will fit on such a wall.
For this reason, shingles or mesh are pre-fixed on wooden surfaces. Then the base coat hides the reinforcing layer, after which the mixture is applied at a depth of 15-20 mm. The total size of the cover can be from 2 to 3 cm. In this case, the thickness of the plaster along the mesh is not regulated, since the mixture is needed to hide the reinforcement.
On wooden surfaces, shingles or mesh are pre-fixed
Drywall
Plasterboard walls are initially smooth. Often, various tasks are performed using gypsum board sheets:
- internal partitions are created;
- multi-level ceilings are formed;
- Walls with excessive curvature are leveled.
This type of base is rarely covered with plaster, since drywall acts as a finishing material. The surface is smooth and free of defects. Therefore, there is no need for alignment. But plaster is also applied to such walls to disguise joining seams, dents from screws and the fasteners themselves. To do this, apply a putty composition or dry finishing gypsum, acrylic, or silicone mixtures.
The minimum thickness of plaster on plasterboard sheets is 1.5 mm, and the maximum value is from 3 to 5 mm. It is better not to use cement compositions, since these mixtures are heavy. Due to this load, drywall may warp.
To disguise the joining seams, dents from self-tapping screws are applied to the drywall with plaster.
Insulation materials
Foam plastic, extruded polystyrene foam, and penoplex are used as insulating materials for the facade of buildings. Sheets of insulation are attached to the rough layer or the base itself without prior plastering of the walls. Next, the seams are sealed and the reinforcing mesh is fixed. And since all insulation materials are not able to resist mechanical stress due to their softness, plaster finishing is a prerequisite.
The reinforcement itself is performed as follows. To begin with, the plaster is applied to the insulation with a layer of 15 mm. Next, the mesh is attached and immersed in the solution using a spatula. After this, the next layer is applied with a thickness of 10 mm to 20 mm.
Why is plastering walls with your own hands the best option?
The first thing that foremen of hired teams of craftsmen specializing in repairs suggest doing is preparing an estimate.
In this case, a significant part of the final amount will be the payment of workers, as well as the contractor’s share. In the best case, the cost of materials will need to be doubled, and presumably that’s how much it will cost you to hire a crew.
That is why quite simple plastering of brick walls with your own hands is much more profitable. But there is also a flip side to the coin - if you do not have experience, mistakes may be made with the result in the form of cracked walls and the need to start all over again, or call the same craftsmen. Not to mention wasted materials.
It follows that you need to study the finishing technique well, use the right tools and materials, and perform the stages of wall plastering only in the sequence that is suitable for the work you have planned.
And here’s the first piece of advice: purchase building materials in abundance, especially plaster mortar (or its components, if you mix it yourself), since layers of different compositions may not adhere well.
It is also better to take care of the tools right away so as not to interrupt the finishing process, which could have a negative impact on the quality.
Thickness of decorative plaster
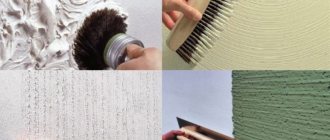
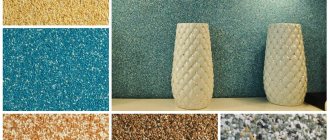
Decorative mixtures also have their own minimum and maximum values. This plaster is divided into several types:
- textured;
- structural;
- Venetian;
- pebble.
The thickness of the pebble surface depends on the size of the grains
Structural decorative plaster
Venetian has the lowest plaster layer values.
For a textured cover, the “dimensions” of the cover reach 50 mm
Venetian has the lowest plaster layer values. This is explained by the fine fraction of the component (stone flour). The same applies to Moroccan and silk decorative mixtures.
For textured and pebble finishes, the “dimensions” of the cover reach 50 mm. This is an imitation of brick laying, the type of wood, and sea waves. The thickness of the pebble surface depends on the size of the grains.
For any experienced craftsman, compliance with the thickness of the plaster coating is a prerequisite. Following the requirements of the standards is not due to any whim, but to the need to create a high-quality and durable coating.
Did you learn something new? Share in the comments!
Types of coatings
According to modern rules SNiP III-21-73, there are 3 types of coatings:
- Low quality. This type of plastering is suitable for finishing walls with your own hands in non-residential premises.
Permissible deviations vertically and horizontally are 3 mm per 1 meter. Also, for every 4 square meters, 3 smooth irregularities are allowed, the depth of which does not exceed 5 mm. Surfaces can be plastered with cheap starting solutions.
- Average quality. In this case, the requirements for surfaces are more stringent: vertical or horizontal deviations should not exceed 2 mm per 1 m.
As for smooth irregularities, their number is limited to 2, and their depth is 3 mm. This way you can plaster the facades.
- High quality. The requirements for this type of coating are the most stringent. Horizontal and vertical deviations should not exceed 1 mm per 1 m, and there can be no more than 2 smooth irregularities, while their depth cannot be more than 2 mm.
Plaster thickness depending on the type of mixture
Let's consider what thickness of plaster should be applied when using different compositions. The most popular are gypsum and cement. Lime compounds are also used for premises, and clay finishing is often used. Each of the materials forms a coating, the strength of which depends on the size of the plaster layer. This property can critically manifest itself when the solution sets; if the thickness of the coating is less than permissible, it will tear when drying (the plaster will crack). The minimum is also determined by the size of the filler fractions.
The finishing of the premises can be done with gypsum or gypsum-sand mortar. According to the recommendations of the manufacturers, the dry gypsum mixtures they have developed can be applied up to 50 mm thick (Volma layer - up to 60). The minimum thickness indicated by companies is 5 mm, but craftsmen often apply a 3 mm layer of gypsum mixture. When applied by machine, the minimum is 8 mm. According to SNiP, the thickness of a single-layer gypsum coating is up to 1.5 cm.
When using a cement mixture, the normalized minimum is 1 cm, maximum 2 cm for one layer. When leveling plastering, the spray layer is up to 0.5 cm, a separate layer of soil is at least 5 mm. The total thickness of the coating is at least 10 mm.
Lime mixtures can be used for outdoor finishing (with the addition of cement), but are more often used in dry rooms. The thickness of the spray is up to 5 mm, the thickness of the soil is up to 7 mm. If a lime composition is used as an intermediate – buffer layer between cement and gypsum compositions, then the thickness of the “buffer” should be at least 4 mm.
Clay is an excellent plastic material. Most often it is used for wooden surfaces, onto which shingles are filled before plastering. The minimum layer of clay mixture on top of shingles is 10 mm. If the coating is thinner, the clay will simply peel off. Clay-sand cementless mortar is applied with a thickness in the range (mm) - 10-35, with the addition of cement - 15-35.
Brick walls
Such structures are usually finished with cement-based plasters.
In some cases, a little lime is added to them to increase the plasticity and moisture resistance of the material. The thickness of the plaster layer on brick walls should not exceed 3 cm. It is also recommended to use reinforcing mesh to strengthen the layer.
If we are talking about facing bricks, then working with them is quite difficult. Its surface is very smooth, so the solution can fall off even if a reinforcing mesh is used. Such material must first be impregnated with special primers, and only then can finishing begin.
How to control the layer of plaster mixture
Beacons are used for these purposes. They are metal guides 3-4 m long and 6 or 10 mm thick. Six-millimeter products are convenient because they allow you to apply a small layer of solution, while ten-millimeter products are more rigid and comfortable.
Beacons allow you to control the layers of applied solution
After all work has been carried out with a plumb line and the curvature of the coating has been determined, the beacons are installed. To do this, you need to retreat 30 cm from the corner, draw a straight line, apply small portions of the solution to it and glue the beacon. By pressing or pulling outwards you need to align it, and then install the second one at the opposite corner. The remaining products are installed on the wall at intervals of 130-150 cm. Then you need to plaster the surface so that the material does not extend beyond the lighthouse.
Experienced craftsmen can slightly change the thickness of the plaster layers based on their personal experience, but beginners are highly advised not to deviate from the above parameters and the manufacturer’s recommendations.
Concrete walls
Smooth surfaces of this type are pre-treated with primers containing quartz sand or flour. This material increases adhesion and ensures tighter contact between the plaster and the wall.
To finish such surfaces, cement-based plasters are used, to which a little gypsum or lime-gypsum mixtures are added. For rough concrete walls, ordinary cement plasters without additional components are sufficient. The main thing is to treat them with “Betonkontakt” before plastering the surface yourself.
When to level walls and types of plasters
Concrete or brick walls almost always need to be leveled, especially in the following situations:
- The difference at 2 meters is more than 1 cm.
- With visual curvature.
- If perfect evenness is required.
To level the surface it is necessary to use different mixtures and plasters. For many years, the composition has remained unchanged, so working with them is as easy as before. Plaster is a familiar mixture for anyone who has ever done a renovation. They are based on gypsum or cement, to which polymer is added.
Types and purpose of plaster
It is not recommended to level bathrooms, toilets, and kitchens with gypsum-based mixtures; it is better to use universal mortars that contain cement. When preparing the solution, it is necessary to thoroughly mix the components, then allow the plaster to stand for 10 minutes and mix the solution again. Do not add water or plaster after this.
Before plastering, it is important to correctly decide on the mixture option. There is a lot of material available in stores, but there are two main types:
| Plaster base: | Description: |
| Plaster: | Gypsum-based plaster has certain advantages over cement-based leveling materials, but it is more expensive. There are many types of gypsum plasters on the market, but the most popular is rotband. You can level the surface with gypsum plaster in the living room, bedroom, balcony, or use it in a room where there is no high moisture. |
| Cement: | This type of plaster is universal. Two types of such a solution are sold, in which there will be different compositions and fractions. For roughing work, a coarse sand fraction is used, and for finishing work, fine sand fractions should be used. The plaster is suitable for work outside, as well as inside the house. |
To level the walls with cement plaster, you will need to use putty; without putty, it is not recommended to glue wallpaper or paint the base. Cement mixtures have advantages:
- The cost of the material is low, due to which it is in demand.
- Plaster cladding is durable if you follow the plastering rules and use a high-quality mixture.
- The solution is created quickly and applied simply. The mixture does not set quickly, which is good for beginners.
To increase the plasticity of plaster for cement-based walls, it is recommended to use a little lime, which is added to the finished mixture. Like any other material, cement plaster for walls has its disadvantages:
- You can’t decorate the walls with a thick layer. The thickness does not exceed 2.5 cm, otherwise the finishing material will crack. This means that plastering work is carried out in several steps, and mesh reinforcement is also used.
- The wall coating takes a long time to dry, due to which it is not possible to move on to the final finishing, decoration and design of the home interior right away.
Types of decorative plaster
Working with this type of plaster for walls takes a long time, but if it is a bathroom, toilet or kitchen, then there are no options. When using gypsum plasters, you need to understand their advantages, because gypsum-based plaster is also popular:
- The mixture is safe for health, due to which it can be used in any room.
- Plaster has good moisture absorption, so the microclimate in the house will be at the proper level. This mixture absorbs moisture from the air and holds it in itself, and releases it when necessary.
- The consumption of the mixture is small when compared with cement types.
There are also disadvantages to the material - quick setting. You need to plaster the walls quickly, and without experience it is difficult to do the job. It is not recommended to prepare a lot of solution at once; it is better to treat certain areas on the wall and prepare the solution in doses, since the unused residue loses its properties. Some argue that the disadvantage of rotband is its high price, because the material is more expensive than cement plaster. It is difficult to say which plaster for leveling walls is better, because they are used in different areas and have different features. The choice is made based on the premises and the need for decoration.
Cellular concrete walls
If the building was erected or insulated using gas or foam blocks, then plastering work will be quick and easy. At the preliminary stage, you will only need to treat the walls with deep penetration impregnation. Such surfaces can be plastered with gypsum plaster, concrete or lime mortars.
On a note! Currently, construction stores offer a wide range of plasters suitable for certain surfaces and operating conditions. Manufacturers indicate the proportions in which the mixtures need to be diluted and provide various recommendations for use, so there will be no problems with the choice.
Advantages over other types of alignment
Compared to other leveling methods, plastering is unrivaled and demonstrates the following advantages:
- Mechanical stability.
Even with strong point impacts or vibrations, the coating does not deform - but only if installation technologies are followed. - Resistance to temperature fluctuations.
Depending on the base, it can withstand temperatures ranging from -70 to 70 °C without deformation, destruction or weakening of strength. - Moisture-resistant and moisture-proof.
Due to these qualities, long-term protection of walls from moisture is ensured. - Vapor permeability.
The microporous structure of the plaster compositions ensures the free penetration of steam and air, which contributes to their microcirculation and the formation of an optimal microclimate in the room. - Heat and sound insulation properties.
Due to these qualities, comfort in a house or apartment increases and heating costs are reduced. - Plasticity during installation.
For some time after mixing, the solution does not harden; adjustment and adjustment of the layer thickness is possible without changing the chemical and mechanical characteristics of the coating.
In addition to the advantages due to its physical and chemical properties, plaster is also convenient in practical terms. Due to the large selection of bases, it is suitable for any type of coating and operating conditions.
Solution. How to make the right choice?
A solution for plastering cement-based walls is prepared as follows. Cement is mixed with sand in a ratio of 1/2. In addition, you can increase the amount of sand to 5 parts.
The composition is thoroughly mixed, then water is gradually poured into it. The solution should resemble dough.
To prepare cement-lime mortar you need cement with sand and lime. For one part of cement there are 6-8 parts of sand and up to 3 parts of lime.
First of all, cement and sand are mixed. Lime milk is poured into the resulting composition. All ingredients are thoroughly mixed together.
If the solution turns out to be too thick, you need to dilute it with water. After adding liquid, all ingredients must be mixed again.
If the walls are lined with facing bricks, their plastering should be entrusted to professional builders. Plaster does not adhere well to materials with a polished surface.
It will be difficult for a beginner without experience to properly plaster the surface. As a result, the plaster may peel off and fall off the wall in pieces. Professionals, in addition to their knowledge and skills, use reinforcement with a special primer.
If a smooth concrete wall is to be plastered, gypsum with quartz particles is added to the cement mixture. The latter give the surface the roughness necessary for good adhesion to the solution.
Lime-gypsum solution is prepared from gypsum (1 part) and lime (3 or 4 parts).
First, water is poured into the solution container, then gypsum is poured into it, and everything is thoroughly mixed. The consistency of the mixture should be semi-liquid. Lime is added and all parts are mixed again.
For a rough concrete wall, you can use “Betonokontakt”, and solutions are used on both cement and gypsum bases.
Before plastering, foam concrete walls are treated with deep penetration primers. You can choose gypsum or cement mortars at your discretion.
A photo of wall plaster demonstrates the best design ideas for the interior. The coating will be of high quality if you choose it wisely. You can consult with the manager of the hardware store.
The modern market offers a wide range of mixtures that are easy to prepare. To get the finished composition, you just need to mix them with water. An example of such a mixture is “Rotband”.
Surface preparation
At the very beginning, you need to prepare the surface of the walls. To do this, you will need to remove the old coating and all parts that do not adhere well to the wall. If there are cracks, they are sealed. It is recommended to remove the soft layer from the walls, it does not matter how much is removed. High-quality preparation is the key to quality repairs. Holes and pits in the wall are sealed immediately, since a thick layer of mortar will not hold, and a thin layer will not cover the defects.
If the wall is made of concrete or painted with a special mixture that gives a perfectly smooth surface, then the plaster will not adhere well and may fall off. In this case, it is recommended to use “Betonokontakt” to improve adhesion. In order not to waste money, notches are made on the wall with an ax; about 100 notches are needed per square meter.
Preparing the wall for plastering work
Based on what kind of plaster needs to be laid, the composition of the primer is selected. Before use, it is important to read the instructions, then apply it to the wall and wait until everything dries. Next, a calculation is made of how much plaster is required to level the walls, taking into account the size of the walls. Additionally, the ceiling is leveled using a rotating band. When everything has been calculated, work is carried out.
Preparing walls for plastering
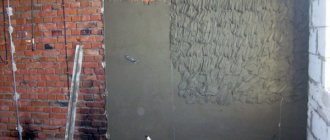
There is nothing stopping you from covering the walls with a leveling solution by simply spreading it over the surface, but the result will be unpleasant, believe me. There will no longer be a plane as such; instead, your gaze will cling to the wavy surface. It’s a completely different matter if the walls are prepared for plastering according to all the rules.
To begin with, we chop off all unreliable fragments from the surface, be it sagging that can be present on both brickwork and concrete slabs, or peeling paint. Also compare the seams between the rows of bricks especially carefully, since they will interfere with determining the most
We drill holes in the upper right and left corners of the wall and screw screws into them using plugs.
We press the plumb line to one of them and determine the most protruding section on this line, after which we screw another screw into the lower part of the wall exactly vertically.
Using the attached rule and level, we make sure that the line between the heads of the screws is perfectly vertical; if there is a deviation, we tighten it with a screwdriver.
We repeat the operation at the other end of the room, after which we stretch the cords between the upper and lower screws, along which we screw in new screws at equal intervals, vertically from below and from above, also to the length of the rule.
When the marking of the future location of the beacons is completed, the cords can be removed. Now you need to clean the wall again, sweeping away any dust and crumbs remaining after drilling.
Then we take a primer, preferably deep penetration, and treat the entire surface well with a roller. If it is brickwork, the seams must be covered with the composition very carefully, due to the high degree of unevenness. We are waiting for the soil to dry.
Along the line between the screws positioned vertically in relation to each other, in several small portions, we apply plaster to the wall. We carefully press the profile beacon into them, pressing the rule edge along the entire length, and pressing on it until we hit the screws.
We press the profile beacon into the wall
Prepared walls for plastering
Carefully coat the beacons with slightly spread thick plaster, trying not to catch the installed profiles.
It is very important that the distance between the beacons does not exceed the length of the rule, which should move as if on rails.
When everything is ready, we clean the wall of excess mixture that holds the profiles, especially from particles that are not held securely, after which we begin leveling the walls with plaster with our own hands. To do this, we take the same composition that we used earlier, only, of course, in a large container. This can be a cement-sand mixture mixed in proportions 1:3 or 1:4 with sand.
There are two points to consider.
- Firstly, the thicker the layer is planned, the larger the sand fraction should be.
- Secondly, the proportions of the solution for plastering walls must be precisely adjusted, since the more cement you add, the faster the mixture hardens and the more fragile the coating will be.
Tools and devices necessary for work
Leveling a wall with plaster requires the use of special tools, including:
- To apply the primer you must use rollers.
- Spatulas.
- Trowel and/or half/trowel.
- A container with a nozzle for spraying water when grouting the work surface.
- The materials are the plaster mixture itself.
- Wide container for mixing. Preferably a plastic container.
- Mixer (drill with attachment).
When leveling walls with plaster, you need a supply of water, beacons, and screws.
Marking
First, you should check the walls with a building level and find out the deviation; to do this, you need to apply it to different parts of the surface horizontally and vertically.
After this, you need to find all the bumps and depressions by applying the rule to the wall. Mark these defects with a marker or pencil. If the deviations are more than 3 cm, it is necessary to remove the bumps with a grinder and fill the depressions with putty.
Now you can proceed directly to marking for paint beacons. You should start from the corners of the room, stepping back 30 cm from them and drawing straight vertical lines from the ceiling to the floor. Then retreat 160 cm from the drawn line and draw the next one, and so on until the end of the wall.
After this, you need to decide on the length of the beacons. It should be taken into account that you should retreat 15 cm from the floor and ceiling and mark these points. Holes are drilled at the points and dowels with self-tapping screws are installed.
Then stretch the cord from corner to corner horizontally - near the ceiling and floor.
The result should be two parallel lines. The cord will intersect the remaining vertical lines; marks should be made at the intersections, holes should be drilled and dowels installed without self-tapping screws. The result should be two rows of holes running exactly along the same line.
Grouting and sanding after leveling the walls with plaster
If, after applying the plaster, tiling is planned, then it remains as is.
If wallpaper is pasted, it must be rubbed with a special trowel; before painting, puttying is done with preliminary rubbing of all defects. Sometimes puttying is done before wallpapering in order to achieve ideal quality - this is at the customer’s choice. Grout removes all minor defects (sinks, bumps, tool marks) that remain on the plaster. It begins only after the top layer of plaster has completely dried. If the plaster is dry before grouting, it is slightly moistened with water. It is necessary to grate, alternating circular movements and in a running motion, with a special grater. Sometimes this smoothing is done again, also slightly moistening the applied plaster with water, achieving a glossy, optimally leveled wall. After this, putty is applied in accordance with the recommendations placed on the packaging or documents included with the mixture.
Plastering will even out even walls that have severe defects, bumps and depressions. Therefore, after the operation, it will be easy to glue tiles, wallpaper and other materials to the walls.
Primer
This stage is mandatory, since the duration of operation of the future surface depends on it. The primer increases the adhesion of the wall, so the plaster will stay on it better and longer; in addition, primers can serve as antiseptics, improve surface ventilation and serve to remove dust.
Deeply penetrating compounds are used when finishing brick walls or surfaces made of cellular concrete; for smooth ones, you can get by with “Betonkontakt”.
The selected primer is poured into a paint container, and a roller or brush is dipped into it, then the tool is pressed onto a special surface on the container and the entire area is treated. After applying the first layer, you need to wait about 2-3 hours, then repeat the procedure and leave the walls to dry for 10-12 hours.
Mechanized plaster - pros and cons
A few words about mechanized plaster. Mechanized plastering of walls involves the use of all kinds of equipment. This article is about do-it-yourself plastering, so I won’t write much about it. There are many types of equipment: a plastering station, a powerful compressor that uses a special gun, or special plastering installations on guides.
Of course, there are many advantages to using technology, such as speed and enormous output. But the disadvantages are that if you plaster apartments, then this is not such a huge amount of work in which you can use a plastering station. It takes longer to wash it than to plaster the apartment. A compressor with a special gun (hopper) is a more suitable option for apartments and small cottages. But you still have to mix the solution manually and tighten it accordingly. One of the advantages is the speed of application, but you still have to sweat. There is also such a device as a “manual plastering machine,” but that’s a completely different story, which is used in decorative coatings. In general, the thing is quite funny, I wouldn’t mess with it.
So we figured out how to properly plaster walls in theory, everything else will come with practice. Please ask all questions in the comments.
Types of plaster beacons
More recently, wooden slats served as a guide (they are still sometimes used on construction sites due to the possibility of repeated use and minimal cost). Such guides must first be well soaked in water so that they do not change their size when applying the solution. Or you can coat the surface with waterproof paint.
Modern samples - aluminum, steel, plastic guides with a height of 3 - 30 mm (depending on the thickness of the layer of plaster applied), and a length of 2.5 - 6 m.
Those similar to the letter “T” are used for flat surfaces, those similar to the letter “L” are used for external corners. There are also polyvinyl chloride (PVC) flexible arched corners. They are used for finishing arches.
As a rule, steel products cannot be reused, since after removal the profile turns out to be deformed. The exception is aluminum “ears” (more on this later).
There is another type of beacon - made of plaster mortar.
Along the markings, thrown around the perimeter, and then in the middle, rows of nails are driven in increments shorter than the size of the rule (you can also create a plane using a plumb line). The mixed mixture is poured onto the nails. As soon as it begins to harden, part of it is removed (head to top). The result is the so-called stamps.
The remaining distance between them is covered with a solution, applying the rule to two adjacent marks. As soon as the mixture begins to set, the rule is removed by first lightly tapping it with a hammer. It turns out to be an even strip, which is the lighthouse.
Plastering in this way is quite difficult - it is important that there is no excess mortar, because the accuracy of leveling depends on this. This method has a significant advantage - at the end of the work, the beacons do not need to be removed; they are notched and plastered. You can also make the guides horizontal (this option has recently been considered a more advanced method).
A few words about the cost
On average, a T-shaped beacon with a 6 mm profile costs 5 UAH, a 10 mm one can be purchased for 7 UAH. For a 3-meter corner profile in online stores they ask for about 5 UAH, a flexible arched corner - 6 UAH.
Alignment sequence
- First, prepare the mixture according to the recipe on the package. At this stage, the necessary equipment is a bucket and a construction mixer. The contents of the bag are poured into a bucket, diluted with water, and mixed thoroughly. Let the mixture sit for a while and repeat the mixing process.
- Apply a rough or primer layer, for which you grab portions of the mixture with a spatula and forcefully throw it onto the wall surface. They start at the bottom and move up from lighthouse to lighthouse, filling the entire space. If the curvature of the wall is small and the sprayed layer is equal to the height of the profile, then this is enough.
Preparation of the solution - When, after applying the primer layer, the beacon strips still rise above the surface, the procedure is repeated, waiting until the first coating dries. A leveling layer of sufficient thickness should hide the profile underneath.
- Leave the finishing compound for a while so that it begins to set. Next, take the rule and place it between adjacent profiles from below. Press tightly to the surface and move upward. A signal that the layer is completely leveled is the ribs of the beacons that appear from under the coating. Having brought all the walls of the room to the desired form, wait for the composition to completely set.
The rule is moved between profiles - When some strength of the coating appears, the beacons are removed. The grooves remaining after them are filled with plaster.
- Proceed to the final stage - polishing. The completely dry walls are moistened, then all defects are smoothed out with a grater.
Attention! The corners are aligned using a special plastic corner profile. At the end of the work, it is left under the finishing layer.
How to install beacons for plastering walls
Most often, two methods are used. Each has certain advantages and disadvantages. One is less expensive and more accurate, the other is faster.
Method 1: installing beacons using special fasteners
There are two types of fasteners.
- In the first case, these are plates with one fixed end and a cutout for a plug.
- In the second - the so-called “ears” - steel plates with side braces and a slot for a self-tapping screw (after installation, the “ears” are bent on the sides of the lighthouse).
Then everything is simple: fasteners are installed on leveled self-tapping screws (screws) and the beacons, cut so that they are 5–10 cm shorter than the height of the room, are snapped into place.
It takes no more than 15 minutes to install one unit. The installation process is simple, plus there is no need to wait for the solution to harden, which significantly saves time. In addition, as mentioned earlier, the guides, pulled out before the plaster has completely dried (it is removed with a narrow spatula), are wiped and used again.
Method 2: installation with gypsum mortar
Beacons are cut according to the height of the wall.
Prepare the batch according to the instructions (the viability of most mixtures does not exceed an hour, so you should not dilute a large amount).
Then it is evenly thrown along the marking (“flip flops” are thrown in increments of 30 cm).
Having applied the beacon, you need to press it along its entire length - drown it in the solution and reach the heads of the screws. Additionally, verticality is controlled by the level.
Wait for the solution to harden (to make it set faster, add building gypsum (alabaster), approximately 10% of the total mass).
The first beacon has been successfully installed. The rest are created in a similar way.
We figured out how to place beacons under plaster walls. Next comes the actual plastering process.
What tool to plaster walls
I will note the main tools for manual application, and we’ll talk about them. And so, what we need:
| Tool | Description |
| Rule, cutter | Aluminum long tool for leveling plaster on the surface (see photos below). Available in different lengths up to 3m. Usually, for indoor repairs, we will need 3 cutters of different sizes (1m 1.5m 2.5m), if there are hard-to-reach places, then we can cut them to any desired length. |
| Level | It will be needed to identify deviations from the horizontal or vertical level of the surface, to set beacons, to check the finished wall, to set corners, etc. You can use either a bubble level or a laser level (it will speed up the process). |
| Spatula and smoother | For applying material to a surface. We will need a trowel with an average length of 30-35 cm. A spatula is 10 cm. |
| Trowel, trowel | Needed for throwing material. It has different shapes and types. To apply the mortar, a teardrop-shaped “drop” trowel is usually used, but often craftsmen also use square, mason’s trowels. A matter of taste. |
| Roller and bucket and brush | For priming and wetting the surface. |
| Polyurethane grater | For final grinding of cement and lime compositions |
| Trough, container for kneading and water | For kneading, you will need a 40 liter trough and a 10-15 liter bucket for water, or better yet 2 buckets, because you will need to wash the mixer or kneading whisk in one. |
| Mixer, whisk | Without a construction mixer or something similar, I do not recommend starting such a process as plastering walls. |
| Covering film, masking tape | In order to cover window sills, doors, windows, radiators or simply paste over adjacent walls. |
| Plastering ladle | If you don’t have the skill, then it’s better not to pick it up. We’ll talk about how to plaster walls with this tool in another article. |
Plastering walls on beacons
It is recommended to fill the gaps in two stages (especially if the layer thickness is more than 3 mm).
The first layer is a rough cast, not reaching 5 mm to the level of the beacons.
We leave it as “bumps”. Cast as often as possible. Start at the bottom of the wall and move up.
The second layer is applied after the first has dried.
Now you need to protrude a few millimeters beyond the guides. Having thrown a certain area, wait for the solution to start setting. Then they take the rule and begin to level it - remove the excess, leaning the tool on two adjacent beacons.
Advice! The rule is moved from bottom to top, slightly swaying it from side to side (zigzag). The force is applied as close as possible to the beacons in order to avoid deflection of the plank and not to press the mortar with an “arc”. At the very end, it is carried out a couple of times in the opposite direction (from top to bottom) - this way the wall will turn out to be perfectly flat.
The cut solution is reused: mixed thoroughly, thrown into uneven areas (shells) and pulled together again. It is also useful for rubbing voids and gaps after removing profiles.
Guide profiles: remove or leave?
Let's figure it out together. There is information that beacons left in walls rust, creating original patterns that cannot be deduced in any way, and can cause cracking of the plaster. There are grounds for such unrest.
- Firstly, the material of the product itself may be of poor quality.
- Secondly, by running a rule over a galvanized profile, you can damage the protective layer, exposing the metal, which, when interacting with the environment, will lose its chemical properties.
- Thirdly, the humidity in the room plays an important role (the higher it is, the more likely it is for rust to appear).
As for cracks, expert opinions differ. Some argue that the plaster cracks when the beacons are removed, others - when they are present in the walls, for example, when the owners want to hang a picture. However, everyone agrees that this issue is secondary compared to the appearance of rust.
To summarize, we can say that there is no clear answer to remove or leave beacons. Among the ten professional plasterers we surveyed with an impeccable reputation, eight responded that they prefer to remove the guides in all cases, except when preparing for tiles or decorating with stone.
If you are still inclined to “leave the guides,” then choose aluminum or plastic ones - they do not rust. Also try to remember the approximate location, so as not to place mounts under shelves or pictures later.
The beacon is easy to make: we find the edge of the profile from below and pull it up. It is better to perform the operation before the plaster material hardens. The remaining strips are sealed with plaster and proceed to the last stage.
Grouting plaster
After the surface has dried, you need to go over it with a float and a sponge soaked in water. Rub gently in a circular motion. If you plan to lay tiles, then this operation is not necessary: the remaining unevenness and roughness will come in handy - you will get a stronger adhesion of the materials.
How much does it cost to plaster walls using lighthouses?
Before mastering a new technology, it is interesting to calculate how big the savings are.
In the construction services market, the price depends on the volume and thickness of the layer.
For a surface up to 30 mm thick they ask for 100 – 130 UAH. for 1 m2. Plastering complex geometric shapes and ceilings costs from 180 UAH.
per square. This does not include the cost of materials. We multiply it by our volumes - I think it’s worth the effort.
Congratulations, do-it-yourself wall plastering using beacons has been successfully completed! We sincerely hope that the instructions given in this article were useful. If you have any questions, we will be happy to answer them (contact us by phone or send a request by email).
Video
Wall leveling technology using beacons
The method of using beacons is suitable for processing large areas and pronounced unevenness. Most often, beacons are placed on plaster or cement. The technology is as follows:
- Markings are made on the wall. The lines should go from the ceiling to the base of the wall vertically. The step is within 100 cm. It is important to focus on the length of the rule.
- Smooth steel slats are taken along the edges, screws are screwed in (top - bottom), and a cord is pulled between them.
- First, fix the outer two profiles
- Then other slats are beaten along the cord.
The mixture is prepared according to the manufacturer's instructions. The result should be a viscous solution with good plasticity.
Important!
When preparing a good quality mixture, you should not have any lumps.
The solution is poured between two installed beacons from bottom to top. Alignment is carried out by rule. If defects are found, add some more mixture. After removing the beacons, you can begin sanding and grouting.
There is another method that I would like to talk about, this is the beaconless method, which is used with minimal deviations.
It is important to understand
that working without beacons will not allow you to achieve a perfectly flat surface.
This method works well if you plan to wallpaper the walls later. The process is as follows:
- An even profile (slat or rule) is applied to the surface. Defects are marked.
- The protrusions are removed.
- Where there are depressions, a solution is added, which must be immediately leveled.
- Next, the entire surface is leveled.
I would like to draw your attention to the fact that the described method is well suited for leveling small areas.
How to decorate walls with plaster
So, the paths for the rule have been laid, the soil covers every centimeter of the surface that we want to make flat and smooth, all that remains is to roll up our sleeves and get to work.
Many beginners wonder how to properly level walls with plaster and do not receive a clear answer from experienced craftsmen. Although there is nothing complicated in listing all the stages. Let's be consistent and consider the whole process in great detail.
We take a spatula or trowel, whichever is more convenient for you, scoop up a small amount of the mixture and throw it at the wall with a whipping motion, as if trying to break through it with this lump.
The harder the captured portion hits the wall, the better it will adhere to the smallest irregularities on the surface. We thoroughly fill all the space between the beacons, without trying to level the composition. This technique of plastering walls is called spraying.
In principle, the first layer can also become the last if the unevenness is small and the beacons are not too high.
But if the thrown covering was not enough for it to align with the profiles, we repeat the procedure after the soil has set. It must be said that when the base is covered with a leveling compound, the technology for plastering brick walls is no different from working with a concrete base. As a result, you should reach the finishing plane when the mixture almost completely hides the beacon strips underneath.
When there is quite a lot of finishing composition on the wall, wait a while until it begins to dry out.
Then we take the rule, apply it tightly with its edge to the bottom of two adjacent beacons and move it up like on a sled. At this stage, finishing the walls with plaster yourself is carried out with the greatest expenditure of effort. When the ribs of the beacons appear from under the mixture, the coating should be completely leveled.
It is advisable to use a long rule to capture a couple of rows between profiles at once. More is unlikely to happen, since there will be too much difference in the degree of drying of the composition at opposite ends of the site. When all the walls take the proper form, we wait for the composition to set thoroughly.
But everything has hardened, even if not completely, but there is already some strength. Let's remember what to do after plastering the walls. It's time to get rid of the profiles embedded in the coating, unless, of course, you intend to leave them there forever.
The fact is that plaster absorbs moisture from the air well, but metal tends to rust, and corrosion sooner or later appears on the surface, be it wallpaper or “Venetian”. Therefore, we boldly cut the coating along the beacons with a spatula and, lightly tapping them with something weighty, we extract the “rails” that have served us so well for the rule. We cover the resulting gaps with the previously used composition using a spatula or trowel.
Now we take a grater, and, regularly moistening the surface of the walls, gently, in a circular motion, smooth out all the observed defects, of which there should not be so many. There is no need to press hard, your main goal is for all the irregularities left by the rule to disappear. Actually, this is the end of the master class on plastering walls; then you can move on to wallpapering or painting.
Selection of plaster
Before starting work, we need to decide what kind of plaster we will use.
Plaster compositions are divided into:
- Ordinary plaster . It is used for both external and internal work, using cement, clay, gypsum mortars and mixed types of mortars;
- Cement-sand mixtures (gypsum) . The mixture requires the use of additional additives and plasticizers. The gypsum mixture is considered more environmentally friendly and is recommended for use when performing rough finishing of residential premises.
Based on the quality of the material, plaster is divided into:
- Simple plaster;
- Improved plaster;
- High quality decorative.
When plastering walls, there are two possible leveling technologies:
- Under the rule;
- Under the lighthouse.
The first technology ( as a rule ) is applicable if it is important to create a flat and smooth surface with minimal material costs (for example, in a garage or utility room).
It is not advisable to level a wall to one level with a large difference in area, since it will not be possible to save money, and the evenness of the walls will leave something to be desired.
Leveling the walls using the second technology ( under the lighthouse ) allows you to get a more even surface of the walls, and is better suited if other materials will be applied to the walls (decorative plaster, wallpaper, etc.). That is why this method is most often used in finishing houses and apartments.
In addition to plastering walls, other methods are also common, for example, the method of covering walls with plasterboard sheets. However, the plastering method has a number of noticeable advantages over drywall:
- The mixture for leveling the walls will not take up as much space as covering it with gypsum plasterboard sheets;
- Plaster does not require the installation of additional structures;
- When plastering, you get a monolithic structure without seams and joints (without which drywall cannot do);
- Even when applying gypsum plaster in a thick layer, it will not become covered with cracks;
- The plaster mixture is not harmful to health because it is a natural material.
True, plastering has its disadvantages:
- Working with plaster will take longer than when installing plasterboard structures;
- The site must have a water supply. Plastering work cannot be done without water;
- Plastering walls is a messy process that requires mixing to be done directly at the crew's workplace.
So, we’ve sorted out the selection of material and basic concepts. We move on to the next stage - preparing the walls.
Preparing walls for painting or paneling
If you plan to paint the wall surface after plastering, then finishing work must be done especially carefully. The surface must be prepared, leveled, chips and cracks removed. After this, a layer of acrylic primer is applied. The surface must be opened with 2-3 layers of putty. Each layer is dried and re-opened with primer. It is important to use finishing putty to level walls before painting.
After the last layer of putty has dried, the surface is finely cleaned. This is done using an emery mesh.
The use of alabaster or other materials containing an oil base is not allowed. This base prevents paint from being absorbed into the surface.
The paint is applied using a roller with a long handle, first painting a small area of the wall.
When you plan to cover the facade of a house with different materials (siding, planks), it is necessary, as when installing a thermal curtain, to perform the following preparatory work :
- Remove all interfering objects from the finishing surface. There is no need to level the corners and clean the surface, since the wall will be hidden under a layer of surface material.
- Remove old finishes, if present.
- Proceed to secure the bases to the wall surface.
- Preparation for decorative plaster.
Such plaster is considered an expensive pleasure. Preparation is characterized by bringing the wall surface to a state of complete smoothness.
Conventionally, preparation is carried out in four stages:
- All irregularities and unnecessary objects are removed from the external wall of the house.
- We clean the surface to perfection. The surface must be dry, smooth and able to absorb moisture.
- We level the walls using gypsum mortar or putty. All cracks and chips are removed.
- A primer is applied to the prepared surface. A special one with deep penetration is used. It will help preserve the coating and protect it from various factors. The exposed wall with primer dries within 6 hours.
The prepared surface is ready to apply patterned plaster to it. We select decorative plaster and apply it to the top layer of primer.