What is a rotband
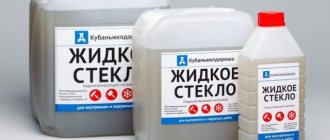
One of the oldest manufacturers of gypsum powders for the construction industry in Europe, the Knauf company, mastered the production of dry mixes (SS) intended for plastering walls in the last century.
In addition to gypsum, the mixture contains modifying additives, thanks to which the solution not only becomes more plastic, but also does not set longer and adheres more reliably to the base.
Practical Germans began to depict a red ribbon on the packaging of new products as a symbol of the brand. The SS itself was named accordingly - RotBand (red ribbon translated from German).
Gypsum plaster marked rotband is a universal material. Suitable for many types of substrates, not only for dry rooms or indoor conditions, but also for leveling walls in rooms with temporarily increased humidity.
In the latter case, it is necessary to use a coating that protects the plaster from moisture. You can level the wall with a rotband on a glazed loggia or veranda, since the coating can withstand 75 freezing cycles without loss of strength.
Possessing high adhesion, Knauf Rotband is especially suitable for manual application on dense concrete and ceiling surfaces, with which other compounds do not work well. The tenacity and strength of the composition allows the mixture to be applied to vertical surfaces in one layer up to 50 mm thick.
The plaster mass is easy to prepare and apply even to hard-to-reach areas, since the material is highly plastic. This increases the productivity of plasterers and reduces fatigue.
Other advantages include:
- ease of processing;
- non-flammability;
- the ability of the created coating to maintain a microclimate;
- the ability to achieve a smooth surface suitable for painting by simple processing.
In order for the coating to be durable and last a long time, plastering the walls with rotband should be carried out in accordance with the guidelines developed by the company’s specialists. Instructions are located on the packaging.
Preparatory work
Some craftsmen note that the gypsum solution can be applied directly to the base without prior preparation. This is not quite the right position. Although the material has a high degree of adhesion and ductility, this will not protect it from dirt, debris or chipped concrete in the wall.
Let us consider in order the preparation of the foundation for Rotband:
- Cleaning the surface from dirt, debris, pieces of old wallpaper and other finishing materials. Removing chipped concrete, old grout from cracks and holes. Find out how to quickly clean the surface of previous plaster here.
- Applying a concrete contact type primer in one layer. It needs to be given time to dry: it is indicated in the instructions.
- Geometry assessment. If the surface is not very littered, you can level it without beacons, otherwise installation of guide structures is necessary.
Preparation of the solution
To prepare gypsum plaster you will need:
- dry mixture;
- a bucket or trough, depending on the volume of work;
- drill with mixer attachment;
- water.
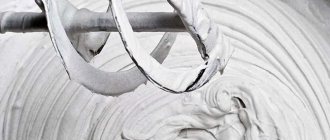
Mix the plaster according to the following algorithm:
- Pour 3 liters of cold water into a clean bucket.
- Add two handfuls of dry mixture to the water.
- Mix with a mixer at low speed.
- Add the rest from the bag.
- Be sure to stir at low speed until a thick, homogeneous mass is formed so that it does not foam or form lumps.
- The finished mixture is allowed to stand for about 4 minutes.
- Mix again with a mixer.
- Insert a narrow spatula up to 10 cm into the mixture. It should stand steadily in the solution, without falling or tilting to the sides.
- If everything is met, the plaster is ready for use.
Important
The algorithm is designed for a bag of dry mixture weighing 5 kg. The general proportion can be derived as follows: for 10 kg of dry material - 6 liters of water.
We invite you to watch a video on how to mix Rotband plaster:
You can find out how to correctly calculate different types of plaster for different mixtures here, and you can learn how to properly mix different solutions from this article.
Rotband: step-by-step instructions for use for beginners
The instructions for use suggest that the sequence of plastering a room when Rotband plaster is used is similar to the procedure for working with other plaster compositions.
The order of work during plastering of the entire room:
- ceiling plaster;
- processing and leveling of walls;
- finishing of slopes, columns.
Next, we will consider in detail each stage of plastering with rotband.
Preparing the base
Regardless of the newness of the walls, before plastering the surface of the base is prepared, since conditions must be created for a strong connection of the two materials. The second purpose of preparation is to cleanse stains of a biological nature - to protect the plaster coating from the appearance of mold, rot or fungus in the future. And removing rust prevents brown spots from bleeding through the layers of finish.
Another task of the preparatory stage is to strengthen the weak near-surface layer and repair defects. In addition, if the base has a porous structure, then the open pores during plastering will take away the water needed by the solution, disrupting the hardening processes of the plaster. Therefore, the pores need to be clogged before starting work.
Before work, you should de-energize the wiring and protect sockets, windows and doors from damage.
In the room being renovated, plaster, wallpaper, paint, peeling, unusable old plaster are removed from the walls. The resulting cracks and deep potholes are repaired. Remove old metal fasteners (nails, screws, hooks) from the walls.
If hardware needs to be left, they should be insulated (for example, painted) to prevent rusting. Stains of efflorescence, formed rust, grease, soot or any biotic growth are removed.
In a new building, preparation is also necessary. In brickwork, the seams are deepened to a centimeter and unstitched. The surface of the brick is scratched with steel brushes. Traces of grease are removed from the concrete, and notches are applied to smooth walls. Nodules and large protrusions are cut down. At the joints of plasterboard sheets, chamfers are cut off and screw heads are recessed. Before plastering, they are covered, for which a serpyanka is applied to the joints.
Primer
Before priming, be sure to remove dust from the surface and dry the base. The correct choice of primer for Rotband Knauf determines the result of all subsequent work.
The instructions indicate the brands of primers used for different substrates:
- easily absorbing water (cellular or expanded clay concrete, cement-lime plasters, brickwork) - primed with Tiefengrun or Mittelgrunt (dries in 6 hours);
- Dense materials that do not absorb moisture (concrete, polystyrene foam, cement plasters, tongue-and-groove slabs) are treated with Betonkontakt and dried for 12 hours.
Mittelgrunt (can be replaced with Knauf-Multigrunt, dilution proportions are given in the primer manual).
Displaying beacons and corners
To level the surface of a wall that has only slight deviations, you can do without beacons. When walls are littered or have a surface with large differences, beacons are used to create landmarks.
Before using them, ceiling and wall surfaces are weighed, the most protruding points are found, and the location of the auxiliary plane is determined. A mark (plaster) with a thickness of at least 5 mm is made on the site with a solution. They navigate by it by installing the slats. There is a detailed article about installing beacons on our website.
In addition to beacons, profile corners are mounted on protruding corners, aligned in the same plane with the beacon strips of adjacent walls.
Preparation of the solution
The instructions for use provide scant information about how rotband plaster is prepared for use. There are only four lines that may not be entirely clear to beginners. Therefore, we describe the process sequentially.
To dilute one (30 kg) package, you need to prepare a clean (without remnants of the previous batch, which is important) plastic container and pour 17 liters of water into it. So, out of the 18 liters specified in the instructions, there remains a liter of water, which will be needed if the resulting solution is too thick.
In the latter case, at the end of mixing, the density is adjusted by adding liquid. The capacity of the vessel depends on the number of plasterers involved in applying and leveling the mixture on the wall. If plastering is done alone, then a 90-liter container is enough to have time to work out the entire mass before setting begins (there are only 20-25 minutes left from the end of mixing).
The temperature of the air, as well as the base, is not lower than +5°C, not higher than +30°C.
Open the bag, scoop out the powder with a dry trowel, pour 8-10 portions into water, and begin to knead the mixture with a mixer.
Mixing a small amount of powder creates a solution, which will take a couple of minutes. During this time, additive substances pass into the water, facilitating the correct flow of the subsequent chemical process.
After this, the rest of the material in the bag is gradually poured in. This is done while continuing to stir, after which the solution is left, allowing 5-7 minutes to soak. Mix thoroughly and add water if necessary. If the solution mass comes out a little liquid, add dry powder from another package. Naturally, stored water is not added to such a mixture. After the second mixing, the mass is used for plastering, and SS can no longer be added to it.
Mixing is performed at low mixer speeds.
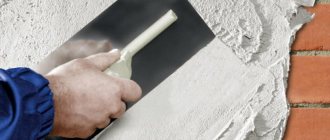
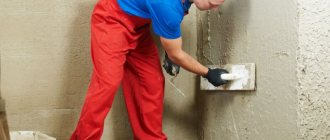
Tightening and leveling
The solution is applied in the same way as cement compositions. Use a spatula with a wide spatula or a wide grater. The mixture is used to fill the space from lighthouse to lighthouse. Having filled an area about a meter long, the solution is leveled along the beacons using a rule with an h-shaped profile.
If the thickness of the leveling coating is more than 15 mm, the plaster is applied in two layers. At the same time, having applied the first mark, it is “combed”, covering the surface with combs (for which a spatula with a comb is used). A day later (not earlier), when the applied mass has hardened, apply the next layer, which is leveled along the beacons.
The instructions warn that applying a second layer over a freshly laid one is only possible if another half hour has not passed since the start of its application. If they do not have time to meet this period, the layer is allowed to harden for a day.
To align, the tool bar is usually guided, leaning on the edges of the beacons, with small zigzags across the longitudinal line. The solution that accumulates on the rule is removed with a spatula, transferring it to unfilled areas. The rule is to do it one or two more times. After which they continue to fill the space between the beacons.
The slopes are plastered, maintaining the “dawn angle”. The correct plastering sequence is: the top one is plastered first, followed by the sides. For leveling, you can use a cut (short) rule, a wide spatula, or a specially made tool.
After approximately 45-60 minutes from the mixing time, the condition of the applied solution is checked by pressing it with a finger. If the set dough does not stick to your fingers, cut off the protrusions using a trapezoidal rule (the same can be done with a wide spatula). On slopes this is done with a “kantenhobel” (plane).
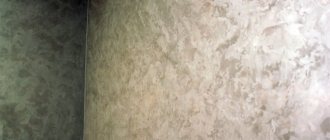
The result is a finish that has small (up to 3 mm) unevenness in the form of tool marks, scratches or burrs, as well as sagging up to 2 mm. A rough finish of this quality is suitable for decorative plaster (with a filler fraction of more than 2 mm), as well as gluing tiles.
Second contraction and alignment
If you need a better quality surface, wait 15-20 minutes after the first trim and perform a second trim. To eliminate unevenness, use a wide spatula.
Removing beacons and sealing grooves
The procedure for removing beacon profiles is carried out after the mortar mass has set and pulling out the metal parts will not cause the mortar to slide. Remove the planks by clearing the area near the end with a chisel. The edge of the lighthouse is clamped with pliers and pulled away from the wall.
After removing the profile, a groove is formed on the wall - a groove. Dust is removed from it, the inner surface of the groove and adjacent areas are primed. Then fill it with mortar, which is leveled flush with the wall with a wide spatula.
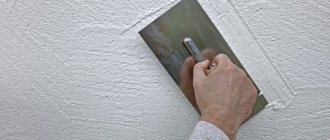
Grouting plaster
A special quality of smoothness can be achieved by grouting rotband plaster, performed 15-20 minutes after the second trimming. The plaster coating is moistened generously using a sponge grater (you can use a felt trowel).
Moving the grater in a circular manner, smooth out the marks left by the spatula or rule. Allow moisture to be drawn into the solution (this can be seen by the wall becoming dull), then smooth it with a spatula. This achieves a finishing quality suitable for gluing structural wallpaper, applying texture paint or decorative plastering with finely graded compounds.
If after another 2.5 hours (or within 24 hours) we wet the wall again with a sponge, we will pull out the gypsum milk from the surface layer. It will fill the remaining pores under the influence of the smoothing iron. This creates the basis for painting the wall with matte paints, making the Venetian.
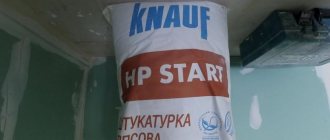
Eco-friendly plaster KNAUF-Rotband
Instructions for preparing the KNAUF-Rotband plaster mixture are located on the back of the packaging on bags of all packaging sizes: 30, 25, 10 and 5 kg, as well as in the information sheet.
Preparation of plaster mortar
Pour the contents of the bag (30 kg) into a container with 17 liters of clean, cold water. Mix with a construction mixer until smooth, adding water until the desired consistency is obtained and mix again. Leave for about 5 minutes and stir again. Do not add dry plaster to the prepared mortar mixture. It is not allowed to introduce other components into the solution! Apply the mixture to the surface within 20 minutes and level using the h-rule. Check the deviation of the surface from horizontal and vertical using a level, string or template, if necessary, apply an additional layer of solution where necessary. As soon as the plaster solution begins to set (approximately 45–60 minutes after mixing), level the surface with a trapezoidal rule, holding it perpendicular to the base, cutting off excess and filling the recesses.
Applying plaster mortar
Apply the prepared plaster solution to a surface 5–50 mm thick within 20–25 minutes after mixing. The solution should be applied to the ceiling with a plaster trowel “on itself”, on the wall - applied with a trowel or spread with a plaster trowel from bottom to top, and then leveled using the h-rule using zigzag movements. Bases made of CBPB and expanded polystyrene should be plastered with reinforcement over the entire surface with fiberglass mesh with 5x5 mm cells. Mesh consumption is approximately 1.2 sq. m per sq. m of surface (including overlap).
Layer thickness
The recommended average thickness of the plaster layer is 10 mm, the minimum is 5 mm. A single-layer application of the solution in a layer up to 50 mm thick is allowed, however, in this case, the drying time of the plaster layer for subsequent finishing increases significantly. To reduce drying time, apply the solution in two steps. First, a layer 35 mm thick is applied, which, while still soft, needs to be “combed” in waves with a plaster comb and only after this layer has dried, treated with KNAUF-Mittelgrund primer, diluted with water in a ratio of 1:3. After the primer has dried (min. 6 hours), apply a second layer of plaster. Plaster ceilings only in one layer with a thickness of no more than 15 mm. The minimum thickness of the plaster layer for gluing ceramic tiles is 10 mm.
Leveling the surface
As soon as the plaster solution begins to set (approximately 45–60 minutes after mixing), level the surface with a metal trapezoidal lath or a wide metal spatula, cutting off excess and filling the recesses. Cut off uneven areas in corners and slopes with a plaster plane. After drying, ceramic tiles can be glued to such a surface using KNAUF-Fliesen glue, having previously treated the surface with a KNAUF-Tiefengrund deep penetration primer. In places where the tiles come into direct contact with water, it is necessary to apply KNAUF-Flachendicht waterproofing. For tiling over waterproofing, adhesives are used: KNAUF-Flizen Plus, KNAUF-Flex, KNAUF-Marble.
Grouting and smoothing the surface
If the surface is being prepared for painting with a roller or wallpapering, then after a short period of time after trimming (15–20 minutes), the surface of the plaster must be treated with a spatula, eliminating minor deviations from the plane remaining after trimming. Then (after 15–20 minutes) moisten with water and rub in a circular motion with a hard sponge or felt grater, removing possible unevenness and marks from previous processing steps. After waiting a short time until a matte surface appears (about 10–15 minutes after wetting), smooth the plaster with a stainless metal trowel or spatula using wide movements. Wallpaper can be glued to such a surface. To achieve a glossy surface, it is necessary, after 4–5 hours, but no more than a day after the start of application, to moisten the plaster generously again and re-smooth it with a metal trowel or a wide spatula. After this treatment, there is no need to putty the surface of the plaster; it is suitable for applying textured paint. After smoothing the surface of the ceilings, cut through the unhardened plaster layer with a Stucksäge saw to the full depth along the entire perimeter of the room to prevent the formation of cracks.
Create a structure (if necessary)
Fine-grained gypsum plaster rotband is suitable as a material for creating relief patterns on the wall. You can create a unique decoration with your own hands, since the gypsum composition is harmless to the skin. You can experiment with gypsum plaster to achieve different effects. Wanting to change the interior design, they use shaping techniques, a description of which can be found in the Decorative plasters section.
To create a pattern after leveling the mass, a relief roller or any other forming tool (hard brush, trowel, brush, crumpled plastic bag, shaped spatula) is usually used. When the mixture has hardened and completely dried, the decorated ceiling is painted.
Nuances of technology for working with Rotband plaster
A surface plastered with Rotband is usually perceived as rough preparation. However, the beauty of Rotband is precisely that it allows you to completely bring the walls or ceiling “to mind.”
Two finishing solutions in one
The surface of the plaster can be structured, that is, given a given pattern or texture. To do this, after applying and leveling the mixture, it is usually necessary to roll the not yet hardened surface with a relief roller or give it some kind of structure with a molding tool, for example, a trowel or a hard brush.
If the plastered surface is being prepared for wallpapering or painting, you need to wait about 15 minutes, then moisten the plaster generously with water and grout the surface in a circular motion to even out possible marks and irregularities. To do this, use a felt-based grater or a sponge with a rigid porous structure. After waiting a short time until a matte coating appears, you need to lightly (almost without pressing) smooth the surface with sweeping movements, using a wide spatula or metal grater.
As a result of this simple operation, the top layer of plaster is somewhat strengthened, becomes smooth and glossy. After drying, it is quite possible to glue dark-colored wallpaper onto it. It is not recommended to glue light and thin wallpaper directly onto Rotband, as its base may show through. In this case, it is better to apply a layer of white finishing putty. After smoothing the surface of the ceiling, the unhardened plaster layer is cut with a special saw to the full depth along the perimeter of the room to prevent the formation of cracks.
Features of ceiling plaster with rotband
There are some differences between finishing the ceiling and leveling the walls with a do-it-yourself rotband:
- If a layer of up to 50 mm can be applied to the wall with a rotband, then a layer of up to 15 mm can be applied to the ceiling. Therefore, if the height difference on the ceiling is more than 30 mm, it makes no sense to plaster it to level it. You need to use other means, for example, drywall.
- If during leveling the walls the movement of the tool when applying the plaster mass is directed from bottom to top, then when plastering the ceiling it is directed towards itself.
- After plastering and smoothing, the gypsum thickness along the perimeter of the ceiling (without gaps) is cut to the base with a Stukzege saw. The use of such a constructive technique prevents the formation and development of shrinkage cracks, which otherwise can originate near the walls, developing towards the center of the ceiling.
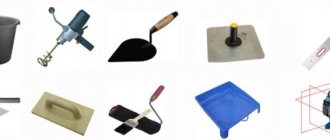
Necessary tool
Before work, prepare the necessary tools:
- h-shaped and trapezoidal rule;
- wide spatula;
- corner spatulas;
- trowel;
- level and other devices for installing beacons;
- mixer;
- half;
- ironing board;
- rollers (for priming and applying patterns);
- brushes;
- sponge or felt grater;
- capacity (90/200 l);
- masking tape;
- cord, plumb line;
- clean rags.
A special feature of the tools used to work with gypsum mass is that the metal spatulas and trowels must be stainless. If you use tools made of rusting steel, black marks will remain on the wall.
How long does it take for the solution to dry?
The drying time for rotband plaster is indicated in the instructions for use for optimal conditions:
- humidity up to 60%;
- temperature - +20°C;
- layer thickness – 15-20mm.
It is 7 days. In fact, plastered walls may have a thicker or thinner coating, and the temperature conditions of the room may differ. With good ventilation, the drying time may be a couple of days shorter.
The manufacturer recommends priming the surface of the rotband after drying with Tiefengrund primer, the film of which will protect the gypsum material from moisture and increase adhesion to water-dispersed paint or wallpaper.
If the Knauf plaster that you used to renovate your apartment is already familiar, then when building a house there is a high probability of using this material again. We hope that the article “Rotband plaster: instructions for use” will help beginners achieve “German quality” guaranteed by the manufacturer.
How to thin Rotband gypsum plaster
Before working with the material, carefully read the instructions for use. On the back of the package, the manufacturer indicates how to properly dilute the mixture. True, there is practically no information about the intricacies of working with the composition. Before getting started, you should prepare the following tools:
- scales,
- electric drill with mixer (for stirring the construction mixture),
- measuring container for dry composition,
- measuring container for water,
- container for finished plaster,
- trowel (trowel).
Plaster should be prepared in the quantity necessary to complete a certain amount of work. Do not dilute the entire mixture at once. The viability of the solution does not exceed 30 minutes, after which it begins to harden.
Important! Professional craftsmen recommend diluting 2-4 kg of dry mixture in one go.
The exception is when, for example, it is necessary to eliminate a significant difference in height or repair a crack. In such a situation, work must be carried out very quickly.
Before mixing the components of the composition, place an additional container of water nearby in which you can immerse the mixer attachment. A characteristic feature of Rotband is its high adhesion. The plaster sticks to any surface. Therefore, after use, the instruments are immediately immersed in water.
How to breed Rotband - proportions
To dilute the Rotband Knauf dry mixture you will need ordinary tap water.
- weigh the empty container, then use a trowel (trowel) to add the dry mixture, weigh again (minus the weight of the container);
- pour 80-90% of the volume of water into a measuring container, calculated according to the proportion specified by the manufacturer;
- pour water into the plaster container and add the dry mixture and the remaining water in parts, stirring continuously using a drill with a mixer;
- It takes 2-3 minutes to mix (if the composition is too thick, you can add a little water);
- let the solution sit for a couple of minutes, then stir again. The mixture is ready to use.
The high quality of the composition is indicated by the absence of lumps.
Important! During the plastering process, you can no longer add components to the finished solution.
Features of gray, rose and white Rotband plaster
The German-made plaster mixture contains gypsum binder and special polymer additives that facilitate faster and more convenient application. The products are supplied in paper bags weighing 5-30 kg. The mixtures are available in gray, white, pink colors, which do not affect the practical characteristics of the composition. But experts note that the solutions behave differently in their work. For example, if a layer of gray or white plaster is applied too thickly, small waves may form. Similar features are not observed in pink plasters. This fact is explained by the different grain size of the composition. The gray and white mixture has no more than 0.5 mm of grain, while the pink mixture has no more than 1.2 mm.
How to breed Rotband in small quantities
The mixture is thoroughly mixed and work begins. The composition is applied to a previously prepared, primed surface. To obtain a perfectly flat base, plastering is carried out along the beacons. The treated surface is moistened with water and smoothed (glossed) with a special grater or spatula. This should be done no later than 12 hours after plastering.
It takes an average of one day to dry 1 cm of layer. It will take a week for the surface to dry completely.
Recommendations for diluting Rotband plaster:
- The material must not contain lumps or be caked. If the mixture contains lumps, after dilution they will absorb water, which can cause cracks to appear on the treated surface;
- Using too cold water to mix the solution will increase the drying time of the plastered base and vice versa;
- After 2 mixings, it is prohibited to add water to the solution. This is explained by the fact that the composition has already begun to set, lumps may begin to form, making it unsuitable for work.
When diluting Rotband plaster, it is important to observe proportions and technology. It is not recommended to prepare a large volume of the mixture, because the period of its use is limited. Fulfillment of these conditions guarantees high quality of application and long service life.