The huge variety of building materials that are used today to decorate walls often confuses people. Therefore, in this article I would like to talk about fur coat plaster - a fairly popular method of finishing wall surfaces. That is, let’s figure out what this plaster solution is, why this finish is called that, its advantages and disadvantages, and also consider the method of application.
What is “fur coat” finishing?
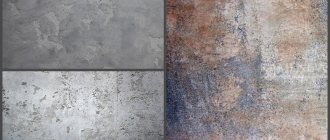
This technology of wall decoration received its name only because after applying the plaster mortar, a coating is formed on the wall surface, somewhat reminiscent of the back side of a sheepskin coat. That is, the fur side. In this case, even ordinary cement-sand mortar can be used to form a fur coat. It's all about the way you apply it. And this method is the usual spraying or throwing of a mixture that forms a rough coating on the wall.
Of course, today no one uses traditional methods of preparing a solution of cement and sand with the addition of pigments. Manufacturers of dry plaster mixtures offer a fairly large range of “fur coat” solutions with different colors.
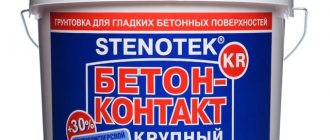
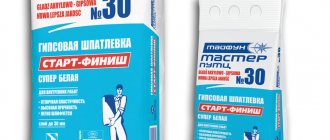
The finishing process itself comes down to purchasing a ready-made dry mixture and diluting it with water in the proportions recommended by the manufacturer. With subsequent application to the wall of the house. Manufacturers have gone further, so you can buy “fur coat” in a ready-made diluted form on the market. This is a ready-made composition that just needs to be applied to the plane of the wall. And if dry mixtures are sold in paper bags, then ready-made diluted ones are sold in plastic buckets.
It should be added that the plaster mortar in buckets is a material to which polymers have been added. That is why this version of the plaster solution is applied to the walls without cracks and other defects that usually appear after the finish has dried. The thing is that polymers increase the plasticity of cement mortar.
Peculiarities
The traditional solution for applying plaster under a fur coat is a mixture of sand and cement, taken in a ratio of 1: 3 and diluted with water to the desired consistency.
The sand is selected in accordance with the requirements for the surface being formed: when making a rough, rough “coat” you should take mountain or ravine sand, and to obtain a smoother texture you should use fine-grained quartz.
Sand should be sifted before adding to the solution. Lime, gypsum and clay can be used as the main binder.
The advantage of this composition can be considered the low cost and wide availability of the constituent components, while the disadvantages include the low ductility of the material and the likelihood of cracking when the layers dry unevenly.
The most modern and convenient to use are ready-made dry mixes based on acrylic . The material is available in white, gray and colored versions, which allows you to purchase a ready-made composition of the desired shade or paint it yourself. Coloring is done using coloring powders and pastes.
The disadvantage of self-dyeing is the need to strictly adhere to the proportions of the dye, deviating from which there may be a difference in shade between solutions of different batches. In order to avoid problems with coloring the mixture, you can resort to the method of painting the finished surface after it has dried .
Painting is done using moisture-resistant and light-resistant facade paints, which not only solve a decorative problem, but also do an excellent job of eliminating small cracks.
Materials and tools
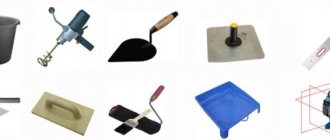
To work you will need:
- mixing container;
- electric drill or construction mixer;
- sandpaper (fine-grained);
- brushes and planks;
- tinting paste;
- construction rule;
- textured roller and spatula;
- stick and broom.
For quick and high-quality application, you can use a special machine for fur coat plaster. This is a device consisting of a container within which flexible metal plates rotate. When the handle is rotated, the organ sprays the solution onto the wall.
Types of plaster
The use of fur coat plaster is still relevant today. Builders using this method try to save on materials, which is not at all necessary, since currently in any hardware store you can find dry decorative plaster under a fur coat at an affordable price.
The main advantage of this material is the fact that its performance properties are higher than those of its homemade counterpart. Due to the wide selection of finishing materials presented by brands for sale, you can find plaster on store shelves in the form of a ready-made mixture. It is sold mainly in buckets. The cost of this material is higher than its dry counterpart, as are its performance qualities.
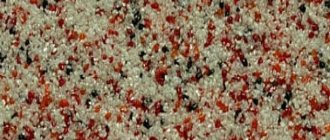
This decorative plaster received its unusual name due to its similarity to fur: when finished, it has a rough texture. This look is obtained thanks to the simple technology of mixing plaster with small stones. The size of the stone can be varied, it all depends on the purpose pursued during the repair. By using larger stones, you can get a more prominent wall. The opposite result can be achieved by using small stones.
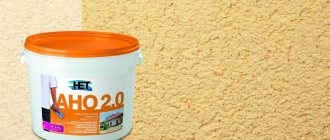
Fur coat plaster in the form of a dry mixture must be diluted with clean water at room temperature. This type of decorative plaster today has white and gray colors. It is a budget type of such finishing material; this option is used mainly for covering larger surfaces. One of the main advantages of this material in powder form is the ability to paint the composition in any desired color.
The composition of the finished paste plaster in buckets includes synthetic polymers , which gives the composition increased softness and strength. Plaster of this design can have absolutely any color. It is advisable to use this expensive plaster for interior work (in order to save money), and it can also be used for final coating of surfaces. It is also important to use expensive plaster to cover individual parts of the interior (for example, arches, columns, borders). In this case, the concept of high cost is relative: if repairs are carried out for oneself, the use of high-quality materials should be the main principle of work.
In addition to all the listed properties, the plaster decorative material under the fur coat has good thermal insulation and sound insulation properties, which justifies its name. It protects walls from the negative influence of the environment. The use of this plaster greatly facilitates and speeds up the preparatory work, as it allows you to hide defects in the working surface. Installation can be done independently (without the participation of a qualified technician).
It is important to mention that plaster damaged during use is easy to restore. The material allows this possibility, and the updated area will not stand out from the overall finishing fabric.
A sufficient number of advantages of using fur coat plaster in wall decoration have been noted. For example, this composition can be painted using silicone or acrylic paint. Now you need to figure out how to apply it to the surface of the walls.
Application area
“Fur coat” plaster is suitable for finishing the following surfaces:
- facades of private houses and municipal buildings;
- walls in rooms;
- street fencing;
- columns and bas-reliefs;
- basement rooms.
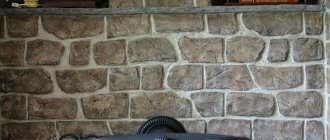
Important! Practice shows that textured, pronounced reliefs with coarse stones are used for finishing facades. If the walls are finished indoors, fine-grained plaster is usually used, giving a smoothed relief.
By the way, depending on the type of plaster, the “coat” can be applied both to a concrete or brick wall, and to drywall.
Tips for choosing material
The safest plaster is the one that contains acrylic or silicone in addition to cement. These parameters play an important role, directly affecting the quality of the product. The appearance of the façade of the building also depends on this.
If difficulties arise regarding the choice of composition, it is worth considering that most dry mixes are made on the basis of cement. Ready-made plasters are acrylic or silicone compounds.
Plaster under a “fur coat” is an effective way to make the interior unique, as well as to endow the façade of a building or any external surface with originality. The range of plasters for creating such a texture is wide, which allows you to choose the right option depending on your preferences and amount of cash. The easy execution technique is another reason to pay attention to this finish.
Was this information useful to you? Share in the comments!
Advantages of decorative plaster “fur coat”
The fact that the textured finish in question has not lost its popularity over the years allows us to talk about the serious advantages of this material. These include:
- Cheapness. Among all decorative and finishing materials, “fur coat” is considered the most affordable. In addition, to decorate a building with such a mixture there is no need to purchase special tools, which also allows repairs to be made with minimal investment.
- Additional heat and sound insulation. In addition to acquiring a pleasant appearance, buildings with applied decorative plaster acquire additional insulation and decent sound insulation. Important! Here you need to understand that to use a “fur coat” as insulation, it is necessary to apply a thick layer of plaster, which is quite expensive.
- Easy to apply. Even a person who has never encountered plaster mixtures in his life can master the technology of applying a “coat”.
- Decent appearance. Perhaps the “fur coat” cannot boast of such sophistication and aristocracy as Venetian plaster, but such a finish looks quite dignified, fresh and attractive. In addition, such plaster can be painted in any color you like without any problems.
- Maintainability. According to experts, there is no other plaster that, if necessary, could be so easily restored, returning it to its previous appearance. In this regard, the “fur coat” is surprisingly repairable.
- Excellent vapor permeability. Despite its apparent density, the plaster in question allows the walls to “breathe”, and therefore helps maintain a healthy microclimate in the house.
- Light weight. It is worth saying that this façade coating has a low specific gravity, which means that before applying it there is no need to strengthen the foundation.
- No seams. Finally, a coating such as “fur coat” has no seams or joints, so this material does not let cold into the house and does not accumulate moisture, and it lasts longer than finishing materials with seams.
Advantages and disadvantages
Many builders believe that fur coats are a very interesting way to decorate walls. “Fur coat” has many properties that distinguish it from other facade plasters:
- This plaster is easy to apply. Even a person far from construction can cope with its application;
- Different application methods. Trowel, roller, mesh, broom: all these tools can be used to apply decorative paint. It is also possible to apply using a compressor and a hopper bucket;
- High aesthetic performance. This decorative plaster looks very good, not inferior to bark beetle and pebble decorative plaster;
- High noise and sound insulation. Due to its low cost, the fur coat can be applied in thick layers without fear of overpaying huge sums;
- Good paintability. The finished plaster can be painted with a roller or spray gun. Also, when mixing mixtures, you can add color directly to it. This way the coating is completely painted over its entire thickness;
- Cheapness.
- Maintainability. A fur coat can be restored quite simply.
Homeowners say one of the most significant disadvantages of decorative plaster “fur coat” is that dust settles on it very well. Therefore, from time to time you have to either wash the walls with Karcher or repaint them.
Disadvantages of decorative plaster "fur coat"
- Not too long service life. The sand-cement composition of the mixtures suggests that such external coatings are not durable. Silicone-based “fur coat” is the most durable in this regard, but it is not a serious competitor to other finishing materials for the facade.
- Moral old age. Numerous reviews say that “fur coat” is an outdated type of decorative finishing. And this, against the background of the variety of modern finishing materials, does not testify in its favor.
- Rapid contamination. The textured surface of the plaster quickly attracts dust and other contaminants. Therefore, such a façade should be washed periodically.
How to make plaster under a fur coat
In order for your fur coat plaster to turn out to be of high quality in all respects, the issue of preparing materials, tools and necessary components must be taken very seriously. Since there are several ways to apply fur coat plaster to the surface of walls, the set of materials and the required tools for application will be slightly different.
A specific method of applying plaster to the wall surface is selected based on what area needs to be treated, what layer thickness you want to obtain, etc.
Preparation for work and necessary tools
In order for your fur coat plaster to last as long as possible, you must strictly adhere to the simple rules for its application.
First, you need to prepare the surface on which we will apply the coat of plaster with your own hands:
- If your house is a new building, then when laying the walls it is not recommended to do jointing, leaving gaps between the bricks (blocks, etc.). If you are applying plaster to a building built several years ago, it is advisable to make notches on the surface of the wall. All these recesses will strengthen the adhesion between the wall and the plaster, significantly increasing its reliability and durability.
- Next, having finished all the “dirty” work, the wall must be cleaned of dirt and dust, which can be done with a metal brush.
- Once absorbed, it will increase the strength of the top layer of the wall surface, preventing it from further crumbling, and will also enhance adhesion to the fur coat plaster. The primer is applied to the surface using wide brushes, a roller or a sprayer. The choice of tool depends on the amount of work and the size of your budget.
- For maximum effect, when applying the primer, make sure it gets into all the cracks and cracks. After it has completely dried, you can begin applying plaster.
What material is used
The simplest and most inexpensive option for preparing a plaster mixture is to use sand, cement and water. Sometimes gypsum is additionally added to increase strength, but it absorbs water well, which is bad for exterior finishing work, so you will have to additionally paint the resulting “fur coat” well.
If your aesthetic tastes require something more, and your financial capabilities allow you to realize this, then you can pay attention to the market for ready-made modern dry mixes.
Ready-made mixtures are distinguished by ease of preparation, increased elasticity, improved penetration into crevices and cracks, increased resistance to sunlight, increased sound and thermal insulation coefficients, etc.
Typically, ready-made mixtures are sold in large plastic buckets, which makes the process of preparing them easier - add water and stir it with a construction mixer - and the façade plaster under a fur coat is ready!
Advantages and disadvantages
An analysis of its positive and negative aspects will help you make a positive decision or refuse to use plaster under a fur coat.
The advantages of this method of cladding external walls include:
- low cost of materials for making the mixture;
- no need to purchase expensive tools and equipment;
- a variety of paint colors for use in the finishing mixture;
- relatively simple maintainability;
- the ability to perform work alone.
As we can see from the above, for facing external walls using fur coat plaster, the efforts of one craftsman are sufficient; the presence of an assistant is not a necessary factor. You can change the color scheme of the resulting wall even a minute before applying it to the wall surface, just replace the paint of one color with another. It is worth noting that the main disadvantage of such plaster is the appearance of cracks on it, which can simply be filled with a new mixture. And although the appearance may suffer somewhat (the new area will have a different shade), then this will not affect the sound and heat insulation properties of the plaster.
Among the negative points, the following should be highlighted:
- rather low sound and noise insulation rates in comparison with wall cladding, for example, basalt slabs or foam plastic;
- modest appearance against the background of modern exterior finishing materials;
- as mentioned above, the difference in shades between the main and repaired sections of the wall.
Good sound and heat insulation of basalt wool and polystyrene foam is provided by the air inside them. In a cement-sand mixture there are few such air layers, they are small in size, so these parameters are quite modest. To increase them, it is necessary to increase the thickness of the layer of plaster under the fur coat, which, in turn, reduces the reliability of its attachment to the wall surface.
So it turns out that choosing a method for cladding external walls is necessary based on many factors: the size of the budget, aesthetic preferences, required sound and heat insulation characteristics, etc.
Coating methods
The technique of applying decorative plaster coat can be done either manually or mechanically. Manual methods are used when the amount of work to be done is small. But what to do if you have to process a lot of “squares” of the wall.
In this case, preference should be given to the mechanical method of applying plaster, which is ideal for working with large areas.
Brush and board
The first method, which has been known to our grandparents for a long time. The tool required is a stiff brush and a small board. Dip the brush into the plaster mixture and turn it upside down with the bristles, placing it in a horizontal plane. Next, we begin to move the board along the surface of the brush in the direction from the wall towards us. Under the influence of the board, the hairs of the brush bend, and then, when the board moves further, under the influence of elastic force they straighten and shoot pieces of the mixture along the wall.
This method is more suitable for applying thin, decorative layers of plaster under a fur coat and is not used to create thick sound and heat insulating layers.
Net
Not very common, but quite valid, is the method of applying plaster under a fur coat through a mesh. To do this, a fine mesh netting is fixed at some distance in front of the wall, and then, using a construction trowel, you begin to throw small portions of the plaster mixture through it. Flying through the mesh, they break and form quite interesting patterns on the surface of the wall. After finishing work, do not forget to remove the mesh.
With a broom
When using this method of applying plaster under a fur coat, you will need, as is clear from the name of the method, a broom and a stick. Take a stick in one hand and place it horizontally at ground level next to the surface of the wall that you will be covering. Next, dip the broom into the plaster mixture and apply it with a light, sharp blow to the stick. Under the influence of centrifugal force, particles of plaster fly off the surface of the broom, splash onto the surface of the wall and “stick” to it.
This method is quite labor-intensive and time-consuming. With one portion, you apply a small amount of the mixture to the wall surface.
Therefore, a fairly large number of such movements will be needed, as a result of which it is used when processing small areas. By the way, we do not recommend using a sorghum broom when performing this type of work, since the sand-plaster mixture has a fairly large mass, which, combined with blows on the stick, will quickly lead to damage to the broom. It is advisable to make a broom yourself from thin branches of a tree.
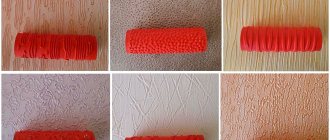
Roller
Using this method, we can get a thicker layer of plaster in less time spent on work. This is a more modern way of making fur coat plaster. The principle of its operation is similar to painting walls with paint using a roller. We take a shallow rectangular container, fill it with the plaster mixture, then dip a roller into it and then roll the mixture onto it along the wall.
You can also apply a portion of the mixture to the surface of the wall being treated and roll it out using a roller.
Manual sprinkler
Using a machine to apply plaster under a fur coat is considered a semi-professional method. The container is filled with the prepared mixture, after which the master begins to rotate the sprinkler handle. The handle rotates the shaft located under the mixture container. On this shaft there are many metal tendrils, which, rotating, will shoot particles of the mixture towards the surface being treated. This method is somewhat reminiscent of working with a roller.
Gun with compressor
Professional option. The plaster mixture, under the influence of a high-pressure air flow created by a compressor, is directed from a hose to the wall surface. This method allows you to quickly and efficiently process large surfaces. Plaster under a fur coat applied in this way is more textured and durable compared to all previous methods. One of the obvious disadvantages of this method is the high cost of the equipment necessary for it.
Coloring
How can you make your “fur coat” look beautiful and different from your neighbor’s? Of course it needs to be painted!
There are two ways to add color to plaster under a fur coat:
- adding special tinting paints to the plaster mixture;
- painting the finished surface.
In the first case, you pour a certain amount of paint into a container with the mixture while preparing it. After finishing stirring, you will receive a homogeneous colored plaster mixture. This method allows you to save on construction work, because after the plaster has dried, you will not have to paint the surface.
Of the minuses, it should be noted that you need to very clearly measure the amount of paint and the amount of the mixture to which you add it. Otherwise, you will end up with different portions of plaster of different shades, which will look very unsightly on the finished wall and, most likely, you will have to do additional work to eliminate this nuisance.
You can also paint the plaster under a fur coat after it has completely dried. This is best done using a special paint sprayer, or, in extreme cases, using a roller.
It is not recommended to use a brush, as you will spend too much time and the paint will be less able to get into the cracks and crevices. Painting the finished surface makes the wall less likely to get “spotty”, but also has its disadvantages, since only a thin outer layer of plaster is painted:
- less durability compared to coloring the mixture;
- When cracks appear in the plaster, they will be unpleasantly noticeable. You can, of course, paint over this area, but you won’t be able to choose the exact shade of paint, and a kind of colorful “scar” will appear on your wall.
Thus, coloring gives a more aesthetic and reliable result, but requires high skill in performing the work.
Tip: in addition to paint, you can add more environmentally friendly components to the solution, for example, crushed cobalt glass, powdered coal, red iron ore, manganese or fine marble.
Coloring
If you want to add variety to the interior or decorate the façade of a building, you can use painting. There are several ways to change the color of the coating, among them are:
- Adding color to the finished solution. The presented option is suitable for a small surface. If the volume of work is large, you will need to prepare several buckets of the mixture, and it will be difficult to create the same shade.
- Applying paint over the mixture is a more convenient option. To do this, just wait 2-3 days after completing the work, and then apply an even layer of paint using a roller. When performing work, it is better to use water-repellent compounds, this will allow you to take care of the coating in the future.
Descriptions of popular brands, photos
Plaster compositions designed to create mixtures with a “fur coat” effect are sold by many renowned manufacturers . To make your choice more informed, it is worth familiarizing yourself with the brand names and their key features.
Knauf
This brand has long established itself in the construction materials market. The company's assortment includes a product that allows you to obtain a “fur coat” coating. It is called Knauf Diamant Shuba and is sold in 25 kg bags in the form of a dry mixture for self-breeding. Its key advantages:
- suitable for façade and interior wall decoration;
- a diluted mixture allows you to obtain plaster that, when dried, forms a structure characterized by pronounced graininess and roughness;
- plaster can be repeatedly repainted;
- the composition can be applied to the surface being processed either using hand tools or using professional spray compression equipment;
- textured surface allows you to create a spectacular design of a room or facade;
- has water-repellent properties and protects walls from getting wet;
- not affected by adverse weather and atmospheric factors.
Specifications:
- Dry density: less than 1400 kg/m3.
- Compressive strength: more than 3.5 MPa.
- Vapor permeability index: 0.04 mg/m·h·Pa.
- Water absorption rate: less than 15%.
- Withstands more than 50 freeze-thaw cycles.
- The shelf life, while maintaining the integrity of the packaging, is 12 months.
The mixture consumption rate per square meter of surface (excluding possible losses) is 3.8 kg/m2. The water consumption level for this composition is 0.28 liters per 1 kilogram of dry mixture.
Lakra
Lakra is a domestic brand producing dry and ready-made mixtures, paint and varnish compositions and other materials for home repair and decoration. The composition in question is sold completely ready for use and is manufactured on the basis of an acrylic water dispersion. Decorative plaster with a relief in the form of a “fur coat” is characterized by increased whiteness.
Other advantages of the composition include:
- high-quality coating that can eliminate minor unevenness and defects in the base;
- can be applied using a roller and does not require the use of expensive professional equipment;
- the coating is resistant to moisture and atmospheric factors, as well as loads during operation;
- the plaster layer is highly durable and permeable to steam, which allows the walls to “breathe”;
- excellent adhesion to surfaces made of various materials - concrete, brick, chipboard, plaster, natural stone, etc.;
- contains no solvents;
- no smell;
- the painted surface can be washed.
The ready-made composition of the Lakra brand can be used for plastering both external and internal surfaces, which must be pre-prepared before applying the plaster as follows:
- The plane must be cleaned of traces of dust, dirt and remnants of the old coating, if any.
- All surface defects must be eliminated by knocking down sagging and filling cracks and depressions.
- The plane must be treated with a water-dispersion based primer to increase adhesion.
- Application is carried out at an air temperature of at least 12°C and a humidity of about 80%.
- Before applying the plaster mass to the surface, it is recommended to mix thoroughly without diluting.
- Plastering is done using a roller; the type of texture formed will directly depend on the length of the pile on it and the thickness of the mixture layer.
- Uniform distribution of the composition is possible within 20 minutes, otherwise visually noticeable joints between sections may occur.
- To finish large areas, it is recommended to involve several workers.
- If the master performs the treatment alone, the coating is applied to a small area and then structured.
- After this, you can begin immediately finishing the next fragment of the surface.
- To wash instruments, the manufacturer recommends using only clean water, without adding solvents.
The shelf life of the finished composition is 2 years from the date of manufacture. It is recommended to store the plaster mixture that is not immediately used in the manufacturer’s container and cover it tightly with a lid to prevent drying out, at an air temperature in the range from +5 to +35 degrees. The composition is able to withstand up to 5 freeze-thaw cycles, fully retaining its consumer qualities.
Important
At an ambient temperature of +20 degrees and a humidity of 60%, the drying time of the plaster composition will be approximately two days. It will take 10 days to fully gain strength. The solution consumption level is on average 2 kg per square meter of surface.
The product contains:
- water-based acrylic dispersion;
- mineral supplements;
- titanium dioxide;
- functional fillers and ethylene glycol.
Manual tinting using universal or water-based colorants is allowed, in a concentration not exceeding 5%.
Elbrus
White decorative plaster is sold in buckets weighing 15 kg, and is immediately ready for use. The composition can be applied to brick, concrete and other types of surfaces, creating an ideal, snow-white coating. Thanks to the texture of the composition, the surface looks optically voluminous. The “fur coat” effect can be achieved by applying it with a regular long-haired roller. This composition can be used for internal and external work.
Among the advantages of the material:
- affordable finishing cost;
- low material consumption: with one 15 kg bucket you can process about 25 m2 of surface;
- high strength indicators, good resistance to atmospheric factors;
- perfect for finishing wall finishing work;
- may be subject to frequent wetness, suitable for washing with a damp cloth.