Good painting of the walls is noticeable immediately - after it the paint is applied in an even layer, the coating does not have defects in the form of stripes and stains. Of course, you need to use good enamel; our paint store in Kostroma offers original materials. You can select branded products from the catalog and start working right away.
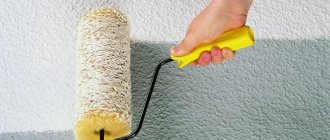
The roller painting technology itself causes difficulties for beginners. If you do not calculate the effort, dip it completely and do not allow the paint to drain, it will lie in a thick layer, which will lead to the formation of smudges. Incorrect movements often leave traces of stripes that spoil the entire look. To eliminate such difficulties, you need to choose the right tool and follow the coloring technology.
Painting technique: existing options
When using a roller, you should pay attention to the quality of painting: a lack of paint on the tool can lead to the formation of unpainted areas that are difficult to notice during the work process.
Such “bald spots” will have to be duplicated with an additional layer of paint, since dotted strokes will stand out from the overall uniformity of the coating. A common method of working with a roller is the “W” technique: vertical stripes slightly overlap each other at the junction, allowing you to quickly paint a large area. The speed of painting using this method does not allow the paint to dry before the end of the work, which makes the resulting layer even and visually consistent.
Painting with a “W” requires plenty of room to manipulate, so it’s best to do it in an empty room. The long handle of the roller makes it especially convenient.
Another way to avoid gaps and stripes is the “squares” technique. It consists of conditionally dividing the wall into squares at the corners, which are painted alternately, and then connected into a single covering with horizontal stripes. This method depends on the illumination of the room and takes into account the direction of light from the window.
Painting in “squares” requires speed to avoid premature drying, so it is more often used by professionals. Hobbyists need to monitor the degree of drying of the paint in order to prevent the coating from being applied to an area that has already dried.
Preparing walls for painting: work order
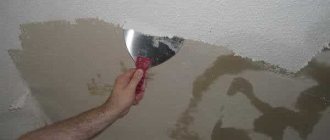
The first thing to do is to thoroughly prepare the surface. New walls just need to be leveled using putty, sanded (article on sanding walls), cleaned and primed (selecting and applying a primer). If the walls are not new and there are any old finishing materials on them, then they must be removed.
How to remove old paint from walls?
If you don't know how to remove paint from a wall, try using a putty knife, a wire brush, and sandpaper. In more complex cases, you may need a hair dryer and special solutions to remove old paint. Old wallpaper can be easily removed if you first soak it in hot water and remove it with a spatula (more details in a separate article). After removing the old coating, the walls are washed from dust and dirt.
If the wall is uneven or there are cracks, you can use gypsum plaster. Next, the surface is leveled using putty and cleaned with sandpaper. If there are traces of mold on the wall, they must be properly cleaned and treated with a special antiseptic. When the surface is leveled and sanded, all dust and dirt must be removed from it and primed well.
Wallpaper paint for painting
Before you start painting walls, you need to measure the surface area and calculate how much material will be needed. Then, taking into account the necessary characteristics, select the paint itself.
Before applying paint to the walls, you need to mix it with a wooden stick, and in some cases, dilute it with water or a special solvent and pour half of it into a painting tray. If the paint in the can has dried out and a crust has formed, it must be removed before mixing the paint to avoid unevenness in the coating.
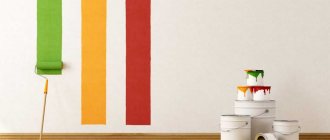
Wall painting
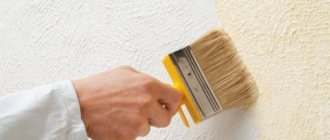
Special paint brushes and rollers are used to apply paint. It is better to start by painting hard-to-reach places, such as corners, joints with other surfaces, pipes, borders with door and window openings, switches, sockets, etc. For such places, use a small brush. You need to take a little paint so that it does not flow from the brush or drip; the excess can be removed on the edge of the tray.
Once hard-to-reach areas have been painted, you can begin painting the walls. It's easier to use a roller for this. The paint is applied to the wall surface in a W-shaped motion. Thus, it is necessary to evenly apply the paint in a thin layer over the entire surface of the wall.
If there is a risk of paint touching elements that are not to be painted or you need to make a straight line, you can use paper tape. After the paint has dried, the tape is carefully removed.
After a few hours, when the first layer has dried, you can apply the second. The paint for the second coat is usually not thinned. The work process is identical to painting the first layer. If painting the second layer failed to achieve uniform color, then it is worth applying a third layer of paint.
To ensure that the paint dries evenly and stains do not appear, painting work must be carried out with windows and doors tightly closed. You should also avoid direct sunlight on the surfaces to be painted.
When painting each individual layer, it is advisable not to take breaks, as the coating may turn out uneven. If you still had to pause, then the roller or brush should be wrapped in plastic wrap.
How to clean brushes and roller
If you don't want to throw away your used brushes and roller, you can wash them. To do this, place the instruments under running water and rinse thoroughly. It is advisable to comb the bristles of the brush with a metal comb while washing. After the instruments have been thoroughly washed, they must be wrung out and dried thoroughly.
When oil-based paint is used in painting work, a solvent is indispensable when cleaning tools. If the paint does not wash off immediately, you can leave the brush or roller in the solvent for a while, then rinse and dry well.
It is not recommended to use the same tool to apply different types of finishing materials (primer, glue, paint), even if you have thoroughly washed the brush or roller. For each type of material, a different tool must be used.
Roller selection
The whole variety of rollers is based on the difference in their purposes (use for different paints and varnishes, surfaces, areas of the surface to be painted).
Size
The rollers are divided into three types based on size.
- Mini - designed for local work in small areas, in corners, for stencils. Also, mini rollers with a rubberized base are used to strengthen seams, increasing the adhesion of the coating to the wall.
- Midi - medium-sized rollers, convenient for most painting tasks. They are used when painting walls, floors, ceilings, and the correct selection of a coat allows you to work with all types of paint.
- Maxi are large rollers, when using which it is difficult to monitor the uniformity of application and the absence of gaps. Maxi-rollers are used in priming work on large areas, as well as in creating a primary coating layer that will be covered by subsequent finishing.
A variety of roller sizes is also observed in the range of highly specialized rollers for uneven surfaces, aggressive paint compositions, structural paint or bitumen.
Foam rubber
It is highly absorbent and suitable for painting most surfaces.
The foam nozzle is chosen for water-based or adhesive-based paints and varnishes. You cannot use a foam roller with water-based or oil-based compositions, as during operation they will destroy the structure of the material, which will lead to the formation of lumps on the paint.
Velours
Gives a smooth surface, used for ceilings or as a finishing layer on walls. Velor is suitable for using water-based and oil-based paints, but it does not absorb solutions well, which is why you have to often draw paint from a tray.
Polyamide
Synthetic coats for rollers are universal: they are suitable for all types of paint and varnish compositions, are not afraid of aggressive solvents, and absorb and release paint. In addition, polyamide rollers are easy to clean after painting, so they last a long time.
Fur
Fur rollers vary in degree of fluffiness and give excellent results even on uneven walls due to the length of the pile. Fur coats (artificial or natural) are used for water-dispersion, oil, alkyd compounds, and are distinguished by the application of coatings without splashing. Fur rollers help create an even layer of paint even on surfaces with cracks, differences, or chips. Suitable for painting large areas.
Painting walls: selection of tools, process features
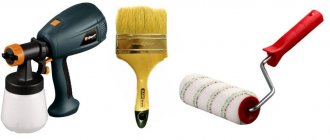
There are several ways to apply a coloring suspension to surfaces:
- brush;
- roller;
- spray gun;
- equipment.
A paint brush is ineffective, there is a lot of waste from the spray gun, the equipment is used infrequently, and all that remains is a roller. The design (if we don’t talk about new models) is simple. A wide wheel is mounted on the curved handle. It is fixed with a clip and can be removed.
The working surface is a fur coat, it can be:
- fur;
- foam;
- velor;
- rag or thread;
- flock or other, with a smooth surface.
Some, higher quality, are made from natural materials, others from artificial ones. The choice of pile length has a basis; the longer the pile, the more uneven the surface can be processed. There are three categories of pile:
- long;
- average;
- short.
The video has the same division:
- short, 8–10 cm in length with a diameter of 10–15 mm;
- average length 15-20cm, 20–90 mm;
- long from 25 cm, diameter from 80 mm.
Different sizes
Size affects speed and convenience.
For small areas, in hard-to-reach places, a medium or small roller is suitable. But for large areas, you will need a large roller and a long handle.
How to paint walls correctly
The selection of roller also depends on the type of paint and varnish applied. Each paint has features, timely consideration of which will make the work with a roller high-quality and effective.
Water-based paint
The optimal choice for water-based emulsion will be rollers coated with velor or pile.
Velor coats have weak absorbent power, so they are better suited for small surfaces to be painted.
Pile rollers are an expensive option (especially those made from natural materials), but they have a number of advantages:
- the ability to select the length of the pile to create layers of a certain thickness (for thin - short pile, for thick - long);
- used for uniform painting of walls and for decorative finishing;
- long-term operation;
- the presence of a special elongated pile for porous, rough surfaces.
Enamel
Enamel paint is used to obtain a glossy surface, so the requirements are for the initial smoothness of the wall and for the roller material, which should not leave particles or air bubbles. Creating a glossy coating requires a large-sized natural wool roller - this will allow you to have time to apply the enamel without drying out streaks.
Silicate paint
The peculiarity of applying silicate paint with a roller is that the coat material must pick up and release the same amount of solution from strip to strip, otherwise the difference in the thickness of the layers will be noticeable visually. For silicate compositions, synthetic rollers and special trays with a place for rolling out in the form of a mesh are selected, which removes unnecessary excess.
Other types of paints
The modern variety of types of paint and varnish materials can create difficulties when choosing a roller. In this case, it is better to contact a consultant in the store, who will select a tool taking into account the characteristics of the paint. In addition, it is worth paying attention to the instructions for use, which should list the compositions suitable for the roller. So, for painting walls with latex paint, a roller with minimal synthetic bristles is better suited, and when applying alkyd mixtures, you cannot do without a brush, which should also match the markings.
Preparing the walls for painting
Sometimes stains remain due to poor preparation, if the walls are dirty, the paint lays down in an uneven layer or begins to flow, leaving marks. To prevent this from happening, you need to properly prepare for painting, following simple rules:
- the walls are washed and dried;
- degrease the surface with a clean cloth;
- the primer is first applied with a roller;
- After it has dried, the walls are considered ready for painting.
The primer must be compatible in composition with the enamel. If you choose similar compositions, the paint will adhere perfectly to the surface. Thanks to good adhesion, it will be possible to achieve a uniform color and the absence of defects.
Why streaks and streaks appear: expert advice
To avoid defective areas on the surface to be painted, you must follow a number of mandatory instructions for working with the roller.
- The fur coat should be checked for the quality of the pile in the store (a quality tool is when, when held with the palm of your hand, the structure returns to its original form; with a slight twitch, the hairs of the fur coat do not separate from the roller).
- The metal frame of the roller should not have any extraneous stains of old paint or rust; the rotation mechanism must be smooth and free.
- Despite the fact that a roller allows you to quickly paint a surface, when working with a specific paint composition it is necessary to calculate the exact drying time. Stains and stripes most often form at the junctions of different layers, so following the technologies for paints, varnishes, and liquid wallpaper will help avoid poor-quality results.
Thus, using a roller for applying paint is the best option for combining price and quality: the tool does not require large financial costs, is suitable for all surfaces and is easy to use.
Pros and cons of working with a roller
Among the undeniable advantages of this painting tool are:
- the ability to paint large areas with maximum speed;
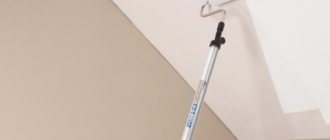
- Ease of use. If necessary, you can attach an extension handle (“fishing rod”), allowing you to reach the most remote areas.
It also has its disadvantages:
- the difficulty of painting corners and other hard-to-reach places;
- the need to select the most suitable type of roller for each paint composition.
But, nevertheless, the advantages of this tool are much more significant than the disadvantages. Otherwise, it would not be so popular among professional builders and finishers. The roller is ideal for painting walls in the kitchen, bathroom, and toilet.
Operation and care of painting tools
After completing work with water-based paints, you must rinse the tool with warm running water and hang it to dry. It is prohibited to squeeze out the liquid, since the pile becomes wrinkled and does not restore its original configuration. To wash a fur coat from synthetic or oil-based enamels, use a solvent (for example, white spirit).
You should calculate the rationale for cleaning in advance, since the cost of solvent may exceed the price of a new cover or roller.
To extend the service life, the pile is washed from water-based paints with a solution containing a softener and a cleaning agent. After removing the pigment, the product is thoroughly rinsed with water and placed on newspapers or paper towels.
If it is necessary to take a technological break during the painting process, the tool can be placed in the refrigerator. Before further use, defrosting of the pile will be required (in case of using water-based materials).
After finishing the painting work, all tools must be cleaned of paint residues.
How to repaint a ceiling without streaks
To repaint the ceiling without streaks, you need to arm yourself with a roller with a long handle and water-dispersion paint. The ceiling is painted with a roller in one layer. It is advisable to paint from the walls to the center of the ceiling. It is necessary to paint so that the stripes of repainting slightly overlap each other in turn.
The first, most critical strip should be located very close to the wall. In further work it is necessary to observe the correct direction of the layers. The penultimate layer of paint is applied perpendicular to the window, and the very last layer is parallel. When painting, it is necessary to pause when applying individual layers to allow the previous layer to dry.
Requirements for the room before painting
Before you start painting, it is important not only to prepare the walls, but also the room itself. To do this, all the furniture needs to be taken out of the room to another room, and those that cannot be moved should be moved to the center of the room and covered with plastic wrap, on the floor along the wall, and newspaper or similar film should be laid down.
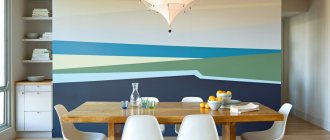
Painting walls with water-based paint design photo ideas
It is important to consider the temperature conditions of the room before painting. At low temperatures, that is, below 5 degrees, applying paint to the wall will be much more difficult, and the drying process may take longer. And at elevated temperatures of more than 35 degrees, the paint dries quickly without having time to set, causing such defects as peeling, roller marks, etc. Air humidity in the room should not exceed 70%.
Dyeing technology
Once the desired tool has been selected, the base and accessories for the work have been prepared, you can begin painting.
- The roller should be used without jerking, moving smoothly and continuously over the surface with some pressure;
- The roller leaves a fairly thin layer of paint, so you should paint in several layers;
- It is advisable to change the direction of movement when applying each new layer in order to hide streaks and strokes and obtain uniform coloring;
- The surface should be inspected from different angles and sides, with the light on and natural light on. If bald spots or irregularities are found, they can be touched up without waiting for drying;
- Work should be carried out without long breaks to avoid the formation of streaks and uneven shades;
- You need to work with the roller until it stops painting and only then apply new paint.
Preparing water-based paint
Before you directly paint the walls with a water-based mixture, you will first need to prepare it. Before use, the solution must be mixed until a homogeneous mass is formed. Read the instructions on the package, they may provide additional recommendations for preparing the mixture. Sometimes the paint needs to be diluted with water, this will help it lay down in a more even layer. If you want to create a shade yourself, you will need to purchase a special color for water-based paint.
To check if the color suits you or not, apply a little onto a small piece of cardboard and let it dry. After this, determine whether you are happy with the shade. Don't forget that dried paint is slightly different in color from fresh paint.
How to apply paint with a roller correctly
We fix the mixer-mixer in the drill chuck and thoroughly mix the contents of the bucket at low speeds so that there are no bubbles. Pour paint into the tray. Its level should not reach the axis of the roller. Rolling the roller back and forth in the tray, we draw paint onto the coat, then run it several times along the inclined corrugated surface of the tray. This operation will remove excess paint and distribute it evenly throughout the coat.
Now the most important thing: a certain amount of paint is retained in the coat of the roller. You need to determine experimentally how much area of the wall it will be enough for - just roll out the paint on the wall in the shape of a square until it is completely finished, i.e. The roller is already almost dry. Now mentally divide this square into strips equal to the width of the fur coat. Let's say we get five stripes.
Techniques for applying paint to walls
We start painting from the top corner (from the left or right - it doesn’t matter). We pass the first stripe, from bottom to top we pass the roller along the second stripe, we pass the third stripe, from bottom to top we pass the roller along the fifth stripe, then along the fourth and only then along the first stripe. Through such cunning manipulations, we approximately evenly distributed the paint across the width of the square.
Next, horizontally, each time, at the end, tearing the roller off the wall, starting from the top of the square, we draw successive stripes one under the other. We repeat the operations, only starting from the fifth stripe. After two passes, the paint is distributed over the entire surface of the square absolutely evenly.
We pick up the paint and continue painting according to the same pattern. When shading horizontally, we capture the previous square by the width of one stripe. When the top row of squares has been completed, we begin painting the next row from the side where we started. If the wall is very long and hot, the paint dries quickly, it makes sense to paint the squares vertically.
When finished, rinse the roller thoroughly - it will serve you for a long time. Good luck!
Video on the topic “How to properly paint walls with a roller”
Which paint is best for painting walls and ceilings?
From personal experience I can say that the higher the quality of the paint, the lower its consumption, and despite the apparent high cost, the costs ultimately turn out to be even lower than if you paint the walls with cheap paint. High-quality paint adheres well, does not run down the walls, and does not drip from a brush or roller. In a word, painting with it is a pleasure.
When choosing paint for covering walls and ceilings, today preference is given to latex water-based paints. Unlike oil and alkyd, they dry quickly, are easily tinted in any color, and are environmentally friendly and form either a matte or glossy surface at will. Among them there are resistant to moisture, fungi and mold. Tools and surfaces with paint stains can be washed well with tap water. There are practically no disadvantages to water-based paint.
High-quality latex water-based paint from Finland and paint from a Russian manufacturer under the Euro Tikkurila brand have become widespread on the Russian market.
Experience with Finnish and Russian paint has shown that Russian Euro is practically no different from that made in Finland. But Tikkurila from Finland costs much more. Therefore, for painting the walls, I chose water-based latex paint of the Euro brand, which is manufactured in Russia using Finnish technology and materials (Tikkurila). The Euro Tikkurila series of water-based paints for walls and ceilings indoors is presented in several types. So it is possible to select paint for any room in the apartment.
| Table of the main technical characteristics of Tikkurila Euro series water-based paint | |||||||
| Technical specifications | Unit | Euro 2 | Euro 3 | Euro 7 | Euro 12 | Euro 20 | |
| Purpose | — | Painting of concrete, brick, plasterboard, putty walls and ceilings, chipboard, fiberboard, wallpaper for painting | For painting walls and ceilings previously painted with alkyd or oil paints, for painting heating radiators | ||||
| Shine | — | Deep Matte | Matte | Semi-matte | |||
| Moisture resistance | — | Not intended for washing | Can be washed with a soft foam sponge | Can be easily washed with a brush | Moisture resistant, suitable for bathrooms, mold resistant | ||
| Paint color | — | White, tinted in light colors according to the Tikkuril “Symphony” catalog | |||||
| Consumption depending on the type of surface | Concrete or plastered surface | l/m2 | 0,2 – 0,3 | 0,15 – 0,2 | — | ||
| Non-absorbent surface | 0,1 – 0,12 | 0,08 – 0,1 | |||||
| Absorbent surface | 0,12 – 0,14 | 0,12 – 0,2 | |||||
| Dry residue | % | 56 | 58 | 51 | 49 | 44-49 | |
| Density | kg/l | 1,4 | 1,5 | 1,3 | 1,3 | 1,2 | |
| Drying time at 23°C | hour | 1 – 2 | |||||
| Work temperature | WITH | 5 – 30 | |||||
| Operating temperature | 5 – 40 | ||||||
| Solvent | — | Water | |||||
| Dilution with water | Primary coat or primer | % | no more than 20 | ||||
| Second coat coating | no more than 10 | ||||||
| Packaging, metal can or bucket | l | 0,9; 2,7; 9,0; 18,0 | |||||
As can be seen from the table, the technical characteristics of Euro 2 - Euro 12 paints are mainly distinguished by their resistance to moisture and consumption per meter of wall covering. But Euro 20 is a special paint for painting walls and ceilings in rooms with high humidity, such as a bathroom.
Since I had to paint the walls in the hallway, where the humidity is low, I chose Euro 2 paint, as the most inexpensive of the Euro series. It should be noted that the cost of tinting paint when purchased in a store, depending on the color, can be up to half the cost of the paint itself (the darker, the more expensive). Yes, and you can miss the color. Therefore, I bought the color separately and tinted the paint myself, choosing the color by painting a section of the wall.
It should be noted that matte paint hides wall defects much better than semi-matte, and even more so glossy.
Learn more about decorating rollers
On the surface of the roller intended for decoration, recesses or protrusions are applied, allowing you to create an imitation of natural stone, wood structure or brickwork.
In addition to rubber, there are products with a leather working surface, which allows for the application of an ornament similar to Venetian plaster.
Only an experienced craftsman can apply neat decor using a roller. If the trajectory of movement is violated, the pattern turns out to be crooked and asymmetrical.
Varieties of rollers for decoration.