Decorative plaster is a granular mixture that includes various types of fillers in the form of stone or marble chips. There are several types of such plasters: structural plasters based on cement or lime, latex ones based on latex, and silicate plasters based on potassium silicate.
Among the main advantages of decorative plaster for walls are the following:
- air and steam passage;
- easy to wash and clean;
- resistant to fading and does not change the initial texture;
- durability;
- quick application;
- will easily hide small unevenness and defects of the wall.
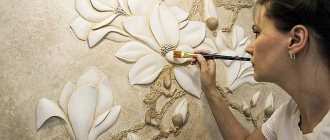
When using plaster, creative people and people with great imagination can create masterpieces with their own hands. At the same time, textured decorative plaster easily accepts all other finishing materials, such as panels, wallpaper, tiles. But all this will not give the expected results until you carefully watch the video lessons or master class on applying decorative plaster:
Application methods
If you want to create beauty in an apartment or house with your own hands, then you can’t do without a video and a master class. There are two main ways to apply the presented material.
Method using rustication. Here rustication is used, and the pattern is applied to already hardened cement. You can learn this example by watching a video master class about decorative plaster.
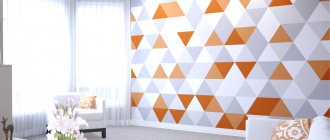
Method when using stamping. In this case, various types of stencils are used. Each of these methods requires special attention and accuracy from the person who carries out this process, because the slightest mistake can ruin the whole picture.
For example, let’s consider an option that, after the final result, presents incomprehensible, as if fairy-tale flowers, which are applied in the same way that frost paints on the windows in winter. If you also choose the right colors for all this, matching both your tastes and the rest of the interior of the apartment, you will end up with a pattern called “Wave”.
Mixing putty
Polymer compositions are sold ready for use, but are slightly more expensive. If a dry mixture is used for work, then it is diluted with water according to the recipe specified by the manufacturer. It should not spread, but also not be too thick.
You can mix the solution either manually or using a mixer or drill with an attachment. When adding color, you need to remember the proportions of the materials in order to subsequently prepare putty of the same shade. Otherwise, the color will be uneven, and color joints will form on the surface. When making structural plaster with filler (sand, stone chips, flock, etc.), no more than 10-15% of them are added. Otherwise, the adhesion of the solution will decrease and it will not hold firmly.
Lime-sand plaster
The presented type of decorative plaster is the cheapest of all types. But despite the fact that the price is relatively low, its quality is no worse than all other types. Application can be done in various ways, but it is important to properly prepare the surface. To fully prepare it yourself, you need to completely get rid of the old coating; it is advisable to degrease the entire surface of the wall, and then prime it.
When decorating the walls in the kitchen, in addition to the already obligatory degreasing, complete removal of dirt is also added. We suggest you watch how to prepare the surface in the following video master class:
Due to frequent cooking in the kitchen, the walls become very dirty, and applying primer is only possible on a clean surface. It is necessary to begin work only after the plaster has completely dried: the waiting period is about 12 hours.
Textured plaster is one of the most common and used methods for applying decor. The process is carried out using the usual methods, you just need to start from the corner and plaster in parts. Application can take place in two ways: in one layer or two layers. It is necessary to approximately calculate those sections of the wall that will be most hidden after installing the furniture. It is in these places that it is desirable to make connections between sections.
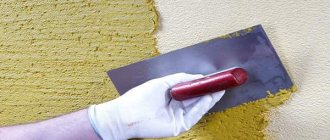
Any solution of the presented type is applied with a spatula. If there are small grains, you can use a pneumatic sprayer. In order to add density to the already applied plaster, you can take graters and half-graters. If you do not carry out the compaction process when working with your own hands, then over time small cracks may form. Texture, with this type of decorative plaster, can be added in several ways:
- processing using plastic solution;
- processing using semi-plastic solution;
- spray application.
Textured plaster installation
Such dry mixtures in bags or ready-made solutions in buckets are purchased at construction stores. Mixtures dry more slowly, so you can prepare the solution in a much larger container and treat the wall surface at a time.
Finishing
Leveling the walls is done with coarse-grained mixtures intended for large thicknesses, and the textured mixture is applied to a flat surface in a layer of about 3 mm. The material is applied with a spatula. After applying the mass, without waiting for it to set, a textured layer is applied using various devices.
Options
To do this, use the following tools and devices:
- rollers;
- stamping stencils;
- spatulas and trowels;
- crumpled rags.
Each method requires a little practice, so it's best to try covering the surface somewhere inconspicuous.
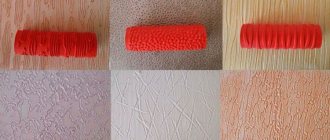
It is convenient to work with a roller, since with the help of its textured sides you can apply small and large designs. The difficulty that awaits a master who decides to make such a texture with his own hands is that when the roller moves, the structural putty is pulled together into a thin layer as it moves - at the end of the work, an unexpected thick layer of material is obtained. To avoid such a nuisance, before applying the textured mass, the wall is divided into strips or squares using masking tape 3 to 5 centimeters wide. The plaster is applied to the space between the tapes, then processed with a roller, with the excess mass ending up on the tape. The strips are removed, after the total area has dried, the depressions are filled and passed again with a roller. Sometimes even squares, diamonds or stripes look advantageous even without filling, creating a kind of decorative composition.
It is more convenient to work with stamps: they are imprinted into the soft surface of the layer at a selected frequency, while maintaining the depth of indentation. Ready-made stamps can be bought in a store or made with your own hands, embodying a pre-conceived idea. After the material has dried, the unsuccessful and protruding elements are removed with a spatula and grater, and then the surface is primed before painting.
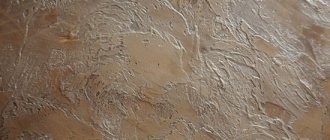
You can use various materials at hand for texture, for example, wrap an old rag on a roller and make passes over the area. The result is a peculiar pattern that imitates the surface of marble veins, only convex. Don’t forget to clean the roller from accumulated putty after a short pass and change the rag.
Painting the surface with the applied textured pattern is done after the layer has dried, correction of unsuccessful bulges, and the obligatory primer. They paint the entire surface with one color, the unevenness gives a shadow, the texture is emphasized in an advantageous color. Sometimes two-color painting is used on the principle of dark depressions and surface tinting of convex elements. Layers are applied at intervals necessary for the previous one to dry.
Semi- and plastic types
Texture in both cases is added after complete leveling of the decorative plaster. The movements should be as long and sweeping as possible, or the second method is in circular movements. You need to wait about 2 hours for it to set. The relief is created by following special rules, and the final result in the form of a drawing will depend on the correctness of the work.
To add texture, you can use a variety of materials:
- special blades are sold;
- plaster rollers;
- or use an ordinary broom.
All your fantasies will be realized depending on what you want. Modern designers offer ready-made methods for interior decoration. A pattern can be applied to the surface in 2 different ways. The first method involves applying a new layer. The second method is to carefully cut out a pattern from existing plaster. When using the second method, you must clearly know that more than 5 mm cannot be cut.
Advantages and disadvantages
This finishing material has quite a lot of advantages. One of the first advantages is environmental friendliness for interior decoration; walls, even with decorative elements of putty, “breathe.” The main advantage is that during application, it is possible to close small cracks and uneven roughness. If you plan to apply a layer of more than 10-11 mm, then the requirements for the preparatory base will be much less.
The service life is unlimited, the surface is resistant to external influences. It is easy to clean and abrasion resistant. It is worth noting that artistically, it is impossible to repeat the same pattern on different surfaces. There are no joints or seams present.
In addition to advantages, they also have disadvantages. These include the cost of a master’s services if you plan to hire a master.
Features of application with filler
When purchasing this type of decorative plaster, you only need to apply it to the wall, following the rules. After all, it gives texture to itself after complete drying. Application should be done in an even layer of 2 to 5 mm. But the movements must be cross and continuous.
Application is carried out using familiar tools, and if there is excess, it is better to remove it immediately using ordinary water. If the plaster has had time to dry, then removal is carried out mechanically.
When applying it yourself, the texture is added with a spatula using, for example, wave-like or circular movements. The work requires 2 people. One applies the decorative plaster itself, while the second paints immediately behind it. Watch the video master class:
The drying process takes place within 2-8 days, depending on the size of the layer. After complete drying, you can proceed to painting.
Purpose and application
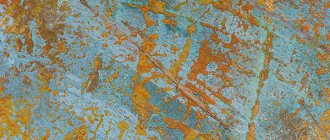
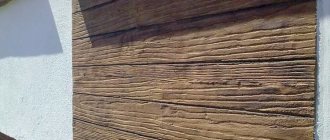
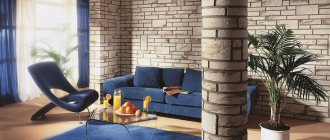
Initially, decorative plaster was invented to imitate the use of expensive finishing materials in a room. But even today the purpose and application have not changed. It is widely used to create the texture effect of expensive finishing material on walls. The texture and variety of design ideas allow you to create the effect of silk, precious stones, and rare wood. The main thing is to use it correctly.
It is decorative plaster that is used instead of wallpaper, because it is universal and can fit into the interior of any style, be it Moroccan with elements of the East or Baroque, or maybe a modern designer’s take on the finishing of the room.
Dyeing process
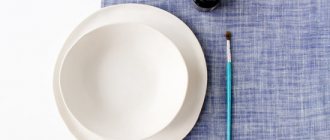
Coloring can also occur in various ways. There are special brushes and rollers for this, and you can also use mittens. To create effects, such as scuff marks, rub a damp sponge over the painted surface. After the decorative plaster has completely dried, if small protrusions have formed, then the best colors for them will be gold or silver, and the best coating will be azure.
If you want to repaint it in other colors, then this will not be a problem, and the texture will not be disturbed. To further increase the longevity of the process, special waxes are sold. After purchasing, applying it yourself and completely drying, in addition to long-term durability, you will additionally receive the effects of slight shine and shimmer. This kind of work should still be entrusted to a professional. But if you want to try to do it yourself, then you should watch the video tutorials and master class on coloring:
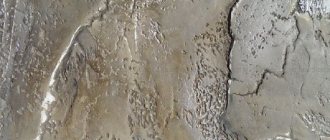
“Skala” plaster application technology
A practical and uncomplicated method that really anyone can master. In this case, to obtain the structure we need, we don’t even need to purchase any specialized mixture - almost any cement- or gypsum-based putty will suit us. It would be best to buy putty, which comes ready putty , for example, would be ideal ; soft putties like “Vetonit” should not be used).
Attention! If you need to putty a bathtub and toilet, or a kitchen, then you should choose a cement-based putty.
A water-based protective varnish applied in a thick layer over the paint will also be required. In the wettest corners of such rooms, protection is usually made of tiles or glass.
How to apply decorative plaster:
- Even before starting the main work, you should prime the walls , and, if possible, apply a simple layer of putty, in this case you will avoid problems with gaps, and generally improve the entire coating as a whole.
- Application. We take the putty with a trowel and apply it as evenly as possible onto the wall in a layer of two to three millimeters over an area equal to approximately half a square meter. Thickening of the layer entails roughening of the irregularities.
- Next, after distributing all the material along the wall, we proceed to the implementation of the structure itself. We free the trowel from any remaining material and firmly apply it to the just applied putty. It doesn't matter which way to do it. It is important to slightly lift the bottom edge of the tool while simultaneously pushing down. You shouldn’t just put it on the wall , because in this case it will stick.
- You can create an original and beautiful structure with any movements , this is what distinguishes this type of plaster from other types of finishing. Now, smearing the bumps, create your own unique texture! It is important to smoothly remove the tool from the mixture , avoiding unnecessary marks. Once you start, you will figure out how to do it correctly. If somewhere it didn’t turn out beautifully, you can easily smooth it out and do it again in a new way. Experiment with movements and find the option that suits you.
- Remove the remaining mixture from the ironing iron after completing each section so as not to spoil the design with it.
- To avoid gaps, when starting a new section, do not forget to overlap the previous one.
- From the moment of application until the walls can be painted, you will have to wait about a day for the mixture to dry.
During the finishing process, problems may appear such as an uneven pattern or marks from a stuck trowel . Don’t be afraid of them, because the work imitates mountains and rocky surfaces. You just need to be careful that there are no sudden changes , as they are immediately noticeable.
Decoration and effects tools
Quite different tools can be used for different designs, effects and decorations. The main ones will be:
- application tools;
- roller;
- rope;
- additional homemade materials.
Textured elements should be coated with two colors, sometimes even selected from the opposite spectrum. To do the work yourself, watch the video master class on applying plaster:
Whatever method of applying plaster is adopted, the main thing is to be careful and accurate. And you will succeed!
Recommended Posts
Derufa – decorative plaster
Decorative plaster made from putty
Pebble decorative plaster Ceresit
DIY decorative bark beetle plaster
American – decorative plaster
Consumption of decorative bark beetle plaster per 1m2
Composition and technical characteristics
The composition and technical characteristics of decorative putty depend on what components it consists of. If we break it down, we will see that it consists of a base, filler and various additives. The basis can be both natural components (water) and organic ones (solvents, resins).
The filler is also different, but often manufacturers use marble, granite and quartz chips; some manufacturers use sand as a filler. The size of the crumb affects the texture of the mass; the smaller it is, the smoother the surface will be; the larger it is, the more prominent the pattern will be.
To make the finishing material more elastic, various additives are used, which can also enhance the effect of the filler.
Consumption per 1 m2
The solution consumption per 1 square meter depends on several factors. One of them is the preparatory stage, how well the surface was prepared for finishing. The second point is the consistency and area of finishing. If you diluted the dry mixture, the consumption will be 4300 g. per square meter. When using mineral plaster, consumption is 3.8 kg per 1 sq. meter.
Also, the consumption of finishing material depends on the material from which the wall is made (brick, wood, plasterboard, concrete, monolith, etc.).
Attention! The time of use of ready-made mixtures depends on the technical characteristics. The cost depends on the company and the environmental friendliness of the material, weight and packaging.
Painting decorative plaster
- Before painting, the entire surface must be treated with a primer . For subsequent layers of paint there is no need to prime the surface.
- The texture will almost lose its effect and beauty if we paint our plaster all in one tone. It's best to use two so that the texture can be highlighted. This is done with a wash, which will highlight the hollows of the texture, or with a dry brush, to highlight, on the contrary, irregularities.
- For “Rain” only the washout method is recommended, but for “Rock” absolutely any method is recommended, due to the diversity of the structure.
- The wall should be painted (in the initial, background color) with a long-nap roller , applying at least three layers. But it is important not to overdo it, as this will hide small irregularities.
- When highlighting the texture with a dry brush, use some contrasting, light shades, and dark ones to highlight the wash.
Attention! Any paint is suitable for a dry brush; for the background before washing, the best option would be waterproof paint. By the way, paint consumption is much higher than when painting simple, even walls; this should also be taken into account in advance.