Primer for bathroom walls and bathtubs
The bathroom is one of the most visited rooms in the apartment. Hygiene procedures require constant contact with water. This substance is known to cause significant harm to various types of surfaces. Metal structures are susceptible to corrosion. And due to constant high humidity, steam, and temperature changes, mold can form on the surfaces of walls, ceilings, and floors. Soap stains, smudges and alkaline deposits, and rust are also common in bathtubs and bathrooms. In order for the operation of the room to last longer, you need to choose the right intermediate construction and finishing materials for repairs. How and with what you should prime the bathroom walls, more on that later.
Types of primers with special performance properties
Since the bathroom is a specific room, not every building material is applicable here. It is mandatory to prime the surfaces of walls, ceilings, and floors before decorative finishing (painting, whitewashing, laying tiles).
First of all, the substance increases the adhesive properties of base and finishing materials. It is also a kind of additional protection from the influence of the characteristic microclimate . An antifungal primer will prevent mold from forming. Deep-penetrating solutions increase the density and strength of base elements. The primer's protective film provides double-sided waterproofing.
This means that the primer used for the bathroom walls and ceiling should be:
- antifungal;
- moisture resistant;
- moisture-proof;
- moisture-repellent;
- deep-penetrating;
- strengthening;
- increasing adhesion of other materials;
- increasing the hydrophobization of cement-concrete mixtures.
Materials are classified into two groups, the selection principle being one of the properties - adhesion or strengthening. If priming is carried out on a rough surface, it is recommended to use both types of materials. Pre-treatment with a strengthening solution, subsequent treatment with an adhesion-improving solution.
You should also pay attention to the composition of the primer mixture. Some of them are not recommended for indoor household use. In residential and non-residential premises, the use of alkyd, acrylic and mineral primers for walls is allowed.
It is important to use a water-repellent primer when working in the bathroom.
Important information about strengthening solutions for walls: in addition to the fact that a strong film is formed on the surface of the wall, the substance penetrates several centimeters deep, thereby strengthening the material from the inside. The solution is applied in a thick layer; it is recommended to use it during intermediate work before installing tiles and decorative plaster. The composition of the primer mixture should be compared with the composition of the tile adhesive solution.
By the way, all loose, porous surfaces of the walls and ceiling in the bathroom must be primed. But if you plan to lay tiles on concrete, you can try to do without priming.
When choosing appropriate mixtures, you need to be guided by both the type of base surface and the quality of other finishing materials. For example:
- wooden walls - alkyd and shellac primer;
- concrete walls - acrylic, emulsion;
- metal wall construction - special mixtures for metal.
Before purchasing, be sure to read the composition, properties and features of use of the substance indicated on the packaging. It wouldn’t hurt to consult with people knowledgeable in construction and repair matters.
Primer selection
Antifungal primers are available in a wide range of modern construction stores. Most species have a preventive effect. If the humidity level in the bathroom is very high, the room is not ventilated, the foundation of the building has flaws in waterproofing, pipes are leaking, it is necessary to use a deep penetration antifungal primer. Such compositions have a higher degree of protection and penetrate deep into walls. They are recommended to be used when black spots have already appeared on the walls and there is a need to update the renovation. When choosing a soil, you should take into account the advantages and disadvantages of certain types and focus on the type of surfaces being treated.
Acrylic
Acrylic primer is in constant demand among consumers. It is made on the basis of acrylic resins. The presence of these components in the composition can significantly increase the adhesive properties of the soil. Acrylic primers are easy to apply to surfaces and provide a more uniform distribution of decorative compositions over walls or ceilings.
This material dries quickly when applied, which is very important when using it in rooms with high humidity and poor ventilation. Rapid drying of the soil allows you to minimize the time intervals between certain stages of work. Acrylic primer is ideal for subsequent application of paints based on water-dispersion or acrylic bases.
Alkyd
Alkyd primer is used to treat wood surfaces. This option is ideal for renovating a bathroom in a wooden house. Its use is recommended for preparation for painting, applying putty, glue, and for subsequent finishing with liquid wallpaper.
Alkyd primers dry quickly and perfectly protect surfaces from mold. But they are not recommended for use on concrete foundations. Alkyd primer does not interact well with drywall and plaster.
Quartz
Quartz primer contains tiny particles of microcrystalline sand. When applied to walls, the surface becomes rough. This helps improve adhesion. It is recommended to use quartz antifungal primer before subsequent application of decorative plaster. High viscosity and the absence of volatile components allow the mineral primer to be applied in one layer.
Primer work before tiling
Tiles in the bathroom can be found most often as decorative cladding. Properly installed tiles have a long service life. It is less demanding in care. It has good technical characteristics of resistance to external influences. Before laying tiles in the bathroom, it is necessary to carry out several stages of preparatory work.
- The walls, floor or ceiling (base) should be puttied and leveled; a concrete screed may be required for the floor.
- The primer to be used is diluted and mixed thoroughly.
- You can prime with a roller or brush.
- If necessary, after the first layer has dried, the wall surface is primed again.
Proper laying of tiles according to all the rules will last you much longer
Priming surfaces before other types of finishing work
If the walls and ceiling will be subsequently treated with putty, then the surfaces need to be before priming:
- clean off old decorative coatings;
- degrease, remove dirt;
- plaster joints, seams, cracks;
- clean with sandpaper;
- collect accumulated dust from the walls.
Next you can prime. For general work, use a nap roller; for priming in corners and hard-to-reach places, use a brush.
Often the walls, floor and ceiling of the bathroom are simply painted. Both paint and other materials used for intermediate work must be hydrophobic. In order for the paint to adhere well, last well and for a long time, an antifungal, deep-penetrating primer with good adhesion must be used.
Bathroom renovation will take some time, since the primer layer needs to be given 5-6 hours to dry before applying paint. The sequence of preparatory work for painting is similar to preparing the walls of a room for putty.
Surface preparation
Before treating walls, floors or facades with waterproof material, it is necessary to carry out preparatory work clearly and step by step. The final result will depend on quality preparation.
Main stages of preparation:
- Clean the surface from any contaminants (debris, dust, grease stains, etc.).
- Clean off all protrusions and protruding fragments of old plaster.
- Using coarse sandpaper, sand the surface.
- Cracks and chips should be covered with plaster, and if necessary, leveling should be done using a starting cement composition.
- After complete drying, sand the surface again with sandpaper.
- Remove dust with a damp cloth.
The surface is prepared, you can start applying the primer.
Bathtub enamel restoration
As mentioned above, not only the walls, but also the bath tank itself can suffer from the special conditions of the room. We mainly use enamel tanks. During operation, enamel is exposed to various influences. And once white, it turns yellow, darkens, gets scratched... Restoration work can be carried out independently, it is much cheaper than buying a new container.
Restoring an enamel coating is a complex, multi-stage task, often requiring special skills and knowledge, but at the same time it is completely doable. It is not recommended to use the room throughout the entire length of restoration work.
- The surface must be cleaned of rust, especially if the enamel is chipped.
- Afterwards, wash the container thoroughly and wait until it dries.
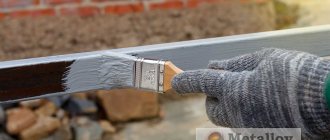
- Next, the bare metal areas are primed. You can use a glypthal mixture, which has good adhesive properties.
- The primer solution must dry completely. This will take up to two days. You can, of course, artificially speed up this process, but experts prefer drying under natural conditions.
- The next stage is putty. Thus, the treated area needs to be leveled with the general surface (plus 2 mm). The substance will take about an hour to dry.
- Re-priming.
- Enamelling.
The arrangement of such a specific room requires increased attention to the quality of construction and finishing materials. Walls, ceilings, and floors must be reliably protected from excessive moisture and sudden temperature changes. After all, humidity and heat are one of the main causes of the formation of fungus and mold. If you are not sure that you can handle the repair tasks yourself, entrust this task to specialists.
Source of the article: https://kraska.guru/gruntovki/vidy-gruntovok/dlya-vanny.html
Primer for bathroom walls and bathtubs - we describe in order
Bathroom tile wall primer is very important. It is extremely necessary to use it when carrying out repair work. Now construction stores and manufacturing companies offer a wide selection of materials with different characteristics. If the repair is done with your own hands, without outside help, then you need to clearly determine the necessary material and know how to use it.
Properties and functions of water-repellent primer
The primer is an opaque mass with a liquid consistency. Upon contact with the surface, it penetrates deep into the base. After which a moisture-repellent film appears. It represents a protective barrier.
The composition is most often used to treat concrete surfaces in the bathroom or kitchen. It is used in rooms with high humidity or for facade work. In addition to stone and concrete, soil can be used for other surfaces - wood, plasterboard sheets, plastic.
With the help of the substance, it is possible to avoid the destruction of the coating, which is exposed to constant exposure to water. The unique characteristics of the soil are important when performing the following types of work:
- laying tiles in the bathroom or kitchen;
- finishing of building facades;
- room decoration;
- the need to apply paints and varnishes.
Preparatory work
First you need to prepare the walls for painting. In other words, it is necessary to remove the previous layer. Most often, this is either old tiles or paint.
You can remove and clean both of them yourself. You can remove paint from the walls using a regular spatula. If the old epoxy paint adheres well to the wall and does not come off, then you can leave it and proceed to the next step.
The next step will be putty. It is best to use moisture-resistant ones, because the climate in the bathroom requires high humidity. The ideal option would be latex water-emulsion dispersed putty.
It is specially designed for interior work and waterproof finishing of a room.
According to all the rules, you need to putty from the bottom up. First, it needs to be applied to the uneven walls, so they can be partially leveled.
The third preparatory stage will be primer . For the bathroom, it is advisable to use a special moisture-proofing primer. Do-it-yourself decorative painting of bathroom walls?
Which soil to choose is up to you; in general, they are universal.
Paint for walls in the bathroom must be special - resistant to high humidity, so carefully read the instructions on the can before purchasing or consult with the store manager.
Painting should begin no earlier than 24 hours from the moment the primer is applied; it must dry completely.
Prices for acrylic paint (Tikkurila, Dulux, etc.) are quite affordable and will be affordable for anyone. You can choose the color right in the store. How much the primer costs depends on the region where you live, but in general its cost varies around 150-200 rubles per bottle.
Rules for using primer for walls
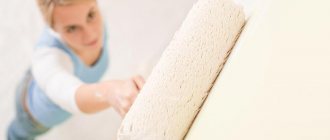
It's not at all difficult to prime the walls yourself. To prime the walls efficiently and quickly, you will need very few tools.
- A roller, preferably with medium pile and a long handle, so that the composition can be applied more thoroughly.
- Brush for treating areas inaccessible to a roller.
- Special container for primer.
- Protective mask and gloves.
- During the work, you may need sandpaper, a metal brush, or a spray bottle.
Please review a few important points before you begin.
- The first thing you need to start with is preparing the walls. It is necessary to free them from paint, wallpaper and other traces of old finishing. After this, fill up minor defects, if any. Large damages must be plastered. Try to make the wall look even.
- To get a good end result, you need to be careful about choosing the right primer mixture. To do this, you need to clarify why priming is being done: primary surface preparation, increasing adhesion, or other purposes. After this, an inspection of the room whose walls need to be primed is carried out, be it the bathroom, where the atmosphere is more humid, or the kitchen, or the bedroom. In accordance with these points, the primer composition is selected. The primer consumption is always indicated on the packaging, but it usually changes during the application process. It is better to take into account the maximum flow rate.
- If you need to prepare walls for wallpapering, then you need to apply the composition before and after puttying. It is possible to begin gluing only after final drying; the composition must dry without drafts and temperature changes.
- If a wall is being primed for plaster, concrete contact is perfect; it will increase adhesion and protect against moisture. After four hours you can plaster.
- If the primer is for painting, then it is applied both to the drywall and to the bare wall. After stirring, it is diluted with a special agent according to the manufacturer’s recommendation.
- To avoid gaps during application, you can add pigment.
Now you know how to properly treat walls with primer, what types of primer exist, and what components are included in its composition. Knowing all the features of preparation, the pros and cons, you will be able to choose the right primer and prime the walls yourself. If in doubt, the best choice would be a universal primer; it can be used on a variety of surfaces, even dilapidated ones. The main thing is to carefully read the instructions on the package. By doing this you will protect yourself from unnecessary purchases and will be able to use the composition correctly.
Why prime bathroom walls?
Doubts associated with the need to carry out priming usually arise among people who do not have any knowledge in the field of repair work. It should be noted that some surfaces do not need to be treated with primer before finishing, but loose bases must be treated without fail. Why is this so important?
Priming the walls in the bathroom is a very important stage of finishing work, which greatly affects the quality of the repair.
- Priming the walls significantly improves the condition of the surface, has a positive effect on its structure and plays the role of a binding material. Due to this, the base begins to deteriorate at a slower rate, which affects the durability of the repair.
- Strengthening adhesion. The adhesive used for laying tiles adheres better to the primed surface, ensuring a stronger adhesion. In order for the effect to be of the highest quality, it is necessary to use a primer mixture that is suitable for tile adhesive. It is best to choose both products from the same manufacturer, because then you can be sure of their compatibility.
- Reducing the level of consumption of materials - paint, glue and other substances that can be used for further processing of the wall in the bathroom. The distinctive advantage of the primer is that it fills all the pores and forms a strong film between them.
What types of primers are there?
Types of wall primers are specifically designed for treating vertical surfaces, interior and exterior. They can be different in characteristics, method of application, basis, level of protection from negative factors.
Acrylic
This product is one of the best options for home use. This is due to the fact that acrylic primers contain harmless polymers without a specific odor. Additionally, we can highlight the fact that they are suitable for any type of surface and dry quickly after application.
Among the main advantages are the following:
- Hides small cracks and irregularities;
- Extends the service life of the decorative coating;
- If the composition is too thick, it can be easily diluted with water;
- Allows you to reduce the consumption of glue and paint.
It is noteworthy that a few hours after applying the primer are enough to allow further finishing of the wall to begin.
Deep penetration before plaster
The first class of primers is a deep penetration primer.
Visually reminiscent of milk with a weak neutral odor. After application and drying, it leaves a durable film on the surface, thereby strengthening and removing dust from the layer.
A deep penetration primer is suitable for treating loose surfaces, which allows you to strengthen the wall and reduce paint consumption.
It works best to create a reliable base for heavy types of wallpaper.
Mineral
A primer based on mineral components is used for the initial treatment of surfaces for the purpose of leveling.
A primer based on mineral components works with surfaces made of specialized mineral materials: concrete, brick, plaster, as well as gas silicate and expanded clay concrete blocks.
Cement is used as a binder in such cases.
Adhesive
Adhesive primer is a special solution, the purpose of which is to improve the adhesion of the treated surface to the finishing material. In addition to improving adhesion between materials, this primer also performs other functions:
- protection of metal surfaces from corrosion;
- prevention of mold and mildew;
- increasing the strength of cracked or porous surfaces;
- reducing the level of moisture absorption.
Penetrating antifungal primer
Antifungal primer is an affordable and simple solution to protecting surfaces from the harmful effects of harmful microorganisms.
This primer is applied at the final stage immediately before finishing.
The topical issue of using antifungal treatment is for external walls that are exposed to precipitation.
Isolating for color matching
This substance makes it possible to even out the colors of the final paint. In addition, during operation it will allow you to maintain the brightness and saturation of the applied color longer. It is used for both internal and external surfaces subject to painting or plastering.
Universal for plastering and painting
A universal, deep-penetrating primer designed for indoor and outdoor use and in areas where strong adhesion is expected. A universal option is used for walls before painting or plastering, as well as wallpapering. Additionally, it can be used for treating facades and floors.
Types of water-repellent primer
Hydrophobic soil is often used in repair work. With several layers of protective material applied to the surface, the penetration of water and moisture can be prevented. When going to a hardware store to make a purchase, you should know that there are different types of such primer, depending on the purpose of its use and composition.
By purpose
Builders divide primer into two types:
- Strengthening.
- Adhesive.
Both types not only have hydrophobic characteristics, but are also used to increase the adhesion of the finishing material to the surface. For example, in a kitchen or bathroom, where there is often high humidity and evaporation, an adhesive primer for wet areas is used. Thanks to its composition, not only the plastered surface, but also decorative ceramic tiles are protected.
Strengthening primer is intended for facade work. It is applied before laying loose finishes such as “bark beetle” and penetrates into the concrete coating to a depth of 5 cm, thereby enhancing water resistance. Sometimes builders add a small amount of strengthening primer to the starting cement mortar. This method helps prevent the formation of air voids.
By composition
Hydrophobic primers with various compositions are available in markets and hardware stores. Before purchasing it, you need to consider what material the main surface is made of. Let's look at the most popular water-repellent primers:
- Acrylic. A primer on this basis is considered universal, since it can be used on any surface. The deep penetration composition (up to 10 cm) after drying forms a dense transparent film and increases the adhesion of the finishing material to the surface.
- Silicone. The material is intended for processing building facades. After applying the composition, a waterproof film is formed on the walls. Protects decorative plaster from peeling and rashes.
- Aluminum. A primer with this composition is intended for treating metal and porous surfaces, completely isolates it from moisture, and also prevents corrosion.
- Epoxy. A moisture-resistant deep penetration primer designed for concrete or metal coatings. The material provides strong adhesion of the paint and varnish composition to the surface and protects it from moisture and corrosion. A primer applied to a dark surface, after it has completely dried, allows you to paint with a lighter enamel.
Important! If the solution gets on any part of the body, wash it off immediately with soapy water. If necessary, consult a doctor.
On video: what types of primer are there?
Correct application to absorbent surface
Thus, we have already found out what is the best primer for tiles on the floor, for walls or ceilings; all that remains is to figure out how to apply it correctly, so that everything is done according to the process technology. There is nothing complicated about this, so even someone who has never dealt with anything like this before can figure it out. To work, you will need a roller, a tray for it, a hand brush, and a properly selected primer mixture. It won't hurt to get gloves, goggles and a protective suit.
- If the instructions require it, you need to prepare the primer for use by diluting it with water or simply pouring the mixture into a tray.
- You need to immerse the roller in the mixture so that it gets thoroughly wet, then lightly squeeze it on the edge of the tray and begin applying primer to the walls.
- You need to apply the composition with confident strokes from top to bottom, making sure that you do not get an excessively thick layer of the substance. Otherwise, a film may form that will definitely peel off, and it is better if this happens immediately and not after laying the tiles.
- After waiting for the soil to dry completely, you need to run your palm over the primed surface and if the wall continues to be smeared, the procedure will have to be repeated.
Immediately after all priming work is completed, do not forget to quickly and without hesitation wash the roller itself, and along with it the tray, in warm water. It wouldn't hurt to use any detergents. If this is not done, the tool will become unusable after drying and will not be able to be used again.
Moisture-proof primer
To carry out renovation work in the bathroom, you will need a large list of materials that are resistant to water. The most relevant product in this case is a primer for wet rooms, which can provide the maximum level of protection for the base.
The use of moisture-proof primers before finishing the walls in the bathroom has the following advantages:
- ensuring the maximum level of adhesion between the wall and the tile. This criterion is of paramount importance in cases where the walls are uneven and require subsequent processing with leveling materials;
- the presence of special components allows for protection against moisture. In addition, this will reduce the level of water absorption by the base, which will improve the microclimate in the bathroom;
- enhancing the resistance of glue, as well as other materials and structures to moisture.
Moisture-resistant primer for bathroom walls is an ideal option when you need to provide the maximum level of surface protection from moisture. The most important thing is to choose the right composition that will be combined with tile adhesive and enhance its properties.
Pros and cons of using soil for wet areas
The use of a hydrophobic primer has the following advantages:
- Increased adhesion between finishing layers. This property is of particular importance if the bathroom or toilet has uneven walls or floors. In such a situation, a thick layer of leveling materials will be required to obtain a flawless surface.
- Protection from moisture. This treatment helps to reduce the water absorption parameters of the surface. This helps normalize the indoor microclimate.
- Reduced levels of dusting and vulnerability to chemical elements. This effect is observed in the case of applying primer to a concrete floor without subsequent finishing.
- Increased overall structural stability. This is due to strengthening with polymer complexes.
At the same time, using a primer for wet rooms also has a number of disadvantages. The main disadvantages include the following:
- The complexity of the process. Applying primer yourself takes a lot of time and effort. This entails an increase in the cost of work.
- Vapor permeability of some compositions after polymerization. As a result, humidity parameters increase. To get rid of excess moisture, it is necessary to organize forced ventilation.
- High cost of imported compounds. If you want to save money, it is better to give preference to domestic soils.
We prime non-absorbent walls and floors
Having figured out which primer is best for tiles, as well as how to properly work with plasters and other absorbent surfaces, the only thing left is to understand how to properly treat a wall with other qualities and properties, for example, concrete. Most often, suitable primer for such walls has a paste-like consistency and is sold ready for application, in buckets or plastic jars.
- After opening the container with soil, do not forget to mix it thoroughly, as it may separate during storage.
- Pick up the composition with a regular brush and distribute it evenly over the surface of the wall, trying to ensure that there are no unnecessary sagging or smudges.
- After all the walls are thoroughly primed, all tools, that is, brushes, gloves, trays, etc., must not be forgotten to be washed so that you can reuse them later.
Many experienced builders believe that it is not advisable to purchase a large bucket of soil for priming small areas, since it is sold in such packages, because the remaining material will simply have to be thrown away. But what to do and what primer to treat the walls with before laying tiles, if the area is small and there are no small cans on sale?
It is recommended to purchase liquid primers of any type and degree of penetration and tile adhesive, which you will inevitably need, and then make a solution approximately the thickness of liquid store-bought sour cream. It is with this composition that you can pre-coat the walls, ceiling and floor before laying ceramic tiles on them. You can apply the mixture to the walls with a roller or brush, and after use it all needs to be washed thoroughly.
Types of compositions and their differences
As indicated in the name, all primer compositions for the bathroom can be divided into two main groups, which differ radically in their properties and characteristics and are suitable for different situations. You can easily choose the best option if you use the recommendations from this review.
Option 1 - deep penetration primers
This type of composition is the most common for a number of reasons:
| Versatility | Primers of this type are intended for absorbent surfaces: concrete, plaster, brick, putty, gas silicate, plasterboard and other similar materials. That is, the primer is suitable for most surfaces found in bathrooms, you don’t need to buy several types, you can get by with just one, which is very convenient |
| Availability | The price of strengthening compounds is very affordable and varies over a fairly wide range; any buyer will find an option that suits their budget. Moreover, even inexpensive options have a decent level of quality if they are produced in a factory in compliance with all technology requirements |
| Convenience | There is no need to carry large containers; you can buy concentrate and dilute it on the spot. For example, from one liter of the composition you can get 4-5 liters of the finished solution. Agree, this is very convenient, because you can prepare as much primer as you need at the moment, and conveniently store the rest of the composition in a small package |
| A large assortment | You can choose one of many options, and the compositions differ not only in brand and concentration, but also in the presence of various additives that increase moisture resistance, give the composition antiseptic properties, etc. All the necessary information is indicated on the packaging, so no problems can arise with choosing the optimal solution. |
Buy primer only in stores, especially during the cold season. In markets and pavilions, there is a high probability that the composition was frozen, and this negatively affects its properties.
Let's look at specific options; I will talk about the types of compounds that are most often found on sale and with which I have personally worked:
- Styrene-acrylic dispersion "Kreps" can be diluted in proportions from 1:2 to 1:5 depending on the type of base. The composition is well suited as a base for a wide variety of finishing materials and can be used as an independent coating; when the bathroom has a natural stone surface, it can simply be treated with 2-3 layers of this solution. The cost of one liter is about 160-170 rubles;
Not a bad solution for the bathroom
- Concentrated soil-moisture insulator “Eskaro Aquastop” has simply excellent water-repellent characteristics. Therefore, I advise using it on the most difficult surfaces with high absorbency, it penetrates deeply into the material and creates a reliable water barrier, the composition is sold as a concentrate and diluted before use, the price of one liter is about 280 rubles;
Water-repellent primer for the bathroom is perfect
- Domestic soil "Lira" is sold in the form of a concentrate, diluted in a ratio of 1:3. The composition is suitable for any porous surfaces in rooms with high humidity and is easy to use and affordable in price; a three-liter package will cost you about 350 rubles;
Not a bad option for the bathroom
- “Plitonit” compositions have earned a reputation for being very high quality and durable; they have excellent strengthening properties and are well suited for any premises. The compositions are sold in the form of concentrates; as for the cost, a three-liter canister will cost about 600 rubles;
A good option for those who value quality
- If you have pockets of fungus on the surface, then it is best to use special antiseptic deep penetration primers. One of them is “Milkill”, it has excellent protective properties and can be used both for the prevention and control of mold; a 10-liter package currently costs about 600 rubles;
This composition will effectively protect the bathroom from fungus
- Another very popular option is deep penetration primer with antiseptic VD-AK-0301. The solution has good protective properties and a quick drying time; it is often used as a primer for bathroom tiles, because the composition perfectly protects the base from fungus. As for the cost, a liter will cost you about 120 rubles.
This domestically produced option is in no way inferior to imported analogues
But choosing a high-quality composition is not enough - you need to use it correctly, so I will tell you how to organize the workflow to achieve the best result:
This is what the work plan looks like
- First you need to remove all remnants of the old finish, if any, it is important to completely clear the base. If there are stains on the walls or floor from any compositions based on bitumen, oil paints and chemicals, then they must be removed;
- Next, you need to thoroughly clean the surface of dust; this is a very important part of the work, since small particles greatly impair the adhesion of any composition, and the fewer there are, the better the final result will be. The work can be done either with a brush or broom, or with a special construction vacuum cleaner (household equipment should not be used);
- As for preparing the primer solution, it all depends on its type. If you have a ready-made composition, then you need to shake it thoroughly before use, and if it is a concentrate, then you need to dilute the primer in the required proportions (the instructions on the package will tell you the optimal solution), for this use clean warm water and a container of a suitable size;
Use only clean water
- Applying primer at home is most often done with a brush or roller. For ease of work, I advise you to purchase a paint bath the width of the roller, so you can quickly wet the roller and remove excess composition. Such a device is inexpensive, but its benefits are enormous, you will see for yourself when carrying out the work;
You just need to add the composition to the bath as needed
- The composition is applied to the wall in an even layer; do not prime the surfaces so that smudges or puddles remain on them. Try to treat every inch of the surface to ensure the best quality work. You can cover flat surfaces with a roller, and prime corners and other hard-to-reach areas with a brush;
To avoid using chairs and ladders, purchase a special telescopic extension for the roller
- After the surface has completely dried (this takes on average from 1 to 3 hours), you need to check its strength: run your hand over it, if grains of sand fall from the base or are picked up on your hand, then another treatment is necessary. Personally, I have not had a case where after the second layer the base did not become strong, it is unlikely that your situation will be different.
Option 2 - adhesive compounds
This option differs from the one described above, let’s look at its main advantages:
- Allows you to work on smooth and hard surfaces such as concrete, oil- and alkyd-painted surfaces, plastic, metal and much more. Simply put, a good adhesive composition makes a substrate unsuitable for finishing suitable, which is very important;
Here's how the compositions of this group work:
- The composition includes a quartz filler, due to which, after hardening, the surface becomes rougher and allows the materials to better adhere to the base;
- Primers of this type are sold exclusively in finished form and are packaged in buckets of various capacities. The thicker consistency also results in higher consumption - from 250 grams per square meter;
- In addition to adhesive properties, such primers have good moisture-repellent characteristics, because they are made on the basis of polymers that are not afraid of moisture and retain the properties of the composition in any conditions.
Many manufacturers make the composition brown so you can control the coverage
Now let’s look at what compounds are found on the market and what their features are:
- Compositions from the Axton brand are affordable; a 1.5 kg package will cost you only 90 rubles. At the same time, it is of good quality, comes with a color indicator to control the coverage of the entire area and fits perfectly on a wide variety of surfaces, including ceramics and oil paint;
This is the most economical composition for the bathroom
- The acrylic-based primer has fast drying times and high moisture-resistant characteristics. The composition is produced on the basis of acrylic and is completely safe for human health, its cost is approximately 300 rubles per package weighing 3 kg, which is also inexpensive;
This option is good because it dries quickly.
- Concrete contact (this is also the name of this group of compounds) “Aquastop” from “Escaro” is distinguished by increased moisture resistance properties and can be used in any place with high humidity. The composition fits well on a wide variety of surfaces and creates a moisture-proof layer, and the quartz filler makes the surface rough, which improves the adhesion of adhesives and other compounds. The asking price is 280 rubles per package weighing 1.5 kg;
This option perfectly protects the base from moisture
- The German composition "Knauf" is of excellent quality and fits well on any smooth and poorly absorbent substrate. The result is a very rough surface, on which any adhesive composition fits perfectly, the only disadvantage can be considered the high cost, it is about 1000 rubles.
High quality but expensive option
We have looked at the main types of primer for bathroom tiles, now we will figure out how to apply such compounds:
- First of all, you need to clean and prepare the base; this is done in exactly the same way as in the case above, so we will not focus on this aspect;
- The manufacturer recommends applying the composition with a brush, but, in extreme cases, you can get by with a roller, especially if the application area is large. Apart from this tool, nothing else is actually needed;
The swing brush is perfect for the job
- When carrying out work with your own hands, it is very important not to forget to thoroughly mix the composition after opening the container. This is necessary for the reason that the soil contains polymer additives and quartz filler, which inevitably settle during storage, and if the mass is not mixed, its properties will be far from the declared ones;
- The composition is applied to the surface from any side convenient for you, usually one layer is enough. This coating can dry for quite a long time; all the exact information is indicated on the packaging.
If you have surfaces with different absorbencies, then all of them can be coated with adhesive primer.
Application of the composition is not difficult
Selection options: how to choose the best option
Choosing a high-quality primer that is appropriate for a specific case is an extremely important issue.
Priming not only makes it possible to significantly improve the treated surface by leveling and bonding, but also makes it possible for subsequent processing.
The following presents the main criteria according to which the choice should be made in a particular case.
Compound
Types of primers, depending on the characteristics of the composition, are divided into the following types:
- acrylic or universal;
- alkyd;
- glyphthalic;
- perchlorovinyl;
- polyvinyl acetate;
- phenolic;
- polystyrene;
- aluminum;
- epoxy;
- shellac;
- mineral.
Manufacturer
Those who do not want to risk the quality of repairs can immediately discard the option of purchasing products from local or little-known manufacturers.
Thus, it is recommended to use products only from trusted manufacturers: Among domestic ones we can highlight.
White or red
The choice of a substance based on color is carried out, first of all, depending on what kind of coating will follow in further stages. However, white primer is considered quite universal and is used in most cases. Experienced craftsmen also skillfully change the tone of the primer to match the color scheme of paint, wallpaper or other type of topcoat.
How to choose for the bathroom: which one is best to choose?
Specifically for the bathroom, the primer puts forward the most stringent requirements. This is due to the fact that it must cover absolutely all surfaces of the room, in addition to the walls, equally, but also because in the bathroom the coating is constantly exposed to moisture, microorganisms and chemicals. Thus, when choosing a primer for the bathroom, you should make sure that it meets a number of requirements:
- Moisture resistance.
- Antifungal.
- Deep-penetrating and strengthening.
- Moisture-repellent.
Selection parameters depending on surface type
An important factor when choosing can also be the type of surface itself on which the primer will be applied.
Concrete
Concrete contact or primer for concrete is designed to ensure sufficient adhesion to concrete. This is important for the subsequent application of putty or plaster on concrete and other surfaces that do not absorb moisture.
Brick
There is an opinion that it is possible to apply plaster or paint to a brick wall without prior priming, since high-quality adhesion will be ensured. However, it is recommended to prime the brick base, since not all building mixtures include primer additives, which can lead to accelerated cracking and destruction of the entire layer.
Tree
A primer for wood is also necessary, since it often acts as an antiseptic, which allows you to protect the wood from all sorts of destructive influences. This is most relevant for wooden surfaces located outdoors.
Gypsum putty or gypsum coating is a surface characterized by increased absorbency, which requires the use of a specialized primer.