On the street, we look up to see the moon or passing clouds, and if we are indoors, our gaze rests on the ceiling. On the street we see an immense space, the houses are a dead end. But this is only in some cases. You can choose the ceiling covering in your home so well that people will enjoy its beauty. Use, for example, wallpaper for the ceiling to be painted, and your home will be significantly transformed, you just have to work a little with your imagination.
What else should you know about beam loads?
The ceiling, as a rule, is at the same time the floor of the next floor and the ceiling of the previous one. This means that it needs to be made in such a way that there is no risk of combining the upper and lower rooms by simply overloading the furniture. This probability especially arises when the step between the beams is too large and logs are abandoned (plank floors are laid directly on the timber laid in the spans). In this case, the distance between the crossbars directly depends on the thickness of the boards, for example, if it is 28 millimeters, then the length of the board should not be more than 50 centimeters. If there are lags, the minimum gap between the beams can reach 1 meter.
It is also necessary to take into account the mass used for the floor. For example, if mineral wool mats are laid, then a square meter of the basement floor will weigh from 90 to 120 kilograms, depending on the thickness of the thermal insulation. Sawdust concrete will double the mass of the same area. The use of expanded clay will make the flooring even heavier, since the load per square meter will be 3 times greater than when laying mineral wool. Further, we should not forget about the payload, which for interfloor floors is at least 150 kilograms per square meter. In the attic, it is enough to accept a permissible load of 75 kilograms per square.
Many owners of summer cottages choose wooden floors when building houses. This is due to the fact that wood is an environmentally friendly material that has aesthetic appeal and natural naturalness. In most cases, the installation of a wooden floor requires the presence of logs - wooden beams laid on the main floor
During installation, it is very important to choose the correct distance between the floor joists
Scheme of laying lags.
Stages of the finishing process
Like any repair process, wallpapering the ceiling is divided into several stages
The correct sequence of work plays an important role, it is worth paying attention to this
Ceiling preparation
First of all, you need to get rid of the old finish. If it is whitewash, it is simply washed off with warm water. If the ceiling is painted with water-based paint, you will have to work with a spatula.
Ceiling preparation
The second is leveling the ceiling surface. When dismantling the old finish, small defects may appear, so first the ceiling is treated with a deep penetration primer. This material will not only increase adhesion, but also strengthen the top layer.
And the last operation at this stage is another layer of primer; after it has dried, you can begin the gluing process itself.
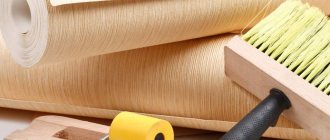
Preparation of material, tools and devices
There are no special restrictions on the choice of wallpaper for the ceiling; you can use everything that is on the market today. Photo wallpapers, for example, blue sky and white clouds or starry sky, are very popular. We list several types of wallpaper suitable for ceilings:
- vinyl wallpapers;
- non-woven;
- glass wallpaper;
- liquid wallpaper.
All of them have a dense structure, with which you can hide minor unevenness in the ceiling (cracks, recesses, small differences).
Patterned wallpaper is trendy right now.
Paintable wallpaper is especially popular, because it can be repainted several times. So if you get tired of a certain color, there is no need to remove the old finish, you can simply apply new paint.
Prepare the tools you will need for finishing:
- roller and brush;
- a special rubber roller or plastic spatula;
- scissors and knife;
- clean cloth;
- ladder;
- paint bath.
You can glue wallpaper yourself without an assistant. In this case, the wallpaper sheet is folded into an accordion, but this method requires a lot of experience, so it is not suitable for a beginner. And another important point is a durable and wide pedestal, the likelihood of falling from which is minimized. To do this, it is better to use a table or install trestles.
Wallpapering
The gluing process depends on what wallpaper is chosen. For example, if it is paper or vinyl wallpaper, glue is applied to the material itself. If it is non-woven wallpaper, glue is applied to the ceiling. On vinyl wallpaper, you need to let the glue sit for a couple of minutes, but you can’t do this with paper wallpaper: apply the adhesive and immediately lay the material on the ceiling surface.
The gluing technology itself has already been described in the article on paper wallpaper, so here we will only list the features.
Glue is applied to the first strip from the center of the strip to the edges
It is important that the glue does not get on the front side of the wallpaper. One person climbs onto the sawhorse, carrying one of the edges of the wallpaper strip in his hands. The edge must be glued to the corner of the room, stretching it along the ceiling and leveling it over the entire area. After gluing the strip, remove remaining air and excess glue from under it.
To do this you will need a clean roller.
Air bubbles and joints are rolled with a rubber roller
This procedure must be repeated with the remaining strips. The only difficult moment is to glue the adjacent strip to the already pasted one
The sticker is applied end-to-end; if the selected wallpaper has a pattern or pattern, then you will have to maintain the alignment of two adjacent stripes, so special attention must be paid to the design at the trimming stage
The excess is cut off before the glue dries using a knife and a long spatula.
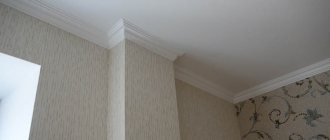
The joint between the walls and the ceiling can then be covered with a ceiling plinth.
So, gluing wallpaper on the ceiling is not such a simple matter, but there is little complexity in it. The main thing is to carry out all the steps described above correctly and if you strictly follow the recommendations, then no problems should arise.
Types of ceiling wallpaper
Such wallpapers are produced smooth and textured, and the second option is in greater demand. Textured wallpaper has a wide variety of patterns, which allows you to create a very interesting interior. Depending on the composition of wallpaper for painting, there are the following types:
- paper based;
- fiberglass;
- non-woven.
Regardless of the type of wallpaper, they are all impregnated with a composition that increases moisture resistance; in addition, they are much stronger than ordinary wallpaper and can withstand repeated repainting very well. Due to its greater thickness, paintable wallpaper perfectly masks minor defects on the ceiling. For the ceiling surface, wallpaper is used of both medium width, which is 60 centimeters, and large ones, a meter or more wide. Wide wallpaper is advantageous in that when it is hung, fewer seams are formed, and the appearance of the ceiling becomes more neat. But narrow wallpaper is much easier to glue.
How to glue it with your own hands
The selected type of wallpaper is cut into strips of the required length and glued to the ceiling. You must first impregnate the surfaces to be glued with an adhesive.
Surface preparation
Before you paste over the surface, you need to prepare it. Old paper covering or plaster must be removed. Remove the wallpaper using a spatula, after wetting the surface with warm water. The enamel paint does not need to be removed, however, it must adhere firmly and not peel off or fall off. It is better to remove lime or acrylic paint by first washing the surface with hot water. The ceiling should be smooth and even, not crumble or peel.
Alignment
Uneven ceilings are leveled using plasterboard slabs. True, such repairs are suitable for rooms with high walls. After leveling the surface with plasterboard, you need to glue the joints with perforated paper and carefully putty them. Before applying the glue, the top must be treated with an acrylic primer.
putty
If there are seams, holes or defects on the surface, they need to be hidden. For this purpose, gypsum putty is used, which is diluted with water. The ceiling is completely plastered or some individual areas are sealed. After plastering, the surface is treated with acrylic primer. It dries quickly, does not release toxins, and prevents the appearance of yellow spots on the paper.
Slicing
Before you start gluing, you need to calculate the amount of material, cut the roll into strips of the required length, and mark the ceiling. It is better to glue the wallpaper starting from the center, because this is where the pattern should fit perfectly.
The panels should be positioned vertically to the flow of light coming from the window. Strips glued in this way will not have visible joints. The length of the panel should be equal to the length of the ceiling (plus 5 centimeters for reserve). The quantity depends on the width of the surface to be pasted.
When cutting wallpaper with a pattern, you need to adjust the panels to the pattern. Each strip should start with the same pattern. Smooth, single-color wallpaper without a pattern can be cut, taking into account only the length of the surface to be pasted.
How to properly coat with adhesive solution
Each type of wallpaper has its own type of glue. When gluing a surface, you must not use an inappropriate adhesive. Dry glue is mixed with water and left for 30 minutes to swell. Then a medium-thick adhesive mass is applied to the wallpaper and ceiling. True, each type of material has its own gluing technology.
Instructions for covering different types of wallpaper with adhesive solution:
- Paper. First, the glue is applied to the ceiling for 10-15 minutes for impregnation. Then a thin layer of adhesive solution is passed over the entire canvas. The paper needs 5 minutes to soak.
- Non-woven. The glue is applied only to the ceiling for 15-25 minutes for impregnation. Dry strips are glued to the surface.
- Vinyl. If the base is paper, then the strips and the ceiling are impregnated with glue. If the material is non-woven, then only the wall needs to be treated with the adhesive solution. Impregnation time is 10-25 minutes.
How to glue correctly
The first strip is glued along the line marked on the ceiling. The rest are joined according to the pattern and the width of the surface. The dry cloth can be wrapped in a roll and glued to the ceiling coated with glue yourself, standing on a stepladder or on a table. The glue-soaked strip will have to be folded like an accordion with the pattern on top.
To paste the ceiling with such a cloth, you will need the help of another person. He must hold the folded wallpaper in his hands while the master glues the strip to the ceiling. The panel must be pressed firmly to the surface, and then walked over it with a rubber roller. Level the wallpaper from the center to the edges. Excess glue expelled out is removed with a rag.
Surface preparation
It is important to know that high-quality ceiling pasting is impossible without proper surface preparation. The thinnest wallpaper requires an almost ideal smoothness of the ceiling; for dense wallpaper such care is not needed. If the ceiling has been whitewashed, first remove all the whitewash, otherwise the wallpaper will not stick. Whitewashing is easy to remove: you need to wet the ceiling well, and then remove the plaster with a spatula. Residues can be removed with a damp cloth. The same is done when the ceiling is painted. Of course, paint is more difficult to remove than whitewash, but it is impossible to guarantee that wallpaper on paint will stick as well. But if you decide not to remove the paint, then you should pay special attention to the ceiling primer; you can even apply it in two layers.
When the ceiling is cleared of whitewash, it is necessary to putty all the cracks, sand the unevenness and eliminate other defects. After this, carefully prime the entire surface. Another important point is that before pasting, it is best to mark the ceiling so that the ceiling is covered with wallpaper for painting parallel to the walls.
Sticker order
The technology for gluing non-woven fabrics to the ceiling is as follows:
Apply glue to the ceiling with a roller. You need to make sure that the entire surface where the first strip will be glued is covered evenly. Use a brush at the joints with the walls.
The wallpaper, rolled into a loose roll, is leaned against the ceiling with its edge and straightened with a plastic spatula strictly parallel to the wall. If you are afraid of making a mistake, you can make a small overlap on the wall or baguettes. It is subsequently cut off with a sharp blade.
Carefully rolling out the roll, straighten the canvas and lay it on the ceiling without squeezing the glue out from under it. While there is a lot of glue under the wallpaper, the canvas can be trimmed if necessary
When the strip is pasted, begin to push out excess glue and air bubbles using smoothing movements.
- Then the wallpaper is carefully trimmed. A spatula or ruler is pressed into the corner between the baseboard and the ceiling, and the excess is removed with a wallpaper knife.
- When gluing the following panels, check their joining. If a mistake occurs, non-woven wallpaper meets the master halfway - they can always be tightened up.
- The joint is rolled with a plastic roller.
A cross-shaped cut is made at the location of the chandelier, a wire is threaded through it and the wallpaper is firmly pressed to the surface.
How to glue: description of technology
The method of gluing ceiling wallpaper depends on the type of canvas, as they differ in their structure and density. It’s worth noting right away that it’s impossible for one person to cover this surface in a room. Therefore, if you plan to decorate the ceiling yourself without hiring craftsmen, first of all you need to independently calculate the material consumption, plan the stages of the work and find reliable assistants.
The process should begin with preliminary surface preparation. As for the sizing technology, it is different for each wallpaper and is carried out as follows:
Non-woven wallpaper
They are material in rolls, which consists of two layers - a polymer coating and non-woven fabric. They are durable in use, “breathe” well and do not absorb odors. Before using them, the ceiling is thoroughly cleaned of dirt and old surfaces, then the base is primed and puttied. The working area must be hard, dry, level and durable.
The canvases are measured and cut into strips with a small margin of 10 cm
For products with a pattern, it is important to consider the height of the report. All cuts must be numbered and glued sequentially
Sometimes such wallpaper is fixed using the reverse method.
In this case, the glue is applied only to the ceiling, and it is recommended to treat the strips with a special solution that will protect them from the formation of fungus and mold.
Vinyl wallpapers
They are glued similarly to non-woven ones on a previously prepared ceiling; the pattern on the strips should match as much as possible. The cut strips are stacked on top of each other. However, their number should not exceed 10 pieces. The glue is applied both to the base itself and to the wallpaper; their swelling time is indicated on the rolls.
It is best to start pasting from the corner
It is important to ensure that the strips are attached end-to-end and that the glue does not get on the top side of the strips. The remaining material should be cut off with a knife and blotted with a dry cloth.
Paper wallpaper
This type of product is fixed to the ceiling in two ways - without overlap and end-to-end. If the canvases are glued along the direction of the room, the number of seams will be minimal, but the process itself will be labor-intensive and complex. As for pasting in width, it is much simpler and resembles working with wall decoration. The glue is applied both to the ceiling and to the canvas. To simplify the supply of the impregnated sheet to the surface, it is recommended to fold it on the floor in the form of an accordion.
How to choose paint
Once you've sorted out your wallpaper, don't forget to choose the right paint for it. Fiberglass fabric is painted with various compositions, but for non-woven fabric only water-dispersion paint is used. The main thing is that it dissolves with water, and not with chemical solvents that can damage the outer layer of wallpaper.
USEFUL INFORMATION: Vinyl wallpaper on non-woven backing: technology for working with the material
| Types of paint | Advantages | Flaws |
| Alkyd paints | They do not deteriorate from bright light and moisture, contain substances that prevent the appearance of various fungi, and have a rich color. | Contain substances harmful to human health and are short-lived. |
| Water-dispersion paints (latex) | They dry quickly, have no odor, and are safe for humans. | Latex paints do not allow you to create rich colors. |
| Acrylic paints | They do not fade in the sun, have greater color saturation, dry quickly, and often contain antifungal additives. | They do not tolerate washing with chemicals well. |
Choose the paint color at your discretion. You can create your own shades by mixing different colors. Just keep in mind that this mixture will look different on wallpaper than in a container. It’s easy to check the shade - apply the mixture to an unnecessary piece of wallpaper and wait for it to dry. And do not forget that in this case it is better to prepare a sufficient amount of the mixture at once: if you use up one part, it may be difficult to achieve the same shade when preparing again.
When choosing paint, be sure to consider the humidity in the room. Choose options in which the wallpaper will last you a long time.
Expert advice
Wallpaper on the ceiling must be glued using a certain technology, which ensures a high-quality and beautiful coating. To achieve the desired result, take a look at the advice of experts:
- If you are cutting panels by rolling out the covering on the floor, then place plastic film underneath so that the material does not get smeared.
- It is more convenient to adjust the sheets according to the drawing in advance, rather than during gluing to the ceiling. To do this, two adjacent strips are rolled out on the floor face up. After that, they are adjusted according to the pattern and trimmed to the required length.
- If gluing the material to the ceiling surface is carried out alone, then the canvas is folded like an accordion and placed on the left hand. Then, with your right hand, apply the edge of the canvas to the ceiling and smooth it. Then they continue to apply and smooth the canvas, carefully straightening the accordion with the left hand.
- You can glue lightweight polyurethane skirting boards directly to the surface of the wallpaper, if you don’t mind that in the future, when removing the old coating, the skirting boards will also come off. You can do it another way - after gluing the wallpaper on the ceiling, mark the installation locations for the skirting boards, cut through the coating with a cutter and remove it from the area under the ceiling decor. After this, the baseboards are glued to the surface of the base.
- To carefully trim the stock of canvas near the wall, apply a wide metal spatula to it and cut it with a construction knife at the junction of the wall and ceiling. The excess part of the material is removed, and the remaining edge is pressed well to the surface.
- Paper wallpaper is glued overlapping, and heavy dense coatings are glued joint to joint.
The glued coating dries at natural humidity and room temperature. It is forbidden to turn on heating devices or open windows for quick drying. Flows of cold and warm air will lead to uneven drying of the surface. As a result, the coating may peel off.
After the pasting we start painting
Painting wallpaper on the ceiling requires several conditions. You should create a temperature regime in the room that is favorable for the procedure, as indicated on the paint packaging. There should be no drafts. If possible, all furniture should be removed or covered with something, protecting it from drops. The same must be done with the walls if you are not going to finish them.
You will need:
- protective glasses;
- roller;
- brushes;
- headdress;
- gloves;
- ladder;
- dye.
Painting methods
- Classical. Roll the entire surface, except the corners and edges, where it is better to use brushes. Determine the direction of the light, paint perpendicularly. When the paint is dry, apply a second layer, this time in the direction of the light.
- Option with non-woven wallpaper. Paint the wallpaper on the side where it will be attached to the ceiling. Or apply paint to the ceiling, but do not touch the canvas itself. You will get a very interesting effect when the paint shines through from the inside.
Try using a smooth roller, applying paint only to protruding parts. This will highlight the structure of the wallpaper well.
Recommendations
- Cut the strips over the entire ceiling area at once - this will help avoid contamination of the material during work.
- To make a neat cut, place the roll face down, draw a line, fold the wallpaper along the mark and cut it along the fold.
- When calculating the number of stripes, keep in mind that it is necessary to make allowances on both sides of 4-6 cm, depending on the presence of the pattern.
- A specific glue is suitable for each type of wallpaper; if there is no information on this matter on the packaging of finishing materials, choose the composition based on the base of the paintings.
- The adhesive mixture intended for finishing the ceiling should have a thick consistency.
An important design element that gives a complete look to the entire room is the ceiling. By covering its surface with plain wallpaper, or combining different shades of materials, you can visually expand or, conversely, divide the room into zones, which will make your home cozy and beautiful.
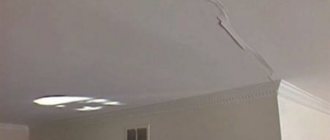
Repairing cracks in wallpaper and ceilings
Eliminating cracks in wallpaper and ceilings
If you see a crack in the ceiling wallpaper, you shouldn’t be too upset. If you show a little patience, you can disguise this defect and you will not have to completely re-glue the ceiling space.
So:
- To begin, prepare a sharp construction knife, universal glue and quite a bit of sealant in a tube with a gun. When everything is ready, start sealing the resulting crack.
- To do this, spray this area with water from a spray bottle and wait until the wallpaper begins to move away from the ceiling. But don’t overdo it, if you wet them too much, they may eventually tear and then the defect will definitely not be able to be removed.
- As soon as the wallpaper begins to peel away from the surface, take a knife and make a neat cut along the entire crack line. Then spread the wallpaper so that you can easily see the cracked ceiling.
- Carefully seal the crack with sealant, smooth everything out and wait until it sets. At the final stage, lubricate the wallpaper with glue, wait 5 minutes and bring the two parts together.
- You should glue these two halves together the same way you glued two pieces of wallpaper. If you don't hurry, you won't get the overlap, and after drying the area will seem perfectly even.
What wallpaper to choose for the ceiling?
Now it’s worth taking a moment to understand what wallpaper to choose for the ceiling. Still the most common and popular are wallpapers whose base is made of paper. Their main advantages are low cost and gluing technology that has been proven over the years. According to the manufacturers, only such wallpaper allows the ceiling to “breathe”, which creates the most comfortable climate in the room. At the same time, paper-based wallpaper is short-lived and has low resistance to mechanical damage and aggressive environmental influences.
Vinyl wallpaper is produced using multilayer technology. They consist of two layers: the bottom layer of paper (or fabric) is covered with a layer of polyvinyl, and then a pattern or embossing is applied to the surface. This allows this material to be used for gluing ceilings in rooms with high humidity. The main disadvantage of vinyl wallpaper, as well as any other synthetic material, is airtightness.
It is recommended to wallpaper the bedroom with modest wallpaper in “calm”, soft tones. Similar advice applies to kitchens.
Modern technologies used in the production of wallpaper have allowed manufacturers to significantly improve the performance properties of their products. For example, wallpaper has appeared with high resistance to humidity, ultraviolet radiation and the ability to care for it using detergents. These properties allowed this type of coating to take its rightful place on the ceilings of corridors, kitchens, bathrooms and toilets.
One of the latest innovations in the field of finishing materials is seamless fabric coverings, which give the room an elegant look, while the number of seams is kept to a minimum. This coating is as monolithic as a painted surface, but at the same time your ceiling will have a more modern appearance.
If you are unable to find wallpaper of the required texture and color, you can purchase wallpaper that is designed for painting. The most popular among them are non-woven and glass wallpaper.
Non-woven fabric is a fabric made from compressed pieces of fiber, very dense in structure. Foamed vinyl is sprayed onto the non-woven fabric through a stencil with a pattern in the form of various reliefs. The reverse side of the wallpaper remains smooth.
The basis of glass wallpaper is fiberglass thread, which is made from quartz sand, soda, dolomite and lime. This material is resistant to microorganisms and is not afraid of chemicals. When using glass wallpaper, the surface acquires additional rigidity, and the strength of the material is so high that it allows you to close small gaps.
After gluing these types of wallpaper, they are painted with water-emulsion paints using a paint roller. In this case, painting can be done repeatedly.
Paintable wallpaper for the ceiling: choice, features of gluing and painting
Non-woven wallpaper for painting has proven itself to be an excellent solution for solving such ceiling covering problems as cracks that do not affect the base, small dents and layers from the plaster mixture. These properties are explained by the fact that the canvases have a significant density. This same characteristic makes it easy to paint the coating several times.
- affordable price category - the product has a reasonable price, which does not limit the popularity of wallpapering surfaces;
- a wide selection of textures allows you to create surfaces that are amazing in nature;
- The process of cladding and painting does not require special tools or special professional skills, although experience is required.
Each type of wallpaper, after painting, acquires an individual coating. Thus, this parameter can become a decisive factor when choosing the required material. The correct selection of composition to paint the ceiling depends on which version of wallpaper will be used.
So, for non-woven wallpaper, only a water-dispersion composition is suitable, but for glass wallpaper, almost any existing solution is suitable, if its properties are taken into account. Duplex two-layer paper wallpapers for painting look good, but they are susceptible to swelling, and most importantly, they can be painted no more than 2 - 3 times. One of the modern widely used materials for interior decoration is plasterboard. Thanks to its versatility, drywall is loved by builders and finishers, both amateurs and professionals. With its help, you can level any surface, build a decorative structure of almost any shape, make a convenient cabinet in a niche, etc. Liquid wallpaper is applied only to a completely puttied surface.
When puttying only the joints between sheets of drywall, it results in them shining through the layer of decorative coating, distorting its color and generally spoiling the overall impression. The fact is that putty materials are not moisture resistant. They absorb moisture perfectly, even if they are treated with a water-repellent composition.
When saturated with moisture, the seams darken and show through, especially through light-colored material.
- appearance;
- price;
- lifetime;
- practicality;
- application area;
- Convenience when gluing ceilings of complex configurations.
Puttying of joints between gypsum boards begins with reinforcement. Serpyanka or perforated paper is used for this purpose. The choice of material depends on the shape of the gypsum board edge. Serpyanka is used only where it is guaranteed to be covered with putty. To seal joints, special gypsum mixtures are used, for example “Knauf Fugenfüller”, “Volma, etc.
In principle, it is possible to paste directly onto walls finished with gypsum plasterboard; the surfaces are smooth, and the material itself seems to facilitate the process. However, not all so simple. There are some nuances here that make work difficult. It is advisable to familiarize yourself with them at the beginning of the entire process. After reinforcing the joints, the plasterboard surface is prepared for painting.
For this purpose, puttying and priming work is carried out.
How to glue ceilings: step-by-step instructions
Preparation
Preparing the ceiling surface for the gluing process is an important step in ceiling repair.
First, empty the room of furniture and equipment, remove lighting fixtures, and protect the exposed ends of the wires with electrical tape. To create a favorable microclimate for work, close the windows tightly and turn off the air conditioning in advance.
Prepare the ceiling as follows:
- Use a spatula to clean off the whitewash, and wash off any remaining residue with a solution of water and soap;
- for small unevenness, level the surface with a thin layer of plaster; for significant differences, you will have to use drywall and a profile;
- After leveling, the ceiling needs to be primed. This will improve adhesion and ensure reliable fastening of the wallpaper. Apply the primer with a roller or brush.
When leveling the ceiling, you need to know how to putty the ceiling.
Cutting canvases and marking
The canvases should be glued along the side walls of the room, perpendicular to the window openings. Otherwise, with sufficient natural light, all joints will be noticeable.
In order to mark the ceiling, measure a distance from the wall equal to the width of the roll. Do the same on the opposite side. Draw a straight line that connects the two points.
When measuring each strip of wallpaper, leave small allowances on both sides, and also follow the patterns, if any. The images must match.
Cut the roll into sheets using a sharp knife along a straight line. Number all the canvases in order and fold them carefully.
Gluing technique
To wallpaper the ceiling, first prepare the glue. To do this, read the instructions carefully. Typically, dry mixtures are produced for wallpaper, which need to be diluted with water.
Please note that some types of glue require time to completely dissolve, while other compositions can be used immediately. The consistency of the diluted glue should resemble thick sour cream without lumps
Once you have everything prepared, proceed to the gluing process:
- take a roller, dip it in a container with adhesive, coat the canvas with glue on the inside and along the edges. Wait 10-15 minutes for the paper to soak;
- While the canvas is “resting”, apply glue to the ceiling - to the place where the first sheet is installed;
- Unfold the sheet and place one edge of it against the ceiling. Gently begin to press the canvas onto the surface. Using a roller or rubber spatula, immediately smooth the coating from the center to the edges, thereby expelling excess air;
- After gluing the canvas, carefully inspect it for bubbles. If there are any, remove them immediately with a spatula;
- each canvas must be glued quickly, otherwise the glue will have time to dry out and the material will not adhere well to the ceiling;
- in the corners between the wall and the ceiling, press the wallpaper with a spatula, and cut off the excess parts of the canvas with an even line;
- with the next canvases proceed by analogy as with the first piece;
- where the lamp will be located, make a cross-shaped cut, insert the wires through it, and press the canvas tightly to the ceiling in this area;
- After you have covered the entire ceiling surface, leave it until completely dry.
Painting
If the wallpaper needs to be painted, it is recommended to do this some time after pasting so that it can dry. Any paint can be used and coloring can be done more than once.
When painting the floor, it is better to cover it with oilcloth or unnecessary newspapers so as not to spoil the floor covering. It is better to do the work with a roller, and where it is impossible to use a brush.
What paint to choose and how to paint
Different types of wallpaper for painting require different painting materials. So, non-woven wallpaper must be coated with matte or glossy water-based paint. They are also perfect for paper coatings.
To create a smooth surface on glass wallpaper, acrylic or latex paints are used.
Before proceeding with the final painting, you must allow the wallpaper to dry completely. After the canvases are completely dry, they can be painted.
For paper coverings, this will be a difficult step, since they are not as strong as others, so it is possible that the paper will tear.
But such a canvas cannot be corrected; it requires replacement. In order to reduce risks, you need to use soft velor or fur rollers for painting. Important! The roller pile should be of medium length so that there are no unpainted areas in the relief.
Before applying the paint coating, those areas that do not need to be painted are sealed with masking tape.
After preparation, the paint can be poured into a ditch, from which it can be easily removed with a roller.
A roller is passed over the paint, and then over a special surface of the cuvette, and this is repeated several times. There should be no paint dripping from the roller that is ready for use.
A minimum of two layers are applied, since one layer will show through the coating, and the second will completely cover all imperfections.
Important! When applied, the layers may appear to be of different shades, but once the paint dries, they will be equal in color.
Choosing glue for ceiling plinth
You can glue the ceiling plinth without the help of a professional. The main thing is to be able to cut corners, as well as choose the right tools and glue. The choice of the latter will depend on the material of the decorative element, since not every glue can be used.
Foam and polystyrene
The most affordable and practical are ceiling skirting boards made of polystyrene and foam. Even a beginner can glue such decorative elements. They are light in weight, so they can be fixed with any glue.
Their only drawback is their fragility, so cutting the corners, as well as cutting the planks themselves, must be done very carefully. Adhesive should be applied to the reverse side
Experienced repairmen note that it is easier to install such skirting boards on acrylic putty, and to seal the seams between the ceiling and the planks, you can use gypsum putty with the addition of PVA glue. White sealant will make the joints almost invisible.
Plastic and polyurethane
Polyurethane and plastic ceiling skirting boards are resistant to wear and temperature fluctuations. They are also flexible, so they can be glued on bends, in corners, in recesses of different sizes, and combined with suspended ceilings.
When choosing glue, it is worth considering that such skirting boards shrink over time. Therefore, any cracks must be sealed with silicone sealant and all joints tightly closed. This means that “Moment”, “Titan” glue and liquid neopropylene nails are suitable for such decorative elements.
Also, during gluing, all ends must be coated with special compounds. Connecting strips, internal and external corners, which are provided with plastic skirting boards, must be mounted on an adhesive composition with a high degree of adhesion.
If the walls are uneven, then in this situation it is better to use acrylic putty. It is difficult to work with, but it will remove all errors and visually improve the joints between the planks.
Wood or plaster
Wooden and plaster skirting boards are an excellent choice to highlight a classic interior, the main thing is not to use them in rooms with high levels of humidity.
The choice of glue depends on the weight of the planks. If the baseboards are light, then they can be mounted on liquid nails, but heavy ones are better mounted with self-tapping screws.
By the way, gypsum skirting boards are considered the strongest and most durable, and if you buy a dry composition and a mold for casting, you can make such a decorative element with your own hands. Experts advise fixing gypsum skirting boards using a mixture of PVA and alabaster, but if the planks are massive, then using liquid nails.
To install the baguette, you can make homemade glue. Just mix one part PVA and four parts dry putty. Dilute the mixture with water to the consistency of thick sour cream and leave for 15 minutes. This composition can be used within two hours.