For any type of wall finishing, you must first prepare the surface. Priming is done first. Due to this, the adhesion of the facing coating to the surface is improved. But professional compositions for priming walls are quite expensive. There is a good way to save money - PVA primer. This solution can be made with your own hands, and it is suitable for brick, concrete, and wooden walls.
Features of using primer
Primer compositions are easy to manufacture; making them yourself is not difficult. Most often, PVA glue (polyvinyl acetate) is used as a base.
Initially, this is a solid substance that is colorless and odorless, absolutely non-toxic, despite the chemical method of manufacture. The cost of glue depends on its scope of use, characteristics and components.
To make a PVA primer with your own hands, it is recommended to choose the construction type of this glue. Unlike other analogues, the composition of construction PVA is characterized by better durability, strength and water resistance of the prepared composition.
PVA-based primer can only be used during interior decoration. The scope of use of the composition is quite extensive; surfaces are coated with the solution before applying paint, putty or plaster.
Attention: The use of PVA compounds for exterior finishing is strictly prohibited, since the primer will not give the desired effect.
Tile and wallpaper come into best contact with this type of solution. Wooden partitions can also be coated with PVA-based compounds instead of a primer, for which you only need to add a small amount of colorless varnish.
The positive performance properties of PVA solution are best demonstrated using the decoupage technique. In this case, the use of the composition is explained by the need to use a multilayer coating. The use of PVA primers allows for high-quality gluing of all applied layers together, eliminating the possibility of individual elements peeling off from the finished decor.
Homemade compositions can be used to cover walls and ceilings in any room of the house. This also applies to rooms with high humidity. But PVA is not an antiseptic, therefore it does not provide proper protection of the wall surface from the development of mold and mildew. For rooms with high humidity, the purchase of special compounds is required.
Why is PVA added to concrete?
One of the uses of PVA is to add an emulsion to concrete mortar. Why is this being done?
Construction mortars based on mineral binders, which include cement mortars, have some disadvantages:
with high compressive strength – low tensile and bending strength;
low impact resistance;
low adhesion (adhesion) to other materials;
low resistance to abrasion and the formation of large amounts of dust during abrasion;
low elasticity and mobility of thick solutions.
To avoid or prevent these disadvantages, the use of polymer additives is required.
Polymers influence the physical and chemical processes of setting and hardening of the solution and change the structure of hardened concrete.
Making your own PVA primer
Before you make a primer with your own hands, you need to prepare the necessary components:
- 2 parts water;
- 1 part PVA;
- cement is added taking into account the thickness of the composition.
The method of mixing the solution does not cause any difficulties: add a little water to the PVA, stir well, and add the required amount of cement. The prepared composition should have a thick consistency and adhere well to the wall.
Attention: Before mixing the glue, you need to decide on the required volume. The glue primer should not be prepared “in reserve”, since the unused composition loses its adhesive properties over time.
A self-made primer is an excellent and inexpensive product that precedes the treatment of surfaces with wallpaper glue, but this is not enough for reliable wall cladding. Professional builders recommend adding resin and chalk to primer solutions. Their total volume should be no more than 6% of the finished composition.
Rules for mixing the solution:
- The proportions of water to glue are 2:1.
- A convenient container for mixing is required: a basin, a bucket.
- All work must be done in a warm room.
Constant stirring of the solution will help to avoid the appearance of an upper water layer. To simplify the work and create maximum uniformity, it is best to use a construction mixer. After preparing the composition, the mixture is filtered.
PVA primer is characterized by the fact that it creates a film on the wall without penetrating into small cracks and cracks. But taking into account the inexpensive cost of all the components used, the result is excellent material.
You need to clearly define your finishing goals. A universal primer that does not require high water resistance is suitable for wallpapering. Facing with decorative plaster will require the use of more expensive primer.
Tips for diluting and using PVA primer
When priming the walls, it is necessary to apply the solution correctly; when using PVA glue compositions, there are certain subtleties of the work. Step-by-step surface treatment looks like this:
- Walls that need to be primed must first be thoroughly cleaned of the old finish. To do this, you can use various tools and materials: brushes, spatulas, sandpaper. If the household has a hair dryer, then it can also be used. This powerful unit can easily and quickly deal with small particles of old finish.
- The quality of the prepared solution is checked using a test application. This will make sure that the composition does not peel off from the wall. A test application is carried out on any place on the surface; if the solution is made correctly, it gives a transparent whitish tint.
- A very thick primer is diluted with water. Having decided on the proportions and consistency of the PVA primer, it is applied to the surface of the wall, the primer must be left until it dries, after which you must try to pry off the edge of the dried film with a spatula. If the soil layer comes off easily, add a small amount of water to the solution. A dense and firmly attached layer of film on the surface indicates that the priming process can be carried out.
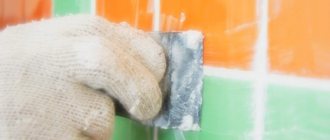
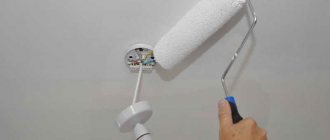
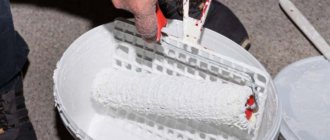
- The PVA mixture is used as follows: using brushes of various sizes, you need to treat the corners of the walls and difficult areas, then cover the remaining area with a short-pile roller. Spray guns are not used when working with primer - the suspension is very thick even with a significant volume of added water.
- A homemade primer is applied in 2 layers, and the second layer must be applied after the first has completely dried.
In terms of their performance, homemade primer mixtures cannot be compared with professional compounds, but their use significantly reduces the cost of repairs and is advisable to use in cases where cosmetic finishing is performed with budget building materials. For expensive facing materials, it is necessary to initially replace the homemade primer with professional mixtures.
Application technology
First you need to check the degree of adhesion of the homemade primer to the base. To do this, you should apply a little mixture to a separate area and wait a little. The composition should lie on the base as easily as possible, leaving a characteristic white or pink mark. If the primer adheres well to the surface, no visible film should appear after it has completely dried. If a film appears, then you need to add a little more water to the mixture.
The composition must be applied in several layers. At the same time, it is best to prepare the soil in small batches so that it does not have time to lose its positive properties. It is worth paying attention to the fact that before starting work, the walls must be thoroughly cleaned of dirt, dust and various types of foreign objects. You also need to remove all existing defects on the surface. You can apply the material with a regular paint brush, but a roller will help make the process faster and easier. This will allow you to cover a fairly large area in a short period of time without much effort. After each layer of homemade primer has completely dried, you can proceed directly to wallpapering.
Advice from professionals
In order to avoid any problems with repairs, you need to listen to some recommendations given by professionals.
- Different types of primers cannot be used to treat the same surface.
- If there are bumps or other raised areas, it is best to treat them with a small brush.
- The material must be applied evenly. It is worth making sure that there are no lumps or streaks.
- If a spray gun is used for processing, then it is imperative to use protective equipment - gloves, goggles and special clothing, a respirator.
You can begin to apply finishing materials only after the primed surface is completely dry.
Priming the walls with glue will slightly strengthen the base and also increase the adhesion rate.
It is advisable to use this method exclusively before gluing wallpaper, because in other cases it may not be of any use.
Advantages and disadvantages of homemade primer composition
First you need to determine whether this primer is suitable in each specific case. The main advantages of a homemade primer:
- Increases the water resistance of the surface. PVA creates a thin film layer on the wall that does not allow moisture to pass through, and at the same time allows vapors to escape. Primer treatment protects against changes in humidity.
- Increases adhesion. Coating with a PVA solution increases the strength of the cladding material. This is important if work is carried out on highly absorbent walls.
- Cheap soil. PVA is inexpensive and is mixed with ordinary water, resulting in the cheapest primer. If you need to carry out repairs with low material costs, then this is an ideal option.
The PVA mixture has disadvantages:
- The coating may peel off. If you do not follow the proportions when mixing the mixture, a film layer will form on the wall, which will peel off easily and will not provide the necessary strength.
- The PVA glue primer does not penetrate deeply into materials. The composition is absorbed by only 2-3 mm and will not be able to strengthen very dense surfaces. In addition, the mixture is also poorly absorbed into walls with a smooth surface.
- The appearance of yellow spots. If you apply a thin layer of plaster or cover surfaces with cheap wallpaper, then after a while yellowness may appear in some areas.
- Not an antiseptic. If protection against the appearance of fungal infections is necessary, then you need to additionally purchase a special composition. PVA does not have such capabilities.
Enhancing the properties of homemade primer
The properties of the PVA composition can be enhanced. Before making a PVA primer, you need to prepare the components for the reinforcing composition:
- laundry soap 60% – 2 parts;
- bone glue – 5 parts;
- copper sulfate – 1 part.
The mixture can be prepared using available means; for this, select an enamel pan or bucket of the required size. It is advisable that this container is not needed in the future, since it cannot be used for cooking in the future.
Production of a primer with enhanced properties:
- Bring water in a bucket to a boil.
- The soap must first be grated with a grater - this will save time for dissolution.
- Pour the soap shavings into a container of boiling water, reduce the heat to low, stir the mixture until the soap dissolves.
- Add bone glue and vitriol to the mixture.
- Cover the bucket with a lid and cook over low heat for about 30 minutes. The composition must be stirred regularly to avoid the appearance of lumps.
- After 30 minutes, remove the mixture from the stove, let it cool slightly and strain through a sieve.
- When the liquid has cooled completely, surface treatment can begin.
Attention: If a moment was missed during cooking and lumps formed in the composition, they can be removed using a regular mixer. But this procedure must be performed with caution so as not to break the equipment. After using the mixer, you need to wash it well.
What will you need?
Before you make your own primer mixture, you need to prepare the components and tools that will be needed in the process of creating it.
Strengthening
The primer mixture to strengthen the surface layer consists of the following components:
- copper sulfate – 100 g;
- wood glue – 0.5 l;
- laundry soap 60% – 1 bar (200 g);
- water – 7 l.
Deep penetration
This primer solution can be prepared from:
- PVA construction glue – 1 l;
- clean water – 8 l;
- cement - one trowel.
All components must be mixed thoroughly.
Adhesive (on wood)
The primer used to enhance the bond strength of materials consists of:
- alum – 1/4 kg;
- drying oil – 30 g;
- water – 1 l;
- dry paint glue – 200 g;
- laundry soap – 1 bar (200 g);
- chalk – 2 kg.
For painting
To get 10 liters of primer solution for lime paint, you need the following components:
- quicklime – 1.8 kg;
- laundry soap – 1 bar (200 g);
- water – 10 l;
- drying oil – 100 g.
Recipe for making a primer for adhesive paint:
- powdered or crushed chalk – 2.5 kg;
- dry glue – 200 g;
- laundry soap – 200-250 g;
- copper sulfate – 150 g;
- drying oil 25 g;
- water – 10 l.
Useful tips
Recommendations from experts on the use of homemade soil composition.
- It is best to treat the wall surfaces with the solution using a roller, dipping it into a special plastic tray, which, due to the presence of a large number of ribs, will not allow the roller to absorb a large volume of the liquid composition.
- When wallpapering walls, you can use a composition made from wallpaper glue to prime the surfaces. The properties of PVA and wallpaper glue are almost identical. They can provide good strength and sufficient penetration. Moreover, when using wallpaper glue as part of the primer, you do not have to wait for the composition to dry out. The wallpaper is glued directly onto the primer.
- Professional builders advise applying the primer layer in one wide motion from bottom to top. It is necessary to try to apply the primer so that the roller does not pass over one area several times, otherwise the layer will turn out to be uneven. To make the overall layer as dense as possible, you need to let the first layer dry completely, and only then apply the next layers on top of it.
Taking into account all the advantages and disadvantages, all that remains is to determine whether a self-prepared primer is suitable in each specific case or not. Professional solutions can provide protection against the effects of fungi; they do not separate, but the cost of purchasing them is much higher, in contrast to similar mixtures made at home.
