Savig
12653 0 5
Savig June 26, 2017Specialization: master of interior finishing works. I am well versed in power tools for repair and construction. Formerly a teacher at a radio engineering college.
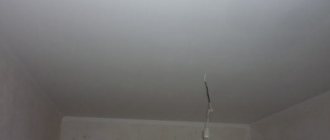
Applying primer to whitewash is a very risky task
Are you planning to paint a whitewashed ceiling and for some reason you don’t want or can’t wash off the whitewash? In some cases, you can get by by applying a special primer to it. What are these cases, and what solutions are suitable for them? I propose to look into all of the above issues together.
Primer: how to apply correctly?
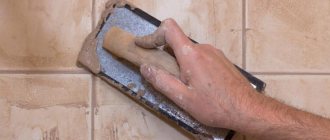
When the ceiling surface is cleaned and dried, a primer is applied. It will strengthen the bottom layer and improve adhesion to the paint. The strength and durability of the coating will increase significantly.
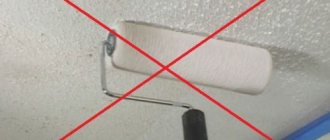
The ceiling is primed using a paint roller.
It is advisable to apply the material in two layers. Do not begin processing until the first coat of primer is completely dry. At the end of the work, the tools are thoroughly washed.
If drops of primer get on the floor, it is recommended to wash them off as soon as possible. Otherwise, the substance will become so ingrained that it will be impossible to wipe it off.
Removing stains step by step
When repairs have not been done for several years, various stains may appear on the surface.
- To remove soot, use a 2% baking soda solution and then apply primer to the treated areas.
- Rusty stains can be easily removed with vitriol soil.
- When the stain cannot be removed, the plaster is rubbed.
How to clean a surface from paint and whitewash?
Is the ceiling lime coat applied in three layers?
Is the surface painted with oil-based or water-based paint? Something definitely needs to be done about this. We will consider each specific case and together with you we will make the right decision.
To wash off whitewash, use plain water. Wet the roller generously and run the tool across the concrete ceiling.
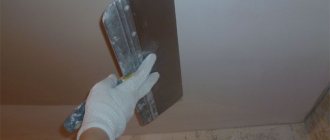
The surface must be thoroughly wet, otherwise the whole process will have to be repeated. Armed with a metal spatula, methodically and gradually remove the bleached layer. After cleaning, wipe the ceiling 2-3 times with a damp cloth.
Some experts advise not to remove the old layer of “water emulsion” if it adheres well. It’s easy to test old paint for strength. Wet a small area of the ceiling with warm water and try to clean it.
If the paint is holding firmly, you can start priming right away. The unstable layer is washed off with water and scraped off with a spatula.
A little secret for readers of the Znatokpotolka website. We do not recommend wetting more than one square meter of area at a time. This is due to the fact that water evaporates quite quickly.
It also happens that the ceiling is covered with moisture-resistant paint that is resistant to water.
A mechanical cleaning method is indispensable. A grinding machine or drill with an attachment will come to the rescue. To prevent dust from getting into your eyes and respiratory organs, wear safety glasses and a respirator.
To remove oil paint, just use alcohol, which will degrease the ceiling. When buying a special product for removing enamel, remember: it is very toxic. Ventilate the room regularly during renovation work.
Surface preparation
Before applying primer, you need to properly prepare the surface:
- it is advisable to completely remove the old coating;
- wash away traces of rust and various stains, you can treat them with copper sulfate;
- qualitatively remove all greasy stains;
- remove traces of soot;
- putty on the surface of various chips, cracks, seams, and other defects.
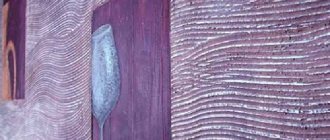
Repairing cracks in the ceiling
After cleaning the ceiling, you may notice seams and cracks. It is recommended to process them immediately. If this is not done, the cracks will definitely show themselves through a new layer of paint and putty.
The seams are thoroughly cleaned of old plaster. For narrow cracks (up to 5 mm), putty is used; wide cracks are best sealed with gypsum plaster. Huge seams are first blown in with foam, and only then plaster is applied.
A special reinforcing tape (serpyanka) will help avoid the formation of cracks in the future. It is applied to fresh putty and embedded in it. The second layer of putty is applied on top.
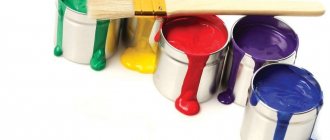
What primers to use
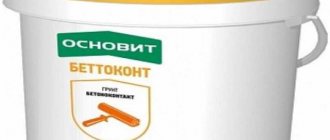
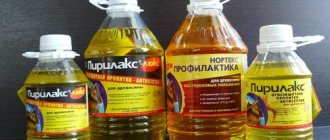
If you have chalk whitewash and you absolutely do not want to wash it off, or for some other reason it is not possible to wash it off, you will have to use an impregnating composition used for whitewashing work.
Such a solution always has the word “chalk” or the indication “for a chalk base” in the description. Representatives of this type of mixture are usually called “anti-mel.” There are also professional, deeply penetrating compounds, for example ST 17.
In general, the purpose of any deeply penetrating or strengthening primer mixtures is to give the base, which has a loose or fragile consistency, the strength necessary for subsequent processing.
You can consult with the manager of a finishing materials store, who will certainly suggest the required composition and help you make a choice.
In principle, you can use all types of impregnations called “anti-chalk” or base-strengthening primer mixtures and compositions.
Any of them will do. But, everything is done only at your own peril and risk. No one can guarantee the result here.
There are many examples when even experienced craftsmen, using such compositions, did not receive the required quality of coating and remade the entire job, starting with completely washing off the chalk base.
Application technology
Any primer composition of this type has instructions for use on the packaging. But it would be useful to mention the main stages and subtleties of the process.
First of all, you need to make sure that your existing whitewash can withstand at least a primer. To do this, after preliminary cleaning the surface from dust, the first layer of primer is applied. Only the special primer mentioned above will do.
After applying the first layer, be sure to let it dry completely. This can take from two hours to a day, depending on the temperature and humidity in the room. It is not advisable to ventilate the room - the risk of peeling off the entire chalk coating will increase.
If after the first stage of priming nothing swells or peels off, then the next layer of primer can be applied. There should be three of them in total, and each should be completely dry.
When the primer is completely dry, once again you need to carefully inspect the entire area treated with primer. If there are doubts about the strength of the resulting base, it is better at this stage to change the strategy and go back a little - start completely removing the old coating.
If everything is in order, you can start painting the surface. But this should be done very carefully. Ideally, use a spray bottle for painting.
Primer for whitewash.
I'm going to do cosmetic renovations in a 3*4 m kitchen. I don't want to delay the renovation for a long time (rip off the whitewash, prime, wait until it dries, putty, wait until it dries, clean, prime, wait until it dries, putty, wait until it dries, clean again + Paint + DUST). Question about the ceiling. Panel house, the ceiling is flat, but whitewashed with chalk. Is it possible to coat the chalk with a good primer (for example, made in Germany), maybe 2 times, and paint it with water-based paint? Has anyone tried it? It’s not for nothing that they call a primer with “Deep Permeability”
Look for a primer that states that it can be primed over whitewash. We have a “German hydrosol primer” (works great) and I saw our own Vapa “Antimel” or something like that.. If an ordinary primer (even a good one) there is a risk that it will not hold the entire layer of chalk that has not been cleaned off. Then go at least once with a spatula.
It is forbidden. The result will be like this, you will get a film with a layer of chalk between the ceiling
“Stirlitz was talking nonsense. The nonsense screamed and burst out.”
2Valenok Chalk paint is the same water-based emulsion, only the emulsion is not based on polymer, but on animal or some other prehistoric glue. Therefore, in principle, you can paint with a highly diluted (half and half with water) water-based emulsion, and nothing will be terrible. But it is better to first prime with a penetrating primer and paint undiluted.
Pleischner threw himself out of the window for the ninth time. The poison had no effect.
2Gray You are right. it's very interesting when the chalk, primer and paint are wrapped around the roller.
What type of whitewash should I choose?
Whitewashing is the simplest and most affordable method for ceiling repair. Every year many new products appear that can adequately cope with the design of the ceiling, but simple whitewash is still in demand.
Lime and chalk are two existing types of whitewash. These are natural, environmentally friendly natural materials, which is not unimportant in our time.
Pros and cons of whitewashing the ceiling with lime
Pros:
- affordable price;
- bactericidal properties;
- antiseptic qualities;
- can be used in the kitchen and bathroom, as it is not afraid of moisture;
- not afraid of low temperatures, you can whitewash unheated rooms;
- good adhesion to any materials;
- hides small cracks;
Minuses:
- does not give a snow-white color;
- when dry, it emits a strong unpleasant odor;
- may cause allergies;
- Work related to lime must be carried out with gloves, as it can cause irritation upon contact with skin.
How to dilute lime whitewash
Quicklime is a substance that can cause chemical burns. The solution should be prepared using skin and respiratory protection. In addition, upon contact with water, a reaction occurs and the solution becomes very hot.
For 10 liters of solution you will need:
2.5 kg quicklime;
a small amount of blue, this will give the whitewash whiteness;
Take 1 liter. water, dissolve all components and gradually, stirring, bring to the final volume.
Leave the resulting solution for a day, then filter to remove the larger fraction.
Pros and cons of whitewashing the ceiling with chalk
Pros:
- affordable price;
- provides rich white color;
- environmentally friendly, breathable material;
- does not cause allergies.
Minuses:
- the chalk coating is fragile;
- whitewashing with chalk is afraid of dampness, stains on the ceiling from leaks are difficult to remove;
- requires frequent renewal as it quickly loses its whiteness.
Chalk whitewash solution
For 10 liters of ready-made solution you will need:
100 g PVA, wallpaper or wood glue;
100 g of laundry soap, grated;
a little blue, this will give the whitewash whiteness.
We cut pieces of laundry soap into a container for the solution and pour 300 ml of water, after which we need to mix well so that the soap dissolves in the water. Then we add glue, it enhances the adhesion of the solution and makes our whitewash much stronger, and lastly we add blue. Then gradually add chalk and water (add gradually, while mixing thoroughly). Add water until ten liters of water are added to the solution.
Let it brew. Strain.
In order not to make a mistake in the proportions, you can purchase ready-made dry mixtures. They are completely ready for use; you just need to dilute them with water, following the instructions on the package.