Comments: Comments to the post Whitewashing walls with lime are disabled
Lime is undeservedly neglected these days. Meanwhile, sometimes it is much cheaper and more practical to use whitewash for finishing work. Once the walls have been covered with lime for painting with water-based paint, they must be cleaned of old whitewash, puttied and soaked with primer. It is often easier and cheaper to whitewash them again. In addition, lime has antiseptic qualities. Due to these properties, whitewashing walls and ceilings with lime is recommended in schools, medical institutions and kindergartens. Whitewashing is used for both interior and exterior work.
Where is lime whitening used?
- Lime is used for whitewashing not only residential premises. The garage, basement, various utility rooms or animal pens are whitewashed with lime mortar. Slaked lime not only gives a fresh white color to walls and ceilings, but also disinfects the room.
- Lime whitening is used to paint fences, and trees are whitened during gardening work. Lime is not afraid of dampness; whitewashed walls in a basement or cellar do not require secondary whitewashing for several years. After drying, a strong crust forms on the whitewashed wall surface, which clogs small cracks and holds the plaster layer together.
- The lime layer of whitewash in bathrooms, showers, swimming pools and baths, thanks to the film formed on it, protects the walls from moisture, because It is not only durable, but also moisture resistant.
- When preparing lime for whitewashing walls, organic dyes are sometimes added. By mixing slaked diluted lime with pigment, you can achieve the desired shade of any saturation.
Useful properties for the garden
Fluff grass is often used in gardening. It helps achieve the following effects:
- protect crops from pathologies and strengthen their immunity;
- increase the adaptive characteristics of crops, helping to resist the influence of dangerous factors;
- improve crop nutrition;
- accelerate the dissolution of various substances in liquid;
- retain nitrogen in the soil;
- improve crop root growth;
- accelerate the decomposition of organic matter.
See also
Types and properties of water in soils, how the level can be lowered and increasedRead
The fluff helps to stabilize the top layer of soil and normalizes its composition. In addition, lime helps neutralize the harmful effects of hazardous metals.
Equipment for whitewashing walls with lime
To work you will need:
- bucket with water;
- brush or brush;
- protective clothing (rubber gloves, goggles, gauze bandage or respirator);
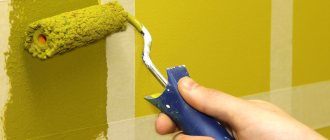
- It is not recommended to whitewash walls with a paint roller. When applying the second layer of whitewash, the roller begins to “pull off” the previous layer;
- whitewashing walls using a spray gun significantly saves the consumption of lime mortar. Electric or pneumatic spray guns are used for work; sometimes garden mechanical sprayers or even vacuum cleaners are used.
Lime is a fairly caustic solution and you should not neglect protective equipment during whitewashing work. Do-it-yourself whitewashing is not so much difficult as it is dirty work. Before work in the room, the floors and furniture are covered with film.
Lime consumption during whitewashing
- The amount of lime consumed depends on the method of application, the porosity of the surface and the consistency of the lime mortar. When whitewashing walls with a brush, the consumption increases. For brick walls or walls made of porous materials, more lime will be required. On average, half a liter of whitewash of medium consistency is used per 1 m2. Quicklime, fluff in powder form and lime paste are available for sale.
- Fluff lime is diluted in a ratio of 1:3. If you dilute a pack of 2 kg of slaked lime fluff powder in 6 liters of water, then the resulting ready-made whitewash solution will be enough for 12 -14 m2 of wall. Lime powder is poured with water and stirred. The time for complete soaking of dry lime powder is from 0.5 to 2 hours. The mixture is stirred from time to time until a homogeneous mass is formed. The remaining lumps of lime are kneaded and the solution is filtered through a fine sieve or gauze filter.
- Lime paste - diluted with water 1:3 and after thorough stirring, ready for use. As a result of stirring, a solution is obtained that is comparable in thickness to the consistency of liquid kefir.
- It is important to achieve the required thickness of the solution. Liquid lime mortar gives a pale saturation to the surface, while too thick mortar may begin to bubble and fall off when dry.
A lime solution for whitewashing walls in a closed container and at above-zero temperatures has an unlimited shelf life. Quicklime looks like small lumps and can also be kept dry for a long time.
How to slak lime for whitewashing walls
- Prepare a metal container for slaking lime. During the slaking process, lime releases heat, boils and splashes. Therefore, take care of protective equipment. Rubber gloves and goggles won't hurt. Drops of lime brine that get on the skin can cause chemical burns.
- Break up large pieces of quicklime, place them in a metal container and fill with three parts water. After contact with water, the extinguishing process begins. For the first 10-20 minutes, the solution behaves aggressively - a boiling effect is created with the formation of steam. During this period, the container can be covered with a lid or moved away.
- Stir the lime mixture periodically and leave it for 6 hours to liquefy and settle. After settling, undissolved elements, small stones and particles of debris are removed by filtering through a fine sieve.
- Lime milk is almost ready for use. To impart better qualities, experienced specialists add salt and drying oil to lime brine. For 10 liters, a bucket of mash 30 g. drying oil and 100 gr. salt. Sometimes they add a little blue. Salt and blue give the solution whiteness, and drying oil strengthens the adhesive properties. As a result, whitewashed walls do not stain clothes and have a fresh white color.
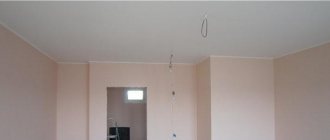
Preparing the wall surface for whitewashing
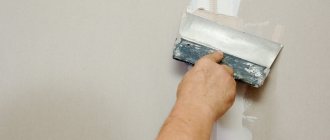
- Before whitewashing with lime, the walls are cleaned with a dry, stiff brush to remove dust, dirt and loose particles of old whitewash. Large cracks or damaged areas of plaster are puttied and leveled. The fine mesh cracks will be closed during whitewashing with the solution and will not be visible after drying.
- Yellow stains from water drips are rubbed off with a damp sponge and white. Copper sulfate solution is good for removing stains of fungus or mold. The surface of the walls must be absorbent and treatment with soil mixtures that create a protective film is not recommended.
- It is better to start whitewashing walls in cloudy weather. This way it is better to visually determine the correctness of the strokes when whitewashing by hand with a brush. In addition, lime does not like to dry quickly in direct sunlight.
Removing stains from walls
Removing whitewash from the ceiling.
Often, traces of various origins remain on cleaned surfaces. They get rid of them. Otherwise, after a while they will make themselves felt on the newly whitewashed walls. If traces of rust are found, they must be washed using water. Treat with copper sulfate diluted in water (take 50 g of sulfate for 1 liter of boiling water). The mixture is applied with a brush.
If the rusty stain is of impressive size, prepare a primer based on copper sulfate. Consumption of vitriol is 100-150 g per bucket of water (10 l), 250 g of laundry soap, animal glue 200 g, drying oil 30 g, sifted chalk 2-3 kg. Vitriol is diluted in a liter of water, grated soap and glue are dissolved in another container and drying oil is added. In the third bowl, chalk is combined with water. Finally, all the mixtures are mixed and the output is a primer.
Remove greasy marks with a solution of soda ash. In a liter of water (hot) dilute 3 tbsp. l. soda Soak a white, clean rag in the hot solution and apply it to the greasy stain. Repeat the procedure until the mark is removed. For 1 sq. m usually 1 liter of prepared lye is sufficient. Wipe the cleaned area well with a damp cloth.
To remove soot from walls, use a 3% solution of hydrochloric acid. If mold is detected, you can use bleach or copper sulfate solution. Any of the ingredients is diluted in water.
Procedure for whitewashing walls with lime
In interior spaces, floors and furniture are covered with film. Wear a work suit, hat, rubber gloves, safety glasses and a respirator.
- For a spray gun, the lime solution is carefully filtered. Spraying begins in a circular motion from the top corner, holding the spray nozzle at 90° to the wall at a distance of 15 - 20 cm. It is necessary to select the optimal mode so that drips do not appear. To apply the second layer of lime whitewash, just let the first layer dry a little.
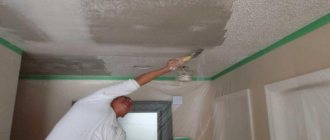
- When whitewashing by hand, the brush is pre-soaked in hot water for half an hour. Natural fibers soften, and the lime mixture adheres better and more evenly to the surface of the walls. It is correct to start whitening from the top corner and from the window. Any smudges that arise are wiped off with a brush on dry areas of the wall. Light from the window allows you to determine the direction of movement of the brush for an even whitewash without streaks.
Work order
If the surface was leveled and well washed before finishing work, it will be enough to apply whitewash only in two layers. The ceiling must be mentally divided into small sections. Applying whitewash should start from the corner of the room; it will be more convenient to move from the window to the door. Before applying each subsequent layer of material, you need to wait until the previous layer dries.
To whiten the joints of the ceiling and walls, it is best to use a paint brush. It is more convenient to cover the rest of the surface with whitewash using a roller. There is no need to dip the roller too much into the paint ditch, as excess mixture on the tool can lead to the formation of smudges and streaks. The solution is applied to the ceiling in neat parallel strokes.
One layer is not enough to create a high-quality coating. The first layer may show through the shade of the surface, and may also have streaks from the roller. The finishing layer is applied perpendicular to the previous one. Do not forget to stir the solution regularly, as particles of chalk or lime may settle to the bottom of the container.
Water-based paint is easier to apply and goes on more evenly. Water-based emulsion can also be used to apply whitewash to an old layer without first cleaning the surface.
Lime consumption during whitewashing
Where is lime whitening used?
Lime has excellent antiseptic properties, and it is also inexpensive. Lime whitewash, due to the fact that it is a good antiseptic, is recommended for medical institutions, including schools and kindergartens.
You can whitewash a basement or garage with lime - the white ceiling and walls will make it lighter, and it’s also not expensive. Lime whitewash also creates a durable film, so it will not remain on clothes when it comes into contact with the wall.
Lime whitewash is used for finishing wet areas due to its moisture resistance.
Whitewashing with slaked lime helps disinfect the surface; as a result, it is used for whitewashing cowsheds, chicken coops, cellars, and other livestock premises.
Lime whitewash is also used to treat tree bark.
How to whiten correctly?
1. Find a master, but he is unlikely to work for low pay. If you want to save money, you should whiten it yourself.
2. Do-it-yourself whitewashing is not a very difficult job, but it is dirty and unpleasant. Before starting work, you should cover the furniture and floors with film, or completely vacate the room. You should also prepare protective clothing for yourself.
Whitewashing the walls
Lime consumption
The consumption of whitewash will, first of all, depend on the surface being treated and the method of its application. If you apply whitewash with a brush, the consumption will increase. Smooth walls will require less whitewashing than brick walls. Approximate consumption for smooth walls per 1 m² is approximately 0.5 liters of finished whitewash.
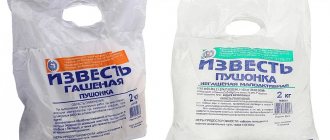
Quicklime and slaked lime are available for sale. Slaked is often sold in the form of powder - lime paste and fluff lime.
Slaked lime
1. Fluff lime is diluted in the ratio of 1 kg of this powder per 3 liters of water. One package weighing 2 kg should yield approximately 6 liters of whitewash. This whitewash should be enough for 12 m² of surface, but only if the whitewash is not applied to the brickwork.
2. Ready lime dough should be diluted as follows: for 1 kg of dough, about 3 liters of water. Considering that with one liter of whitewash you can whitewash about two squares of walls, it is quite easy to calculate how much lime paste will be needed.
Lime consumption during whitewashing
Despite the abundance and excellent quality of modern finishing materials, lime continues to be actively used for whitewashing stoves, ceilings and walls, and is added to the solution. For example, renovating a house for elderly parents who want only one option - lime whitewash. Or renovating the classroom where your children study. Ceilings and walls are whitened with lime to strengthen the plaster, as well as to disinfect premises such as a chicken coop, basement, barn. Outbuildings are whitewashed both outside and inside. Therefore, it is important to know what lime consumption will occur during whitewashing.
Adviсe
Before purchasing material for whitening the ceiling, you need to calculate the approximate amount of solution that will be required for finishing. To do this, you need to take into account the area of the surface being treated and the consumption of one or another composition per square meter. It is advisable to buy material with a reserve.
When purchasing a mixture, pay attention not only to the manufacturer and characteristics of the product, but also to its expiration date. Expired material loses its performance qualities and is not suitable for creating a reliable coating.
Whitewashing: selection and application
One of the most inexpensive and easiest to use materials for finishing the ceiling is whitewash. Whitewashing the surface will not be particularly difficult, and you can cope with this task yourself, without involving professionals. In order to obtain a high-quality coating as a result of your work, you need to know some of the subtleties of working with such material.
Features and types
Whitewash is a solution of a certain substance that is used to whiten the surface. Chalk or lime is mainly used as the basis for such a solution. Most often, this material is used in repair work for finishing the ceiling. There is also a type of medicinal whitewash for garden plants. The term “whitewashing” also refers to the process of finishing work itself.
As noted earlier, lime, chalk, and water-based paint are used to whiten the ceiling. Each material has its own advantages and disadvantages, as well as differences in finishing work.
Whitening the ceiling with a chalk-based solution is one of the cheapest ways to finish ceilings, since the price of chalk is quite low. However, a low price does not mean poor quality of the material. The chalk mixture is easy to apply and adheres well to the surface. In addition, the mixture has excellent covering ability.
Chalk gets quite dirty, which is a disadvantage of this material. This coating has one more disadvantage - the material may turn yellow. To prevent the appearance of a yellowish tint, when making the solution, you need to add a little blue paint to tint fabrics.
Lime is produced by burning carbonate rocks. The material has bactericidal properties. Lime mortar covers small cracks on the surface well. This mixture, like the chalk mixture, has a low price.
Lime mortar has a strong unpleasant odor, which is a disadvantage of this composition. Finishing work must be carried out with gloves, since lime can corrode it upon contact with skin.
Some recommendations
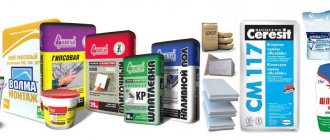
To improve the performance characteristics of the produced whitening solution, it is necessary to add some additional components to the mixture: wallpaper glue or laundry soap. Instead of wallpaper glue or PVA, you can add a carpenter's adhesive mixture to the composition, which you can make yourself at home. This material is added to the solution in order to improve the quality of the coating and increase its service life.
If lime whitewash will be used to finish the facade, then drying oil must be added to the solution. Drying oil will improve the quality of the coating, making it more reliable and resistant to moisture.
Whitewashed walls are susceptible to various stains. To prevent the coating from becoming so easily soiled, you need to add regular table salt to the whitewash solution. When introducing additional components into the mixture, the correct proportions must be observed:
- drying oil is added in the amount of one hundred milliliters per bucket of whitewash solution;
- to get a perfectly white lime coating, you need to take one kilogram of salt per ten liters of solution.
How to whitewash the ceiling and walls correctly?
Among modern methods and possibilities for decorating ceilings and walls, whitewashing is becoming just as relevant today. Whitewashed ceilings are not only simple, but also inexpensive. In addition, sometimes it is possible to re-whitewash the old layer and refresh the appearance of the room. But this can be done if the first layer was applied correctly.
What it is?
There are several methods for preparing whitewash. The most popular is chalk; it is a simple and affordable composition for whitening indoor surfaces. The second most popular material is lime, this is explained by the fact that walls and ceilings treated with it can resist damage from fungus and mold. Another equally popular material is a composition called fluff. This is a white powder that has undergone a quenching stage after liquid and fixatives have been added to it.
Modern production produces lime:
- slaked, which is supplied to points of sale under the guise of paste or powder,
- quicklime, sold as granules or large lumps.
Before starting any repairs, you need to know what technical characteristics are inherent in whitewash and what its application is. To begin with, we note that dry whitewash mixture is used almost everywhere. Its two-component emulsion is suitable for apartments, for manual processing of walls in the bathroom, and even for decorating the exterior of a house.
In order to whitewash walls and ceilings, only slaked lime is used, but first you need to prepare it.
To do this you will need:
- lime and water in a ratio of 1: 1,
- metal container, it must be clean, without damage or rust,
- lid,
- a wooden stick or spatula to mix the solution.
After the lime is mixed with water, the boiling process begins, the solution heats up to 130 degrees. The consistency begins to bubble and splash, so it is better to cover it with a lid so that the composition does not get on the skin.
It is prohibited to use plastic containers as containers, as they may begin to melt under the influence of temperature, and in addition, mixing the composition will be extremely inconvenient.
After the composition is covered with a lid, the container should be transferred to a cool place for 3 weeks. After the specified period, the mixture is taken out and mixed thoroughly; this must be done until all the granules have dissolved and only a white veil remains. If necessary, water can be added to the prepared solution to obtain a homogeneous but opaque composition.
As a result, if you use 1 kg of quicklime, you should get approximately 10 liters of solution. Most often, during the slaking process, all granules are dissolved; in order to avoid further incidents in the work, the solution must be mixed with special care, and before working with whitewashing, it is advisable to strain the consistency through a special sieve.
Peculiarities
Today, in order to use plaster, it is enough to dilute it. In addition to determining the volume of material per 1 m2, you also need to know the shelf life of the composition, as well as how it needs to be diluted, and whether the old layer needs to be washed off. If we talk about the decorative side, then even a combination of colors can be used here. Colored whitewash is no longer uncommon. Thus, the KSOM plant produces not only material with chalk or an adhesive base; for them, the norm is the production of a wide variety of compositions.
Whitewashing is designed to give the walls and ceiling a beautiful appearance. It makes it possible to refresh the interior of the room. The peculiarity of using this material is that the working surface must be properly prepared.
How to whitewash the ceiling and walls correctly?
Whitewash, what is it? How to whitewash a ceiling with lime? We calculate the consumption of lime per 1 m2. What is the difference between adhesive and lime composition?
Filling minor flaws and priming the surface
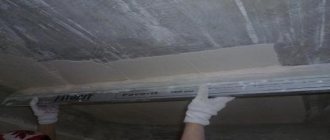
Cracks in the walls will require repair. Remove any fragile particles to prevent them from falling off later. Prime the cracks and begin to putty them. For putty you will need:
30-50 grams of glue are diluted in a liter of water. Dry plaster and chalk are added to this mixture. To properly prepare putty, the ingredient consumption is: 1 share of gypsum, 2 shares of chalk and the same amount of diluted glue. Having combined all the ingredients, the mixture is thoroughly mixed until a dough-like mass is obtained. Using prepared putty, use a spatula to seal cracks and cracks.
Having got rid of all minor defects, they begin to prime the working base for chalk whitewash. The primer mixture is prepared using:
- laundry soap (40%) 200 g;
- drying oils 50-100 g;
- slaked lime 3 kg.
The soap is grated and diluted in hot water (3 l). Add drying oil there. In a separate container, dilute lime in water (4 l). Mix the resulting mixtures. Finally, dilute everything with water to 10 liters. Prime the walls with the prepared solution using a roller, brush or spray.
Accurate chalk consumption during whitewashing
Whitewashing will help tidy up your living space at minimal cost. It is used to whiten the surface of the ceiling and walls. The coloring mixture is prepared on the basis of chalk or lime. When preparing a new solution, use the same basic material as before.
Scheme for preparing the ceiling for painting.
How to remove whitewash
All finishing activities are accompanied by preparing the surface for painting. First you need to free the surface of the walls from old whitewash. For this you will need:
- water container,
- foam sponge or rag,
- scraper or spatula,
- ladder.
Clear the room of furniture in advance. If some items cannot be taken out, you need to protect them with a special film. It will protect them from contamination. To free the walls from the old coating, you need to start from the top, moving down.
Tools and consumption
There are several ways to whitewash the ceiling in an apartment. The difference between whitening methods lies primarily in the tools used. To carry out finishing work, you may need the following equipment:
- paint brush;
- roller;
- manual spray gun KRDP-3;
- container for preparing the solution;
- construction mixer for mixing the mixture;
- ladder;
- surface cleaning brush;
- bucket of soapy water:
- masking tape and polyethylene;
- plastic cuvette;
- metal spatula;
- sandpaper.
To apply the mixture to the ceiling, a roller or paint brush is usually used. To prevent the new brush from falling off during bleaching, it must be soaked in hot water for a while. Initially, it is better to choose a tool with natural hard bristles.
Whitening using a spray gun is a very labor-intensive process. It is more convenient to use such a device for whitewashing walls rather than ceilings. Before working with such a tool, the prepared solution of chalk or slaked lime must be passed through gauze.
When preparing the mixture, it should be remembered that per square meter of surface the rate of the finished solution is approximately 0.5 liters. However, the consumption of chalk per 1 m2 exceeds the consumption of lime per 1 m2. To make a solution, it is customary to take the number of components based on the consumption per ten square meters.