A wonderful thing is plasterboard, convenient, technologically advanced, and now indispensable when decorating premises. But for now, many people attach gypsum boards the old fashioned way - to the profile, although this is not the only way to fix it in the right place. We are talking about gluing sheets. The quality of fastening may be in no way inferior to that made using a metal frame, but for this you need to follow the technology and choose the right adhesive for drywall.
Advantages of the glue method:
- ease of installation;
- gaining time;
- saving money, which costs the purchase and installation of the frame;
- increase in space - lathing would take 5-6 cm of space from each wall.
When are gypsum board adhesives used?
Cases when it is better to attach plasterboard sheets to surfaces using the adhesive method:
- When leveling main walls with differences, blockages and other irregularities up to 50 mm. However, with large potholes, the cost of too much glue can exceed the cost of a metal frame and make the idea uneconomical.
- When leveling the ceiling. But in this case, while the glue is setting, the gypsum board must be securely fixed so that it does not collapse under its own weight. Dowel-screws will solve the problem.
- When designing door and window slopes.
Creating a door slope from gypsum plasterboard
Forming a slope by gluing drywall
Glue can be used when fixing the second layer of drywall with a 2-layer sheathing of a frame or sheathing, but this is rarely practiced: using self-tapping screws in this case is faster and cheaper.
Drywall adhesive: which one to choose?
The list of types of adhesives recommended for attaching drywall is quite extensive:
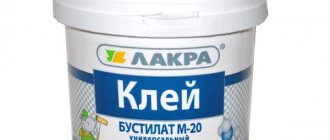
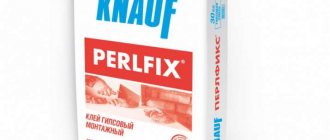
- Specialized glue (“Perlfix” from the German one, “Ceresit”, Russian analogues “Volma” and “Montazh”).
- Plaster or putty based on gypsum. In terms of price, quality of adhesion to the surface being glued, and the degree of shrinkage during setting, there is practically no significant difference with specialized adhesives for working with plasterboard.
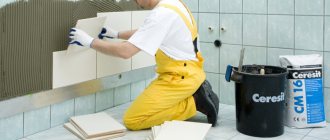
- Acrylic putty. Used when subsequent tiling is planned. The composition protects walls from mold, the harmful effects of fungi and high humidity. With it, drywall is attached to a base made of wood, shell rock, stone and foam blocks.
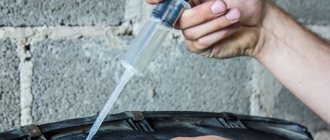
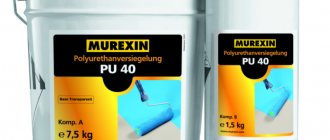
- Polyurethane assembly adhesive in an aerosol can. An ideal material for installing gypsum boards and gluing seams on curved walls. With its help you can level the ceiling and attach ceramic tiles. To work with it, you need a special gun that ensures economical consumption of the solution.
- Polyurethane foam with a low coefficient of expansion replaces glue.
- Tile adhesive. Its mobility and fine-grained filler make work convenient and fast.
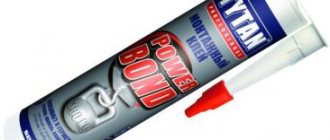
- Sealant. Any type of sealant replaces glue intended for gypsum plasterboards; in addition, it allows you to process joints, corners, and close cracks, making them impervious to moisture.
USEFUL INFORMATION: GKL "Gyproc": types and characteristics of material
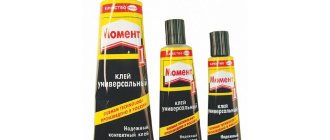
- Liquid Nails. A strong adhesive that is safe for health, but requires time to dry and is designed for a load of up to 15 kg. It is quite suitable for gluing not the thickest drywall.
Note! The mixture for attaching gypsum boards from Knauf requires professional skills; work must be carried out without delays, since the glue hardens quickly.
Glue consumption and storage conditions
Adhesive consumption depends on the composition and evenness of the wall.
Material consumption and storage rules depend on the nature of the adhesive composition and are indicated on the packaging. In fact, the actual figures are somewhat different. Perlfix from Knauf hardens within 30 minutes so that it becomes impossible to use. Therefore, all preliminary preparations - cutting, measuring, marking - must be completed in advance.
The glue sets quickly. However, complete drying occurs within 5-7 days . Therefore, it is advisable to postpone staining, otherwise the sheets may move during work.
Glue consumption is 5 kg per 1 m². In reality, consumption depends entirely on the installation method. When fastening using method 2, the composition will be used up much faster. It is almost impossible to calculate the actual consumption. Therefore, they usually buy several packages, and then calculate the required quantity based on the results of pasting 1 wall.
How to glue drywall to brick, gas and foam concrete
For uneven surfaces with wide joints, such as brick, foam and aerated concrete, it is convenient to glue plasterboard sheets with gypsum glue or any other gypsum mixture. In addition to the high-quality result, the advantage is cost-effectiveness: usually 5 kg of Perlfix is consumed per 1 m², the price of which is 300 rubles. for a 30 kg bag.
Inexpensive polyurethane foam is comparable in cost to gypsum glue. A 750 mm cylinder for spot application is enough for 8–10 m², the cost per square is 30–40 rubles. However, here, if there is a large gap between the gypsum board and the wall, solving the problem of foam expansion, each sheet will have to be additionally attached with dowel screws.
Preparing the base
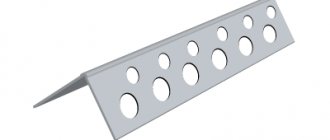
Before gluing the drywall directly, the surface is primed and grooves are made for electrical wiring. When masonry, serious attention is paid to eliminating inherent cracks and irregularities. For this purpose, leveling putty mixtures are used. In some cases, to eliminate defects, you can glue strips of plasterboard and mounting tape.
Foam and gas blocks usually do not create similar problems, but damage can occur due to careless transportation and unloading. They are eliminated with a gypsum mixture.
What adhesive compositions are required for concrete floors
Typically, monolithic walls do not have obvious irregularities; gluing gypsum plasterboard onto them is hassle-free and quick. For this purpose you can choose:
- gypsum adhesive for plasterboard sheets;
- plaster putty;
- acrylic putties;
- cement adhesive for gluing tiles;
- polyurethane glue;
- polyurethane foam.
Each product with a minimum adhesive joint will ensure a strong connection between drywall and concrete.
“Betonokontakt”, a primer that contains acrylic polymers, cement, and quartz filler, has impeccable technical characteristics. Its feature is special additives and additives that guarantee reliable contact with the most difficult and dusty surface, which is usually the case with concrete.
When the base is polystyrene foam, polystyrene foam
Polystyrene foam and expanded polystyrene protect the home from the cold, but to prevent destruction and prepare the walls for finishing they require covering them with plasterboard. As a rule, covering a room with foam plastic steals 5 or even 10% of the usable area. If, in addition, you place drywall on a metal profile, the loss of space will be even greater, so gypsum board stickers are the best option here. The following will successfully complete the task:
- adhesive foam for drywall;
- acrylic putty.
USEFUL INFORMATION: Drywall cutter: types of knives and their features
GKL and gypsum fiber
Sometimes it becomes necessary to glue plasterboard onto a similar plasterboard or gypsum fiber sheet. There are no irregularities on such bases, so any adhesives that provide a minimum seam size are suitable for the job. It can be:
- acrylic putty;
- liquid Nails;
- silicone sealant.
Suitable materials are foam, gypsum and cement adhesives, but the thickness of the joints when using them will be greater and will cause an irrational reduction in the space of the room.
Summarize
So, in this review, we tried to figure out how to glue drywall to drywall, how to properly prepare the surface for work, how to place sheets of material on the base so that the finished surface is smooth and durable.
The technique described in the article can hardly be called very popular. However, sometimes it happens that you have to do this kind of work. If you do everything carefully and follow the recommendations given in this article, then everything will turn out as it should, and you can rest assured about the quality.
Option No. 1 (for smooth walls)
It is used on walls without differences (usually concrete or plastered surfaces).
- The walls are grooved, the cable is secured in the resulting grooves, and holes are made for sockets and switches.
- A primer is applied to the dust-free surface. If the wall is painted and the adhesive composition does not stick, a composition with quartz filler solves the problem.
- Holes for electrical equipment are cut out in the plasterboard.
The adhesive composition needs to be prepared for 1-2 sheets, especially at first, when there is no necessary skill.
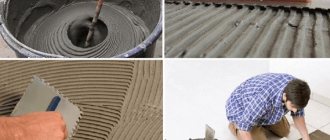
- Gypsum-based glue is applied to the plasterboard with a notched trowel, and the excess is removed. If a different composition is used, for example polyurethane glue, it can be applied in stripes or as shown in the photo.
- The sheet is placed face down next to the installation site.
- Before sticking, carefully lift it and guide the wires into the prepared holes.
- The sheet is applied effortlessly to the wall, using the rule, they find places where the material should be attached more tightly to the surface, this is achieved by tapping the sheet with your hand or applying a board and lightly hitting it with a mallet. You should not knock on the level - this is a precision tool that will fail before the floors become level.
Preparing for work
So, let’s assume that one drywall material is already glued to the wall, and you glued it yourself - otherwise you would not have the question of how to fix the second layer of material. You could simply screw it to the bottom sheet with self-tapping screws.
First, you need to make sure that the base is firmly attached to the wall - if the bottom layer of drywall is “walking” somewhere, it is better not to attach the second layer to it, since the material most likely will not stick.
If the base is held firmly, you can prepare:
- First, thoroughly clean the surface of dirt and dust. This is necessary in order to increase the reliability of bonding surfaces. Moreover, this operation will not take much time - just sweep the wall with a broom or vacuum it.
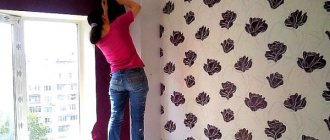
- Next, you can start priming the plasterboard joints; to do this, carefully treat all the joints with a composition that will be used in the future. It is important to be careful that all areas are coated with the primer solution, this will increase adhesion and make the joints stronger.
- Carry out this operation carefully so as not to stain other finishing materials, floors, doors or windows, for example, very often many people wonder how to wash the primer from glass.
- After cleaning the surface from dust and priming, you can process the seams - first they are sealed with a sickle mesh, then you need to prepare the Knauf Fugen composition according to the instructions on the package. It is impossible to mix the composition with a reserve, as it dries out within half an hour. The finished glue is applied to the seams and smoothed with a spatula. The result should be a continuous, flat surface.
- After the glue has completely dried (usually this takes no more than two hours), you can begin the last stage of preparatory work - apply a primer to the entire surface of the first layer of drywall. The work is simple - the primer is applied in an even layer over the entire surface using a roller or brush.
After this, you need to wait about a day for the primer to absorb and dry (from our review you can find out how long it takes for the primer to dry on the walls), after which you can begin the main work.
Option No. 2 (irregularities up to 2 cm)
When the difference in wall level approaches 2 cm, the drywall should be glued in a different way, although the preparation of the surface and plasterboard, primer, and laying of the electrical cable do not differ from the previous option.
Instructions for gluing gypsum boards to moderately uneven walls are as follows:
- Prepare the adhesive mixture in larger quantities than in the first case, apply it to the drywall not with a notched trowel, but in separate dots or even piles, as in the next photo - this way the unevenness will be leveled out and, as a result, a strong fixation of the plasterboard on the wall will be ensured.
USEFUL INFORMATION: Step-by-step instructions for drywall work: making your own ceiling and walls
- The sheet is placed on pads at the fastening point - the beginning, as a rule, is the most protruding section of the wall surface.
Glue dots are made along the perimeter of the sheet at a distance of 25 cm from each other, inside the perimeter they are placed every 40 cm. There should not be large gaps so that the reliability of the fastening does not suffer. For the same reason, you need to ensure that the height of the points is greater than the differences in wall level.
- Gluing begins by bringing the electrical wires out and lightly pressing the drywall, which should simply cling to the wall. It is better to work together, so that one master constantly holds and, if necessary, helps press the sheet.
- The final fastening is preceded by a thorough check of the plane in all directions to determine in which places to press the material. When flaws are identified, individual sections are tamped down, and the process continues until complete satisfaction with the result.
A special option when drywall is attached to a surface made of gas or foam concrete. In this case, for reliable fixation, the adhesive composition is applied not to the sheet, but to the wall, although this method requires care - when installing the gypsum board, it can be easily warped.
Assembly adhesive
This composition has moisture-resistant properties, and therefore can be installed in places where the humidity level deviates from the norm. This mixture should be applied to the walls with a spatula. Movements should be circular, and the intervals between strokes should be within 15-30 cm.
During use, the instructions for drywall adhesive must be strictly followed. This is due to the fact that the composition dries quickly, and the placement of the sheet on the wall can only be adjusted within 10 minutes. after fastening. It is also important to regulate the uniformity of sheet installation using the rule.
Option No. 3 (differences more than 2 cm)
Technology for surfaces with large unevenness:
- Remove weak areas of plaster from the ceiling.
- The walls are carefully primed.
- Beacons are prepared: 100 mm wide strips are cut out of plasterboard, necessary to create a level base. These elements are placed along the perimeter of the wall and vertically every 40–60 cm. They are fixed using glue, the layer of which is adjusted taking into account level differences.
- The main sheets of drywall are glued to the beacons after the glue on the strips has completely hardened. They are attached using the composition that was used to create lighthouses. The adhesive mass is applied in lines along the width of the guides, after which the sheet is lifted and pressed against the beacons. If they are aligned correctly, installation will not be difficult.
- The joints of the canvases are treated with glue or special putty.
- After drying, prime again, allow time to dry, and finally putty the surface of the drywall.
The gypsum board sticker, like any other task, is feasible for those who love and know how to work. Such people will benefit from today's publication. For those who are determined to do all the work from start to finish with their own hands, a video with a visual description of the process will help. Ask questions in the comments to the article. Good luck in your creative endeavors!
Work technology
If you are interested in how to properly glue drywall, we suggest using our instructions. At the first stage, the walls are prepared. To do this, they are cleaned by removing old plaster, putty and paint. Then they are carefully primed.
To prepare the glue, you need to prepare a wide container and pour water at room temperature into it. The dry mixture is poured into a container with water and stirred with a mixer. The formation of a homogeneous mass is necessary. When the mixture is ready, it must be applied to a sheet of drywall in the form of cakes. The distance between them is 250 mm.
In some cases, the glue is applied in wide strips. After this, the drywall is applied to the wall and leveled. When the desired position is reached, the sheet should be pressed down. An important condition for the quality of work is the choice of adhesive composition from well-known brands.
- Technical gases. What are they?
Roofing. What are they?
- Rolled sheet metal. What it is?