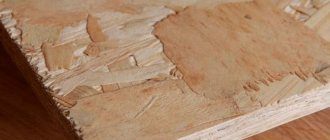
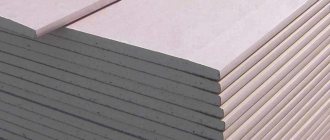
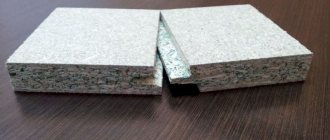
Cement-bonded particle boards are widely used in the design of private houses and apartments. They are especially in demand if you urgently need to level the surface and reduce the time for repairs. The material is environmentally friendly, has an affordable price, and the floor made of fiberboard over wooden joists is reliable. The main thing is to study the installation rules, have time and patience.
Using DSP
Characteristics of cement bonded particle boards
DSP has a multilayer structure, as it is made by pressing from small shavings, wood fibers, cement, and plasticizers. This is a universal material that is used for various construction and repair work in any climate for any finish. It is not completely perfect, but it has a lot of advantages:
- High resistance to mechanical stress. Its mechanical strength is 3 times higher than the strength of chipboard.
- Immunity to the appearance of mold and fungi due to the alkaline environment.
- Ability to withstand humidity and critical temperatures.
- Fire safety due to the presence of additives in the composition that reduce the risk of fire.
- Long service life.
- Convenient installation, ease of drilling, fastening, cutting.
- There is no need for additional leveling - the surface is flat and smooth.
- Environmentally friendly - it contains natural wood and cement.
- Good noise insulation (up to 30dB).
- Low cost due to simple manufacturing technology; the formation of voids and internal defects is excluded during production.
There are only two disadvantages: when cutting the material, cement dust is released, and during installation, the large weight of the slab causes inconvenience.
Considering the characteristics of the material and the manufacturing method, it becomes clear why DSP laid on a wooden floor is popular.
Is it possible to lay ceramic tiles on floors using CBPB, technology and stages of work
Today it offers a wide selection of new construction and finishing materials, but tiles have still not lost their relevance and are just as in demand as before. And all because the material has high performance characteristics and a lot of advantages that other materials cannot boast of.
Among the advantages of ceramic tiles are their service life, durability, attractive appearance, environmental friendliness and high moisture resistance, which allows them to be laid on any base, including wood.
But many argue that it is impossible to lay tiles on a wooden floor, because natural wood is flexible, which will not ensure reliable adhesion of the tiles to the wood. However, this is not so; a tiled floor will serve faithfully for years if, when laying on cement-bonded particle boards, you follow the installation technology, properly prepare the base and use the necessary glue. In this article we will talk about how to lay tiles on a concrete floor. First, let’s find out what the pros and cons of DSPs are.
Characteristic features of using DSP
The material has a high degree of strength due to its structure, which includes 4 layers. The outer layer contains finely dispersed shavings - it gives hardness. There is a long sliver inside, which gives the slab bending strength.
The use of DSP in various areas of construction and repairs is justified by absolute safety for people and the environment. As a result of research, it was revealed that the slab, even after prolonged contact with the aquatic environment, does not change its original qualities.
Using a floor slab
- Due to its characteristics, DSP replaces concrete screed because it is easier to install.
- Due to its ability to withstand heavy loads, such a canvas will last for many years.
- The product is selected according to thickness, being sure to pay attention to the traffic flow of the room.
- DSP is used for finishing indoors and outdoors, but is especially popular for leveling floors. DSP is used in rooms with high humidity.
Attention! It is most in demand for floors under ceramic tiles, since this material requires a flat base.
- Floors made from CS slabs are used for arranging a three-dimensional floor, since in this case a reliable subfloor is required.
- Used for laying “warm floors”, which combine a flat surface and thermal insulation.
An excellent way to install DSP is on wooden floor joists. To preserve the positive qualities of the material, you must follow the installation rules.
Gvl is moisture resistant for floors. GVL for floors
GVL (gypsum fiber sheets) is a finishing material for floor leveling, made of gypsum reinforced with reinforcing additives and fluffed cellulose fibers.
It has gained particular popularity due to its excellent technical and operational characteristics.
Figure 1. Construction of a GVL base
Advantages of gypsum fiber sheets
Gypsum fiber sheets have many advantages, the main ones being environmental friendliness and fire safety. The material is able to regulate the microclimate in the room, absorbing excess water at high humidity and releasing it back at dry air.
Other benefits:
- high density and strength;
- ease of installation and speed of installation;
- light weight, does not require reinforcement of the base;
- good moisture resistance compared to fiberboard and gypsum board;
- installation eliminates wet and dirty processes;
- easy to cut with a hacksaw or electric jigsaw;
- does not bend under loads;
- increased sound insulation;
- frost resistance, allowing you to withstand up to sixteen cycles of freezing and thawing;
- low thermal conductivity;
- no waste or debris during installation.
GVL is perfect for installing a heated floor system.
Along with its advantages, GVL is sensitive to humidity, so special attention should be paid to waterproofing measures. This is a rather fragile material that requires care during transportation and installation.
This is a rather fragile material that requires care during transportation and installation.
Professionals prefer KNAUF products due to their high quality and affordable price.
TOP 3 best products according to customers
Gypsum fiber sheet Knauf/Knauf Supersheet FC moisture resistant 2500x1200x10 mm
462.00 rub.
Product code 27
Knauf Superlist FC is a high-quality, environmentally friendly, moisture-resistant plasterboard for dry p.....
Gypsum fiber sheet Knauf/Knauf Superlist FC moisture resistant 2500x1200x12.5 mm
515.00 rub.
Product code 31
Knauf Superlist FC is a high-quality, environmentally friendly, moisture-resistant plasterboard for dry p.....
Gypsum fiber sheet Knauf/Knauf Superfloor moisture resistant 1200x600x20 mm
RUB 304.00
Product code 7
Knauf Superfloor is a factory-ready product for element-by-element assembly in...
Types of GVL
Gypsum fiber sheets are produced in the usual form - GVL, and moisture-resistant - GVLV, impregnated with hydrophobic primers.
They can be distinguished by markings on the sheets.
Marking example: GVLV-B-FK-1500*500*15 means:
- GVLV - the symbol “B” indicates the moisture resistance of the sheet:
- "B" - manufacturing accuracy. Marking "A" means high accuracy of the sheet. The symbol “B” indicates that the sheet was made with large deviations.
- FC - folded edge. PC stands for straight edge. Sheets with a straight edge are used for leveling floors, while sheets with a folded edge are used for walls.
- 1500*500*15 - length, width and thickness of the sheet.
Conventional sheets are used in dry residential areas where there is no risk of leaks. Moisture-resistant sheets are used in damp and unheated rooms.
Standard sizes of gypsum plasterboard for flooring:
- length 1500 and 2500 millimeters;
- width 1200 and 1000 millimeters;
- thickness 10 and 12 millimeters.
Figure 2. Standard sizes of GVL.
Prefabricated floor elements are produced in standard sizes of 1500*500 millimeters. The thickness of gypsum plasterboard for prefabricated floors is 200 millimeters. The sheets have folds for fastening the elements together.
Figure 3. Prefabricated floor elements.
Manufacturers also produce other sizes of slabs according to consumer orders.
Preparation for floor covering with slabs
To lay the material on a wooden floor, you will need a subfloor (old wood), insulation, vapor barrier material, and DSP sheets. Before laying the CBPB, the base is equipped, the logs are laid, and to carry out the work it is necessary to prepare the following tools:
- hacksaw;
- nylon fishing line;
- pencil, felt-tip pen, ruler;
- nails, dowels, screws;
- drill;
- cipher machine.
You will need the following materials: timber, antiseptic, putty.
Base for joists
The base (soil, reinforced concrete) for laying the floor must be strong. In a private house on open ground, the surface is initially leveled, a sand and gravel cushion is laid with a layer of 20 cm, which is compacted well.
The supports for the logs are laid out on the ground in the form of brick columns, into which cement mortar is poured. The distance between the supports (0.5-1 m) depends on the timber used for the logs. To improve water and thermal insulation, lay a waterproofing material, for example, thick polyethylene film. It is laid with an overlap on the walls.
Concrete flooring is checked with a horizontal level. The floor is considered suitable if the deviation is no more than 3 cm, and differences are eliminated by adding spacers.
If there are serious unevennesses, then make a screed, otherwise the subfloor will be unstable and lead to deformations and damage to the decorative coating. Small cracks and holes are puttied and sealed with cement mortar.
Installation of logs under slabs
Attention! Before installing the lag, a gap is left so that there is room for expansion of the material.
- The timber is installed horizontally against opposite walls and leveled. The rest of the logs are placed on them in increments of 50 cm - this is an acceptable distance for installing particle board materials.
- The same step is used for fastening the ribs of the transverse sheathing. The materials are fixed with self-tapping screws and dowel nails. Pieces of plywood are placed between the concrete and the joist, which adds strength.
- Lay insulation material using suitable material: polystyrene foam, mineral wool.
Cement-bonded sheets are laid on the installed logs.
Preparation, cutting of CBPB
Before laying the sheets on the floor, sheets of cement-bonded particleboard material are pre-prepared:
- The DSP floor is laid on joists, distributing sheets 1-1.5 cm thick around the perimeter of the room.
Carrying out marking
- Where the slab does not fit completely, markings are applied to the material with a felt-tip pen at the cutting points.
- Sheets are cut using a grinder with a diamond blade.
- When cutting a slab into pieces with a hacksaw, a furrow is made using a hacksaw blade along the markings.
Attention! For cutting, use a hacksaw with a fine blade, which will reduce the amount of dust and make the edge smooth.
- The plate is positioned with the cut down, the knee rests against the larger part of the sheet, and the smaller part is slowly pulled towards itself - when pressed, part of the plate breaks off in the right place.
- The cut slabs are treated with a water-based primer on all sides.
- If there is a hole on the surface, for example a sewer hole, the following actions are carried out: apply grease to the edge of the hole, place a sheet of DSP and press. Using the resulting imprint, a hole is cut in the slab.
- After cutting the slabs and placing them on the floor plane without gaps, they are numbered so as not to make mistakes when laying them.
Pros and cons of the material
Compared to other materials using wood chips, cement-based particle board materials have a lot of advantages:
- DSP boards for flooring do not burn.
- They practically do not absorb moisture.
- Do not rot and are resistant to mold and mildew.
- Resistant to acids and alkalis.
- They are durable and do not require leveling.
- They are an insulating material, which makes it possible to install a warm electric floor on a DSP.
There are few disadvantages compared to the advantages, but they still exist. This is a lot of weight and cement dust, which is formed in large quantities during the processing process. Therefore, all work on preparing a DSP floor for laminate must be carried out wearing a respirator.
Cement particle boards: application in construction
DSP is a cement-bonded particle board, and the name fully reflects the composition of this material. DSPs are made from a mixture whose components are wood shavings and cement compounds.
What are DSP and OSB? What is the difference?
The building materials include:
- wood shavings with fractions of various sizes – 24%;
- water – 8.5%;
- special additives – 2.5%;
- Portland cement – 65%.
DSP boards for external use
The production process is quite simple - DSP is made as follows.
- Special aqueous solutions are loaded into special mixers, which include various salts, liquid glass and aluminum.
- Next, wood shavings with fractions of different sizes are gradually added to these solutions - mineralization of the raw material occurs.
- Cement is mixed into the resulting composition and a little more water is added.
- The mass is thoroughly mixed until smooth and then goes under a powerful press.
GOST 26816-86. Cement particle boards . Technical conditions. Downloadable file (click the link to open the PDF in a new window).
The result of this production chain is a finished cement bonded particle board, which is quite thin and has a smooth surface. A large amount of cement in the composition allows you to create a fairly durable material. By the way, the chips inside the slab are larger in size than outside, due to which the smoothness of the surface of the finished material is achieved. DSP does not need to be further leveled after installation, making the material excellent for creating a rough floor covering for laminate, tile and other types of finishing. Also, no voids are formed inside the DSP during production.
Production of cement particle boards
On a note! Wood shavings are also used as a raw material in the production of chipboard, fiberboard and OSB boards. The technologies for producing these materials are somewhat similar to the technology for producing CBPB boards.
Comparative table of performance characteristics of wood-based materials
DSPs are used in construction for many purposes
The DSP board is characterized by high environmental friendliness, as it is created from natural materials and practically does not contain additional chemical ingredients. That is why the stove is recommended for use both in residential premises and in production.
Cement particle board (CSP)
Using a cement bonded particle board is an opportunity to avoid the labor-intensive pouring of cement screed to create a base. The building material allows you to reduce labor costs and spend less money from the budget planned for leveling floors for laying the finishing coating.
Installation of a DSP board under ceramic tiles
How to prepare a slab surface for tiling
The surface of cement bonded particle boards is smooth, but there are imperfections, but the defects will remain under the tile adhesive. We are starting to install the tiles.
First treat the surface with a moisture-resistant compound.
In order for the tiles to adhere better to the cement-bonded particleboard, it is necessary to strengthen the adhesion of the materials; to do this, lay a plaster mesh over the cement-bonded particle boards and prime them. Use the primer that is designed for woodworking.
Glue is applied. It is important to prepare the glue correctly, otherwise the fixation of the tile will be poor and after a short time it will begin to slowly fall off and crack under the influence of gravity.
The slabs allow you to create a level base for installing floor coverings
Characteristics of CBPB boards
DSP is a completely new category of material, characterized by significant strength, long service life, and a certain level of moisture resistance. It also has good soundproofing and heat-saving properties. All these features have allowed CBPB boards to take a strong place in the construction industry - they are used for various purposes.
Of course, this material is far from ideal, but still, thanks to its properties and characteristics, it can be used both outside and inside the building. The DSP board does not lose its qualities in a wide variety of climatic conditions.
On a note! Compared to chipboard, which is common for many, a board based on cement and shavings is 3 times stronger and has high resistance to various physical influences and loads.
Table. Key parameters of the DSP.
| Length, m | Thickness, mm | Width, m | Area, sq. m. | Number of sheets in 1 cubic meter, pcs. |
| 2,7 | 8 | 1,25 | 3,375 | 37 |
| 2,7 | 10 | 1,25 | 3,375 | 29 |
| 2,7 | 12 | 1,25 | 3,375 | 24 |
| 2,7 | 16 | 1,25 | 3,375 | 18 |
| 2,7 | 20 | 1,25 | 3,375 | 14 |
| 2,7 | 24 | 1,25 | 3,375 | 12 |
| 2,7 | 36 | 1,25 | 3,375 | 8 |
| 3,2 | 8 | 1,25 | 4 | 31 |
| 3,2 | 10 | 1,25 | 4 | 25 |
| 3,2 | 12 | 1,25 | 4 | 20 |
| 3,2 | 16 | 1,25 | 4 | 15 |
| 3,2 | 20 | 1,25 | 4 | 12 |
| 3,2 | 24 | 1,25 | 4 | 10 |
| 3,2 | 36 | 1,25 | 4 | 7 |
The density of one cubic meta CBPB board is quite high - about 1300-1400 kg/m3. The moisture content of the material is 6-12%. By the way, the material is not 100% protected from the effects of water, but swelling upon contact with liquid over a full day should not exceed 2%.
Characteristics of cement bonded particle boards
The slab is rough to the touch, but smooth - often these indicators depend on the grinding method used. Sometimes the DSP does not need the latter - if the roughness level is no more than 80 microns. The plate is selected in accordance with the operating conditions, as well as the requirements for the final results. For example, smooth slabs are usually used indoors, but rougher slabs can be used outside.
On a note! Finishing of DSP boards is simple - any type of floor finishing can be laid on them, and paint, varnish, plaster, etc. can be easily applied to the surface.
Cement particle board - transportation
Properties of DSP
Cement particle board for flooring combines all the advantages of building materials such as OSB, chipboard, plasterboard and fiberboard, and in some respects it surpasses them:
- Thanks to its multilayer structure, DSP has high strength, similar to OSB. This figure is higher than that of GVL.
- Since the slab has a smooth and even surface, it does not require additional processing before installing the final finish. With this quality, cement products have much in common with chipboard, OSB and plasterboard (about
Advantages and disadvantages
What are the main advantages and disadvantages of slabs over other similar materials? Let's look at the answer to this question in more detail.
Pros and cons of CBPB boards
Advantages of DSP:
- environmental friendliness of the material, as it is made from natural ingredients. DSP does not contain asbestos and formaldehyde-containing substances;
- fungus and mold do not settle on the slabs
- the material is not hygroscopic - this is its main advantage over chipboard;
- DSP does not suffer from temperature changes and does not lose its performance qualities;
- 100% non-flammability of DSP boards allows them to be used in any room. The material can withstand fire for 50 minutes;
- reasonable price , allowing you to purchase material even if you have a small budget;
- significant strength due to multi-layer material. Excellent performance is observed under pressure both from the end of the plate and from any of the other sides;
- the slab does not require additional leveling of surfaces ;
- the material is not afraid of chemical influences;
- cement particle board perfectly resists rotting processes;
- relative impermeability to water - during the day, DSP is able to absorb a maximum of 16% of liquid;
- high noise insulation and heat insulation qualities;
- ease of installation.
Characteristics and features of the material
The dimensions of the CBPB can vary depending on the purpose; most often, standard 2.7x1.2m slabs are used, the thickness varies from 1cm to 4cm. The main properties of cement bonded particle boards are as follows:
- high density, almost complete absence of swelling from water; high degree of strength - the slabs have a hard surface, a homogeneous composition prevents the risk of delamination; resistance to significant temperature changes; fire resistance - the cement-based composition ensures fire safety; frost resistance - this coating is suitable for country houses that are closed for the winter and left without heating; the cement in the composition prevents rotting, the chipboards are not susceptible to mold, mildew, and do not attract insects and rodents; high levels of noise insulation; CSP boards retain heat well; not subject to chemical attack; versatility - suitable for indoor and outdoor use; environmental friendliness - a very small component of chemical elements in the composition makes it safe for human health and the environment; simple production ensures an affordable cost of the material; provide a wide range of options for further design of the room - chipboards are a universal substrate suitable for various types of floor coverings - linoleum, laminate, parquet, wooden and self-leveling floors.
DSP in insulation works
Most often, DSP is used in the field of insulation of buildings and structures. Usually the material is sheathed on the outside of the building. Fixation is done using self-tapping screws or nails.
But, since DSP is an environmentally friendly material, wall and floor cladding can also be done from inside the room. The sheathing process is similar to what is done outside: the material is attached to a wooden or metal sheathing using nails or self-tapping screws. Sometimes adhesive mastics can also be used. After installation of the slabs, finishing is carried out.
Sheathing frame structures using cement bonded particle boards is a reasonable solution
Adviсe
Cement particle boards are a practical, modern, cost-effective material that solves many problems. But it must be used correctly. Here are some tips to help you work with these slabs:
- When drilling holes, you need to make an indentation from the edge of 2-3 cm, no less, then the slab will not crack or crumble.
- If the plate is fixed to any surface other than wood, you should use only metal screws.
- When working with these boards you need to be very careful; the DSP material can be quite fragile.
- Before final finishing, you need to prime the slab.
- If you need to cut slabs into specific fragments, you must use a special diamond-coated cutting tool.
Taking into account all the above information, we can say that CBPBs have found their niche in the construction and finishing industry. They are practically indispensable when constructing foundations on sub-floors made of wood, ideal in rooms with constant humidity and sharp temperature fluctuations.
Due to the high strength of the slabs, in bathrooms with such flooring and finishing, you can easily install any type of bathtubs, dryers, large washing machines, and other household essentials. They can also be used where there is a possibility of subjecting the floor covering to significant mechanical loads. Another advantage of DSP is its good sound insulation qualities. The aesthetic qualities of the slabs are also excellent, while they are undemanding in maintenance and are very easy to wash and clean.
Cement particle boards are widely used as a substrate for various facing materials, for example, mosaics, tiles, and natural stone. They are also used in the installation of “warm floors”. The minimum thickness of the material with its high strength allows it to be used without losing the height of the room.
Application for floor
DSP is often used to create a subfloor. Most often, the material is laid with the expectation that in the future ceramic tiles will be glued to it - this is the most demanding coating in terms of the evenness of the base. DSPs are also suitable for pouring three-dimensional floors and for installing soft floor coverings.
Scheme for the implementation of water heated floors using DSP boards
DSP slabs can be mounted on logs, and also laid on a flat concrete or wooden base. The material lasts for many years and is able to withstand significant loads if installed correctly.
DSP slabs for flooring - photo
Floor installation using DSP
To level a concrete or wooden floor, cement sheets with a thickness of 10–15 millimeters are used. When the rough base is relatively flat, the products can be glued directly onto it without creating a sheathing of timber.
The technology for leveling the base using DSP is as follows:
- The plates are placed on the floor. They should be numbered, and a layout marking should be drawn on the base with chalk.
- The end products are cut to the required size. To cut them, use a hacksaw blade, and then a large amount of dust will not appear, and the edges will be smooth.
- Then the slabs are removed from the floor.
- An adhesive composition is applied to the surface of the rough base using a notched trowel.
- The first sheet is applied to the floor and pressed.
- The next plate is glued, maintaining a gap of 5 millimeters between adjacent products. It is necessary to compensate for the expansion of sheets when they are deformed.
- The gaps between the plates are eliminated with an adhesive composition.
- After it has set, begin laying the finishing coating.
- When laying DSP on a wooden floor, it should be prepared.
- Warped and rotten floorboards need to be replaced with new boards. Gaps are sealed using putty. Before gluing cement-bonded particle board products to a wooden flooring, a primer should be applied to its surface. In this way, the adhesion of the adhesive to the base is improved.
Choosing cement sheets for the floor
The choice of DSP boards is carried out in accordance with the conditions in which the material will be used, as well as the technology by which its installation will be carried out. For laying on logs, slabs with a thickness of 20-26 mm are used - they will perfectly cope with their function as a rough base. If installation is carried out directly on the ground, then 24-26 mm slabs are used. In general, almost any DSP board can be used to level floors.
Average market prices for material
On a note! DSP boards can be laid even in cold weather. It doesn’t matter if the air temperature outside the window drops below zero.
Requirements for CBPB slabs used for floor installation:
- humidity – from 6 to 12%;
- density – more than 1300 kg/m3;
- tensile strength – 0.4 MPa;
- surface roughness – 80 microns;
- moisture absorption level – 16%.
For the floor, DSP boards must be used that meet a number of requirements
Preparing for the installation of a DSP coating
Before starting work on arranging a rough surface made of CBPB, the base of the floor must be properly prepared. For example, when laying material on a wooden base, old or rotten boards must be dismantled and replaced with new ones. It is important to seal all the cracks with putty, and the wooden base is primed for better adhesion to the glue on which the slab covering will be mounted.
If installation will be carried out on a concrete base, then it should also be carefully inspected for damage and repaired if necessary. Also, if there are strong horizontal deviations, leveling is done with cement mixtures. When laying CBPB on the ground, it is necessary to first level the surface - this can be done by pouring a 20 cm thick sand-gravel mixture onto the ground and compacting it.
The process of building a gazebo with a DSP floor
The best option is to lay CBPB slabs on logs. In this case, if it is planned to install the foundation directly above the ground, supports for the logs are installed on the ground, and hydro- and thermal insulation is also laid. The distance between the supports can vary from 0.5 to 1 m - this indicator depends on the thickness of the timber used for the logs.
Materials and tools that need to be prepared for working with DSP:
- timber for logs (section 150x100 or 50x100 mm);
- DSP boards in the required quantity;
- antiseptic solution for timber;
- sawing tool (for example, a hacksaw);
- materials for waterproofing and insulation;
- tools for taking measurements (tape measure, pencil);
- fastening material;
- drill.
Fastening floor slabs using self-tapping screws
How to prepare glue
To lay tiles on DSP, it is better to use cement adhesive. Pour water into the container and add the dry mixture. The proportions are indicated on the packaging. To improve the adhesion of ceramic tiles to glue, add special plasticizers, their amount in the mixture is approximately 15%. Stir the mixture until smooth. It is better to use a construction mixer for mixing. Apply the prepared mixture to the surface of cement particle boards with a notched trowel.
The size of the teeth depends on the dimensions of the tile, for example: for ceramic tiles 30 by 30 cm, a notched trowel is suitable, with a tooth size from 8 millimeters to 1 centimeter. Since the glue dries in 15 minutes, it must be applied and leveled quickly. It will not be difficult to prepare tile adhesive yourself, because the proportions and components are specified in the instructions on the package with the mixture.
Preparation of tile adhesive
Arrangement of the floor using DSP
Let's consider the arrangement of a floor made of cement-bonded fiberboard on joists using the example of a balcony.
Step 1. A layer of insulation is laid under the logs. The logs are installed parallel to the walls at a distance of about 30-40 cm from each other.
The joists are installed on top of the insulation
Step 2. Cross bars are installed and the sheathing is created. The wooden blocks are connected to each other using metal corners and self-tapping screws.
Cross bars installed, sheathing ready
Step 3. The space between the joists is filled with insulating material.
Step 4. DSP boards of the required sizes are laid across the longitudinal joists. The width of the piece of material should be slightly less than the width of the balcony (by 5-10 mm).
Laying CBPB boards
Step 5. The plates are fastened with self-tapping screws to the joists. The gaps between the DSP boards are sealed with an adhesive composition.
Fixing slabs with self-tapping screws
Video - Laying tiles on DSP
DSP floors: laying nuances
In general, the installation of CBPB boards is carried out in exactly the same way as the installation of OSB boards. When carrying out work, it is important to follow several rules, and then the base of the floor will be made of the highest quality:
- wooden beams for logs must be treated with compounds that prevent rotting. Special compounds can be replaced with machine oil;
Antiseptics for wood impregnation
- When installing slabs on a concrete screed, beams of a smaller cross-section can be used for logs - up to 50x50 mm. This will save useful space;
- when installing logs, you should monitor their level - it must be strictly horizontal;
- before installation, the CBPB boards are laid out along the joists - this will allow you to determine which of them need trimming if necessary;
- the glue must be mixed well before use;
- Compensation gaps along the walls will allow you to avoid deformation of the DSP base.
Advantages of using cement bonded particle boards for flooring
This material is becoming more and more in demand, which is explained by its excellent parameters.
The main advantages of the product include:
- Strength. This quality ensures the product’s resistance even to severe mechanical stress. Point loads do not weaken the structure of the part.
- Environmentally friendly. The base, consisting of cement and a wood component, to which special modifiers are mixed, does not pose a threat to human health.
- Fire safety. The resulting coatings are highly fire resistant. Exposure to severe temperatures does not result in deformation or release of harmful substances.
- Resistant to mold and mildew. The presence of alkali in the composition prevents the development of microorganisms on the surface.
You can install the parts yourself without involving specialists, but the work has certain nuances.
Laying features
To correctly lay the products, you need to accurately select the thickness of the cement bonded particle boards:
- The optimal value when working with a concrete or plank base is 10–16 mm.
- If installation is carried out on logs with a pitch of 50–60 cm, then elements with a thickness of 20 to 26 mm are selected. On the ground floor, it is recommended to lay products with a thickness of 10–14 mm in two layers.
- Prefabricated floors in domestic and technical premises can be made in sheets with a thickness of 24 to 36 mm.
Preparatory work
To ensure that the installation of DSP floors does not take much time, you need to carry out all the preparatory procedures in advance.
Marking
- The area of the room is measured and a detailed diagram is drawn up with the data obtained.
- It is very important to pay attention to difficult areas. If there are tapering parts or niches in the room, it is necessary to divide such places into several sections in order to get the right result.
- Temperature gaps are left from the walls, which level out deformations during shrinkage of the building.
- According to the plan, taking into account the selected size of the slabs, it is determined how the sheets will be attached. The technology of flooring on logs involves laying parts across.
- Cement particle boards are being prepared. To do this, the dimensions according to the location on the floor covering are transferred to the parts.
Sawing
Further work may cause some difficulties: you need to choose what to cut the CBPB with.
To cut the slab, the following tools are used:
- Bulgarian. This is the most effective option if panels thicker than 12–14 mm are used. The work will require special diamond discs that provide fast and reliable cutting.
- Jigsaw. The use of such a tool is limited: it can only cut thin parts. Thicker elements will require a set of good files, which are selected empirically, and a lot more time and effort.
- Construction knife. You can cut thin slabs with this device in the following way: using a blade resting on the edge of a ruler or slats, a depression is formed along the line, after which the product is moved beyond the edge of the table and broken off.
On a note! When laying CBPB on the floor, all edges must be extremely smooth, so the last cutting option may require additional preparation due to the presence of defects.
Installation of slabs
To lay parts on a horizontal base in a private house or apartment, you can use different methods, which depend on the type of surface.
Fastening with glue or self-tapping screws
The fixation method is selected based on the specific situation:
- Screws provide reliable fastening to wooden bases.
- When using self-tapping screws, it is recommended to pre-drill holes with a high-speed tool. They should be slightly larger to prevent shrinkage cracking.
- The parts must be glued with a special compound after preliminary priming of the surface of the slabs and the floor.
In some situations, methods can be combined.
Laying on joists
For the process, a wooden beam with a cross-section of 5*8 cm is selected, which will provide the best reliability and rigidity. Parts must be dried and treated with protective compounds.
- Logs are installed. All elements are aligned with each other and fixed. It is recommended to place under them insulation, cut into strips, which will avoid the appearance of cold bridges. If required, jumpers are installed.
- The empty space is filled with thermal insulation material. Dry screed is created in a similar way.
- DSP slabs are laid according to the drawn up diagram with a gap from the walls. If the house was recently built, it is advisable to leave a small distance between all the parts, sealing it with putty or sealant.
- The panels must be fastened with self-tapping screws in increments of 20 to 35 cm. The cap must be immersed flush.
Mounting on concrete screed
You can place the slabs on such a base as follows:
- The surface is cleaned of all excess, dirt and debris are removed. Work is carried out only when the humidity of the coating is low.
- Priming is carried out with a deep-penetrating compound, and the floor is dried.
- The mixture is being prepared. For installation, you will need a notched trowel, which will ensure uniform application without the formation of voids.
This method is excellent for warm water floors, but all gaps between the tubes are first sealed with a self-leveling mixture.
Installation of DSP on the floor
Thanks to its excellent thermal insulation and waterproof qualities, DSP has established itself as an excellent material for rough floor construction in almost any room: on verandas, in the bathroom and toilet.
Scheme of floors with DSP
The use of DSP floor slabs is strongly recommended in the construction of frame houses using Canadian technology. Since the slab (26-40 mm) can withstand a fairly large load, floor joists can be made not 40 cm, but 50-60 cm (according to the width of the insulation).
Lay the slab on joists 5 - 8 cm wide
Preparation for the CBPB before installation is not required (only cutting to the required dimensions); the slab can be laid on logs 50-80 mm wide, leaving a deformation gap of 2 mm (between the sheets).
Before attaching the DSP to the subfloor, you need to see if the sheet will cover the pipe hole. If the slab does cover the pipe, you need to make a marking 1 cm larger than the diameter of the pipe and cut out the opening with a jigsaw (if the diameter is large), after drilling a hole with a 6-8 mm drill or making a cut with a hacksaw for metal, and then knocking it out with a hammer (if the hole is with edge).
Leave a gap between the sheets during installation
Based on the characteristics of the rough floor, you can “put” the DSP on the floor using an adhesive solution, additionally securing the fastening with self-tapping screws.
Before installation, the glue is diluted in a certain proportion with water and mixed with a mixer to the desired consistency, after which it is evenly laid out on the floor surface (no less than the size of the sheet), only then the sheet is laid down. It is necessary to maintain a gap between the sheets (as when installing on joists). When the flooring is laid, all gaps are filled with glue. For details on finishing the walls and floor materials, see this video:
You should know that before installing a cement bonded particle board on the floor, it is necessary to measure all the dimensions of the room, cut the slabs and number them in the order of installation. If possible, cutouts for the pipes should be made immediately.
To summarize the article, we can confidently say that DSP is a new, absolutely effective material that helps simplify and speed up the installation of both the floor and the house as a whole without loss of quality.
Cement particle board, despite its heavy weight, has won a large army of “builder fans” who will never refuse to use this product due to the huge list of its positive advantages.
