Michel
13092 0 34
Michel November 12, 2016Specialization: plumber with 10 years of experience, computer repair specialist, powerlifting coach. I have extensive experience in construction, interior decoration, and making homemade furniture. Hobbies: sports
This article is about how to paint drywall and how to do it correctly. In it I will talk about what paints can be used on gypsum boards in rooms for various purposes. The preparation of the drywall surface for painting and the application of the finishing coating deserve special mention. So, let's go.
Paints on a store window. Our task is to make the right choice.
Requirements for the structure to be painted
Preparation for painting begins at the stage of assembling the frame and covering it with plasterboard sheets. The structure should be monolithic, seamless and stable, since the slightest shifts of the sheets will lead to cracks and peeling, and the drywall paint will begin to crumble.
Therefore, the frame elements are rigidly connected to each other, and the cladding is screwed onto it with special self-tapping screws, ensuring reliable fixation. In new wooden houses subject to shrinkage, a so-called floating frame is installed, and gaps are left between the sheathing sheets and the plane of the floor and ceiling. In addition, the design must have perfectly correct planes and angles, otherwise the paint will highlight all the defects and differences at the joints.
Experienced finishers always take such nuances into account, so it is better to trust only them with the construction of plasterboard partitions, cladding of ceilings and walls. Source prorab.help
Certain requirements are also imposed on the surface itself. The surface of plasterboard is a multilayer paper that gets wet, swells upon contact with a damp substance, and unevenly absorbs paint. If a plasterboard ceiling is painted directly over it, the surface will not have an aesthetic appearance.
Clearly visible seams between the sheets, even if the installation is done very carefully, and the heads of metal screws showing through the paint, from which the coating will peel off very quickly, will not add beauty to it.
There is only one way to avoid this - by covering the surface with a thin layer of putty. It performs several functions at once:
- protects the paper layer from moisture and reduces its absorbency;
- hides joints and fastenings;
- evens out the color of the surface.
An attempt to save money and putty only the seams, recesses from self-tapping screws and surface defects before painting the drywall often leads to uneven painting, especially when using light-colored water-based compounds.
Such a surface cannot be painted; it must be completely puttied. Source mirbetona.info
Features of drywall
Drywall consists of two sheets of special cardboard and gypsum filler. Various substances are also added to it, which can give the material different properties. Despite the fact that gypsum board is a modernized cardboard, manufacturers have not yet been able to completely eliminate the fact that it absorbs all moisture. Therefore, before painting, careful preparation of the surface is necessary, otherwise a lot of paint will be needed. In addition, due to the fact that cardboard is capable of absorbing the composition at different rates, without a layer of putty you will not achieve a uniform result.
The material requires pre-treatment for another reason: if it is not done, any irregularities on the gypsum board will be very noticeable. Sheets that serve as a base and, for example, hide a sewer riser or very uneven walls, are rarely sanded in advance. It is often assumed that they will be covered with some kind of material: in a bathroom this could be tile. Therefore, the surface of the gypsum board is not very smooth.
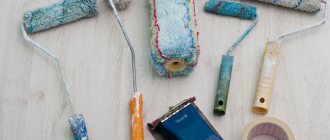
Pixabay
Pixabay
Surface preparation algorithm
Since the answer to the question of whether it is possible to paint drywall without preparation is definitely negative, you need to figure out how to properly carry out this preparation. The whole process can be divided into several stages.
- Inspect the surface for cracks, protruding joints, poorly screwed screws protruding beyond the surface.
- Treatment with acrylic primer for better adhesion to putty.
To prevent the paper from absorbing moisture from the solution, the surface is primed Source obustroeno.com
- Reinforce joints with masking tape and reinforce corners.
- Puttying joints, corners, fastening holes and surface defects.
- Rubbing the putty after drying.
- Applying a continuous thin layer of putty.
- Sanding the surface after the putty has dried.
- Re-priming with 2 layers of penetrating primer.
For leveling, use gypsum or polymer finishing putty. Source gipsmontaj-st.ru
A detailed description of all these processes is in other materials on the site; if necessary, you can familiarize yourself with them.
See also: Catalog of companies that specialize in paints and varnishes and related work
How to prepare the base
- How to prepare a plasterboard wall or ceiling for painting?
The work begins with reinforcing and puttying the seams. The seams are glued with serpyanka and filled through its cell with gypsum finishing or universal putty. The tool is a medium spatula.
Reinforcement prevents the appearance of cracks at the joints of plasterboard sheets after one to two years of operation.
The screw heads are puttied with the same tool. Each of them is sealed with a couple of criss-cross movements of the spatula. With the first sliding movement we fill the recess, with the second “scraping” we remove excess putty.
The second layer of putty is applied to the seams using longitudinal movements of a wide (30-40 cm) spatula. The layer should completely hide the texture of the reinforcing material and fill the recess formed by the tapering edges of the plasterboard.
The seams and screw heads are hidden with putty.
If the seams stand out on the plane of the wall or ceiling, the surface is puttied over the entire area using a wide spatula. The thickness of the putty layer is 1 millimeter. Out of habit, it is difficult to obtain a layer of constant thickness, so it is easier to successively apply two as thin layers as possible.
Puttying the entire surface of the walls.
Wash the tools and dishes in which you mix the mixture before preparing each new portion. If this is not done at least once, lumps of set gypsum remaining on the spatulas or walls of the container will leave deep grooves in the putty.
After the last layer of putty has dried, the surface is sanded - over the entire area (after complete puttying) or along the seams and locations of the screws. You need to grind under oblique lighting - natural or artificial. The light falling on the assembly will highlight all the depressions and bumps with shadows.
What to sand with? Many finishers do this with their own hands - using a hand grater with a sanding mesh. I prefer to use an oscillating sander that uses the same mesh instead of sandpaper: it significantly increases productivity and helps avoid unnecessary fatigue.
Vibrating sander with sanding mesh.
Which mesh to choose? I use #80 mesh for rough sanding the first pass and #120 for final prepainting.
After finishing grinding, two more operations are needed:
- Dust removal . The plasterboard ceiling or wall is vacuumed or swept with a regular broom. Dust will interfere with paint adhesion;
- In addition, the instructions of any paint manufacturer recommend priming the base. Penetrating acrylic primer is applied with a wide brush, roller or spray.
Acrylic primer for painting.
The primer will stick to remaining dust and reduce dye consumption.
Priming the ceiling for painting.
Choosing paint and tools
When everything is ready for the final finishing, it’s time to decide how to paint the drywall - what paint to choose and what tool is best to apply it.
Types of paints suitable for gypsum boards
Before choosing a coloring composition, determine the color and the requirements for it. This may be the coating’s resistance to wet cleaning, degree of abrasion, drying speed, lack of odor, environmental friendliness, etc.
Since the paint is applied not to the drywall itself, but to the putty, a variety of compositions are suitable for painting it. But most often, water-based paints are chosen for interior work in residential buildings, and alkyd enamels are used for finishing surfaces in rooms with high humidity and the need for frequent cleaning.
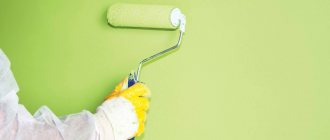
Walls and ceiling painted with acrylic water-based emulsion Source melbournepainting.services
Painting drywall with water-based paint allows you to choose any desired shade and surface texture. Even if the desired color is not among the ready-made compositions, it is obtained by mixing a white base with a tinting pigment. Whether the wall will be perfectly smooth or slightly rough depends on the choice of tool.
The basis of any water-based emulsion is water, and the paint is diluted with it to obtain the desired consistency. The properties of paint depend on what components are included in its composition.
- Acrylics are the most popular and inexpensive. Most of them are not very resistant to moisture, so they can only be used for decorating dry rooms. But there are also moisture-resistant compounds that can withstand wet cleaning.
- Latex ones are more resistant to both moisture and abrasion, do not absorb dirt, are easy to apply and last a long time.
Latex paint for ceilings Source stroylandiya.ru
- Silicone coatings are the most expensive, but at the same time the most convenient to use coatings, especially for rooms where temperature changes, increased air humidity, and the appearance of mold are possible. They can be cleaned, washed, and disinfected without harm to their appearance.
- Silicate paints are similar in properties to silicone paints, but the liquid glass they contain makes the surface impenetrable not only to water, but also to air.
What not to paint drywall
It cannot be said that some paint is not suitable for drywall and somehow affects its structure. Prepared drywall can be painted with any paint suitable for the premises.
The choice of paint for drywall depends on the room where the structure is installed. So, for a HA cabinet in a bathroom, any moisture-resistant paint, including oil-based paint, is suitable. The choice of oil or pentaphthalic paint for the bedroom ceiling will be simply stupid, and not technologically prohibited.
Dyeing technology
Before painting drywall, you should prepare the paint by mixing it thoroughly and, if necessary, diluting it with water or a recommended solvent. The volume of liquid for dilution should not be more than indicated in the instructions.
If you decide to tint the paint, then it is better to do it in a store where there are special machines. It is impossible to achieve the same shade in each jar on your own; you will have to pour them into one large container and tint the entire volume.
Advice! Before painting plasterboard walls, it is recommended to do test paints and let them dry to evaluate the actual color of the future coating. If necessary, you can adjust the shade by adding a little color or a white base.
After drying, the paint may slightly change shade Source forum.ivd.ru
To work, you will need a paint bath, a spatula for mixing paint and masking tape. To avoid staining floors or furniture, they are covered with film.
- A portion of paint is poured into the bath.
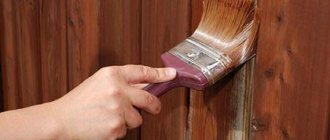
- First, paint with a brush all those areas where it is impossible to reach with a roller or where it can stain the adjacent surface - internal corners, the area along the baseboards and cornices, niches, etc.
- The main area is treated with a roller, which is dipped in paint and rolled along the ribbed surface of the tray to remove excess paint.
- Drywall paint for walls is applied from top to bottom, the ceiling is painted in parallel stripes from one to the opposite wall.
- After treating a small area, immediately roll it over again without dipping it into paint - this technique allows you to remove drips.
If individual areas need to be painted a different color, they are covered along the border with masking tape Source interieurdesigner.be
The minimum number of layers of paint is two.
The second and subsequent ones are applied to the dried surface in a direction transverse to the previous one. The quality of painting is checked using a bright lamp directed at an angle to the surface. If necessary, the defective area can be sanded and repainted.
Preparing a plasterboard surface for painting - important points
Drywall is a man-made material based on compressed gypsum. If you actively rub a piece of such a product, it will turn into dust in just a few seconds. Therefore, gypsum board sheets must be prepared and treated with various primers before painting with one of the above paints.
After installing plasterboard sheets on the wall, there are seams, the dimensions of which depend on the skills of the craftsman. However, the seams will remain in any case, there is nothing wrong with that. But they need to be sealed using putty compounds. Otherwise, after some time after painting, the surface will be covered with numerous cracks.
In order for the putty to have the greatest effect, it is recommended to seal the seams with a special reinforcing tape called serpyanka. If you apply putty in two layers, then the serpyanka is glued after the first layer - in any case, the putty should be the last layer. When gluing the tape, some requirements must be observed:
- The serpyanka is attached exactly in the middle of the seam
- It must be pressed firmly enough at the junction of two sheets of drywall
- Ideally, you should use a continuous tape. If only separate pieces are available, then they are glued overlapping each other.
The seams must be puttied.
Having treated the seams, you can now putty the plasterboard. There are no special requirements here, everything is done according to the standard scheme. At the end of the process, plasterboard walls should be carefully sanded so that the resulting surface is smooth to the touch.
Marking and pasting contours for painting
Modern designers strongly advise against monochromatic painting of walls in residential premises. Especially in children's rooms, kitchens, and dining rooms. Painting using several colors and shades of paint is carried out in several stages and is carried out in compliance with certain rules.
The main thing is precise marking, according to which compositions of all selected colors and shades are applied to the surface
In order for the result to please you, you must first draw a sketch of the future pattern or ornament on the wall, clearly marking the boundaries and places where one color transitions to another. This marking is done using adhesive masking tape. Required:
- In accordance with the pattern prepared on the walls, select areas that should be painted with a product of the same color. Along the border line of a given color, strips of masking tape are carefully glued to the wall, making sure that there are no gaps between it and the wall. Paint can leak into the tiniest cracks and the colors will mix, ruining the result.
- Having prepared the paint of the desired color or shade, apply the composition with a small foam roller so that 2/3 of the tool is on the surface to be painted, and its smaller part (edge) extends onto the tape, tightly adjacent to the wall.
- Having marked the boundaries of an area of the same color, it is painted over completely, moving the roller in one direction, carefully rolling out and distributing the composition.
- Next, you need to wait for the paint to dry completely and only after making sure that the painted area is dry (the paint does not smear) can you remove the strips of masking tape.
In a similar way, mark the boundaries of all components of the drawing and color them one by one.
The best silicate paints
The use of so-called liquid glass in paint and varnish production makes it possible to obtain a plasterboard surface that is resistant to a variety of negative factors.
Just imagine: silicate paint can be used not only for interior but also for exterior work! At the same time, most manufacturers offer quite affordable prices, which allows you to get a good option for decorating bedrooms, kitchens, bedrooms and children's rooms. What is the best paint for drywall? According to professionals, it is recommended to give preference to the following:
- TIKKURILA FINNGARD SILIKAATTIMAALI. The main advantage of this paint is its wide temperature range of application. Drywall painted with this material will not lose its attractiveness either in frost of -50 degrees or in heat of +60. In addition, when painting, a vapor-tight layer is created that has moisture- and dirt-repellent characteristics. It is worth noting that TIKKURILA FINNGARD SILIKAATTIMAALI was liked not only by finishers - it is often used by owners of small sea vessels, which, of course, is an excellent confirmation of the quality of the material.
- BAUMIT SILIKAT COLOR REPRO. This paint can be classified as an elite quality building material. Liquid potassium glass is an excellent binder; it is characterized by inflammability, resistance to fading, dust, dirt-repellent properties, and vapor permeability. The only thing that does not please specialists and ordinary people is the rather high consumption: about 500 grams of paint may be needed per square meter. Another disadvantage is the temperature range. If the room temperature is below +8 degrees, the paint layer is unlikely to retain its decorative properties.
- Ceresit "ST 54". Are you choosing drywall paint for walls? We recommend paying attention to silicate water-based paint “Ceresit”. It has good hiding power, it contains antifungal components, moreover, the paint is completely environmentally friendly and affordable. True, there are a number of disadvantages; for example, the surface must be perfectly prepared before painting. It is best to use plaster compositions made on a mineral basis.
Proper processing of joints and seams, walls and ceilings
To process seams and joints, you must proceed step by step, following the following recommendations:
- Initially, you need to make sure that the joining areas fit snugly to the frame. Each self-tapping screw must be screwed in with a screwdriver, at least one millimeter deep. In this case, the cardboard must not be damaged.
- Now the surface is cleared of debris and dirt. The further quality of finishing materials depends on this preparatory work. Primer solutions are used for cleaning.
- You can start sealing the seams. A small amount of the mixture is applied to the spatula and pressed as much as possible into the seams; the remaining putty must be spread along the joint so that there is no transition at all.
- To seal joints, it is effective to use a gypsum mixture, as it is easy to sand and dries quickly.
- Gypsum also has high tenacity (adhesion), which is especially good for ceiling joints.
Now you need to stick the serpyanka onto the putty, leveling it carefully with a spatula.
It is important that the serpyanka is completely drowned in fresh solution. After the putty has dried, you need to apply another thin layer of the mixture so that the tape is not visible. After the putty mixture has dried on the seams, you can begin processing the walls.
A special role should be given to the finishing of the corners. To do this as efficiently as possible, protective plastic or metal corners are used. When gluing them, you need to use a level, then the corners will be even, and in the future, when finishing, there will be no problems with joining.
Excess mixture must be carefully removed with a tool. Now the solution is applied in a thin layer to the entire wall.
After the material has dried, the surface is sanded with a mesh or a special grinding tool. The main thing is not to overdo it and not to take off too much.
The ceiling is puttied in the same way as the wall surface.
If the ceiling is being prepared for painting, then, unlike previous recommendations, additional bandaging is carried out.
To do this, take a glass non-woven bandage or bandage tape, which is glued with PVA to the entire ceiling surface (the tape should be moistened with water).
Before doing this, the glue should be diluted to make it easier to spread on the material.
When gluing, you should act carefully, then go and press with a spatula to get rid of excess glue and eliminate air bubbles.
Construction work requires precision and consistency, so if you are not confident in your abilities, it is better to seek help from a specialist.
Let's watch a video on how to properly putty drywall:
Paint application technique
If the prep work is done correctly, half the job is already done. The consumption of water-based paint is reduced on a flat, well-primed surface, and application is better.
The basic rule for applying layers
Rules for working with water-based paint:
- You cannot tint where it has already dried.
- First of all, you mark out the areas of future painting by painting around their perimeter with a brush. Only then take the roller
- Usually up to three layers are applied, with the next layer applied across the previous one. This is done to achieve uniform painting. The drying time is indicated on the packaging and does not exceed a day.
- The walls are painted from top to bottom, thanks to this method the previously painted area does not deteriorate due to drips.
After painting, it is inevitable to identify minor defects - spots, unevenly painted areas, visible in bright light. Paint them when they are dry, and remove excess paint with sandpaper.
Painting is done from top to bottom
For interested people, it should be noted that it can be painted in different colors using masking tape. When the entire painted surface is dry, further arrangement of the room begins. A natural continuation would be to decorate the ceiling with skirting boards that hide the seams and the junction of the wall and the ceiling. Now you know how to paint a plasterboard ceiling and other surfaces, how to do it, and what tools you need to have for this.
Drywall paint: which one to choose?
There are a huge number of options for paint and varnish materials. But not all are equally suitable for drywall. So what paint should you use to paint drywall? According to experts, the best option is water-soluble paints. But any paints that contain lime are contraindicated for such a coating.
Of course, it is recommended to choose paint for plasterboard surfaces taking into account the expected operating conditions; you should also focus on the purpose of the surface. Because of this, the texture of the paint is of particular importance. Thus, glossy surfaces can visually expand the space, and they are not difficult to care for. However, the process of painting drywall with glossy paints is labor-intensive; any, even the most minor, flaws will be clearly visible. Matte finishes are one of the best options for ceilings. They are able to hide defects, however, it is quite difficult to care for such surfaces. A compromise option is semi-matte paints, which have the advantages and disadvantages of both options.
Painting the wall is the last stage of finishing the gypsum board
Now, finally, we’ll tell you how to properly paint drywall so that the result pleases you for a very long time. For these purposes, you can use either a roller or a spray bottle. The latter option is not so popular, which is due, first of all, to the lack of such a tool for the average person, and secondly, the spray gun requires certain skills and abilities in operation. Although professionals try to choose this particular device, since the quality of drywall painting in this case will be very high.
Most ordinary people traditionally use a roller. The length of the pile in this case plays a huge role. To obtain a brighter and richer structure, you should buy a roller with long pile. Before using this tool, it should be rinsed in clean water and dried thoroughly. However, a roller is not the only device we need when painting. So, very often there is a need for a small brush, for example, in corners, as well as hard-to-reach places. Movements with the brush should be jerky and sharp so that the coloring matter lies beautifully on the surface, without creating sagging or creating a heterogeneous effect.
It is necessary to paint the walls in stages, that is, in several layers. Moreover, a new layer is applied only when the previous one is completely dry.
Having decided what paint you will paint the drywall with, pour the mixture into a special tray with a ribbed surface, dip a roller in it and apply the paint to the wall. The first stroke should be made parallel to the window, all other movements are made in the same way as the first, overlapping, overlapping the previous stroke by approximately 15 cm.
After the first layer has dried, the second layer is applied in exactly the same way. The number of layers depends on the quality of the paint and the gypsum board itself, but it is recommended to apply at least three layers of paint. Then the wall will look really beautiful, and the result of your work will last for a very long time.
The best silicone water-based paints
Which paint for drywall should I choose? Experts recommend paying attention to compounds made on the basis of silicone resin: they repel water, and therefore are suitable for rooms with aggressive environments. Which colors to choose? Please note the following:
- TIKKURILA Euro Extra 20. The products of this Finnish company can be called synonymous with quality. Therefore, it is not at all surprising that the winner of the rating was TIKKURILA Euro Extra 20 paint. This composition seemed to combine all the advantages of modern silicone paints and varnishes. It is characterized by resistance to ultraviolet radiation, environmental friendliness, and pure color. True, you should only choose paint that was made in Finland, because the one produced in Russia does not always match the quality of the famous brand. Professionals note: this paint is odorless and resistant to water and household detergents. Its only drawback is the high price, but the excellent quality is worth the money spent.
- Caparol CapaSilan. Which paint for drywall should I choose? Pay attention to Caparol CapaSilan. This paint has increased hiding power - in just one pass, professionals can thoroughly paint ceilings and walls. This, of course, simplifies repair work. Moreover, when using Caparol CapaSilan, cracks up to two millimeters wide can be closed! Painted drywall repels water and dust and is easy to clean using regular detergents. It was not possible to take first place in the rating of Caparol CapaSilan paint only because of its even higher price.
- LITOKOL LITOTHERM PAINT SIL. Thinking about what paint is best for drywall? Pay attention to the premium paint and varnish material called LITOKOL LITOTHERM PAINT SIL. Why is she so good? Professionals note that the surface painted with it is resistant to dirt and humidity, and is not afraid of ultraviolet radiation. Another significant advantage is the huge range of colors. In general, this paint is good for almost everyone. However, in our ranking she only took third place. Why? The thing is that the company’s policy provides for the use of not only paint, but also plaster, primer and putty of the LITOKOL brand. Otherwise, the quality of the finishing coating, experts say, is noticeably reduced.
- ALPINA EXPERT. This paint is included in our rating because it has the lowest price and is very economical in consumption. On average, about 140 milliliters of finishing material will be required per square meter of surface. True, paint also has negative sides. For example, it is not suitable for rooms where there are temperature changes and too high or low humidity levels. In addition, ALPINA gets dirty quickly and is difficult to wash.
Possible difficulties and useful tips
If you cover drywall with a layer of paint without observing technological nuances, problems will arise in the future. In the absence of putty, the application of water-based compounds is prohibited, since the top layer of the material will swell. Incorrect addition of color results in stains that are noticeably different from the main shade. Another problem is cracking of the paint layer after drying. This problem occurs due to improper preparation of the base, as well as the lack of gluing of joints between plasterboard sheets.
To avoid most problems, you need to prime the walls in the absence of drafts and temperature changes. The outer corners secure the reinforcing corner. Increased attention should be paid to joints. In addition, you can use the following recommendations:
- it is necessary to paint all places where sockets or switches are installed with a brush at some distance from them (3-5 cm);
- the decorative layer is applied from the ceiling to the floor;
- water-based paint is pre-diluted with water, and a solvent is added to the enamel;
- For rough processing of drywall, an acrylic primer is used.
Drywall is a universal material from which completely different designs can be made. All kinds of decorative materials are used for its cladding, but painting is the most popular. This type of finishing is easy to perform, but it requires adherence to technological nuances.