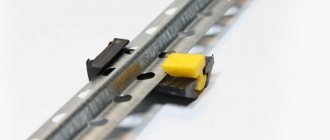
Features of mixing compositions
In order for the walls and ceiling in the room to have a beautiful and even appearance, the main material for their treatment will be putty. It is this mixture that allows you to achieve the desired result. In cases where the working surface is small and there is not much work to do, you can purchase a ready-made mixture, which is diluted in the correct consistency and is ready for work.
If you need to cover all the walls, and maybe even the ceiling, it is much more profitable to buy a dry mixture, dilute it and carry out repair work.
Based on the types of work that will be performed, starting and finishing putty can be used. If the mixture is diluted for rough work, the composition will have a certain consistency.
There are two options for obtaining the finished solution:
- using power tools;
- preparing the solution manually.
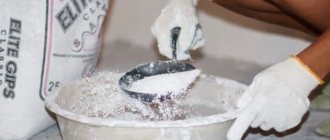
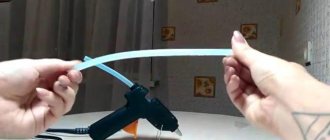
If you have a construction mixer available, then the work of preparing the putty solution will go quickly, efficiently, and most importantly, a large amount of work can be done at once. To do this, you will need a dry and clean container into which water is poured, and only then the dry mixture is added . You need to read the amount of ingredients on the package and adjust the composition as you cook.
When the ingredients are ready, use a mixer to mix them for at least two minutes.
As soon as the solution is obtained, it is recommended to leave it for fifteen minutes and mix again after the expiration of the period. When working in this mode, it is important to set the tool to a speed no higher than 800, otherwise the finished mass will be saturated with oxygen more than normal, which will make its structure porous, and therefore not strong.
Diluting putty manually differs from automatic mixing. First of all, you need to pour the solution, and then add water and mix everything thoroughly. The infusion process in this case is only three minutes , after which everything is mixed using a spatula and the material is ready for use.
The finishing putty is mixed in almost the same way, forming the optimal consistency, not liquid and not too thick.
For woodworking, it is especially important to mix the solution correctly, because it is necessary to create the structure of the material, and then form the desired appearance of the surface.
If during plastering there is concern that the surface may crack, it is advisable to use fiberglass , which has a very thin but strong structure and prevents any changes in the structure of the wall.
Working with acrylic putty
In order for the coating to serve for many years and remain intact and visually attractive, it must be applied correctly. Working with acrylic has its own nuances that are worth paying attention to.
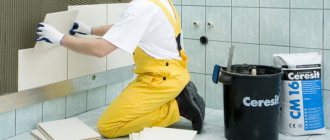
1. Surface preparation. In no case should you be irresponsible about this stage and skip it or perform it in bad faith. It is very important that the surfaces are clean, free of dust and traces of dirt, grease stains and the like. Otherwise, the acrylic putty may lie unevenly or not adhere firmly and fall off over time.
If you plan to work on sealing cracks or crevices, they must first be cleared of remnants of building material and dirt, and must also be provided with free access for dense placement of putty. Laying acrylic putty with gaps is unacceptable - in this case, sealing the cracks may be ineffective.
2. Primer. When working with acrylic putties, priming is a mandatory step and cannot be ignored to achieve a quality finish. Primers in this case are also used on an acrylic base, but the specific type is selected depending on the source material of the surface. For example, if you have clean concrete walls, then they need to be primed with a special adhesive primer, and if the surface is pre-plastered, then a deep penetration primer would be the best choice. There are also universal acrylic primers for atypical cases.
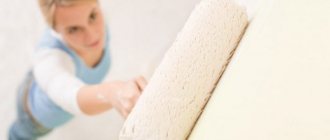
The primer is easy to apply even on your own - it is best to do this with a soft velor roller or a special natural brush. When distributing the composition, you need to make sure that there are no dry areas left, and if there are cracks or chips, then pay special attention to these places and thoroughly moisten them with primer. After the first layer has dried, re-application is necessary. And only after the second layer of primer has completely dried - and this takes about a day - can you begin subsequent work.
3. Puttying the surface. Acrylic putties have a good elastic consistency, making them easy to work with. The easiest way to apply them is with a simple metal spatula of medium or large size, transferring the mass from the bucket onto it with a small spatula. If the putty is too thick and difficult to spread over the surface, you can dilute it with ordinary clean water at room temperature. You shouldn’t add a lot of water at once; it’s better to do it in doses, in small portions, stirring the mass thoroughly, otherwise it’s easy to turn a thick mass into a very liquid one, which will be much more difficult to correct.
4. Surface cleaning. When the putty hardens well - the hardening time is always indicated on the packaging, it must be sanded to a smooth, even state. The easiest way to do this is with sandpaper or mesh. They are fixed on hand graters or on a special hammer drill attachment, depending on the size of the area being treated. When performing grinding work, it is imperative to follow safety precautions: wear a respirator, safety glasses - a lot of dust is generated in the process.
If there is a need to apply subsequent layers of putty, then after sanding the first layer, it must be cleaned of dust and primed, and then puttyed again with acrylic putty. No matter how many layers are needed, the algorithm of actions must be followed the same: sanding - cleaning - priming - putty. After applying the last layer of putty and before further finishing, it is also necessary to apply a primer.
Types of putty and their functions
This material is a lifesaver for major and cosmetic repairs, without which it is unthinkable to create a high-quality surface for finishing with facing materials.
Starting mixtures
Putty is used for the initial leveling of concrete, plasterboard, and brick surfaces. To achieve the best result on very uneven surfaces, apply several layers. Types of material:
- With a cement base. This putty is easily recognized by its gray color. Her responsibilities include leveling walls or ceilings in places with high humidity - bathrooms, garages, basements, toilets. The disadvantage is the coarse grain size, which subsequently requires additional processing. It is not easy to hide it with a finishing layer.
- With a plaster base. This material is white in color. In addition to gypsum, it contains lime. For this reason, there is a high fear of temperature changes, as well as humidity, so gypsum putties are intended only for heated rooms - kitchens, rooms.
- With acrylic or latex. Its functions are to seal cracks, joints, seams, including those defects that appeared due to exposure to moisture. Advantages: high elasticity, minimal shrinkage and extremely small layer thickness, reliable coating.
Finishing lineups
From the name it is clear that the material is used at the end of work with leveled surfaces. Their purpose is to eliminate flaws in starting mixtures, provide better adhesion to finishing materials, and improve sound insulation. They are divided into types in the same way:
- Cement compositions. They are used in “wet” rooms and for finishing facades. Disadvantage - high probability of cracking, tendency to shrinkage.
- Gypsum mixtures. Their task is to improve the ceilings and walls of warm rooms. A relative disadvantage is that it dries quickly, requiring dilution in small portions and “quickness” in work.
- Polymer materials. These high-tech products are applied in a minimal layer, which even “alone” can provide excellent results. There are no shortcomings as such. Latex putty is used for interior work, acrylic putty is used for the exterior of buildings.
When choosing a suitable starting or finishing material, it is better to carefully read the manufacturers’ instructions before purchasing.
Mixtures: dry semi-finished products or ready-made ones?
In stores there are already prepared compositions that do not require any unnecessary manipulations from the master. However, they have a disadvantage, quite a significant one: if the scope of work is small, then unused putty may outlive its shelf life. This means that it will become unusable, as it will lose some important properties.
Therefore, dry mixes sold in bags at an affordable price are more popular. Other advantages are large volumes, ease of transportation, and long shelf life. There are also some drawbacks here: having prepared the mixture, you need to use it up without a trace, and do it quite quickly, otherwise the master will be left with a “broken trough” - a hardened mass.
Features of starting and finishing solutions
To understand how to properly dilute putty, you need to make a choice of what you need. It is known that among the types of putty there are:
- Starting;
- Finish;
- For walls;
- Ceiling;
- Facade;
- For interior parts of the room
Depending on which putty is chosen, there will be an answer to the question of how to properly dilute the putty. Why does the answer depend on the type? Because each solution has its own required volume of water, its own required thickness and consistency.
For example, the first - starting - mixture is needed to level the walls; its layer can reach up to six centimeters in order to hide very large defects. Therefore, it should not be liquid; the thicker the mixture, the better it will fit into the recesses and the faster it will dry later. But don't overdo it.
It is also very important how the master will apply the plaster to the wall. If this is a manual method, then the solution must be thicker. If you plan to automate the process, then you should get an airless spraying machine and spatulas of different sizes - preferably 45 centimeters, 60 centimeters, 80 centimeters and 1 meter. When applied to the wall automatically, the mixture should be slightly thinner than when applied manually.
The finishing putty should be more liquid, since we will apply it very thinly. In the final version, the question of how to dilute the putty is very often not raised, since many people prefer to take it already diluted, right in the bucket.
I would like to provide some tips so that the question of how to dilute putty does not remain unknown:
- It is worth taking into account that the proportion of dry solution and water is different for each mixture. Carefully read all instructions, all requirements and under no circumstances ignore them.
- Before applying the solution, the wall must be clean, dry, free from fungus or mold. It must be pre-treated with a primer, also diluted with water.
- every time after using the tools, clean them and wash them, and throw away the excess mixture, it is not intended for storage.
- get a respirator for working with dry solution - this will ensure safe work.
- If you decide to buy a large spatula so that the cherished task progresses faster, take care of a small spatula, it is easy to “throw” the resulting solution onto a large device.
- Do not mix too much solution at one time. Analyze how much building material you can use at a time and use exactly that amount. Don’t skimp on the solution – it’s better to put in more and remove the excess.
- if there are large potholes in the wall, it is better to immediately cover them separately and bring the surface to a more or less even layer. And then deal with the complete leveling of the surfaces of the room.
At the end of the article, I would like to wish success to every master who has started the big business of plastering - great patience and strength. This is not an easy question, but it doesn’t require a big solution either. Therefore, success in such a difficult task!
In terms of consistency, putties can be dry (for mixing) or paste-like (ready for use).
Dry mixes
sold in bags and are the most common option. Their main advantages are a relatively low price, ease of transportation, a very long shelf life, and the ability to prepare a mixture of the viscosity level you need. The instructions on the package will tell you how to dilute the putty, however, there are some general concepts of preparation that are not written anywhere, but you need to know about them. Therefore, the mixing process is their main drawback. It is also inconvenient that the resulting mass must be applied all and quickly before it begins to harden.
Putties, ready to use
, are sold in plastic buckets and can also be safely stored for a long time.
According to the type of binding raw material, putty can be cement, gypsum and polymer
.
- The cement base is water resistant and is suitable for use in rooms with high humidity. However, such putty often shrinks, after which an additional layer is needed. Due to the cement component, it gains strength rather slowly and microcracks may appear in some places.
- Gypsum putty does not shrink; it can be applied in a layer of even 1 mm, but at the same time it is afraid of changes in temperature and humidity.
- Polymer provides the highest quality coating, but due to the high price it has many unscrupulous fakes.
The choice and preparation of the putty depends on the classification of the putty’s purpose.
- Leveling or starting is intended for the initial treatment of walls, window and door slopes, and the elimination of planning defects. Sometimes it is a good alternative to plaster. If you know how to properly dilute putty for walls, you can achieve an elastic, manageable consistency of the material with much better adhesion to surfaces than plaster mortar. And its drying time is many times shorter. If the plaster becomes ready in about 28 days, then the starting putty will be ready for finishing in 3-5 days. Of course, the time and effort saved are offset by its price.
- The putty of the second layer consists of a fine-grained fraction and is intended for application at a thickness of several millimeters. Sold in plastic or paper bags and used at the last stage of finishing in accordance with the material of the previous layer. It should be perfectly smooth, without depressions or potholes.
- Special putty is usually applied locally and its purpose is indicated on the packaging. It can be waterproofing and acid-resistant, sold in a ready-to-use form and a little more expensive than others.
How to prepare putty for walls
So, in front of you is a bag of dry mixture that needs to be diluted with water, however, not everything is so simple. To know how to properly mix the putty, you need to understand for what stage of finishing it is needed.
The mixture for starting putty should have a very thick consistency, as it is applied in a thick layer and hides the roughest surface defects. The application thickness can reach 5cm, so the putty is applied in several stages. To prevent the solution from setting too quickly and “floating,” it is diluted with purified river sand, free of foreign impurities and clay, in a 1:1 ratio. This method is applied strictly to gypsum mixtures for interior work. A good coating should not crack or shrink.
Step-by-step instructions on how to dilute putty:
- Fill a clean bucket with water in the amount indicated on the package.
- We rinse its walls in a circular motion - they should also be wet.
- Pour the required amount of putty.
- Leave it like this for about five minutes. You can’t stir it right away, you need to give it time to limp a little.
- Let's start stirring. Looking at the consistency, add water or add the dry mixture.
- There is usually some unused putty left around the edges. We wash it down with a brush or clean it off with a small spatula. We continue stirring, moving the nozzle in a circle in both directions, from side to side and from bottom to top. We pause and clean the edges of the bucket again, then knead again.
- We take out the drill and immediately immerse it in a container of water, where we turn the attachment briefly in both directions. If you don’t do this right away, it will be impossible to wash it later.
- Let the mixture sit for about 15 minutes, after which we literally pour a tablespoon of PVA glue into it. Its addition will give the putty elasticity and softness, and after drying the mixture will be especially strong.
- Mix everything thoroughly again.
It is important to know:
- before diluting the putty, study the proportions in the instructions on the package
- Don't mix too much at once: you may not have time to use it before it starts to become
- Do not add water to the setting mixture and re-knead it
- After each portion of the mixture, you need to thoroughly clean the bucket - if dried pieces from the previous stirring remain on the walls, they will fall into the mass in insoluble lumps and make it unsuitable for use.
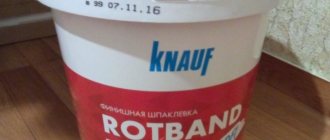
You can combine mixtures from different manufacturers. If it is not possible to buy expensive putty for the entire apartment, a small amount can be mixed with a cheaper base. For example: Knauf Rotband isogypsum contains special polymer additives that provide increased adhesion. We mix it with Satengips in a ratio of 1:3 and get an improved composition of our putty for the finishing type of work.
When choosing a material, pay attention to the production and shelf life. Stale mixtures tend to set too quickly, making work difficult and their durability questionable. Buy putty mixtures from large hardware stores and avoid markets.
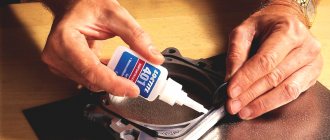
Putty is needed to eliminate unevenness. A base layer of putty is applied to the surface to be repaired, and when it dries, a primer is applied. Sanding is required between these two stages. At first glance, there is nothing complicated here, but any material, even the best, shrinks. If necessary, you can apply two layers of putty, drying and sanding several times. Next we look at how to dilute putty for cars, choosing the desired proportion of hardener and base material.
A primer is needed to improve the adhesion of metal and paint. An even layer of metal can be immediately covered with primer without fear of further peeling. However, in reality, both primer and putty are used. The latter comes in several types:
- Polyester;
- Epoxy;
- One-component nitro and acrylic putty.
As you can understand, two-component polyester putties are now the most popular.
This material itself can be filled with fiber, aluminum chips, etc. Such compositions are called filling or basic. And you can use them if you have a “final” putty, which is used before priming.
Polyester putty filled with fiberglass
So, two types of materials were named: filling putty and final putty.
There are no fillers in the universal polyester putty. If the thickness of the resulting layer does not exceed 0.5 mm, such material is always suitable for use.
You can end the chapter with a small dictionary:
- Full or Fill – “filling” type material;
- Glas, Glass, Fiber - fiberglass;
- Alu – aluminum;
- Lite weight or Light - the material should be used if the weight of the workpiece is critical.
These are the designations found on the packaging.
For further decorative finishing of the walls, putty is used. This is a very important moment in the process of cosmetic or major repairs, because the durability and appearance of the wall finishing will depend on the quality of application of the putty mixture. The quality of the putty depends not only on the application technology, but also on the correct dilution of the dry mixture. Therefore, before starting each repair, you should know how to mix putty for walls.
Putty mixtures come ready-made and dry. Ready-made mixtures are sold in plastic containers, and dry building material is sold in powder form in paper bags. Ready-made putty is more expensive than dry putty, and its use is advisable for minor repair work. If you are planning a large-scale repair, it is better to use a powder mixture, which must be diluted correctly. To find out how to properly dilute putty for walls, you need to take a closer look at the existing types of this building material:
- Oil-based adhesive composition: moisture-resistant, used for covering walls in rooms with high humidity levels. These putties can be used to coat wood and metal products to protect them from rot and corrosion.
- Gypsum putty: consists of a gypsum cement base, used for most finishing works.
- Water-dispersed compositions after puttying form a smooth and durable surface.
- Multifunctional acrylic putties are used to level the surface and remove cracks from old coatings. Acrylic facade compositions are used for exterior work and have high moisture resistance.
- PVA-based putty is a universal mixture that has antifungal properties.
Dry putty must be diluted correctly, otherwise the coating will crack and crumble. To ensure that the coating is reliable and does not crack, certain conditions must be observed when working with it:
- Properly dilute dry putty, following the manufacturers' instructions, observing the required proportions.
- Before application, remove any remaining old coating.
- In order to ensure good adhesion to the surface, it must be primed.
- After priming, an interval of at least 6 hours should be allowed before starting to putty the surface.
- Apply putty in two layers.
- The first layer should dry exactly 24 hours, then the topcoat can be applied.
- Also, a day must pass after the finishing coat before wallpapering or other decorative finishing begins.
Before diluting the putty, you should take into account the type of work for which it is used - starting or finishing finishing; therefore, the consistency will be different.
Peculiarities
Dry putty mixture is a powdery material that contains astringent components, the main filler and various additives. Before applying to the wall to be leveled, it should be diluted with water in the ratio indicated on the packaging by the manufacturer.
Dry putty has a number of undeniable advantages:
- long service life;
- resistance to different temperatures (can be stored in both warm and cold rooms);
- the ability to control consistency;
- low cost;
- ease of use;
- ease of transportation.
The prepared solution cannot be used:
- at high humidity, as over time it will begin to peel off from the walls;
- with sudden changes in temperature, which will quickly lead to its softening.
Experts recommend diluting and mixing the putty using a drill with a special mixing attachment. With its help, the mass is more uniform than when using improvised means.
Advantages of ready-made putty
Compared to mixtures prepared by amateur and professional builders, those mixtures made in factories are always better, and significantly:
- they are always dosed, and you don’t have to measure them manually;
- work productivity is much higher;
- the amount of waste and waste is reduced;
- there is no need to dilute the putty with water.
Also, the finished mixture is easily sanded, processed mechanically, applied well with vacuum equipment, and perfectly covers any corner or seam. Its dry variety is a powder placed in bags or bags. It can be diluted so that the mixture is completely ready.
The only problem is that mixing the mixture must be done correctly right away, using professional equipment.
Rules for diluting putty
Before we move on to the rules for diluting putty, let’s figure out what it should be like.
After dilution, the consumable material must be homogeneous, elastic and plastic. The putty must be easily applied to the surface and smeared. At the same time, the material should not fall off the wall in pieces and stick to the spatula.
When purchasing putty, it is recommended to follow the instructions on the package. There are no uniform breeding conditions, since each manufacturer offers a unique product. And it may differ.
But still, there are several rules on how to dilute putty. These include the following points:
1. To seal cracks and seams on the surface, you need to use thick putty. This composition will easily fill the space, and the remains can be easily smeared. The convenience of this consistency is that the putty will not stick to the spatula.
2. At the final leveling stage, always use a finishing consumable. Everyone knows this, but few people know what consistency the composition should be. In this case, use liquid putty. The material will lay down in a thin layer and create a perfectly smooth surface.
3. Dilute the putty before application. You should not prepare the material in advance, otherwise the material will harden quickly and become unusable.
4. If you are new to construction and renovation, then you definitely need to buy a ready-made mixture and follow the instructions. This way you can easily bring the composition to the desired consistency. The only disadvantage of ready-made mixtures is the high price.
Attention
e! Remember, before you know exactly what consistency you need putty, be prepared to spend time. You'll have to do a few batches before you figure out exactly what you need.
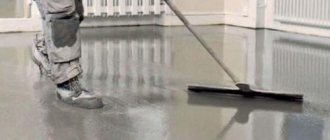
Recommendations for applying a leveling layer
Puttying allows you to solve a number of problems:
- seals artificial holes in wood, such as nail holes;
- fills the natural pores of the wooden surface for leveling (if there are porous types of wood, such as oak) and protection from damage;
- forms a homogeneous layer on which paint can easily spread.
To ensure that the treated area turns out “according to the rules”, use several recommendations:
- If you work with putty outside, choose a day when the air temperature is above +5. Otherwise, the composition will thicken and will not fill the cracks well.
- If there are voids on the surface, they must first be filled with putty, after which they are sanded, the “sand” that appears is removed and the wood is fully processed with putty, and after it dries, you can paint it.
- The best material for a spatula is stainless steel.
- Deep holes (more than a centimeter) in the wood are filled with putty in several layers, allowing each layer to dry. Application thickness – 2-3 mm.
Preparation of plywood
A plywood sheet can hardly be called a full-fledged tree, since this material is obtained from veneer, but it is often used in the construction industry. Using plywood, you can make a variety of interior items and also use it for finishing walls, creating partitions, etc. Due to its smooth surface, plywood is easy to paint, but you must first putty.
There are plywood sheets of different sizes on sale, and it’s not difficult to cut, but to cover a large area, as a rule, you can’t get by with just one sheet—several pieces are installed, right next to each other. As a result of this action, joints are formed that must be sealed, otherwise cracks may appear in the paint.
To hide the seams, they are covered with putty: the compound is applied across the joint, creating a dense layer. It is more convenient to work with a 10-centimeter spatula, periodically moistening it with water, because acrylic compounds dry quickly and lumps may form. After puttying, the surface must be leveled with a grinding machine. When the layer dries, repeat the action, but covering the entire surface, and not just the seams.
Preparing the tree
Wooden products often retain unevenness on the surface from knots, and also have places where resin can appear - these points must be eliminated before applying a leveling compound. Knots should be cut with a chisel (about 3-5 mm deep), creating small depressions, which are then filled with putty. But before that, wooden objects that have not previously been varnished must be oiled - for this they use heated drying oil.
When working with a product that has traces of paint, varnish or other substances on it, the top layer must be completely cleaned. To do this, wipe the surface with a cleaner and wait until the soaked paint can be easily removed with a spatula.
Wash with plain water or vinegar to neutralize the alkaline environment. After that, use sandpaper to lift the wood fibers. To improve the adhesion of the putty to a wooden surface, you can apply a primer, choosing one with the same composition as the putty, for example, acrylic.
What should the consistency of the solution be?
For high-quality work, you need to obtain an elastic and plastic consistency of the solution.
Important
The solution should not stick to the spatula or curl into a tube. There should be no foreign inclusions or lumps in the composition.
To achieve the desired consistency of the putty, you need to dilute it with water in the required proportions, following the instructions included with the dry mixture. The mixing container must be clean and the tools must be well washed. The ingress of small particles of dirt and debris is the cause of uneven drying of the putty on the surface and its cracking.
For some types of surfaces, the consistency of the putty material may require a thicker or, conversely, thinner consistency. It is necessary to take into account the properties of the base material and take a good mixture for dilution. For dense, uniform walls, a thicker, quick-setting compound will be required. For brick or concrete bases, where small cracks are possible, the putty is prepared in a thicker form.
Composition and key features
Acrylic-based putty is used to level deformed surfaces, as well as to prepare the ceiling, walls or floor for painting. To ensure that the acrylic mixture forms a film, manufacturers use talc. The color is formed by special white.
Acrylic putty for walls is considered more profitable than the gypsum type of finish. The disadvantages of acrylic include an excessively fast drying period - about 15 minutes. Also, the use of putty can cause some difficulties in sanding and finishing surfaces.
Among the key advantages it is worth noting the following:
- Acrylic putty is an excellent protection for floors and other surfaces;
- The acrylic mass itself is very elastic, which makes it easy to apply;
- The formed putty base is characterized by the passage of steam, but the coating prevents the penetration of water;
- Putty is considered a fireproof and environmentally friendly material;
- Quick, skillful application of the acrylic composition allows you to form an unusually strong, integral structure on the surface of floors, ceilings and walls.
In addition to talc, acrylic waterproof putty for floors and ceilings contains chalk and iborite. The most popular pigments that color the mixture in one shade or another are ocher and some artificial paints.
Standard proportions
Each manufacturer indicates the recommended ratio on the product packaging. But its correct breeding depends on:
- bases - gypsum, polymer, cement;
- the purpose of the putty - starting or finishing;
- surfaces - ceiling or walls;
- features of the work front and conditions: humidity, dryness, inside a house, apartment or outside.
The standard ratios look like this:
- gypsum: 1 kg per 800 ml;
- polymer: 1 kg per 400 ml;
- cement: 1 kg for the same 400 ml.
A very liquid consistency will allow the mixture to flow down the walls; too dry plaster will make application more difficult. Lumps will cause grooves on the surface, which will lead to repeated work. You can rely on these proportions, but you need to take into account that each manufacturer has every right to offer their own, which are optimal for their composition.
Purpose and application
Acrylic putty is used for interior and exterior work, processing various types of surfaces (concrete, plasterboard, wood, metal, stone blocks, bricks, etc.). Painted and unprimed areas can be treated.
The purpose of the composition is to protect the surface from mechanical damage, decorate and insulate the room. Special products have been developed that are more durable and resistant to temperature changes, which can be used for finishing the facades of buildings.
The mass is used for starting and finishing work at the stage of final surface treatment.
How to dilute gypsum putty
Dilution of gypsum facade putty
Gypsum putty is used in rooms where there is no high level of humidity.
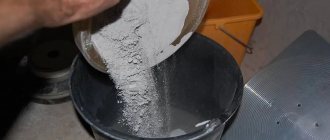
Gypsum compositions have a high drying rate of two or three days. Gypsum putty is poured into a bucket filled 1/3 with water in a thin stream until the powder exceeds the water level by 1/3. After thirty seconds, the powder should settle into the water. Then the solution is mixed with a power tool for 1-2 minutes. If the mixture has not acquired sufficient viscosity, add water or powder while continuously stirring the solution. If you wait at least 1-2 minutes, the mixture will begin to set and you will no longer be able to add one of the ingredients. The solution is stirred twice with a break of one or two minutes. Then the viscosity is checked: the correct consistency should be such that the putty sticks to the wall, but does not remain on the spatula. You should not use the tool when mixing at high speeds: air will enter the mixture, which will form bubbles during application to the surface.
Self-prepared putties
It is not profitable to use store-bought putties to fill large defects in wooden floors (sinks, cracks). In such cases, homemade mixtures are used to fill the main volume of the crack or chip. The middle fraction filler will reduce the degree of shrinkage of the material. After they have dried on top, the area to be restored is thoroughly treated with high-quality store-bought putties. There are many recipes for homemade putties; each master brings his own nuances that increase certain properties of the paste (shrinkage rate, adhesion, drying speed, strength). Here are the most famous ones.
Resin paste
This method prepares a small amount of the mixture for small-scale work. Rosin is used as a solid filler, which is tinted to match the color of the wood using ocher:
- In a heat-resistant container, mix ozokerite and rosin in a 2:1 ratio.
- The mixture is melted on a burner and ocher is added in the same amount as ozokerite was taken.
- The mixture is stirred until a homogeneous mass is obtained.
You can only work with this putty while it is hot. If it begins to harden, it is heated again and work continues.
Chalk based pastes
Chalk has a finely dispersed structure, combines well with oils and varnishes, the mixtures are homogeneous and plastic.
Oil paste
Oil putties are often prepared independently due to the availability of components. To treat the floor that will be painted, you can prepare the following mixture yourself:
- a kilogram of drying oil is taken as a base;
- 1% drier (10 grams) is added to it, which is used to speed up the drying of oil paints and varnishes. The cheapest are NF-1, NF-4;
- season the drying oil with chalk powder. Per liter of drying oil take 2 kg of powder, but it can be adjusted depending on the required degree of thickness of the mixture.
Chalk and PVA paste
PVA glue and chalk are mixed until a creamy mass is obtained. Depending on further use, sawdust can be added to the mixture. In this case, you will get putty for filling large cracks. This mixture takes a long time to dry. To speed up drying, craftsmen add finishing gypsum putty.
A mixture of chalk and varnish
To mix the putty, use a varnish based on the same solvent that will be used in the finishing coat. In this composition, chalk can be replaced with small sawdust. When restoring an old coating, wood dust can be collected from a sanding machine bag. If the sawdust in the bag is dirty, it is prepared by sanding down any piece of wood.
For craftsmen who install parquet, there is always something to putty on the floor. By sanding the wooden parquet, they obtain an authentic filler for the putty material. Therefore, they take putty binders (colorless acrylic suspensions) to the site. They are mixed with wood powder of the parquet being treated and a paste is obtained that is completely identical in appearance to the coating material. After treating the seams with this composition, they become completely invisible.
Video of how the mixture is prepared and applied to the parquet:
Tips for beginners on applying putty
Puttying walls is a very difficult process for beginners. Sufficient experience is required to obtain a smooth surface and correct application. To dilute wall putty correctly, obtaining a homogeneous mass without lumps, you need certain skills. Otherwise, errors can be fatal. To avoid such a situation, you need to prepare in advance.
You need to buy a spatula, the recommended width of which is 30 cm and length - 15 cm. Then you should knead a small amount of the solution to practice applying the putty to the surface. As soon as it starts to work out, you can start working. The putty must be applied to the walls at a certain angle. As a rule, the larger the angle, the thinner the layer of putty. During work, it is recommended to transfer the solution from one spatula to another. This will maintain its elasticity.
The process of making your own wood putty
To make your own wood putty, use adhesive or oil-based adhesive compounds. The use of drying oil or oil varnish allows you to ensure the best quality of the prepared material. Making your own wood putty slightly increases labor intensity, but allows you to reduce the cost of finishing work. One of the proportions of the components used in practice is the following combination:
- pumice,
- ground to a fine consistency – 30 g,
- turpentine oil – 60 g
- and linseed oil – 280 g.
These components are thoroughly mixed and then added:
- casein – 20 g,
- white gelatin – 20 g,
- borax – 12 g,
- 18 percent ammonia – 18
- and water – 290 g.
After stirring, the resulting solution is placed in a water bath at a temperature of 90 °C. All this is mixed until a homogeneous paste-like consistency is obtained, after which the finished solution is removed from the water bath.
Before applying the solution, cool slightly and begin leveling; the material must be used until it cools completely. It is not recommended to reheat the putty, since its quality deteriorates somewhat, so it is advisable to use the prepared solution completely. In terms of its technical and operational characteristics, wood putty prepared according to the above recipe is not inferior to materials manufactured in factories.
There is a good recipe for waterproof resin-based putty. To produce a fusible mixture, the following is used:
- natural rosin – 200 g,
- ozokerite (earth wax) – 400 g
- and yellow ocher – 400 g.
First, rosin and ozokerite are melted, after which ocher is added to the solution and thoroughly stirred to obtain a homogeneous mass. This putty is applied hot. If the entire composition cannot be used completely, then for reuse the putty is heated to a molten state.
Ceiling beams - how to hide them?
Owners of houses with beamed ceilings often try not to use this structural element, but to hide it in order to get an even and smooth ceiling. There are several ways to do this, as well as turn beams into interior decoration. Therefore, next we will consider how to beautifully hide a ceiling beam or give it a more presentable look so that it becomes part of the overall design of the room.
- The second option for exterior decor is to decorate it with plastic or veneered wood panels. This will cost less than buying an imitation made of polystyrene, but it will also allow you to give the element a more beautiful look and install recessed lights inside the lining.
Functions of ceiling beams
Today, ceiling beams are used to decorate ceilings not only in rural homes, but also in country houses and city apartments made of brick and concrete. These elements of an authentic interior are very attractive to residents of the “concrete jungle”. Therefore, open beams are increasingly decorative in nature, without losing their functionality.
Ceiling beams can be used in any room. They look natural in the living room, office, bedroom, library and even hallway. Their massiveness and quantity are determined by the overall dimensions of the room. In a spacious kitchen you can “stud” the entire ceiling with large beams, but in a small hallway you will only need a few pieces.
Decorative beams are a simple and very inexpensive way to decorate the ceiling in an original way. But is this really where their advantages end? Why are beams so popular, and how can you use beams on the ceiling? Let's look at what functions ceiling beams can handle:
- The problem with high ceilings. If the ceilings are high, these designs will successfully emphasize the volume of the room. If the room is too high, which deprives it of comfort, ceiling beams can be placed low under the ceiling to visually lower its level, and the volume of the room will feel more comfortable.
- The problem with low ceilings. If you have a low ceiling that weighs you down, you can try this technique to correct this deficiency. Beams from the ceiling should go to the walls. In this case, it may not be quite a beam running along the wall, but a thin strip to match the beam.
- Decoration of attic spaces. In attics and attics, decorating a pitched ceiling with beams will help bring order and harmony into the space.
- Changing the optical perception of the room. To visually expand the room, the beams should be positioned in width. Well, placing structures along the wide side will make the room look more elongated. In order not to change the geometry, but to add volume to the ceiling, you can install the beams in a “lattice” - crosswise or “herringbone”.
- Functional zoning of the room. One large ceiling beam can divide a room into several zones: in this case, the structure needs to be mounted at the junction of functional zones - for example, above a bar counter or dining table. On the other hand, you can decorate a certain area with beams, so it can be distinguished from others.
- Unusual lighting. On the most ordinary ceiling beam you can attach recessed lamps, LED lighting, hang or tie large chandeliers to it on chains. Beams are often used to decorate niches in plasterboard structures and create spot lighting.
- Hiding communications. “Hollow” pseudo-beams can be used to disguise communications that run along the ceiling, for example, wiring. Structures that imitate beams are often used as boxes for mounting lamps. Such beams are U-shaped, they are hollow inside, so they can even hide pipes.
- Optimizing free space. In the kitchen, you can install various holders and hooks on the ceiling beams, hanging baskets, utensils, dried bunches of herbs or a glass holder on them. You can even attach a TV panel on a special bracket, “air” chairs or swings to the ceiling beams, if, of course, these are real beams and not their imitation.
Arguments in favor of puttying
A wide variety of wood products are puttied, including old window frames, new joinery made of soft and hard wood, parquet, etc.
Puttying wood allows you to get the following advantages:
- The putty layer prevents the absorption of moisture into the material, which results in an increase in the service life of the wooden product.
- Thanks to the putty mixture, it is possible to mask all sorts of surface defects, such as knots, cracks, chips.
- When the coating dries, it remains completely transparent, which allows you to maintain the appearance of natural wood structure.
- Parquet putties come into close contact with the floor material, filling all its unevenness, and also prevent contamination.
The main argument against puttying wood is that the material will swell when exposed to moisture. It should be noted that all mixtures intended for wood impart moisture resistance to the wooden surface. Thus, if the putty is chosen correctly, the fears are unfounded.
How to dilute dry putty - basic rules
Read the instructions carefully, there you will find the proportions in which the mixture should be mixed with water. Take a container of an appropriate size that is easy to stir and pour the contents of the bag into it. Add the required amount of water and start kneading, it is best to do this with a mixer for 10 minutes. The water should be clean and not cold, preferably at room temperature.
Then you can begin finishing work, since diluting dry putty, as you are convinced, is not difficult. You can work with this material for about 40 minutes until the mixture begins to thicken and harden, and, having crossed this time threshold, setting begins to occur almost before your eyes. Of course, the time is average, it is better to check this fact in the instructions on the package, and this can also be affected by the expiration date, the room temperature, and the quality of the material.
How to mix putty for walls: proportions
The manufacturer indicates on the packaging how to dilute the putty mixture. When diluting, you should maintain the recommended proportions; do not dilute too much of the mixture, otherwise it will quickly harden. You need to dilute such an amount of material so that it is enough for half an hour of work. When the mixture is already ready and in the process of swelling, you cannot add water to it. The drying speed of the material depends on its thickness and room temperature. The higher the temperature, the faster the putty composition dries, and the less time remains for its application.
Dilution of the putty mixture can be carried out either manually or using a power tool - a construction mixer, a drill with a special attachment, and other equipment with a rotation speed of up to 800 rpm, the optimal rotation speed is 600 rpm.
To dilute the putty, be sure to use a clean and dry container. If an old bucket is used, in which lumps of the previous mixture remain, they will fall into the fresh composition, and these insoluble lumps will render the entire putty unusable. Power tools used for mixing must also be dry and clean, especially when preparing the finishing mixture.
The standard ratio of putty mixture is 25 kg per 10 liters of water. However, the proportions indicated on the packaging by the manufacturer may differ from the standards.
Starting putty
Solutions are also divided into groups.
They are starting (basic) and finishing. Each type is used in appropriate cases. When the surface has large differences, starting plaster is used. It is applied in a layer ranging from 10 to 15 mm. Some gypsum putties can be applied up to 30mm at a time. This should be indicated on the packaging. The main task of starting solutions is to eliminate large differences and prepare the base for finishing. The surface after basic plaster has a rough texture and easily absorbs moisture due to large particles.
Tips and recommendations for use
Depending on the scope of application, application tips are formed. For example, you need to clearly know that water-dispersion putty cannot be used for ceilings. It exists only to protect against moisture. The same rule applies to other species. Depending on the type, which is determined by the scope of application, it is necessary to use the solution for its intended purpose. To cover surface defects, a starting solution is mainly used.
The application process consists of applying putty with a maximum permissible layer of 3 mm. If there are cracks during work, it is advisable to treat them with plaster. There are 2 application tools:
- spray gun;
- metal spatula.
The spray gun is used when diluting acrylic plaster with a solution, bringing it to a more liquid state. This type of tool is acceptable in the case of finishing. The starting material is applied with an iron spatula. Plasterboard ceilings are also applied to putty areas to level the surface. If the ceiling is uneven, it will be difficult to apply this material.
Important. The putty should be applied exclusively in above-zero temperatures, and choose the time so that there is no heat either. Permissible temperature is from 12 to 30 degrees Celsius. If these requirements are not met, the quality of the application decreases and there is a possibility of destruction.
Some tips on what proportions to stir the material in, how to preserve it so that it does not dry out
Beginning builders often ask, is it possible to dilute dried putty? No. It is taken in one lump and can no longer be diluted (this is its main essence). Therefore, to clean vessels and instruments, you will have to use a mechanical method.
Please note that lumps may form when loose mixtures are picked up from the wall, especially from the back of the spatula, or if there is residue on the nozzle or in the container. Everything needs to be cleaned in a timely manner.
It is convenient to wash the mixer by immersing it in a bucket of water and setting high speeds, so the mixture will dissolve itself in the water, but you will have to wipe the surface a little.
It is necessary to exclude even small lumps, since the layer thickness is often about 1 mm.
Any lumps will be clearly visible. If it was not possible to prevent the appearance of lumps and they have hardened a little, so that the mixer no longer picks them up, you can use a little trick.
Place a medium amount of mixture on a spatula and apply it to the wall in thick layers. Then turn the spatula at an angle of 60° and, using pressure, remove excess and also crush the pieces.
Don't be afraid to use large spatulas, they are more convenient when working on a large area without external elements that get in the way, like a gas pipe.
They are not only convenient, but also practical; it is easy to see areas with unevenness on the wall using a spatula as a level. It is advisable to have an arsenal of spatulas of different sizes.
Wood putty - pros
Putty work on wood is the treatment of a wide variety of surfaces: cracked, Soviet frames, new doors made of a variety of wood types, old or, on the contrary, expensive and beautiful parquet. But whatever construction goal you pursue, wood putty will have many advantages:
- The putty layer on a wooden surface prevents moisture from being absorbed, which means the wood in your home will last a long time and remain dry and healthy.
- A high-quality mixture smoothes out all the cracks, knots and natural defects that natural wood cannot do without.
- When the coating dries, it becomes transparent or acquires a surface pattern, so all natural elements in the interior can not only be painted, but also covered with decorative varnish.
- The parquet mixture adheres perfectly to the floor, fills all the unevenness and holes that appear over the years, and protects it from dirt.
How long does it take for the finished mixture to dry?
The drying time of the putty depends on:
- type of putty mixture;
- thickness of the applied layer;
- air temperature/humidity;
- the base on which the composition is applied.
The average drying rates are:
- starting gypsum mixture with a layer thickness of up to 30 mm - one week;
- finishing composition of gypsum - 4-6 hours;
- starting cement mortar - 5 hours;
- finishing layer up to 3 mm - 1 hour.
Regarding polymer putty solutions:
- epoxy - 8 hours;
- latex - from 12 hours;
- acrylic starting layer up to 1 mm thick - 3 hours, finishing layer 3 mm - 24 hours.
The leveling mixture can harden quite quickly, so to save money it is better to knead it in small quantities.
During repair work, the process of filling walls cannot be ignored, since only after completing this stage can the desired result be achieved. Knowing the rules of kneading and the technology for applying the leveling agent, the implementation will not require much effort and will be within the control of even a novice master.
Scope of application
Wood putty is used for processing or restoration of various surfaces. It can be used for finishing cladding made of MDF panels or plywood, and used when preparing parquet for further painting. The mixture is actively used to restore door panels, window frames or old flooring. These are the most common uses, but this list can be expanded, because the product is quite universal.
It is important to note what properties the putty conveys to the surface in order to understand why it should be used in general:
- The moisture resistance of wood increases significantly, which has a beneficial effect on its service life.
- Regardless of what type of putty material you choose, it can be used to mask existing defects, and some compositions can cope with very large damage.
- Using putty, you can emphasize the texture of the wood.
- The surface that has been treated with the material in question can be safely painted or covered with a decorative layer of varnish.
- The putty used to finish the flooring is characterized by excellent adhesion to the surface. It perfectly fills existing unevenness and even the smallest cracks that are sure to appear in the parquet after several years of use.
Useful tips
Let's take a look at the recommendations of experts:
- When stirring putty using a power tool, make sure that the drill bits are washed and thoroughly dried;
- A layer of diluted putty that is too thick can lead to uneven hardening;
- Stir the solution thoroughly against the sides of the container;
- The consistency of the solution should not be too thick or thin.
For further decorative finishing of the walls, putty is used. This is a very important moment in the process of cosmetic or major repairs, because the durability and appearance of the wall finishing will depend on the quality of application of the putty mixture. The quality of the putty depends not only on the application technology, but also on the correct dilution of the dry mixture. Therefore, before starting each repair, you should know how to mix putty for walls.
Recommendations
Any process has its own subtleties that you need to know and carefully follow:
The putty and finishing material must be from the same manufacturer so that they fit perfectly together.
Often, manufacturers organize promotions for the purchase of related products, so you can purchase not only a high-quality product, but also save on it.
Mixtures on different bases can give unpredictable results, and usually negative ones.
There were cases when such a tandem led to damage to the wood and sometimes it was impossible to fix it. In such cases, a complete replacement is required.
The preparatory stage must be mandatory - the removal of damaged areas, dust, dirt and old coating. It is advisable to use a special brush at the end.
We apply putty with a small protrusion; it is better to remove the reserve than to end up with an unsightly depression.
All putty defects can be eliminated only after proper drying and only by sanding. Start with coarser grit sandpaper, gradually moving to fine grit.
Try to putty as quickly as possible, because the mixture dries quickly. And while this is good for experienced craftsmen, a beginner can make a lot of mistakes and ruin the material.
If you choose a dry mixture, then prepare a small amount that can be used at a time.
After all, if the composition of a larger quantity is not developed, it can quickly become unusable.
Advantages and disadvantages
Wood putty has a number of significant advantages:
- The surface layer prevents the penetration of moisture into the wood material, which means it increases the service life of the structure.
- Smoothes out irregularities and cracks, hides knots that are necessarily present in the tree.
- Improves color rendering of wood surface. The material can be used for painting and coated with decorative varnish.
- Hides defects in wood that have arisen over the years.
- Does not emit harmful chemicals indoors.
- It is not affected by room temperature changes.
- Effectively fills voids in wood material.
- Does not crumble or crack over time.
- Dries quickly.
Main varieties There are several types of putty based on composition:
- Water based. The environmentally friendly product is harmless to living organisms. Plastic and has no unpleasant odor. To remove excess mixture, you do not need an aggressive solvent; just take a damp cloth and wipe the places where the putty has accumulated. Water-based putty can be stored for a long time in closed, airtight packaging, such as a jar. Even in the event of depressurization, the putty does not lose its properties for a long time.
- Oil mixture. Easily handles surfaces and is presented in a ready-to-use form. Volumetric containers allow you to process fairly large areas. Inexpensive and highly sought after mixture.
- Polymer. Used for any construction work both outside and inside buildings. It has increased plasticity compared to other putties. Withstands loads and sudden temperature changes.
Differences between putties for interior and exterior use Any type of wood putty must meet the following requirements:
- moisture resistance;
- effective leveling of uneven terrain;
- preventing wood from drying out;
- high degree of adhesion of the product;
- improving the structure of wood and emphasizing its natural texture.
Manufacturers of putty materials strive to ensure that the mixtures they produce meet all these requirements, but still there is no universal wood putty that would be suitable for interior and exterior work at the same time.
Rules for applying putty on wood To ensure that the result of construction work does not disappoint, you should adhere to certain rules for handling the leveling material:
- External work with wood putty must be performed at an ambient temperature of at least + 5 degrees Celsius. If this requirement is not met, the mixture may not completely fill voids and cracks in wooden structures. Air humidity should be at least 75%.
- It is necessary to carefully prepare the work surface. To do this, remove the remnants of the old coating, clean and wipe off dust. After which you need to sand the surface to improve adhesion.
- Work on applying the coating material is carried out with a spatula or spatula made of plastic or stainless steel.
- If there is a joint or crack on the surface with a depth of 1 - 2 centimeters, then it is better to cover it in several layers, each 3 mm thick. Before applying the next layer, you must allow the previous one to dry thoroughly.
If you wish, you can make wood putty yourself. This is not difficult at all, although it will require additional time. The recipe is quite simple - crushed chalk and PVA glue, diluted to a thickness of 20 percent sour cream.
Colors If putty is applied to new wood only at the beginning of a room renovation, that’s one question. In this case, the color of the material is selected based on the future interior. But there are times when it is necessary to carry out local restoration work. Then the work with choosing a color solution becomes more complicated.
There are several ways to adjust the desired shade of putty for a wooden surface:
- The most common option is to buy a mixture of the color that suits the room.
- You can purchase material of one shade and add pigment to it to get the desired color. You just have to buy the pigment too.
- Wait for the putty applied to the area of the wooden surface to dry and paint it in the desired color. This option is often used for puttying wooden floors.
The presented range of mixtures allows you to choose the desired color, but it should be borne in mind that when completely dry, the mixture may give a slightly different color from the original.