Aerosol can treatment
On the collar of the cylinder, usually free of paint and varnish coatings, we make a marking and core it with an awl under the hole. The nipple must first be disassembled by removing the spool from it so as not to melt during soldering. Using a screwdriver, drill a hole with a diameter of 3-4 mm at a slight angle.
Degrease the surface of the nipple and the soldering zone on the cylinder. A special degreaser, gasoline or solvent 646 is suitable for this. Wipe the surface dry with a clean rag.
Apply flux to the back of the nipple and around the hole on the cylinder.
An ordinary bamboo skewer will help you align the nipple at the soldering site. We put a nipple on it and thread it through the hole, aligning it exactly in the center.
We heat the base of the nipple with a gas burner and solder it with solder. But before this operation, be sure to make sure that there are no flammable vapors from the solvent left in the cylinder. Otherwise, the open flame may rupture the cylinder, which will definitely cause injury to you. To avoid this, fill the bottle full of water and pour it out. And just before soldering, fill the container 80% to reduce the internal volume. Then draining the water through the hole under the nipple is not difficult.
You can cool the soldering area with plain water. We assemble the nipple back by screwing the spool into the sleeve.
A securely soldered nipple will be able to withstand sufficient pressure for reusable use of the cylinder. You can immediately check it by pumping air with a regular bicycle pump.
Such a reusable aerosol can can be used, for example, to brush away small debris from the working surface of parts.
You can refill homemade lubricant and save hundreds of rubles on the purchase of WD-40. You can pour in paint and paint. You can pour eau de toilette and use the bottle as a freshener. There are a lot of applications, go for it.
Reusable spray paint can
Hello to all DIY lovers. Often you have to paint your various homemade products, but it happens that there is not always enough spray paint and you have to go to the store for the next one. After thinking a little, it was decided to make a reusable can of paint that could be refilled at home and added as needed, as well as change the color of paint. It’s also more convenient to paint in hard-to-reach places with a spray can, and unlike a spray gun, you won’t need to be tied to a compressor with a hose.
Before you start reading the article, I suggest watching a video that shows the entire assembly process, as well as testing the finished device.
To make a reusable spray paint can, you will need:
* Metal clamp with dimensions 64-67 * Valve for tubeless wheels * Sheet metal strip * A couple of M4 bolts * Welding machine, electrodes * Personal protective equipment, gaiter, welding mask * Angle grinder, cutting disc * Electric drill * Vise * Metal drill 10 mm and 6 mm * Compressor to check
That's all you need to make a reusable spray can, you probably have all these parts in your workshop.
Step one.
The principle of operation of a reusable can is based on pumping air through a nipple, so in this homemade product this will be the main task - attaching a valve with a nipple, so that no air passes through. To do this, take a clamp that just fits the diameter of the can and weld two bolts to it at the edges.
When working with an angle grinder, be careful, use personal protective equipment, gloves, and safety glasses.
What are the savings? How much should you spend and how much can you save?
It's actually simple math at work here. One can of paint, holding about 400 ml, costs about 200 rubles. Buying paint separately will cost about 70 rubles per 1 liter, and 500 ml of solvent can be purchased for 40 rubles. It turns out that for 110 rubles we get at least a liter of paint, while in a store for 200 we buy only 400 ml. Using simple calculations, you can determine that for the same canister, made yourself, you will need to spend about 50 rubles, instead of 200. The savings are quite impressive, which is good news. However, this method also has a number of disadvantages, for example, pumping paint through a syringe or mixing it with a solvent yourself.
Today we will teach you how to make an aerosol can with your own hands from available materials. This process is not as labor-intensive as it might seem at first glance.
So, the tools you will need are: a utility knife, a drill and bits, a saw and a bicycle pump. As for the actual materials for production, these are: a bicycle inner tube, rubber-based glue, an empty plastic bottle, an empty spray can and paint.
Well, shall we get started?
Step 1.
First you need to release the remaining pressure from the empty can. This will protect you from its possible explosion. This can be done by releasing all the air from it. After this, you need to saw off the tip of the can and get its base, as well as the glass ball.
Step 2.
Next, we cut off the inflation tube from the bicycle tube and glue it close to the base of the plastic bottle. And yes, don't forget to drill a small hole where you glue this tube! Rubber-based glue is excellent for these purposes.
Step 3.
Now we need to make a nozzle. To do this, we drill a hole in the bottle cap that is suitable for the tip of the can with a straw, which we received by completing the first step. Glue will also help to secure it.
Step 4.
It's time to pour the paint. To do this, you can use a homemade paper funnel. IMPORTANT! You need to mix oil paint with oil paint, and acrylic paint with acrylic paint. You should not mix oil paint with acrylic paint!
How to make a reusable aerosol can
Reading time: 4 minutes No time?
Aerosol cans are a very convenient tool for painting. The paint applied in this way does not have the characteristic streaks or unevenness of a brush that are left by the pile of a roller. In this way you can apply not only paint, but also varnish. The small can is convenient to hold in your hand and easy to transport, and the aerosol will help paint hard-to-reach parts that are difficult to reach with a brush. In a word, the can is very convenient to use. But it has one significant drawback - disposable packaging. There is not much paint in a can, and to paint a large part, you will need more than one can. It turns out that you have to pay for packaging again and again, and the consumption of the paint itself turns out to be very small. How to fix this situation? There are two options. First, an airbrush can be an alternative to a spray can, but the cost of such a device starts from 800 rubles, and you still need to get used to using it. And the second option is to make the can... reusable. The author of the YouTube channel The LabOtomy showed how this can be done.
Read in the article
How to put paint into an aerosol can?
Filling paint into an aerosol can is one of the components that ensures that the coloring composition is sold at a fairly high price. Considering that spray painting is disproportionately more convenient, and is widely used in the automotive industry, when a person repairs a car with his own hands in order to save on car service, then the high cost is an extremely negative point.
What you need for work
So, what's the point of the remodel? We need to find a way to fill a sealed container with paint and pump air into it to create the necessary pressure. Moreover, it is important that this procedure does not require any special tool.
To make the aerosol can reusable, you only need one additional part, which you can easily find - a bicycle nipple.
PHOTO: YouTube.com The nipple has such a small hole, and you should select a drill to match its size
All that remains is to assemble all the parts of the device into one whole.
Converting a disposable can into a reusable one
To install the nipple, you need to select a place at the top of the can.
PHOTO: YouTube.com First, mark the drilling location with an awl. It will not pierce the metal of the can, but will make a recess in which it will be convenient to drill. The drill will not slide to the side
PHOTO: YouTube.com Carefully drill the balloon, tilting it down relative to the drill so that chips do not get inside. It is very important to do this only with an empty can, otherwise you risk being covered in paint from head to toe, and this is the best case scenario. Never do this procedure with gas cylinders, they may explode right in your hands
PHOTO: YouTube.com Now the nipple needs to be glued to the can. Epoxy glue is best suited for this purpose; it will firmly connect the parts and withstand pressure loads
PHOTO: YouTube.com Important point: when gluing, you need to accurately align the nipple and the hole in the cylinder that you made with a drill. The easiest way is to use a wooden skewer. It will act as a guide and help you accurately align the parts.
Just glue is not enough to connect the parts; you need to further strengthen this place with soldering. For this procedure, you will need a gas canister and a special nozzle - a gun that produces a constant, narrowly directed flame. In general, such an attachment will be useful in many household chores and will be absolutely indispensable when starting a live fire. So if you have not yet acquired this device, it makes sense to do so. Such a pistol costs around 200 rubles, and you can buy it at any hardware store.
Algorithm for filling a container with dye
Inflating cylinders using professional equipment is beneficial in terms of filling the container, but is not available due to the high price. Self-filling of aerosol cans with paint is justified by its low costs and ease of operation. Although the container is not filled to its maximum capacity.
The aerosol container can be used more than once.
Before filling the can with paint, prepare the following tools:
- A container container is being prepared: empty deodorant, used for dye. A paint can of one type is filled with paint of the same type: acrylic after acrylic, alkyd after alkyd. Otherwise, a “chemical conflict” may occur. The quality of the coating will suffer as a result.
- The dye can be refilled with the desired shade, purchased ready-made or tinted with your own hands.
- The dye is pumped into a large volume medical syringe. If an additional broken needle is used, then releasing the safety valve will be more effective.
- A nipple taken from an old bicycle tube is used.
- For a bicycle or car, a chamber inflation pump.
- Pressure measuring manometer.
Before you fill the paint into the can with your own hands, remove the cap and sprayer from the container. The remaining actions are performed in strict sequence:
- The syringe is filled with dye.
- Using the needle on the syringe, the cylinder fuse is pressed out, and the syringe is inserted into the container until it stops.
- The paint is pumped into a container. Its number corresponds to a specific shade. You can select the desired color by fan. Colors for tinting are most often selected from the RAL, NCS, Pantone catalogs. Mixing base colors allows you to get the desired shade.
- Actions are performed until 2/3 of the container is full. So, for example, a 520 ml cylinder is pumped to 400 ml. This container is enough to paint 1.5 m2 if the paint is applied in two layers.
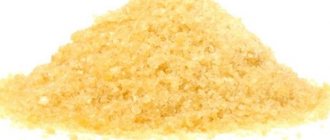
- To mix the dye, 5 balls are added to the container. Balls from bicycle bearings will do.
Useful video on the topic:
To spray, add air under pressure to the container to be filled:
- The safety valve is released using the bicycle nipple. It is inserted into a can.
- A bicycle pump is connected to the nipple. Air is pumped up to a pressure of 5 atmospheres. Low pressure does not provide high-quality atomization. If the indicator is higher, then the container ruptures.
- The nipple is removed and the spray button is installed in its place.
The canister is ready to use. It is shaken, the paint is mixed and spray control is carried out. A small dose of dye is applied to the unwanted surface.
DIY Reusable Refillable Aerosol Can
An aerosol can of paint is convenient, practical, and economical. No wonder street artists love these useful inventions. It is the cans that help them create stunning graffiti on urban sites, and thanks to their mobility, the cans have a significant advantage over airbrushes connected with a hose to a compressor.
However, aerosol cans have a significant drawback - the paint runs out quite quickly, after which the only thing left to do is throw away the can.
Spray painting
But tell me, would you like to reuse aerosol cans? After all, this will significantly reduce the cost of purchasing new aerosols. It is enough to pour the paint into an empty can, create sufficient pressure and you can continue using it. Sounds tempting, doesn't it?
The problem is that making a full-fledged aerosol spray with paint at home is almost impossible and unsafe. However, there is an easier and simpler method that has been tested many times in practice. Compressed air will help with this.
Refilling a paint can using compressed air
Method of applying dye from an aerosol can
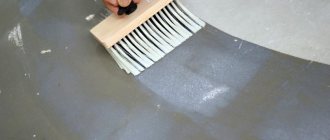
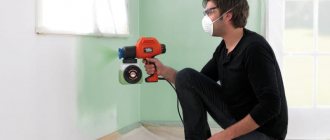
In a room at room temperature, paintwork adheres to the surface better. At the same time, the room is ventilated, and respirators are put on the face.
- The surface to be painted is washed and dried.
- The area to be painted is degreased.
- Use construction tape to create boundaries for the spray area. Use newspapers or covering film to cover areas of the surface that will not be painted.
- If the surface is leveled, then putty is used . It is applied across scratches. Leveling the applied putty, the hand moves along the scratch line. At a temperature of 25°C, the treated surface dries in half an hour.
- Solid fiberglass putty is sanded with sandpaper in the form of a block with a grain of 60-240 ; for soft putty, grain 180-320 is used. It is left in this state for 24 hours.
- The next step is applying a primer. The primer is applied in several layers. Between them, a time of 10 minutes is allotted for drying. When priming is completed and the surface has dried, the surface is treated with sandpaper with a grain of 500, and finally - 1500. For metal, a primer is protection against corrosive phenomena.
- The resulting surface is degreased before painting.
- You can start painting. Shake the container with the dye. It is applied at an angle of 90° relative to the surface. The can is located at a distance of 30 cm. The paintwork is applied in 3 layers. Allow 15 minutes between coats. Complete drying of the enamel occurs after 25 minutes. The material is applied evenly, without smudges.
- To strengthen the coating, sometimes the surface is varnished in the same way as the dye. After 24 hours the varnish dries. Polishing is carried out after a few days.
Paintwork materials from an aerosol container withstand direct exposure to sunlight. Has a high degree of abrasion. The varnish on the surface gives it strength and shine.
We recommend videos on the topic:
The essence of the life hack
The main goal is to create the ability to pump air into the can, creating the necessary pressure in it for subsequent spraying of paint. Two key components will help with this:
- Pneumatic valve. This is an ordinary nipple from a bicycle inner tube, and you can take an old valve. The main thing is that it is intact and reliably holds pressure.
- Hand pump. The one you usually use to inflate bicycle tires will do. It is quite enough to pump air into the can.
Nipple from a bicycle tube
But there's a catch. Aerosol cans are completely sealed because otherwise they would not withstand the pressure inside. Disassembling the spray gun is not an option, since it will not be possible to reassemble it and guarantee its functionality. Ordinary ingenuity comes to the rescue.
About refilling a spray can with paint
Many people are interested in how to make a can of spray paint. Some people are concerned about this topic not so much because of economic considerations, but because the compositions from different containers often differ from each other. In addition, you can also refill varnish, primer, and not just paint, which is very practical.
- The first step is to select the can itself for subsequent refilling. Solid containers are ideal for this. It’s just that containers that are not assembled in a factory (with welded seams, from different parts), especially if the pressure will be created by a compressor, are dangerous to use. Such a product can easily rupture;
- When the container is selected, you need to remove the valve. Next, you need to take a simple medical syringe, large capacity. No needle needed. The composition must be drawn into the syringe;
- The size of the balloon inlet and the syringe outlet diameter are almost identical. The function of an adapter can easily be performed by a flexible plastic tube (a product 10 mm long is sufficient);
- The required composition is drawn into a syringe, then it is connected to the outlet of the cylinder through an adapter. All you have to do is press the valve and the liquid is pumped into the container - nothing complicated;
- Pressure can be created in different ways. The most practical is to use a factory compressor, which is also equipped with a pressure gauge. But if there is no such product, you can adapt a bicycle pump or limit yourself to the same syringe. It is also worth remembering about safety: it is recommended to put the cylinder in a tarpaulin cover;
- Another product is already used as an adapter here. It can be obtained from the syringe needle cap. The open edge is fixed to the pump hose, a hole is made in the sealed one - this is what you need to press against the cylinder, and everything will definitely work out.
Before filling a can with paint, you should make sure that the substance being filled has the same composition, the same base as the composition that was there before. A simple example: nothing good will come of it if you pour car paint into deodorant (the solvent in this case will easily corrode all the gaskets.
- If the container previously contained paint of a different color, you can do this: first pump in the solvent. This will help get rid of any residue from the container.
Conclusions :
It's time to take stock. Based on the above material, it is clear to anyone: painting with a spray can is easy, there is nothing difficult here.
The difficulty lies in proper preparation of the surface, in creating optimal conditions for work.
The work can be reduced in cost if you use rechargeable cylinders. A video about this is recommended for viewing by everyone: both experienced masters and beginners.
The main thing is to follow the advice, then the result will be of high quality and there will be no difficulties in the process.
Don’t rush to throw away your deodorant can; you can refill it with another substance and even paint. To do this we will need a larger medical syringe, a vinyl tube and a small compressor or pump.
If you need to put paint into a spray can, you need to dilute it to a liquid state. Depending on how much the deodorant canister is designed for, and it is usually 150 milliliters, then you can fill it no more than 2/3 of the volume of the deodorant canister, no more than 100 milliliters.
We prepare the syringe; to do this, remove the needle and put on a vinyl tube instead, cut it off, leaving 4mm uncovered. We fill the syringe with paint, remove the spray nozzle from the can and place the tip of the vinyl tube of the syringe onto the tube of the aerosol can.
We press the connected syringe with the can onto the valve and at the same time inject paint into it. After you pour 100 milliliters of paint into the can, take the safety cap from the medical needle, one side is thicker, insert it into the compressor or pump hose, securing it with a clamp or twisted wire, and pierce a hole in the closed end of the cap with an awl, but do not destroy the side at this end.
We wrap the cylinder in a strong cloth bag or place it in a strong pipe for safety. We turn on the compressor and rest the closed end of the cap, with the hole, against the cylinder valve (the side on the cap that I wrote about above will help us with this). When inflating, press on the valve tube. Air fills the container with air, creating pressure in it and gurgling will be heard in it, this air passing through the paint fills the container, creating pressure.
At the same time, keep an eye on the pressure gauge and although in the factory the cylinder is inflated to 4 kg/cm2, it is better to roll up no more than 2.5 kg/cm2 in order not to take risks, especially since you can pump up the cylinder at any time. The cylinder is ready for reuse. Author RVT
Filling paint into an aerosol can is one of the components that ensures that the coloring composition is sold at a fairly high price. Considering that spray painting is disproportionately more convenient, and is widely used in the automotive industry, when a person repairs a car with his own hands in order to save on car service, then the high cost is an extremely negative point.
A can usually doesn’t last long, it costs quite a lot, so there is a natural desire to save money by not paying the cost of new cans every time, and the injection process, which you can do yourself.
This is quite possible if you fill a can of paint with your own hands from a purchased large container with a coloring composition, which in this form is much cheaper. To do this, you need to purchase one disposable one from a good manufacturer, and carry out the process of converting a used aerosol container into a vessel into which you can pump paint repeatedly.
The second possible option is to purchase special equipment for refilling aerosol cans, which is not sold everywhere and is quite expensive. The third is to refill it in the appropriate workshop where there is such equipment, but there it will be approximately half of the cost of the refilled paint, and they may give a small discount for several cans.
Work order
To turn a disposable aerosol can into a reusable one, you must:
- make sure that the canister is completely empty - this is the most important point, since filled canisters are under pressure, and any mechanical impact can lead to depressurization and explosion, which leads to serious injuries;
- carefully remove the nipple from the old chamber, clean it, degrease it and, if necessary, polish it;
- mark a mark on the empty aerosol can for the location of the pneumatic valve, press a small dent with an awl;
- carefully drill a small hole in the place of the resulting mark;
- clean and degrease the hole;
- disassemble the nipple, thread the body onto a wooden skewer (necessary for stability during fixation);
- Apply liquid sealant to the edges of the hole and the base of the nipple;
- insert a skewer into the hole;
- Using a compact gas torch and solder, carefully solder the nipple to the body of the aerosol can.
How to make a canister reusable using available materials?
In order to make such a tool, you need to follow a simple sequence:
- Find an old used spray can. If there is no such thing nearby, you can simply purchase a new one, use it for its intended purpose, and then begin upgrading our tool.
- To begin with, drill a small hole in the bottom of the now empty can. We must not forget that there is still some old coloring matter left in the can, which means it needs to be thoroughly rinsed with a solvent.
- The next step is to hold the nipple in a drill and clear it from the chamber by tinning it.
- Afterwards, you can safely install the nipple into our can. Next, you need to add a little water and then inflate the balloon. If bubbles do not form, everything is done correctly.
We assemble and test
It's time to assemble the resulting device and test it. The nipple is assembled according to the standard pattern and screwed tightly. The can is checked for leaks, after which it is necessary to attach a hand pump to the nipple and pump in air.
The more compressed air there is inside the can, the longer it will be able to spray paint in one pump. However, you shouldn't overdo it either. As a result, having pumped in a sufficient amount of air, you can begin painting. By pressing the valve of the spray bottle, the spray will spray the paint due to the air inside.
This method is quite simple and safe. The main thing is to make sure that the can is completely empty before starting work (precautionary measures are never superfluous). After pumping in paint and air, you can safely start your favorite hobby - drawing graffiti or painting any surfaces.
How do you like this life hack? Be sure to share your opinion in the comments to the article.