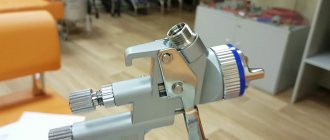
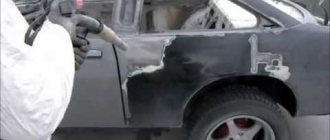
Assembling a compressor yourself is not as complicated as it seems at first glance, especially if you know the principle of its operation. To assemble the compressor, you will need a motor that drives air into a container where the same air will be under pressure. The mechanism is designed in such a way that excess air, due to which the pressure in the container may exceed what is necessary, comes out through a special drain valve. This is necessary so that during the process of painting a car (or whatever else is needed) the paint spreads evenly over the entire surface, and this effect can only be achieved when there is constant pressure in the sprayer.
The compressor can be used in a variety of areas - for inflating tires, airbrushing, painting spare parts, and so on. Having the necessary tools and certain knowledge, it is quite possible to independently manufacture this unit based on a conventional refrigerator. A homemade compressor produces about 7 atmospheres, which is enough for an ordinary garage workshop. A refrigerator compressor will be quite quiet and, most importantly, cheap in cost.
What is better - homemade or purchased?
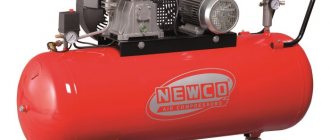
In total, there are several main differences between them:
- The design of the factory compressor contains an electric motor that transmits torque to the working chamber through a belt drive. As for the homemade compressor, it consists of a housing and the engine itself, without belts.
- The factory version already has automatic pressure relief systems, inlet and outlet filters, pressure meters, etc. installed. In a compressor from a refrigerator, you will have to install the control equipment yourself, taking into account all the features.
- Despite the fact that most factory compressors are equipped with automatic systems, some budget models do not have this feature. In other words, these units will have to be turned off independently, noting the time on the clock. Homemade compressors are mainly equipped with a protective relay that turns off the engine if there is a risk of overheating.
- Some factory models may not have any lubrication at all. Of course, they are small, but they lack various exhausts. This circumstance is very important, especially if the spray gun behaves rather capriciously, not tolerating various impurities. As for homemade compressors, there is plenty of oil.
- The main feature of a homemade compressor is that it works very quietly, especially if you put all the tubes on it correctly, maintaining a tight seal. As for factory compressors, they are noisier, so their use is only possible outside the home.
- The cost of manufacturing a homemade compressor is very low, because the main components are taken from old equipment, and the control equipment will cost a maximum of 1000 rubles.
- It is impossible to make any technical changes to the factory compressor. In other words, if the unit is not powerful enough, then it can only be used as a tire inflator, nothing more. Homemade options are good because you can add some parts to them, for example, a large receiver, thanks to which you can significantly increase the power of the device.
As practice shows, a homemade compressor for painting a car breaks down much less often than its foreign and domestic factory counterparts. On the Internet you can find many instructions on how to build compressors with your own hands. So let's discuss several options that can help in this matter.
Homemade mechanism for pressurizing - components
Painting your car is only possible with a good and reliable air supply to the spray gun. Therefore, a direct connection to a pressure source is not suitable. It is best to create equipment with a receiver. This is a metal tank that must be powerful and reliable, with strong and thick walls. An old gas cylinder, a tank from a water pumping station or a modern expansion tank will do. The following actions will also be required:
- in the found receiver it is necessary to make sealable holes for injecting pressure and supplying air;
- it is also necessary to provide a valve that will release excessive pressure after it is reached;
- automation will be required to save electricity or fuel (depending on the type of motor chosen);
- a system of pumping stations and a pressure gauge with automatic shutdown of the equipment are used as automation;
- it is important to ensure the reliability of the insertion of all fittings and adapters, otherwise there will be troubles during operation;
- Reliable installation with the receiver secured to avoid vibration or movement is also important;
- Another requirement is that the power of the equipment used must be consistent with the volume of the receiver.
A DIY compressor for painting a car is a complex project that cannot be implemented without technical experience. Moreover, the car needs high-quality painting, and the compressor must provide an even and stable air supply. A homemade system for painting a car body can be used in the future for a variety of purposes. This invention will be a godsend for any car owner in the garage.
Schemes for making a homemade compressor
Here are several options for device assembly schemes - choose which one is best suited for your purposes:
Compressor assembly parts
- pressure switch;
- pressure gauge;
- gearbox with oil and water separator;
- oil/water separator filter;
- adapters;
- crosspiece;
- fitting and nut;
- coupling;
- nipple;
- a tube;
- car clamps;
- receiver;
- nuts, studs, washers;
- furniture wheels;
- automobile oil;
- toggle switch;
- plug and cord;
- fuel filter;
- plywood panels (chipboard);
- refrigerator compressor;
- oil and petrol resistant hose, screws, Epoxylin, sealant, paint, fum tape, rust remover and other small things.
I checked several different control valves in my versions. After several attempts, I ordered a RUCK14IAMSV check valve, it does not buzz and can be perfect for building a compressor from refrigeration units. You also need to buy a safety valve (MINI SVM14-12). Take a tank from a 16 kg powder fire extinguisher. The pressure in the tank is 9.5 bar, the shelf life is 2 months.
Important: pay attention to what kind of oil you pour in - synthetic oil does not combine very well with regular oil, so you don’t need to pour in just anything.
- An oil separator must be installed between the compressor and the tank.
- Oil should be added through the third solder tube.
- It is best to solder the connector and screw it in with a screw or metal plug.
- Install a dehydrator, it will also capture the oil.
Due to the sudden failure of the refrigerator, I became the owner of an efficient 110 W unit. Of course it can be converted into a compressor. There is a car airbrush, which was previously used with a 12-watt compressor, as well as with a high-power compressor. These devices are noisy and short-lived. So I had to make a homemade one.
Semi-professional air blower
Experts have repeatedly commented that homemade compressor units have a longer service life. Moreover, comparisons were made with domestic and foreign models.
This is natural, because the installation is made with your own hands. Therefore, we will consider the option of how to make a compressor from a refrigerator that will not be inferior even to products from famous companies. So, for its manufacture you need the following list of materials:
- Receiver for compressor;
- Pressure gauge;
- Relay for monitoring pressure in the compressor;
- Threaded adapters;
- Fuel filter (gasoline);
- Gearbox with oil and water separating filter;
- Plumbing cross with ¾ inch thread;
- Motor for compressor unit;
- Automotive clamps;
- Motor oil (10W40);
- Switch (220 V);
- Oil resistant hose;
- Brass tubes;
- Regular syringe;
- Thick board;
- Compressor rust converter;
- Power system filter (diesel);
- Metal paint;
- Nuts, washers, studs;
- Wheels for furniture;
- Sealant, fum tape;
- Needle file.
Compressor assembly instructions
It is important to dismantle the compressor correctly to avoid damaging it. First, using wire cutters, cut through the tubes coming out of the engine leading to the radiator grille. Next, the wires from the relay are cut, but their length should remain approximately 20 cm. Before unscrewing the compressor, you need to make a mark on the relay cover.
Once the compressor blower circuit from the refrigerator is broken, the spindle will be exposed to the atmosphere, which will lead to a loss of its properties. If the factory oil in the supercharger is not replaced, its pistons will quickly wear out, causing the engine to fail. Therefore, it is recommended to first replace it with a semi-synthetic motor one. like from a car.
In addition to the outlet and inlet tubes, the compressor from a conventional refrigerator is equipped with a third tube with a sealed end. In order to use it in the future to paint a car, it is necessary to remove the clogged part. To do this, using a hacksaw for metal, you should make a neat cut around the tube, but without sawing all the way through, and then break off the cut piece. It is important that metal shavings do not get inside.
The remaining pipe must be flared and the old oil drained, then semi-synthetic oil must be poured into it in the same quantity. After which the pipe is sealed with a screw wrapped in fum tape.
The fire extinguisher housing is perfect for the receiver. It is important that it is cast, seamless and has a volume of 10 liters or more. Before using it, you need to inspect the inside of the fire extinguisher for corrosion. A flashlight is used for inspection. If corrosion is still present, it must be removed using a special liquid.
Compressor from an old refrigerator
The unit, made from components of an ancient refrigerator, will not be inferior in performance to compressors from elite manufacturers. To construct it you will need:
- pressure gauge,
- rust converter,
- compressor receiver,
- threaded adapters,
- relay for high-quality control of the flow pressure force in our compressor,
- fuel filter element for gasoline,
- oil moisture separating filter and its gearbox,
- the engine driving the installation,
- cross with 3/4 inch thread for water pipes,
- switch for 220 V voltage,
- sealant,
- motor oil grade 10W40,
- brass tubes,
- oil hose,
- simple syringe,
- thicker board
- metal paint,
- filter element of the power supply system for a diesel engine,
- furniture wheels,
- needle file,
- studs, nuts, washers,
- fum tape,
- car clamps.
A compressor unit from a rare Soviet refrigerator can be useful as a motor. In our example, a compressor from a refrigerator is the most optimal solution. It has one great benefit - a compressor start relay! Very old Soviet models have an advantage over foreign competitors. They are capable of pumping up very high pressures. During assembly, it is necessary to carefully remove rust from the actuator unit.
The rust converter will be able to perform high-quality treatment of the compressor and prevent further oxidation. This will simultaneously prepare the working engine housing for painting. Then they move on to changing the oil. It is clear that if the old refrigerator was subject to maintenance, it was a very long time ago. This also applies to changing the oil in it. But this situation also has a justification - the system is absolutely completely isolated from the environment. Semi-synthetic oil is suitable. This modern lubricant has properties no worse than compressor oil. It will cope with the task remarkably well - it contains many high-quality and effective additives. On the compressor body we find 3 tubes: two of them are open, the remaining one is hermetically sealed. We supply power to the compressor unit and determine the nature and direction of the air flow. It is better to immediately write down or mark the intake and exhaust ducts.
A sealed tube is needed to change the oil. We remove it with a needle file, making a notch around the circumference of the tube. It is important to prevent metal shavings from getting inside the compressor. We break off the tube and drain the oil completely into a container that will allow us to determine its volume. Using a simple medical syringe, we pour in the semi-synthetic, and with a larger volume than what poured out!
After filling, the engine lubrication system is shut down. Select a suitable screw and seal it with tape. It should be remembered that oil in the form of droplets will sometimes penetrate from the air outlet tube. An oil/moisture separator for the compressor will save you from this. Assembly of the installation begins with strengthening the motor with the start relay on a wooden base. It should be in the same position as on the frame. The correct switching of operating modes depends on the correct installation and installation of the compressor!
Stages of assembly work
Making a compressor from a refrigerator means following a simple sequence of steps:
- Take pliers, a 12mm spanner, 2 screwdrivers - one for plus and one for minus. At the bottom of the rear panel, use pliers to cut through the tubes connecting the compressor to the cooling system. Unscrew the start relay, having previously marked the top and bottom sides on it. Disconnect the relay from the plug. We take all the fasteners with us.
- Checking functionality: reconnect the relay, provide air access to the compressor through the tubes, connect to the network. If everything is done correctly, the device works. Air will flow into one tube and out of the other. Label these tubes.
- Attach the compressor with self-tapping screws to a wooden board.
- We take an old fire extinguisher, 1 hose 600 mm long, 2 others - 100 mm, fuel filter, clamps, pressure gauge, sealant. We already have a drill, a screwdriver, and pliers.
- If there is no fire extinguisher, then we will make a plastic container. To do this, you need to take a container with a volume of more than 3 liters. Make 2 holes. Insert the inlet tube into 1 hole at a distance of 2 cm from the bottom of the container. We lower the outlet pipeline 10 cm deep. It is impossible to install a pressure gauge on a plastic tank.
- If there is an iron tank, then the tubes can be fixed by welding. We install a pressure gauge on the iron receiver. We fasten the receiver and compressor together.
- Place a filter on a 10 cm long hose and attach the free end of the tube to the inlet of the constructed apparatus. We use another hose to connect the receiver inlet to the compressor outlet. We fix the joining places with clamps. A diesel filter is attached to the last hose, and its free end is inserted into the outlet of the receiver. If necessary, equipment can be attached to the remaining end of the tube to make airbrushing and painting available.
Second version of step-by-step instructions:
- We drill a special hole for the adapter that needs to be secured. You can choose different methods, for example, the most affordable is cold welding (using Epoxylin).
- Carefully clean the bottom of the receiver from contaminants - plaque and rust. This is necessary so that Epoxylin adheres well to the surface for strong bonding. And, of course, so that the paint does not become dirty and does not form into lumps with debris. This can be achieved by sanding the bottom of the fire extinguisher to a metallic shine using rotating and circular movements using sandpaper.
- We secure the adapter by clamping it from the front side with a nut, and give the Epoxylin time to harden according to the instructions.
- Let's move on to the base for the compressor, for which you need to acquire three wooden boards or a piece of plywood measuring 30 by 30 cm. For the convenience of further moving our device, you can screw mobile furniture wheels to the base. We do not specifically describe the dimensions of the holes and other details, since this will all be purely individual, as it depends on the selected material, type of compressor, and so on.
- We drill holes for the compressor and studs and mount them. The studs are secured with nuts and washers. We put a car filter with a special paper core on the inhalation of the compressor. This will help prevent dust and other small contaminants from getting inside the compressor.
- Next we'll deal with the electrical work. To make our homemade compressor for painting a car convenient to use, we equip it with a pressure switch (for example, PM5 or RDM5), as well as a shutdown switch. The first device, a pressure switch, is necessary for us to turn off the compressor during the process of pumping air into the receiver, when the pressure reaches the permissible maximum, and vice versa, to turn it on when the pressure drops below the permissible minimum. You can set the values of the maximum and minimum pressures directly on the relay using springs, with the large spring responsible for the minimum pressure (and the corresponding activation of the compressor), and the small one for the difference between the maximum and minimum pressure values.
- Take a closer look and you will see 2 contacts on the relay, designed specifically for connecting it to the network. Since such relays were originally used in the water supply system, we will slightly change its purpose and connection features. Our task is to connect the first contact to the network, and the second to the compressor.
- We place the general shutdown switch on the gap between the pressure switch and the 220V network. This will help de-energize the entire installation so that you don’t have to constantly run around to turn it on and off.
- We paint the receiver and begin final assembly.
- Screw the nut with the fitting onto the oil-moisture separator filter.
- We take the hose and put one end of it on the fitting, and with the other we pull it onto the compressor tube and clamp it all with clamps. To do this, we take a reinforced, oil-resistant hose. Each threaded connection should be sealed with fum tape.
- We screw the filter to the bottom of the receiver and treat the silicone connection with sealant.
- We screw on the cast iron lid, but pre-treat its threaded connection with the same sealant. To improve sealing, you can place a rubber gasket under the lid.
- You need to screw a tube onto the lid, the thread of which should be a quarter of an inch, and screw the cross onto it.
Useful: High-quality headphone amplifier using op-amps and field-effect transistors
Compressors using all sorts of unnecessary things as receivers
If, when choosing compressors and motors, craftsmen settled on components from refrigerators and cars, then they do not use anything as receivers - even bottles of champagne and Coca-Cola (at pressures up to 2 atm). Let's list a few worthwhile ideas.
If you have a receiver from KrAZ at hand, you can get a unit with minimal labor costs: all the pipes are already screwed into it.
Compressor unit with receiver from KrAZ
If you are the owner of unnecessary diving equipment, you can use it at work.
Receiver made from scuba cylinders (installation stage - without capacitor bank)
Almost every summer resident with a stove on gas cylinders will have these unnecessary containers.
Compressors with gas cylinder receivers
If the hydraulic accumulator in the water supply system has a leaky bulb, there is no need to throw it away. Use it as a receiver by removing the rubber membrane.
Receiver from hydraulic accumulator
An expansion tank from a VAZ is an inexpensive purchase, even if it is new.
Receiver - expansion tank from a VAZ car
The next idea is for air conditioner installers who have leftover freon cylinders and split system parts.
Freon cylinder as a receiver
Another viable receiver came from a tubeless car wheel. An extremely budget-friendly, although not very productive model.
Wheel receiver
We invite you to watch a video about this experience from the author of the design.
Installation of device parts
For ease of storage and movement, it is best to arrange all compressor parts compactly on one base. We will use a wooden board as a base, on which we securely mount the engine - supercharger and fire extinguisher housing.
We fix the compressor motor using threaded rods threaded into pre-drilled holes and nuts with washers. We place the receiver vertically, using three sheets of plywood to secure it, in one of which we cut a hole for the cylinder.
We attach the other two using self-tapping screws to the supporting board and glue them to the sheet holding the receiver. Under the bottom of the receiver, at the base, we hollow out a recess of appropriate size. For maneuverability, we screw wheels made from furniture fittings to our base. Next we perform the following operations:
We protect our system from dust and coarse particles, for which we use a coarse fuel filter for gasoline engines as an air intake. For this purpose, we use a rubber hose that tightly presses the filter fitting and the inlet tube of the supercharger. There is low pressure at the compressor inlet and reinforcement of contact using automotive clamps is not required. Thus, we made an inlet filter for the compressor with our own hands.
An oil separator should be installed at the compressor outlet; it will not allow liquid particles to pass through. We use a diesel engine power system filter as this protection element. We connect it to the supercharger using an oil-resistant hose. Since the pressure at the outlet of the compressor is increased, here and everywhere else, to strengthen the contact, we use automotive clamps with fasteners tightened with a screw.
We connect the oil-moisture separating filter to the input of the gearbox. We need a reducer to decouple the pressure of the receiver and the outlet of the supercharger. We screw its high-pressure outlet into the water crosspiece on the left or right.
We screw a pressure gauge from the opposite entrance of the quad, using it we will control the pressure of compressed air in the cylinder. We screw the adjusting relay on top of the cross. We seal all connections with fum tape and sealant.
The relay will allow you to set a wide range of pressure levels in the receiver, promptly interrupting the supercharger power supply circuit. You can choose PM5 or RDM5 as the actuator. These devices will turn on the compressor if the compressed air pressure in the receiver drops below the set level, and turn off when the specified range is exceeded. The required pressure is adjusted on the relay using two springs. The large spring sets the minimum pressure level, and the small one regulates the upper limit, setting the compressor shutdown limit. RDM5 and PM5 were originally produced for use in the water supply network and are electrically passive, that is, they are ordinary switches with two contacts. We connect one contact to the zero of the 220 V network, and the second to the supercharger.
We connect the phase wire of the network through a toggle switch to the second network input of the compressor. The introduction of a toggle switch into the electrical circuit allows you to quickly disconnect the system from power without having to run to the outlet every time. We solder all electrical connections and carefully insulate them.
Compressor for car painting
Most often, they make their own devices for painting car body parts.
The key to success in making a reliable and convenient compressor for painting will be the purchase of a durable receiver. The motor from a household refrigerator is not suitable for a device for this purpose. The best option is a car compressor and a 220 V electric motor.
An important part of a piston compressor is a special filter for removing condensate. Place it in front of the hose that supplies air to the spray gun. It is recommended to choose a filter with a fairly durable housing that can withstand high pressure.
Instead of hoses, for the reliability and quality of operation of the device, it is more reasonable to choose copper tubes and a reinforced hose.
Compressor testing and adjustment
Now all that remains is to paint the entire compressor and move on to field testing.
After assembling the structure, you should check its functionality. We connect a spray gun or a tire inflation gun to the compressor output. After that, with the toggle switch off, plug in the plug into the network. We set the control relay to minimum pressure and then apply power to the supercharger. The pressure created in the receiver is controlled using a pressure gauge. After making sure that when a certain level is reached, the relay turns off the engine, we check the tightness of the air ducts and connections. This is easy to do with a soap solution.
After making sure that the compressed air does not leave the system, we bleed it from the receiver chamber. As soon as the pressure in the cylinder drops below the set mark, the relay should operate and start the compressor. If everything is functioning properly, you can try painting some unnecessary part. Preliminary work to prepare the surface for applying enamel is not required here - it is important for us to develop skills and determine what pressure will be required to paint the product. We experimentally determine the value in atmospheres at which the excess pressure is enough to paint the entire part in a uniform layer with a minimum number of blower activations.
Do it yourself
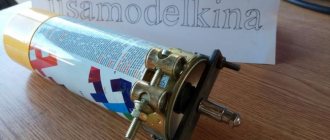
So, we choose to make a painting installation from a regular car camera. List of required materials:
- A car camera that acts as a receiver;
- A pump with a pressure gauge that acts as a supercharger;
- Chambered nipple;
- Repair kit;
- An ordinary awl.
Now you can start making the compressor station. The chamber must be checked for leaks; to do this, it must be inflated. If there are air leaks, the problem must be corrected, either by sealing or by vulcanizing with raw rubber.
After which, using an awl, you need to make a hole in the manufactured receiver. A nipple will be placed here, through which a uniform stream of compressed air will come out.
The additional fitting is secured by gluing. A repair kit will help solve this problem. Then the fitting is connected to the spray gun. To check how the air flow comes out, you need to unscrew the nipple.
In this case, the original nipple remains, it will serve as a valve and hold excess pressure. Finally, you need to determine the pressure level by spraying paint onto the metal surface. If the enamel lays down evenly, then the installation is working well.
In addition, the pressure value can be checked using a pressure gauge. But, its level, even after pressing the aerator key, should not be abrupt.
It is not difficult to design a compressor, but after its manufacture, anyone can make sure that repairing or painting a car will be much more effective than it was with a spray can.
The last parting words include the fact that it is necessary to avoid getting water or dust into the car camera in every possible way. So that these particles do not subsequently get into the spray gun, otherwise you will have to re-paint.
As a result of proper operation, the created installation will work for a long time, but it is still better to automate the air pumping.
Adjustment and testing
The main test of a homemade compressor is to determine the possibility of effectively regulating the pressure that is created in the assembled system. The easiest way to do this is to test paint a surface. In this case, the following is done sequentially:
- Set the relay to 4…5 atmospheres.
- Connect the compressor to the network.
- The stability of the parameter is monitored using a pressure gauge. If the relay is operational, then if the pressure is exceeded, it will turn off the compressor; otherwise, open the relief valve and immediately turn off the unit.
- Check the system for spontaneous bleeding of the energy carrier, for which you can use a regular soap solution.
- When the pressure drops to a level below the minimum permissible, the relay should automatically turn on the compressor.
- After painting any surface, it is necessary to check the quality of the paint applied to it - during an external inspection, no traces of moisture, foreign particles and dirt should be detected. If such defects do occur, you should additionally check the operation of the output filter - oil and water separator.
Conclusions and recommendations for maintenance
The operation of the assembled unit will be long and reliable if routine maintenance is carried out periodically. It comes down to replacing inlet filters, periodically purging all air ducts, and also changing the oil in the compressor.
It is undesirable to load the compressor by more than 75% of power. But it is quite difficult to understand where the line is that cannot be crossed, to predict what pressure the compressor will show. It depends on when the refrigerator was released and what brand it is. On older models this figure will be better. Then, for comfortable, high-quality work, you only need to replace the consumable filters.
