Mosaic tiles have long been used as finishing material for kitchens and bathrooms. Previously, craftsmen had to lay out each individual element, so laying the mosaic took a lot of time. Now the process has been significantly simplified thanks to mosaics produced on mesh or paper.
Distinguished by its originality compared to ceramic tiles, mosaics allow you to decorate a room and realize your boldest fantasies in the interior. In order to decorate a wall or floor with mosaics in a high-quality manner, you need to understand the features of this process.
The difference between mosaics on paper and on mesh
Mosaic tiles on mesh and paper backing are the most popular types of finishes. The second option is cheaper, but it does not allow you to control the seams between individual elements.
Each type has its own rules. The mosaic on the mesh is glued face down, and after the glue has dried, you can immediately proceed to grouting the joints. To install paper-based mosaics, the sheets are applied to the surface with the paper side up, after which you must wait at least a day to continue the process.
Luxurious mosaic and its rich variety (types of material)
Exquisite finishing raw materials are divided into several types. We will not consider everything, since it is very long. Let's take a brief look at the most popular ones.
Elegant glass tiles
Mosaic is produced by melting feldspar, sand, soda and metal oxide at a temperature of 1600°C. A homogeneous substance is formed by injection molding at 1000°C. The product is very durable because it is subjected to high-temperature firing. The products also captivate with a rich palette of shades, which allows you to recreate a huge number of incomparable images.
Elegant smalt tiles
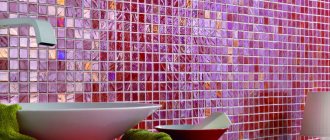
Smalt is multi-colored glass produced using innovative technology. Mosaic is produced by pressing colored glass particles and sintering at 800°C for 24 hours. It is impossible to find identical cubes in tone. Smalt tiles pamper you with stunning appearance and excellent characteristics. True, the price is a little bit high, but this product is an attribute of luxurious interiors.
Graceful mirror tiles
Mirror tiles made from siliceous sand, powdered gold, and coloring oxides are extremely popular. It is a first-class corrector - it enlarges the room, sweeping away boundaries, smoothes out unevenness in the corners, and creates a spatial illusion. In the bathhouse she looks simply magical.
Exquisite ceramic tiles
Mosaic is made from pieces of ceramic tiles that differ in texture and shade. It contains clay, quartz flour, and flux, so it is safe for health. Its choice is huge - glossy, matte, tiles that imitate the surface of expensive natural materials. The product is appropriate in the shower, in the steam room, in the dressing room, and in the locker room.
Noble stone tiles
Stone mosaic is made from:
- marble;
- amethyst;
- onyx;
- jasper;
- lapis lazuli;
- slate;
- coil;
- tuff;
- malachite;
- travertine
The tile is in demand because it pampers with the harmony of nature and wonderful texture. It is ideal for tiling dressing rooms, steam rooms, and bathhouse sinks.
Also popular, but very expensive, is mosaic from:
- metal;
- valuable wood species;
- precious metals and stones.
It cannot be said that the price of an exquisite product is pleasantly pleasing, but it is worth it, since it will never go out of fashion and will delight you with amazing technical characteristics.
Cladding stages
The use of mosaic tiles is quite common: they are used both for finishing a room and for decorating individual elements. In this case, the tiles can be laid on the floor, on the wall, on the ceiling, on the windowsill and on the countertop.
The technology of laying mosaics is not very different from laying tiles, but requires more responsibility. A convenient point when gluing mosaic tiles is their flexibility, which allows you to stretch or narrow the seams.
Glass mosaic is most often used for swimming pools, although it can also be found quite often on walls and floors as panels. The installation of glass mosaics should be planned taking into account lighting, because... horizontal backlight will display all errors.
Tools required for installation:
- 2 spatulas (smooth and serrated edge);
- roller or rubber grater;
- building level;
- knife;
- pencil and ruler.
To lay tiles on the floor, it is better to use a more durable material: stone, marble or porcelain stoneware. Laying marble mosaics is an ideal option for a bathroom interior. This is the most durable material used for flooring. In this case, it is necessary to monitor the color of the selected glue: it should be white, not gray. This is due to the fact that marble quickly absorbs everything and changes its color shade forever.
When arranging a kitchen, bathhouse, or cafe, wooden mosaic cladding is used. This option has a lot of positive properties: strength, soundproofing, durability and uniqueness.
Preparing the foundation
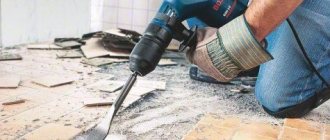
Mosaic tiles should only be laid on a prepared base. After removing the remnants of wallpaper, paint and other coatings, you need to check the plaster. A prerequisite when preparing to lay tiles is to apply a primer to hide traces of dust and improve adhesive properties. After priming and checking the walls using a level, you can proceed to the next stage.
We carry out the markings
After the primer has completely dried, the surface is marked. First of all, you need to decide how the mosaic will be laid. The choice will depend on your imagination and preferences. In addition to the classic one, there are other options for laying out mosaic tiles:
- alternating matte and glossy types;
- combining mosaics with tiles;
- pixel mosaic;
- panels and paintings;
- use of hexagonal mosaic.
The location of the mosaic pieces must be carefully marked. When drawing up a sketch, pay attention to the following points:
- if there are slopes and boxes in the room, the drawing begins to be laid out from them;
- if there is a decorative element in the room, then it is a priority;
- Try to hide all possible undercuts in a corner or at the bottom of the floor.
After the sketch is drawn up, it is transferred to the wall.
Apply glue
Gluing mosaic tiles is not difficult, but you need to choose the right glue. When choosing an adhesive composition, the surface material on which the tiles are laid matters. To prevent the appearance of an unwanted shade, it is better to choose white glue for glass mosaics.
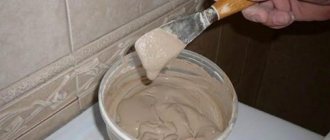
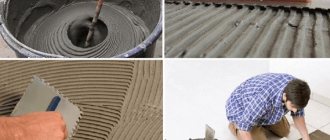
As for the preparation of the glue, the solution is prepared in accordance with the requirements specified on the packaging. After studying the instructions, apply the glue to the surface using a rubber spatula.
It is undesirable to apply glue directly to a surface with a large area, because... it dries quickly and forms a film on the wall. It is better to dilute the amount of glue that will be used immediately.
Laying on floors and walls
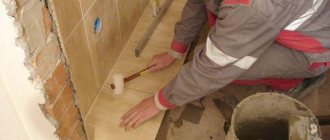
Laying mosaics with your own hands should begin with those places that catch your eye the most. Unlike the technology for laying ceramic tiles, in this case there is no need for additional support - if the work is done evenly, the mosaic will not slip or fall off. Given the high flexibility of the material, you should not press it with your hands - because of this, the sheets may lie unevenly. The optimal tool in this case would be a silicone roller.
Laying mosaic tiles on a grid:
- In this embodiment, the sheet is turned with its front side towards itself, and its back side is completely immersed in the glue.
- The sheet is gently pressed with a rubber spatula.
- The distance between the mosaic pieces is checked (it should be the same).
- The remaining adhesive is removed from the tiles, which are left to dry completely.
Laying on paper base:
- Turning the sheet of paper with the paper side towards you, glue it to the wall and tap it with a spatula to distribute it evenly.
- After laying the second line, we return to the first and blot the paper with a damp sponge until it begins to easily peel away from the surface. Remove paper from the mosaic from the top corner, getting as close to the surface as possible.
- After removing the paper backing, the seams and tiles are leveled with a small spatula.
- Before applying grout, the tiles are left to dry for 24 hours.
We produce grout
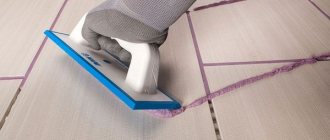
Grouting is carried out only after the solution has completely dried, and for this a minimum of 2 days must pass. The facing surface is cleaned with a brush and warm water. If there are smudges of glue at the joints, remove any remaining glue with a knife or sharp blade.
The mixture is diluted according to the instructions and applied at an angle of 45°. The grout is left to dry for 20 minutes, after which it is cleaned with a dry cloth to remove any remaining mixture. It is then washed with water and polished after drying.
Mapei grout is a win-win option from the Italian manufacturer. Its only disadvantage is that it quickly sets to the surface.
What glue is needed for mosaic?
In each case the choice is individual. For example, for glass mosaics you need to use a special white glue. The consistency of the glue should be optimal (thick country sour cream) to hold the mosaic module on a vertical surface. Mosaic adhesive is applied with a spatula with a tooth size of 3 to 3.5 mm, onto a section of the wall not exceeding the size of 6-9 modules. If the so-called “paper” technology is chosen, then the modules are glued with mosaics, the paper should be facing outward. It is convenient to press the module from the paper side with a regular rubber roller for gluing wallpaper. After sequentially laying a certain section of the wall, you need to wet the paper of the mosaic modules with a damp sponge and remove the paper backing.
Finally, I would like to say that when choosing which glue to glue the mosaic with, be sure to follow the manufacturers’ advice. Use only special adhesives for mosaics, do not try to save a few rubles, remember that the miser pays twice. To care for mosaics, it is better to use neutral detergents recommended by the manufacturers. When cleaning heavy stains, use low-acid detergents, remembering to rinse the treated area with plenty of water.
Pasting on rounded surfaces and corners
Due to their design, mosaic tiles ideally fit on curved surfaces. The process of gluing tiles onto a round surface is not much different from installing them on walls or floors. But some features that the master needs to know still exist and this is that the smoother the bend, the better the tile will look. If the external curvature of the surface is too strong, it is possible to install tiles, but the surface will be ribbed. Also, with a strong internal bend, the distance between the fragments in the tile sheet is violated. So if you decide to design the shape of the walls or pool yourself, avoid sharp bends.
As for gluing mosaics in the corners, it is no different from installing regular tiles. For internal and external corner joints, the tiles must be cut along the seam. If the seam of the tile does not coincide with the corner, then in this case you will have to cut the tile fragments using a glass cutter or a grinder.
How to stick mosaic tiles onto a round surface and how to cut fragments can be seen in the video:
Preparing the base
Methods of laying mosaics.
In the bathroom, before you start laying the mosaic, you should arrange a screed for the floor, while the walls should be free of unevenness and defects. Do-it-yourself mosaics on the bathroom floor should be laid 10 days after the screed is installed.
The material should be purchased with a certain reserve, which may be equal to 10% of the total quantity, this is necessary in order to prevent the need to purchase additional products during the work process to replace those damaged during installation; some tiles may also have manufacturing defects.
Cutting glass mosaic.
There are the following methods for cutting glass mosaics:
1. Using a knife or scissors, you can cut paper or mesh into strips;
2. Using special mosaic tongs, cut one segment at a time;
3. Cutting on mosaic sheets using a cutting machine equipped with a ten-centimeter diamond blade. You should mark the cutting line with a pencil on paper or directly on the mosaic and gradually deepen the cut with a diamond blade. If you try to cut a sheet of mosaic at one time, the coating may crack under the pressure of the master.
Mosaic finishing design options
In order to awaken your imagination and help you choose a design for your bathroom, we offer you finishing options with different types of mosaics:
- Bathroom decorated with red smalt tiles.
- A combination of different types of mosaic tiles.
- Bathroom decorated with ceramic mosaic with large fragments.
- Mosaic tiles in combination with regular tiles.
- A bathroom with smooth curves imitating a mosaic.
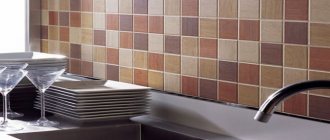
- Kitchen apron made of mosaic tiles.
- Mosaic tiles with a common pattern across the entire wall.
- Mosaic table top.
- Swimming pool steps with a curve, finished with mosaic.
As you can see, with the help of mosaic tiles, you can create a unique design in the bathroom, kitchen or pool, without any extra effort. We hope that our article was useful to you!
How to prepare the base for laying mosaics?
There are two types of mosaics:
- Ready-made tiles glued to a mesh or paper base. They are convenient to use when you need to create a continuous mosaic canvas with an unobtrusive pattern. The mesh can be cut, giving the fragments the desired shape.
- Fragments that are made by hand. At the same time, the master adjusts individual fragments to their shape, creating his masterpiece. For this finishing, broken tiles or natural (artificial) stone are used.
Whatever type of mosaic is chosen, the surface must be carefully prepared. The plane on which the finishing material will be applied must be flat. Even if there are radii and curvatures, you need to thoroughly clean the surface so that there are no bumps. Unless they were not provided for initially. Because during installation, not every wall defect can be corrected with an adhesive solution. And shortcomings in the preparatory work can affect the outcome of the entire case. Therefore, the surface must be carefully plastered and sanded. If possible, you can line the walls with plasterboard.
Naturally, the base must be cleaned of previous coatings. Residues of paint, foreign objects and other contaminants must be removed. Dust must be removed and the surface primed. Otherwise, after a couple of years, the tiles may fall off and the beauty will be ruined.
Gluing mosaic tiles
Doing your own finishing with mosaic tiles is not as difficult as it might seem at first glance. All you need to do is learn which tools to use and follow the instructions below.
Tools for work
Regardless of where you will stick the tiles, you will need:
- A spatula with a smooth edge.
- A spatula with a serrated edge.
- Rubber spatula for grouting joints.
- Rubber sponge.
- Drill with attachment for mixing mixtures.
- Construction knife.
- Level.
- A rag for removing dirt from tiles.
- Plastic crosses for seams.
Glue selection
Each type of mosaic tile has its own adhesive option. Let's figure out which glue is best suited for which type of tile:
- Adhesive for ceramic tiles. For tiles with ceramic elements, any cement-based adhesive can be used. Since ceramic tiles do not have a transparent structure, the color of the adhesive can be gray, white or transparent. When gluing ceramic tiles, the type of base plays a big role. If you need to glue tiles to concrete, plaster or cement screed, you can use any tile adhesive. If the tiles are glued onto a “warm floor” system, waterproofing or old tiles, then in this case it is better to use elastic adhesive, for example, “Superflex R77” or “Litoflex K80 Eco”.
- Adhesive for glass tiles. Through the smalt tile elements, which have a transparent or translucent structure, the surface and color of the adhesive on which they are glued are very clearly visible. For this reason, experts recommend using only white glue for glass tiles. The exception is non-transparent smalt tiles, for which gray glue is also suitable. Popular brands of white cement-based adhesive are Flexbond bianco or Litoplus K55.
- Adhesive for stone tiles. Some types of stone can change their color due to prolonged contact with water. Therefore, to lay stone mosaics, it is better to use quick-hardening cement-based adhesive - “Litostone R98” or “Litostone R99”. Also, for water-sensitive stone types, reactive polyurethane adhesive “Litoelastic” is suitable.
When gluing tiles to the walls of a pool or other surfaces in active contact with water, higher demands are placed on the quality of the adhesive. Since gluing tiles in a pool or shower involves waterproofing, it is necessary to use adhesive with maximum wettability and elasticity. To achieve such properties, liquid latex is added to the glue, for example “Latexkol - m”. The additive is mixed with water and added to the cement mortar, or completely replaces water. There are also cement adhesives on sale that contain polymers to convert water into latex, for example, “H40 Tenaflex Eco”. To glue mesh-based tiles in a pool or bathroom, you can use any elastic adhesive. Since the tile fragments are fastened with a mesh, when cleaning the seams, the mosaic elements are less susceptible to falling out. But keep in mind that in swimming pools it is recommended to use mosaics on a paper backing; only in this case is maximum contact between the mosaic and the tile adhesive achieved.
Choosing grout for joints
There are two types of grout that can be used for mosaic tiles:
- Cement mastic is a cement mixture diluted with latex or water. Cement-based mastic has a meager palette of colors. It is poorly resistant to moisture and chemicals. However, the big advantage of this grout is its affordable price, which is important when there is a large mixture consumption when working with mosaic tiles. If you decide to purchase cement mastic, then the best option would be grout diluted with latex plasticizer; it is more resistant to moisture.
- Epoxy mastic – made on the basis of epoxy resin. Epoxy mastic has very good performance characteristics, it is resistant to water, has increased strength, can be transparent or painted in various colors, which makes it suitable for almost all types of mosaic tiles. The main disadvantage of epoxy mastic is its high price.
