Venetian plaster. History of appearance
Venetian plaster came from ancient Rome, where marble was a common material for the construction and decoration of buildings. After processing it, a lot of marble chips and dust remained, which enterprising craftsmen began to use as plaster.
By combining marble dust with lime and water, they obtained wall coverings that resembled real marble in appearance. While stone, due to its high specific gravity, could not always be used for finishing fragile surfaces, marble plaster coped with this task perfectly. The result was a surface that was not afraid of water and fire, which led to the widespread use of this new material in the rich houses of the inhabitants of Rome.
Time passed, and plaster using marble dust was firmly forgotten. Only in the 16th century did the Italian architect Andrea Polladaio revive the ancient recipe for this wonderful coating. Once again, marble plaster became widespread, first in Venice and then throughout Italy and Europe. This is where the name “Venetian plaster” comes from.
The fact is that it was impossible to use natural marble to decorate houses in Venice due to its heavy weight. As everyone knows, Venice is a city on the water, and here any increase in the weight of the structures located above the foundation could have negative consequences. Therefore, they found an old way to decorate the palaces of Venice with a material indistinguishable in appearance from marble, but much lighter.
Famous artists - Raphael and Michelangelo created their frescoes on this plaster, some of which have survived to this day. This type of wall covering came to Europe under the name “Venetian plaster”, and along with marble dust and crumbs, components of natural stones - onyx, granite, malachite, limestone, quartz and others - were added to the solution.
At the same time, they began to use coloring pigments in plaster compositions to give a certain color to the walls. Natural dyes obtained from plants and even animal blood were added to the plaster as coloring pigments. Many churches and rich mansions were decorated with just such plaster.
A new wave of passion for this material began in the second half of the last century in Europe, thanks to the Italian architect Carlo Scarpa, who helped plaster regain its high position. To see the ancient Venetian, you need to visit the Fontainebleau castle in France, which for many years served as the residence of French kings.
Numerous frescoes on such plaster by famous Italian artists Giulio Romano and Giorgio Vasari can be seen in Naples, Florence and Rome.
In Russia, this type of decoration appeared quite recently, about 20 years ago, but has already managed to win the hearts of lovers of rich decoration.
Elimination of old finishing
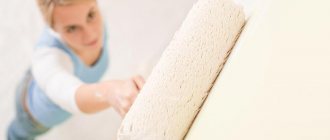
Let's figure out how to prepare a wall for applying decorative plaster. We cover the floors with plastic film, turn off the power to the wires, and prepare an extension cord for connecting power tools. Having prepared everything we need, we begin to work.
Removing tiles, plaster
The old layer of plaster is removed if it is applied in a thick layer, begins to peel off, or becomes cracked. The solution is completely removed and the base is inspected for damage.
The work is carried out as follows:
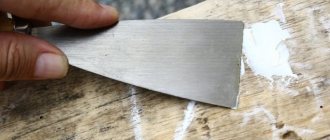
- a thick layer of old coating is removed using a spatula, chisel or chisel, knocked down with a hammer;
- Plaster of medium thickness is dismantled using water applied with a brush to the surface. The better the old coating is moistened, the faster and easier it will be to dismantle it. This preparation option is suitable for facades;
- Another way is to use an electric drill with a brush attachment. Get ready for the work to be dusty;
- a thin layer of plaster can be easily removed with a grinding machine to which the hose of a construction vacuum cleaner is connected.
To remove facing tiles, use a chisel and a hammer. As a rule, this type of coating is easy to remove, but a lot of debris is generated, so you should stock up on bags to collect it.
Removing paintwork
This finishing option is considered the most difficult to remove, but it is imperative to get rid of it so that adequate adhesion is ensured between the wall surface and the decorative plaster. To remove varnishes and paints, one of the methods is used - chemical or mechanical:
- It is easiest to remove paint with special solutions, since the coating is softened by the solution, peels off, and can be easily removed with a scraper. The wash is applied with a brush or spray; when working, personal protective equipment is used - a respirator, gloves, goggles;
- A hair dryer helps a lot in removing paint. By heating the coating, it helps to separate it from the surface, and you just have to work with a spatula. The method is long - heating is carried out in small areas. Its advantage is that a small amount of dirt is formed. The consumption of electrical energy will increase, and the smell of burnt paintwork materials will appear in the room;
- remove the old coating with a grinder or electric drill using round brushes with metal bristles. This option is time consuming and labor intensive;
- Paint applied in several layers can be easily removed with a wide blade spatula.
Removing wallpaper
We continue to deal with the question of how to prepare walls for finishing with decorative plaster with your own hands. If the wall is covered with wallpaper, it will have to be removed, for which there are several ways:
- The easiest option is to moisten the old wallpaper using a foam sponge or spray bottle. Water should saturate not only the finishing material, but also penetrate to the wall surface, softening the glue. The process is simple, especially in the case of paper material. To speed up the process, craftsmen add fabric softener, dish soap or vinegar to the water.
- If the wallpaper has separated from the wall in some places, it can be removed easily, even without the help of water. Dismantling begins precisely from such areas, helping yourself with a spatula. Water is sprayed onto areas where the wallpaper is still firmly in place;
- Vinyl or non-woven wallpaper material is sometimes difficult to remove, so here you will have to use a needle roller or a wallpaper “tiger”. These tools damage the moisture-resistant layer, after which the material is moistened and removed in a well-known way. For such wallpaper it is recommended to use heated water;
- Another option to remove old wallpaper is to use a steamer. The steam supplied to them has an effective effect on wallpaper glue, which loses adhesion and is easily separated from the wall surface. This method is suitable for all types of wallpaper materials;
- Some craftsmen use special products to remove the coating, which are purchased at a building materials store. Instructions for their use are printed on the packaging box. When clearing walls of old wallpaper, it is recommended to use these useful tips:
- If removal is carried out using water, then softened glue and remaining moisture are removed from the cleaned surface immediately. Otherwise, the surface is washed with clean water and wiped dry;
- If the old wallpaper is not removed after moistening, PVA was added to the wallpaper glue, which is resistant to water. In such cases, you will have to arm yourself with brushes with metal bristles or a sander with a suitable attachment. If the wallpaper is held firmly enough to the wall, some specialists, in order to save time, apply a thin layer of putty on it, having previously treated the surface with a primer mixture.
Whitewash removal methods
This finishing material can be removed unambiguously, even if it is firmly attached to the wall.
The easiest way is to rinse with plain water. But this method is used only when the whitewash is applied in a small layer. Water is applied to the wall surface in several passes so that the coating is completely saturated.
You will have to work in separate sections, since a wet wall dries quickly.
Thick layers of whitewash are cleaned with a spatula.
A thin layer can also be removed using the dry method, using a stiff brush installed in a grinder or drill. But in this case, you are guaranteed a large amount of dust flying throughout the room.
Elimination of defects
We move on to the next preparatory stage and eliminate the defects that appeared after removing the old finishing material. If cracks, uneven places, or chips appear on the surface of the wall, then, as a rule, errors were made during construction, or certain conditions were violated during operation.
To avoid problems in the future, it is recommended to eliminate all these defects using cement mortar or putty. To seal deep cracks in preparation for decorative plaster, use fiberglass or reinforcing mesh.
Alignment of walls
Many people wonder whether it is necessary to pre-level the walls. Curvature of walls is a problem that occurs quite often, and its elimination is of no small importance.
Strong differences are eliminated by constructing a frame covered with plasterboard sheets, but in this case some of the free space is lost. Minor defects are eliminated with cement or gypsum mortar applied over installed beacons.
The algorithm of actions is as follows:
- the surface is primed;
- beacons are placed on the solution;
- the free space is filled with a solution slightly below the level of the beacons; if the thickness is large, a mesh is used for reinforcement;
- the final leveling is performed with the finishing layer;
- as soon as the wall is dry, the beacons are removed, the voids are sealed with a mortar mixture.
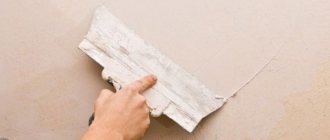
Puttying
If finishing with Venetian plaster is to be done, then puttying is mandatory. The material is sold in a ready-to-use state, which is very convenient for working with it, or in the form of a dry mass, which is first mixed with water.
The application is carried out in a thin layer, because the surface is already leveled with the solution.
For puttying, use a spatula; after the surface has dried, it is sanded with sandpaper.
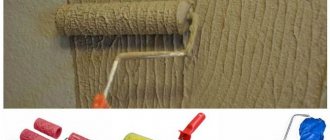
Applying primer
We are moving on to the final stage of preparing the walls before finishing them with decorative plaster.
The following compositions are used in the work:
- perchlorovinyl. The composition works great on surfaces made of concrete or brick stone, penetrates deeply into the structure of materials, provides good adhesion, dries quickly, but has an unpleasant odor;
- alkyd. In addition to the above surfaces, this composition is also used for wood. It penetrates deeply into the material and forms a leveling film on its porous surface;
- "concrete contact". This is the best solution if you need to process monolithic concrete. The composition binds the upper layers of the wall material, leaving a clear roughness on the surface, which increases the adhesion rate to the plaster mortar.
Composition of Venetian plaster
The material for the classic Venetian is aged slaked lime and finely ground marble flour. In European plaster compositions, lime is kept for a long time in underground bunkers, where it is saturated with microelements from the environment and becomes plastic. After this, the marble and lime are crushed to a powder state. It is this composition that can be applied in thin layers, the thickness of which resembles a paint film.
Now the name of the plaster can be seen under the brands Stucco Veneziano, Grassello or Marmorino. But here it should be clarified that Grassello (translated from Italian as “fat”) is a fine-textured lime mastic, applied in 8-10 layers with a flexible spatula, which are then polished with a trowel.
Marmorino plaster is a mastic containing larger fractions of marble flour, and its application is done with a hard spatula.
Currently, plaster compositions contain, in addition to a lime binder, acrylic materials and other polymers. If the classic Venetian was applied to stone or brick surfaces, over old plaster, then new modern compositions can be applied to almost any durable surface, including drywall.
The acrylic content in the plaster determines the number of layers applied. The less acrylic in the composition, the better the translucent effect of the material, but more layers have to be applied.
Preparation and priming
Initially, you need to make sure that the surface is completely dry. If you see fungus, it must be eliminated as quickly as possible. It is necessary to remove the old layer, remove dust and grease stains, if any. As for minor defects and cracks, they do not need to be repaired. The fact is that decorative plaster usually has a peculiar relief, so such small deformations are usually not visible. If the cracks are large, they should still be repaired. To do this, use a regular side grinder with a side disk. The cleaned cracks are filled with a building compound. Next, apply a special basalt layer to strengthen it.
Venetian plaster pros and cons
Let's look at the main advantages:
- the coating of such plaster is easy to wash and clean;
- real Venetian is an environmentally friendly material, since it uses only pure natural materials;
- is characterized by durability, a long period of operation, estimated at more than tens of years;
- unique surface patterns enable designers and artists to create a wide variety of interior styles;
- like any stone, Venetian stone enhances sounds in a room, so it can be used for finishing concert halls and conservatories, recording studios;
- the applied pattern is preserved for the entire period of its operation, without fading or erasing;
- The lime contained in the plaster prevents the development of various fungi and molds.
And now a few words about the shortcomings:
- Venetian plaster can be wet cleaned if the surface is treated with a special acrylic-based water-repellent composition. In other cases, if only one beeswax is applied to the Venetian, it can be wiped with a damp sponge, otherwise the entire coating can be washed off or wiped off.
- High price.
- Difficult to apply.
- High demands on the base surface.
- Making such plaster with your own hands is almost beyond the capabilities of the average person. Only highly qualified specialists can reproduce a real Venetian so as to create the feeling of real polished marble. At the same time, the base under it must be perfectly level and smooth, which is not always possible to achieve with your own hands.
Composition and history of appearance
How did Venetian decorative plaster appear?
The beginning of the use of coatings with mixtures based on natural binding materials is lost in millennia. Theophrastus, who lived in the 2nd-4th centuries. BC. describes the mineral gypsos, remarkable for its stickiness and warmth released during mixing. It was crushed and moistened, and then stones were connected with it. The word "gypsos" was used for gypsum and lime. In the 1st century BC. Vitruvius describes the production of a six-layer finishing coating that strengthens the wall - marbled plaster, which was as durable as natural material. The ancient technique differed from the techniques for creating stucco (stucco - the highest grade of plaster) of the Venetian of our time.
In archaic Greece VII-VI centuries. BC. marble stucco or stucco/stucco was used to decorate temple walls. The finish imitated white marble and consisted of gypsum, crushed marble and lime. The Greeks spread this technique during the Hellenization era. Stuccos with a shiny, glossy white surface appeared among the Etruscans on the Italian Peninsula before the formation of the Roman Empire. The Venetians of ancient Rome had a thickness of 1.6 mm inside buildings, and up to 76 mm outside. Their main advantage was specularity, high strength, and resistance to weather changes. Often their surface was decorated with fresco paintings. Later, the baton was taken up by the Venetians, who were the fashion trendsetters of their time.
Since then, the composition of the Venetian has changed little; the components of the solution are:
- marble dust,
- fine-grained stone chips,
- lime dough,
- water.
In addition to classical components, the composition may include natural or artificial dyes, marble chips can be replaced with chips of other types, and the solution can be mixed with latex emulsion. There is also marble plaster for interior work consisting exclusively of calibrated marble.
Rumor has it that such coatings were invented by “armless” plasterers to hide the shortcomings of their work.
Venetian plaster decorating a wall always looks luxurious, a little magical. Therefore, from century to century it decorates the homes of wealthy people. Venetian plaster in the interior is always a unique design for any room, because it is unique. Various coating techniques give designers a free hand. Nowadays it can be seen in the apartments of people of all incomes, because the composition can be prepared with your own hands, and knowing what it consists of, how to apply it correctly, and having practiced, you can make this coating yourself, improving the wall.
Venetian plaster application
This plaster is used only for finishing the interior of residential and public buildings. It will not be possible to decorate the facade of a house with such decor, since this type of decoration cannot withstand numerous changes in ambient temperature, as well as snow and rain. Not only walls are decorated with Venetian, it can be used to decorate individual interior elements - cornices, fireplaces, columns and other architectural details.
Due to the fact that Venetian can withstand high humidity, it can be used for finishing bathrooms, toilets, swimming pools, baths and saunas. In addition, it is often used to decorate living rooms, halls, kitchens, and individual fragments can even be used in bedrooms. Public buildings - restaurants, cafes, hotels, reputable offices and other establishments that can afford Venetian plaster in the interior can also be its objects.
A real Venetian is applied in layers, the number of which can reach 10. And only a high-class specialist can imagine what will happen in the end when applying the first layers.
Types of Venetian plaster
The Venetian is divided into:
- smooth - in addition to the binder, it includes dust from marble or other natural materials;
- embossed - the presence of crumbs of different materials, the granule size of which reaches 2 mm.
Application of various compositions makes it possible to obtain surfaces:
- imitating smooth marble;
- travertine;
- onyx;
- matte effect of aged plaster with cracks (craquelure), which is perfect for frescoes, panels, and artistic painting of bas-reliefs.
This is just a small list of the effects that can be obtained when using this plaster.
There are many types of plaster.
The most famous in our country, which are offered by numerous shops and craftsmen specializing in the production of Venetian:
"Palmier" - creates the effect of malachite or marble walls, new and shiny.
“Arteko” is the complete opposite of the first type, as it gives the wall the appearance of an old stone.
“Marmoria” - the composition contains large fractions of marble and sand, visible under the top layer.
“Litos” differs from the above in that it does not contain slaked lime.
“Trevignano” is made on a polymer binder and creates the effect of marble, as if illuminated from within. Reminiscent of travertine and available in a wide range of colors, up to hundreds of tones and shades.
“Veneto” is the most affordable plaster, not demanding on the base and application technique.
"Marbello" is not quite classic Venetian plaster. It differs from other types in that it produces a visual perception of a velvety surface, combined with glossy veins. Under different lighting it creates different shades of the surface. It is made on the basis of polymer binders.
"Encausto" - resembles the surface of polished granite with dark specks.
"Tierrafino" - with the effect of Moroccan plaster "tadelakt".
Each manufacturer has their own Venetian and gives them sonorous names. But the principle is the same for all types - applying several layers by the hands of a professional master. Only in this case can you obtain the surface declared on the manufacturer’s packaging.
Caring for a Venetian is not difficult; you just shouldn’t use abrasive cleaning products so as not to spoil the decorative top layer. It is allowed to use mild detergents and a sponge, and this is only if synthetic wax was used for the top coat.
About the composition
Over the centuries, the composition and manufacturing technology of Venetian wine have not changed dramatically. While remaining the same in general, the finish has changed in particulars, and the compositions produced today include the following materials:
- Marble chips are still used, but there is not enough for everyone. Therefore, there are mixtures based on stone dust from granite, quartz, malachite, and onyx. Material of different fractions is used, and the finer it is, the better and more natural the pattern is.
The use of Venetian plaster makes the interior elegant Source pinimg.com
- Traditional formulations include slaked lime. In modern mixtures it is supplemented (or replaced completely) with polymer binders (for example, acrylates). Acrylic or latex emulsion is added to give the desired viscosity.
- To obtain the surface of the desired shade and saturation, coloring pigments, natural or synthetic, are added to the composition.
- Some compositions include additional substances: glitter, mother-of-pearl, and wax can be used to protect the finished finish.
Venetian plaster application technology
The classic Venetian consists of only water-soluble compounds with marble and lime components. There are also compositions based on acrylic binders, but in this case we cannot talk about impeccable environmental friendliness.
Although experts assure that acrylic plaster compositions are more plastic than lime ones and do not produce microcracks. In addition to its composition, plaster requires a special technique for applying it to walls. Real Venetian paint should be applied in thin layers, which can be up to 10, while decorative paints or compositions under the same name are applied in two, less often three, layers.
What surface is Venetian plaster applied to?
There are many tales about the difficulty of working with capricious material, its incompatibility with other types of construction materials, and the complexity of the process itself. The same can be said about any decorative coating if you work with it without taking into account all the features of the selection of materials and technology. Four types of base are used for decorative plastering:
- drywall;
- oil, acrylic, water-based paint;
- concrete slab;
- plaster.
You can apply this delicate material and a wood base, but to save expensive base material you will have to sacrifice funds to purchase mixtures that will close the pores of the wood. In fact, it will be the same plaster, so it makes no sense to consider a wooden wall separately, it’s just that the preparatory process will take on one additional stage - plastering the surface.
Preparing walls for Venetian plaster
This plaster can be applied to many surfaces, excluding metal and wood. On these materials, the classic Venetian cracks. Although acrylic-based solutions may be used on such surfaces. The basis for a classic Venetian can be brick walls, concrete, plastered surfaces painted with oil paint or drywall.
But in any case, all of the above surfaces must have sufficient strength and be cleaned of dust and dirt. Depressions or protrusions are removed by chipping or applying putty or mortar. The peeling plaster is removed and the old paint is cleaned off. Drywall joints are glued with sickle tape, puttied and sanded with sandpaper.
Before applying Venetian plaster, weak surfaces are reinforced with a mesh with a large or small mesh to avoid cracks. After this, the wall is completely plastered. After the putty has dried, the surface of the wall is cleaned with fine sandpaper. Dust from putty is removed either with air from a vacuum cleaner or with a soft, clean rag. The wall is primed with a deep penetration compound.
After priming, after waiting for the surface to dry, a second puttying, sanding, cleaning of dust and secondary priming are carried out. Only in this case will the wall surface acquire the necessary smoothness and evenness. Sometimes a third treatment may be required if the surface is far from ideal.
The final putty is carried out with high-quality compounds, and the dust, after sanding with zero-grade sandpaper, is removed with a dry rag.
The final primer should be made with a material corresponding to the type of finishing putty.
You need to be prepared for the fact that the entire process of preparing the surface for applying the Venetian will take quite a lot of time. It will take at least a day for each layer of putty to dry, and this is at normal room humidity and temperature. If the temperature is lower than expected or the humidity is higher than normal, the drying process may take longer.
Preparing drywall
The preparation of plasterboard walls has its own characteristics. Work is usually performed in the following sequence:
- Fill the seams with putty solution, first glue them with reinforcing mesh and then with paper tape.
- At the next stage, putty the entire surface.
- When the applied solution dries, the walls must be sanded.
- Dust should be swept away with a soft cloth and vacuumed. Then cover the surface with a primer.
- If there are unevenness, apply another layer of putty, and then repeat the steps (sanding, priming).
The time required to prepare the surface depends on several factors, in particular the type of base, the chosen preparation method and other nuances. For example, when putting drywall putty, it is worth considering that each layer takes about a day to dry. The time may increase as temperatures drop or humidity increases.
If Venetian plaster is used in a wooden house, it is imperative to use a vapor barrier. It will prevent damage to the wood by mold and fungi under the finish. When plastering walls, shingles made from small wooden slats are used.
Tools for Venetian plaster
Necessary tools and equipment for applying such plaster:
- metal graters with a width of 20-25 cm;
- special spatulas with rounded edges;
- a set of paint brushes – flat brush, brush brush and others;
- roulette;
- building level;
- fine sandpaper;
- grinding grater;
- rags;
- containers for preparing putty, decorative compounds, wax, washing brushes, spatulas.
Tools for applying Venetian plaster must be made of stainless steel. The corners of the trowel and spatulas should be rounded, and the surface should be perfectly smooth, without scratches or nicks. Experts advise treating new spatulas with fine sandpaper to remove small burrs.
The paint brush “Maklovitsa” should have thick bristles, and the spatulas should be of different sizes, and you must have a narrow spatula for applying the composition in hard-to-reach places.
Video description
About the secrets of applying Venetian plaster in the following video:
Preparing for work
Before applying Venetian plaster, prepare the wall. An ideal wall looks absolutely even and smooth (prepared as for painting), without dust or grease stains. Alignment is mandatory for all Venetian application techniques; it is carried out in the following order:
- Leveling includes 2 stages. The starting composition prepares the surface for puttying. After drying, a finishing putty is applied; with its help the wall is made as smooth as possible.
- The surface is left to dry for 24-48 hours, then sanded using fine-grained sandpaper. The remaining dust is carefully removed.
- The leveled wall is primed (deep penetration compounds are used); It is advisable to apply two coats of primer to enhance adhesion.
- If you don’t have special soil at hand, you can prepare a replacement. To do this, just dilute white acrylic paint with water (1:1 ratio). The primer is applied with a roller and dried, then the treatment is repeated.
A small amount of the mixture is applied to the trowel Source state-18.rf
How to make Venetian plaster with your own hands
Classic Venetian includes dust of marble and onyx. granite, quartz or other natural materials. The binding element is slaked lime. It is this that gives the plaster the strength of real stone over time. In addition to these components, the composition contains a coloring pigment (color).
Modern plaster manufacturers offer ready-made mixtures. Moreover, each manufacturer offers its own formulations with different effects - glossy or matte, velvety or some other surface. An exception may be the option when the master wants to make his own drawing on the wall, according to his artistic vision, in this case the color can be added to the composition at the request of the master.
When purchasing a ready-made mixture, you should pay attention to the production date and batch, so that several plastic containers with the mixture are from the same batch. Then there is confidence that the color of the plaster will be the same. Otherwise, when the mixture is prepared on the spot, it should be done at once for the entire volume of work, since when preparing again, the color of the composition may not be guessed if there is a mistake in the proportions somewhere.
If you purchased white plaster, then the color for it must be purchased from the same manufacturer and the same brand, otherwise the properties of the ingredients may be incompatible.
Quite often, not all walls are finished, but only fragments of them. In this case, before starting work, you should fence off the work area with masking tape, which is removed immediately after completion of work. If you do not allow the last layer of Venetian to dry and then remove the tape, unattractive chips and cracks may form at the joints.
In residential areas, it is recommended to use Venetian in calm pastel colors, with which it is easier to create a cozy interior.
Preparatory stage
Even if you have long been eyeing a container with the mixture in the store, and, having decided to change the design of the premises, rushed to the store and made a purchase, this does not mean that when you come home, you can immediately start decorating. The most important part of the job is preparation for it. The surface of the wall must be thoroughly cleaned of any old coatings, including plaster, if it is not held securely and has cracked areas. After this, we inspect the walls for unevenness.
It is better to smooth out very noticeable protrusions using an grinder's abrasive disc, since this is only suitable for ordinary finishing. If cracks are found in the walls, we embroider them with a diamond disc and cover them with cement-sand mortar; small cracks can be covered with putty, which, in general, is suitable for preparing the surface. The main thing is that after applying each layer it is necessary to use a primer impregnation, applying it with a brush.
If the base is in order and fairly level, minor roughness will be easy to hide directly with decorative plaster. The only thing that should be done if you have a good base is to thoroughly clean it of foreign particles such as dust and other contaminants, degrease it and impregnate it with a deep penetration primer. The last action is necessary to increase the adhesion of the coating. When the putty, primer and other preparatory compounds have dried, you can worry about the problem of how to apply Venetian plaster.
Photo gallery: finishing options
In the photo - Venetian plaster is beautifully applied to the wall, group-ct.com
The photo shows a standard type of Venetian plaster, pierres-et-decors.com
In the photo - one of the types of Venetian plaster, www.venezianka.com
In the photo there is a ceiling in Venetian plaster, artmasters.fo.ru
The photo shows a unique creative work when applying Venetian plaster, remontinfoplus.ru
How to apply Venetian plaster in layers
In short, do-it-yourself Venetian plaster is quite painstaking work, and of course some experience is required.
The classic Venetian is made by the master in one tone, but it is also possible to use several colors or shades. Here everything depends on the artistic taste of the owner of the room. The very concept of Venetian includes the peculiarities of the technology of applying the composition to the wall. Many layers, each one millimeter thick, are pressed together by the force of the master’s hands.
In this action, the master uses the method of smoothing, ironing and polishing each layer. Spatulas of various sizes and shapes are used, and the force applied by the master when pressing the layer is such that the tool and surface become warm. Each layer of plaster is applied with random strokes of decorative mass, resulting in the appearance of natural stone. The plaster mass is translucent and this creates the effect of deep penetration of light rays into the structure of the marble.
The plaster solution is applied in small areas of up to one square meter. Work begins from top to bottom so that constant splashes of the solution do not settle below on the finished surface. The first layer is the base layer, it sets the color of the entire coating.
Regardless of what the master uses in his work - a trowel or a spatula, his movements should be arched from left to right or vice versa, as is more convenient for the master. They go over the applied strokes with a wide spatula, holding it tightly at an angle of 20 degrees relative to the wall. To prevent smooth joints, the mortar strokes should resemble a brush pattern. In this way, the look of natural marble is created when all its veins become visible.
Craftsmen can use various techniques for applying the plaster mass and smoothing it out. “Butterfly” is a method that is used when applying a second layer of plaster, when the mass itself is applied with a movement in one direction, and the excess solution is removed with a movement in the other. It is necessary that the strokes of the solution have ragged edges, like a brush stroke. Then the joints will not be smooth. As a result, the relief that was formed when applying the first base layer disappears, and veins characteristic of marble, onyx and other stones appear.
- When working, pay special attention to the cleanliness of the tool. Every 10-15 minutes it should be wiped with a clean cloth.
It takes up to 8 hours for the first layer to dry, depending on the brand of product used and the manufacturer. Usually work continues only on the second day. The final appearance of Venetian plaster depends on the number of layers applied. Each subsequent decorative layer is rubbed with a metal spatula or grater until smooth and uniform.
After applying the last finishing layer, the surface is either polished with a dry and clean spatula or woolen or suede cloth. The final job of applying plaster is to wax the surface. Although some formulations do not require the application of wax.
Applying layers
To distribute the mixture over the wall, use plaster trowels and spatulas. They are also convenient to use for sanding intermediate layers and for the final application of wax. You also cannot do without spatulas of different sizes: large ones are convenient for applying the base material, medium or small ones will help create a texture (pattern).
A large spatula needs special attention. With its help, the plaster is pressed tightly into the wall, so the quality of the edges of the tool is important. They must be rounded, and the metal of the instrument must be free of defects and mechanical damage. It is convenient to polish the finished surface using suede mittens.
The process of applying the plaster mixture Source diy.sndimg.com
DIY wax for Venetian plaster
Waxing of the surface is carried out after the application of the Venetian is completed, or rather, after 6-7 days. Natural beeswax or synthetic is used. The wax coating adds additional shine to the coating and protects it from high humidity. In addition, synthetic wax allows the decorative coating to be subjected to light wet cleaning, without the use of aggressive detergents with abrasive components.
The composition of synthetic wax may contain additional components that give the surface various visual effects - gold, silver, mother-of-pearl. To apply wax use:
- sponge;
- wool or suede mitten;
- rubber spatula.
The wax is applied in a thin layer to the entire surface of the wall so that there are no smudges or dark spots from excess wax, and rubbed into the decorative top layer in a circular motion. Thanks to the ability of wax to penetrate deep into the material and saturate it, a feeling of volume is created. Therefore, it seems that the wall is glowing from within.
The final polishing of the waxed surface is carried out using a grinding machine with a special pile attachment, 5-6 days after applying the wax. If you don't have a machine, polishing is done using a soft cloth.
Great video on working with a Venetian:
That's all. Today we told you what Venetian plaster is, its history, what components it consists of, the pros and cons of its use, what types it comes in. We separately considered the question of how to prepare walls for this plaster, what tools were useful to us in our work, how to properly prepare the solution, the technology of applying separate layers to the walls, and the subsequent use of wax.