Characteristics and features of plaster
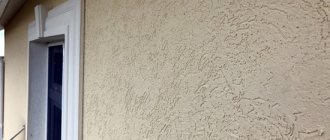
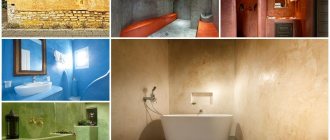
Munich plaster is understood as a decorative plaster mixture for interior and exterior work, which allows you to create three-dimensional designs and textures on walls and other surfaces. When applying, the user can independently choose the type of pattern - bark beetle, crosswise, fleece, rain, etc. As a rule, Munich plaster is made on the basis of acrylic or styrene-acrylic water dispersion and includes fillers made of stone chips or flour. The material may also include:
- pigments;
- ground pumice;
- plasticizers;
- hydrophobic substances;
- titanium dioxide, etc.
Plasters for exterior use usually include fillers in the form of larger granules, while for interior use the finest additives are used. After drying, the coating will be weather-resistant, moisture-resistant, vapor-permeable, and will not be afraid of the action of vegetable and animal fats and mineral oils.
All Munich plasters are characterized by a high degree of adhesion to most building substrates. They fit perfectly on prepared and unprepared concrete walls, previously painted structures, other mineral surfaces, plasterboard, and gypsum fiber.
Plaster can be tinted with water-borne pigment pastes, since most products are sold in white. After drying, the material becomes impact-resistant, protects facades from snow and rain, and also extends the service life of structures.
Often, Munich plaster is applied in a layer of 1.5-3.5 mm, but it is possible to apply several layers of the product. Drying time varies from 6-8 hours to a day depending on the exact composition. Plaster is sold ready-made in buckets or jars, although in stores you can also find dry building mixtures for diluting yourself.
Sequence of work during application
The technology for applying plaster mortar does not cause any difficulties, but there are certain rules, the observance of which allows one to achieve excellent quality.
The facing layer is created in stages, following a strict sequence.
Surface preparation
We inspect the wall surface to be plastered for the presence and condition of the old covering layer, remove peeling and swollen areas, and repair chips and cracks. There are no special requirements for such preparatory work, but there is one condition - differences should not exceed five millimeters.
After the repair, we clean the wall from grease stains and dirt, and remove the remaining paint. For such work, sandpaper with a coarse grain fraction should be used.
When cleaning, it is recommended to work in a circular direction.
Once the sanding work is completed, dust is removed from the wall surface and a primer is applied.
It is very important to use a primer whose shade matches the color of the plaster material.
The solution can be applied after the surface has dried from the primer. As a rule, this takes at least twenty-four hours.
Applying the mixture
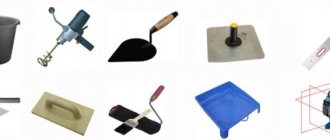
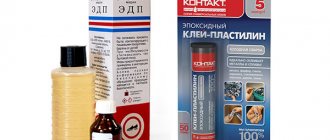
Please note that Munich plaster material is sold ready-to-use, so an electric drill with a mixing attachment and a container for mixing the solution are not needed. The main tools used for plastering will require a spatula with a wide blade or a trowel. If the surface is being plastered for the first time, it is recommended to use a wide spatula.
You will also need a narrow spatula, with which the plaster mixture is applied to the blade of the working tool.
Actions are performed in the following sequence:
The plaster material may contain pieces of marble or pumice, and therefore the coating should be applied in two layers - base and decorative.
We rub the first plaster layer, leveling it with grout. We hold the tool parallel to the wall. During this work, a mortar mixture accumulates on the grout, which must be removed in a timely manner. You don’t have to throw it away, but mix it with unused material.
After this, a second layer of plaster is applied - relief patterns will be made on it.
The thickness of the coating should not exceed three to four millimeters.
The strips are applied from the ceiling to the floor, their width is about sixty centimeters.
Relief creation
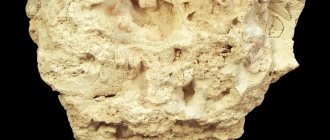
Once you have finished applying the second layer of plaster, take a clean polyurethane float, moisten it with water and apply the desired patterns. Keep the grater parallel to the wall, without slopes. The patterns are formed by marble chips or pieces of pumice contained in the solution.
The relief is created due to the direction of the grater:
While working, periodically wash the grater to remove any adhering solution.
Advantages and disadvantages of the material
Munich plaster is an excellent option for decorative wall decoration. It makes it possible to change the interior or decorate the facades even without the involvement of specialists, since even a beginner in the construction business can master the simple technology. The material boasts other advantages.
Here are the main ones:
- environmental friendliness - there is no unpleasant odor or harmful substances in the composition;
- fire and explosion safety, absence of substances that support combustion;
- the ability to hide base defects;
- easy tinting in any shades;
- the ability to change the coating at your discretion, the use of various techniques for obtaining textures;
- impact resistance, moisture resistance, resistance to negative environmental influences and temperature changes;
- versatility in areas of use;
- excellent UV tolerance;
- elasticity, no cracking;
- wear resistance, long service life;
- high aesthetics of the finished coating;
- ease of maintenance and care.
The disadvantages of Munich plaster include its relative high cost, which is associated with its sale in finished form. Imported brands always have a higher price than domestic ones. In addition, when decorating a large area, it is better to use mechanized means of applying the mixture, otherwise the labor intensity of the work will increase.
Sequence of actions during application
The technology for applying Munich plaster is simple, but still requires strict adherence to the sequence of operations.
Preparing the base
Before the start of the main stage, the foundation for work is prepared. Inspect all areas, assess the condition of the old finishing layer. If there are defects - peeling, swelling - they are knocked down with a spatula or separated with a scraper. Large cracks are repaired. All chips, holes and seams are sealed with ordinary cement-based starting plaster.
After preparatory activities, the level difference should not be more than 0.5 cm. Next, do the following:
- the walls are cleaned of stains, dirt, grease using detergents or sandpaper;
- If possible, remove the paint (only water-based, acrylic, latex compositions can be left);
- if necessary, grind the entire surface in a circular motion;
- brush off the dust, apply an acrylic-based primer (its color should match the shade of the plaster);
- Allow the walls to dry for 24 hours.
Application of the product
If the plaster has thickened, it can be diluted with water, but not more than 5%. The temperature of the working surface must be at least +10 degrees. For work, use a wide spatula, which is most convenient for leveling the base. You also need to prepare a narrow spatula in advance for applying plaster from a jar or bucket.
After the set, distribute the mass along the blade of the working tool, then apply it to the wall, holding the spatula at an angle of 30 degrees to the surface. Stretch the plaster in a thin layer, then rub it with the same spatula or trowel to smooth the surface.
Because mixtures contain fillers, two coats may be required to achieve a nice finish without oozing granules. The second layer is applied only after the first has completely dried. It is ground in a similar way, while excess mixture is promptly removed from the instrument.
It is important that the top layer is about 3 mm thick to make applying the design most convenient. Separately, work with strips up to 60 cm wide (from floor to ceiling), otherwise the mass will dry out and the formation of texture will be difficult.
Relief creation
The texture on the fresh plaster layer is done using a clean polyurethane float. The sole of the grater is moistened with water, held parallel to the wall and the selected pattern is created:
- when drawn from top to bottom straight or diagonally, lines of “rain” or “slanting rain” are obtained;
- the “bark beetle” structure occurs during spiral movements of the grater, etc.
Patterns on the wall are formed by moving filler pebbles inside the mass. There are practically no restrictions in artistic design - you can create the pattern you like.
If the work is carried out on a large area of walls, it is advisable to invite an assistant so that the material does not have time to dry before final design. In the future, you can apply paint, varnish, waxes, glazes or other decorative coatings to the walls, depending on your imagination and the chosen interior style.
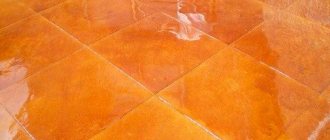
Characteristics
Decorative wall decoration in the interior
The instructions for applying Munich plaster stipulate the need to use special factory-produced putty mixtures. As a rule, these mixtures are made using acrylic dispersion and fillers in the form of marble chips, ground pumice, pigments, plasticizers, etc. .
The mixtures are produced in several versions, depending on the sizes of filler granules. Almost all factory-produced mixtures used for Munich plastering are characterized by increased adhesion.
As a result, this technology, in combination with specialized mixtures, makes it possible to create high-quality and reliable decorative coatings both outside and inside the building.
The Munich plastering technology allows the mixture to be applied to prepared and unprepared concrete surfaces, as well as to any types of mineral surfaces, including previously painted walls.
Among the advantages of this finish, we note the following qualities:
- resistance to excess humidity;
- resistance to sudden temperature changes;
- resistance to prolonged exposure to direct sunlight;
- resistance to mechanical loads;
- environmental cleanliness due to zero toxin content;
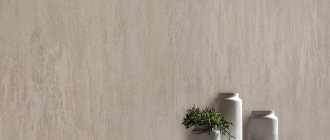
- aesthetic appeal, regardless of the features of the relief formation;
- ease of application and ease of maintenance of the coating.
Plastering technology
Distributing putty with putty
The technology for applying Munich plaster is not overly complicated, however, a number of rules should be followed that will ensure acceptable quality of the work done. Finishing is carried out in stages, with each stage carried out in a certain sequence.
So let's get started.
Surface preparation
- We check the surface on which plastering is supposed to be carried out for the presence of defects in the old coating, such as peeling blisters, etc. The presence of such defects can be detected by running a plaster rule or a wide spatula over the surface. We immediately knock down the swellings and bumps with a spatula, and mark the indentations around the perimeter with a pencil.
- Then we fill the large depressions with regular putty. There are no special requirements for the quality of coating preparation; the main thing is that the difference in levels does not exceed 5 mm.
- Next, we clean the coating from dirt, grease and old paint peeling. To do this, place sandpaper with coarse grains in a special grater and grind in a circular motion.
- After the surface is sanded, remove the dust and apply an acrylic water-dispersion primer.
Important: If possible, purchase and use primers of the same color as the composition that is supposed to be used for plastering.
- Plastering should begin no earlier than the soil has completely dried; on average, this may take up to 28 hours.
Plastering
The photo shows the method of applying relief with a stiff brush.
Since the plaster composition is sold in ready-made form, there is no need for a mixer or additional containers. The main tools you can use are a wide spatula or a paste.
If plastering is being done for the first time, it is advisable to remove the surface with a wide spatula.
You will also need a narrow spatula, with which you can apply the putty mixture to the working part of the wide spatula.
- We open the original packaging with a special putty mixture and carefully mix with a spatula. Use a narrow spatula to scoop up the mixture and distribute it evenly over the entire edge of the wide spatula.
- Hold the spatula with the mixture at an angle of 30 degrees to the wall surface and distribute the mixture in an even layer.
Important: This type of plaster contains large-sized inclusions of crushed marble or pumice. Therefore, it is better to apply the coating in two layers - the first layer is the base, and the second is the finishing decorative layer.
- After the first layer of putty has been applied, we level it by rubbing it with putty. We place the grout almost parallel to the wall and, as it were, smooth the surface.
Important: during leveling of the layer, a mixture accumulates on the grout, which must be cleaned off in a timely manner. We do not throw away the excess mixture removed from the spatula, but throw it into a container with plaster and mix it periodically.
In the photo, the formation of the relief with paste
- Next we apply the finishing layer on which we will make the drawing. This layer should be thin, no more than 3-4 mm, so that large-sized filler can leave corresponding marks when grouting. Lay the layer in a strip no more than 60 cm wide from floor to ceiling.
- After the layer is applied, take a clean polyurethane grater, moisten it in water and begin to apply the design. We hold the grater parallel to the surface of the wall without any inclination, since the design is made using marble or pumice chips in the plaster layer.
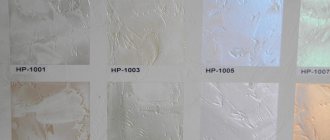
Instructions for applying “rain”
The drawing is made depending on how we introduce the grater:
- If we move from top to bottom straight or diagonally, we get risks in the form of rain - the so-called “rain”.
- If the grater is carried out in a spiral motion, the result is an imposed “bark beetle”.
- In addition, the grater can be moved crosswise, etc.
Note! The advantage of this method of wall decoration is the complete absence of restrictions in terms of artistic design.
An extraordinary way to apply relief with your own hands
- During the drawing process, periodically wash the grater to remove any adhering material.
Important: In order to achieve the optimal effect in a large room, the same pattern is applied to the walls, and the same artist must work.