assets/from_origin/upload/resize_cache/iblock/640/600_450_2/6407175864974bce4a61d7ec81a0246c.jpg From this article you will learn:
- How to start renovating an apartment with a rough finish
- What steps to follow when renovating an apartment?
- What you need to know about renovating an apartment with a rough finish in a new building
- How to renovate an apartment yourself
- What is the cost of renovating an apartment with rough finishing?
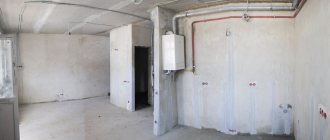
If you purchased an apartment in a new building in Moscow, you will not be able to move into it immediately. The apartment is not yet suitable for living. There are no plumbing fixtures, no furniture, no appliances, just bare walls, floor and ceiling. Before it takes on the appearance of a modern, comfortable home, its owners will have to work hard, devoting their energies to renovating the apartment with a rough finish.
Where to start renovating an apartment with a rough finish
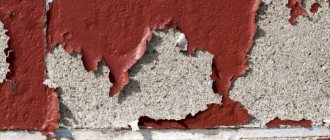
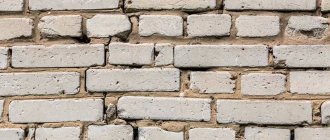
The main principle of successful renovation is to take your time. The new house still needs to undergo shrinkage. During this time, cracks may form in the walls, and the entire repair will have to be redone. To prevent this from happening, you should hold off on major repairs; as a last resort, you can do inexpensive cosmetic repairs.
Before you start renovating an apartment with a rough finish, you should think it over carefully, since the result will directly depend on the planning stage. You can turn to designers for help or do it yourself. There are many computer programs that allow you to create a project for a future apartment and look at the created interior from the outside.
Take the test
Before you begin repairs, you should develop a plan containing the following points:
- Moving walls (except load-bearing).
- Apartment layout.
- Definition of design and style.
- Placement of furniture.
- Places for installing electrical appliances (so that later the wiring can be carried out correctly).
- Location of plumbing fixtures and washbasin (for planning water supply and drainage).
- Coordination of types and sizes of interior doors, doorways, threshold heights.
- Clarification of what materials the walls, ceiling, and floor will be finished with.
After completing the planning stage, when the project has already been drawn up, you should calculate the upcoming costs, determine how much materials and money will be needed to purchase them.
“Clean” or “draft”?
When choosing the type of finish, price was a priority. Apartments with a fine finish cost an order of magnitude higher. In addition, we have repeatedly heard sad stories about people having to partially or even completely redo a completed renovation due to its poor quality. Another disadvantage is that the final finishing is carried out without taking into account individual preferences: if you want a dream renovation according to your own design, it is better to start with a “draft sheet”.
But there is one important nuance regarding brick houses, as in our case: the shrinkage of such buildings can take several years, unlike panel and monolithic ones. And many people advise buying apartments in such houses with a fine finish, waiting a few years and only then doing a thorough renovation. Despite this, we preferred a rough finish, since we planned to create an apartment “to suit ourselves” - from layout to decor.
In such cases, you need to find a place to live for the period of repair work and reserve time and finances. The repair time depends largely on the complexity of the design project and the budget. The dirtiest and most complex work took us two months, and we completed the remaining stages while living in an apartment.
Phased renovation of an apartment with rough finishing
Dirty work
Repair begins with dirty work:
- All rough finishing, if any, is removed. Partitions are moved and dismantled.
- Electricity and water supply systems are being installed. You should not purchase cheap materials, as they are short-lived. The wires and pipes will be embedded, so if they are replaced, you will have to dismantle the walls and make repairs again. To avoid such problems, it is better to immediately buy high-quality materials, although it will cost much more.
- Windows and doors are being replaced (windows and doors installed by the developer are usually made of cheap material and are therefore short-lived).
- If this is provided for in the plan, a cement-sand screed is made to level the floor.
Bathroom
It is more advisable to start renovations in the bathroom with the installation of communications: the electrical system, the water supply and drainage system, and the installation of an extractor hood.
Important Notes:
- When laying electrical wiring in the bathroom, use only whole pieces of wire with a power reserve. After installation, they should be plastered or hidden under sheets of drywall.
- The junction box cannot be placed in the bathroom, so it is better to move it outside the room.
- If you plan to hide the water supply system in the walls, then it is better to purchase plastic or polypropylene pipes, as they are stronger and more reliable than metal-plastic pipes at corner joints.
- Typically, tiles are installed on the bathroom floor. Before you get started, there are some things to consider:
- After leveling the floor with a cement screed, it is necessary to waterproof it using special compounds.
- Avoid the appearance of air cavities when laying tiles.
- For grouting, you should purchase high-quality materials that can prevent the formation of mold and mildew.
After finishing work on the floor, you can move on to the walls. First, they are plastered or sheathed with sheets of moisture-resistant plasterboard, and then lined. Materials such as tiles, plastic panels or wallpaper are suitable for finishing. Moreover, you should choose not traditional paper wallpaper, but vinyl, liquid, moisture-resistant, washable or glass wallpaper.
The ceiling can be finished with plastic panels, and you can also use an aluminum profile or suspended ceilings.
You should not use sheets of drywall to level the ceiling, even moisture-resistant ones. Their service life in a damp room does not exceed 10 years. One of the most affordable materials for leveling the ceiling in the bathroom is moisture-resistant putty followed by painting.
When the repairs are completed, you can begin installing plumbing fixtures, sockets, switches, and bringing in furniture.
Walls and ceiling
The next stage of renovation of apartments with a rough finish is leveling the surfaces. This process can be done in two ways:
1. Wet. This is a labor-intensive method, as it requires special care. The work is carried out using dry mixtures (putty and plaster). The thickness of the applied material should not exceed 80 mm.
When working with dry construction mixtures, the following types of solutions are used:
- Plaster. Used to level walls with strong differences. Gypsum-based plaster is used for the ceiling.
- Putty. Used to level the surface, as well as to eliminate small cuts and chips. The putty can be starting (for initial rough surface treatment) and finishing (for final work on leveling walls and ceilings).
- Primer. Perfectly impregnates the surface and increases adhesion.
It is advisable to use solutions from the same company, as this helps to increase the adhesion of the layers to each other and also minimizes the risk of minor technical defects.
2. Dry. Drywall or other sheet material is used to level the surface. The method is simple, but has a significant disadvantage - the useful area of the room is hidden.
The basic principle of finishing walls and ceilings is to start work from top to bottom. Before leveling, ceiling measurements should be taken to determine the maximum height difference. If the discrepancy in the indicators is more than 50 mm, it is better to use the dry method (here the use of LGK or suspended ceilings is allowed).
Upon completion of work with the ceilings, they begin to level the walls. The method in this case does not matter much; any option is possible. Everything will depend on personal preferences and financial capabilities.
Floor
Another stage in renovating an apartment with a rough finish is working on the floor. You can choose any of the options:
- Ceramic tile. It is mainly used to cover the floor in the kitchen and bathroom, and can also be used in rooms or hallways. This is a very practical material, wear-resistant and easy to replace. The material is available to all categories of the population due to a wide range of prices.
- Parquet. Made from natural wood, therefore environmentally friendly and safe. Parquet is difficult to install and further use.
- Laminate. Visually very similar to parquet. It is characterized by ease of installation and relatively low cost.
- Linoleum and carpet. The cheapest flooring materials are therefore affordable for many. They are short-lived and quickly break down, but the advantages include excellent appearance, softness and warmth.
These are just some of the materials that are most often used in the decoration of residential premises. Before laying the floor covering, it is necessary to make a screed. In order for the floor to have the same level throughout the apartment, you should take into account the thickness of the material used and the thermal insulation layer (for example, expanded clay).
Skirting boards and doors
After completing all operations with the floor, you can proceed to installing the doors. You should not buy the entire set, especially if you don’t have a lot of money. To begin with, you can simply install the frames and trims, and then purchase and hang the doors.
The last thing left to do is to install the baseboards. Today, plastic skirting boards are in demand (they have all sorts of colors, recesses for wires), but ten years ago wooden ones were popular.
Recommended articles on this topic:
- Arrangement of a small apartment
- Stages of renovation in an apartment
- Turnkey cosmetic repairs
General advice
Below are recommendations that will help when renovating apartments with a rough finish:
- If you don’t have enough money, do all the work yourself or invite friends and acquaintances.
- You should not resort to the services of finishers who work without contracts. Subsequently, it will be impossible to get a response from them if something goes wrong. There are many reputable companies officially engaged in finishing work.
- If you doubt anything or are not entirely sure what to do correctly, consult with a specialist or more experienced comrades. Don't refuse paid consultations.
- Adhere to the principle of reasonable savings. Remember that there are times when you cannot save.
- Always follow the sequence of work.
- Don't delay repairs. You should prepare for it in advance, including financially. Accumulate a certain amount of money with a reserve to complete all the work on time, otherwise there will be no effect of novelty.
Dry plaster
Peculiarities
Recently, the so-called dry plaster, which involves covering walls and ceilings with plasterboard sheets (GKL), has become very popular.
Advantages. This finishing method has a number of advantages:
- High speed. Finishing with plasterboard does not require surface preparation. In addition, the sheet installation process itself is quite fast;
- Unlimited thickness . Drywall can be used in cases where it is impossible to plaster the surface due to limited layer thickness;
- Possibility of using frame space to your advantage. Between the surface of the walls/ceiling and the drywall, you can hide communications or place insulation there;
Drywall can be used to decorate a bathroom
- Versatility. There is moisture-resistant plasterboard designed specifically for finishing bathrooms. Thanks to this, this material can be used to decorate any premises;
- Easy to install. Every home craftsman can install drywall with his own hands; the only thing you need to do is follow a certain technology;
- No wet work. As a result, the installation process is quite clean;
- Vapor permeability. GCRs allow the walls to breathe, which, as I said above, is important if you have a wooden or foam block house.
Flaws:
- Low strength. Drywall is a less durable finishing option than plaster. Therefore, after finishing, problems may arise when attaching heavy objects to the wall.
True, this problem can be solved in advance by strengthening the frame. To do this, you need to insert a wooden beam into the racks;
You can strengthen the frame for drywall with wooden beams
- Higher cost . Finishing gypsum boards is more expensive than plaster.
People often ask on forums – how to decorate an adobe house? Drywall is excellent for these purposes. Installation of the frame for it is carried out using long wood screws.
What materials are used for finishing?
When finishing a home using the dry method, you first need to decide on the choice of drywall. In addition to standard sheets, there are the following varieties:
- Moisture-resistant gypsum plasterboard . I have already mentioned the purpose of these sheets above. Externally, they differ from standard ones in green;
Fire-resistant drywall withstands direct exposure to fire
- Fire-resistant gypsum plasterboard. Used in areas with increased fire hazard.
In addition, gypsum plasterboard differs in scope into two types:
- Ceiling. Thickness is 6-8 mm;
- Wall. Thickness can be 9.5-12.5 mm.
It must be said that installation of drywall can be carried out in two ways:
- On the frame . In this case, in addition to the sheets themselves, you will need profiles for the frame and hangers;
Drywall can be glued to relatively flat surfaces - this will save room space
- On glue . If the surface is relatively smooth, the sheets can be glued with special glue.
Price:
| Brand | Cost in rubles |
| Knauf GKL 9.5 mm | 220 |
| Knauf GKLV 9.5 mm | 360 |
| Gyproc GKLO 12.5 mm | 400 |
What are the features of renovating an apartment with a rough finish in a new building?
There is no exact definition of the concept of “rough finishing” of an apartment. It all depends on the developer. Therefore, before deciding to purchase a home with a rough renovation, you need to look at the apartment and find out what types of work will be performed by the builders.
In general terms, the rough finishing of an apartment represents the implementation of the most “dirty” work necessary for putting the housing into operation:
- carrying out the initial wiring of electrical wires;
- leveling walls and ceilings;
- installation of entrance doors and windows. It is possible that the developer has installed metal doors and plastic windows, then there is no need to change them. But basically, builders install cheap doors and windows made of wood, which subsequently must be replaced, as they are of poor quality;
- performing sand-cement floor screed.
Sometimes, the developer, in the form of rough finishing, provides only the supporting structure and routing on the floor (for various communications) without the presence of a bathroom, sink, bathtub, interior doors, etc. You will have to purchase all this yourself. When purchasing an apartment, ask whether the price of the initial rough finishing includes glazing of the balcony and loggia.
From the experience of many, we can say that it is better to renovate a new apartment with a rough finish from scratch. This will avoid unnecessary waste of time and money. Sometimes you have to re-level the walls and ceilings and screed the floor. Sometimes the developer uses low-quality windows and doors that are not suitable for long-term use. In this case, the owners will have to change them.
To avoid additional expenses, find out from the construction company the cost of rough work. Based on this, independently analyze how much the repair will cost if you do it yourself. Focus on the offers of private companies or finishing teams. It may turn out that purchasing all the necessary materials for DIY repairs will be much cheaper.
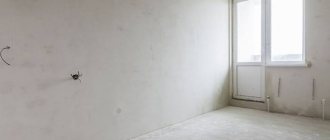
When the rough finishing is done professionally and at the proper level, little is required from the residents: hang wallpaper, decide on the flooring and placement of electrical appliances, paint and whitewash. You should remember about shrinkage; after one and a half to two years, even high-quality finishing material can deteriorate.
Therefore, after rough finishing, it is better to carry out a budgetary finishing repair, and after a year and a half to two years, engage in major expensive repairs that will last for more than one year.
Let's look at the procedure for renovating an apartment with a rough finish:
- Make a plan according to which all free space will be filled. It is better to resort to computer modeling to see the finished result. If this is not possible, you can sketch out a project for your future apartment on a regular sheet of paper.
- If you are not sure about the quality of the glazing of your future apartment or there is an agreement with the developer that there will be no windows, you should find a company in advance that will do the glazing work.
- Installation of all necessary plumbing fixtures. It is better not to do this type of work yourself, but to seek the help of professionals.
- Checking electrical wiring and all electrical appliances, replacing them if necessary. When starting to renovate an apartment with a rough finish in a new building, you should pay special attention to safety.
- Carrying out floor screeding work if the apartment was purchased in a concrete building. It is necessary to prepare a concrete solution, which is used to fill the subfloor. Then the surface is leveled, all irregularities and cracks are removed.
- You shouldn't do anything major to the walls in a new house, they will still be deformed. It is better to cover them with wallpaper, and when the shrinkage has passed, use putty to remove all cracks and irregularities that could have formed during this time, and level the surface of the walls.
- As for the ceiling, it is best to level the surface with putty (even if the height differences seem large to you) and paint. After the building has settled, use plasterboard or suspended ceilings. In order to subsequently avoid distortions and cracks, it is better to wait a little and then proceed with major repairs.
- The last stage of work is installing the doors. When a construction company uses a budget option for wooden entrance doors, it is best to remove them and install more reliable metal doors yourself. This way you will protect yourself from easy penetration into your home and provide the necessary level of sound insulation.
When you are faced with the choice of purchasing a home with a rough finish or just a concrete box, you need to think everything through carefully. You should definitely consult with specialists. Study carefully the official contract for the purchase of living space with the construction company, which must indicate all the activities carried out in your apartment.
What to pay attention to when accepting work
The rough finishing of the apartment in the new building is completed, you need to take over the work. But you need to know what to pay attention to, how and what to check. The contract that you signed with the developer or renovation company will help you. There should be a list of work that must be done. You will need to check:
- How smooth are the walls? To do this, you will need a good building level and a long ruler or rule (more than a meter for sure, but preferably 1.5-2 meters ). Use a level to check the verticality of the walls, and use a ruler or rule to assess the scale of the humps and depressions by applying it to the wall and moving it in different directions.
- The gender is also checked. Additionally, horizontality must be controlled.
You'll have to use different tools - Check the corners - external and internal. They should be 90° (it is advisable to have a large triangle, but you can check with something at hand).
- Electrical check. You will need an indicator screwdriver. If there is voltage (phase), the indicator lights up. If there is no voltage, the indicator does not light up. Here's what you need to check: Check that the circuit breakers are opening phase and not zero. If you turn off the circuit breaker, there should be no phase in the sockets of this group (touch the indicator probe one by one to the wires brought out under the socket).
- Screw the light bulbs into the sockets and check the operation of the switches. Here, too, the phase should open (if you move the switch keys to the “off” position, there should be no voltage on the wires that go to the light bulb).
- When plugging a desk lamp into each outlet (if installed), make sure they are working.
- You can artificially create a short circuit by checking the operation of the machine. But this is only if you know how and what to do.
We need to look around and check everything
If you have any comments, you need to make a list of them and get it signed by a company representative. In theory, your comments should be eliminated.
How to renovate an apartment with rough finishing yourself
Preparing surfaces for finishing
The first thing you should start renovating an apartment with is the rough preparation of surfaces. It is necessary to purchase the appropriate equipment and materials: plaster, primer, trowels, spatulas, trowels and rules of different sizes. Then you should clean the surfaces of all kinds of dirt and dust, and then begin leveling the ceiling and walls. This type of work is performed using a plaster mixture. Read the information on the packaging carefully; the manufacturer usually writes recommendations on how best to dilute the composition and use it at work.
It is necessary to prime the surface, as this will allow the plaster to adhere better and provide reliable adhesion.
The work algorithm is quite simple: the plaster mixture is applied to the prepared surface using a trowel and leveled. This layer must be dried well, and then primed and dried again. After this, a second layer of plaster is applied and leveled as smoothly as possible. You cannot do without using a level in your work.
As soon as all treated surfaces have dried, proceed with the installation of plumbing fixtures. At the same stage, replace double-glazed windows, interior and entrance doors (if necessary) so as not to damage the finish later. Finally, the ceiling and walls are decorated.
Installation of plumbing, doors and double-glazed windows
All the main dirty work has already been done, so you don’t have to worry about staining your windows and doors with construction mixtures. Proceed with installation of plumbing fixtures. You can carry out the installation work yourself. Domestic manufacturers supply all products with detailed instructions, which greatly facilitate the task. The toilet is connected to the sewer pipe (usually the drain outlet is parallel to the floor), its legs are tightly screwed.
Finishing surfaces
The rough work was successfully completed, and all that remained was to complete the finishing touches to give the apartment its finished look.
As a rule, different types of wallpaper are used to decorate the walls of living rooms and bedrooms. If we are talking about simple cosmetic repairs, then you can choose a budget option using paper wallpaper. The same point applies to the ceiling: do not use plasterboard unless the building's shrinkage period has passed. Plaster it or apply paint. After time, it will be possible to carry out expensive and high-quality repairs without fear that cracks and irregularities will form.
For the kitchen, wallpaper can be a good option for wall decoration, but some people prefer to use tiles. It is also suitable for tiling the bathroom and toilet.
Ceiling repair
Ceiling treatment can be carried out using materials such as:
- dye;
- whitewash;
- wallpaper;
- foam tiles.
Regardless of what material you prefer, the ceiling will need to be leveled using putty and primer.
Among the more complex and interesting options for ceiling design using various materials and designs are:
- Installation of gypsum plasterboard structures. Guide profiles are fixed, to which sheets of drywall are subsequently attached. The option of installing single-tier and multi-tier structures is possible. Due to the created volume, such structures make it possible to hide various elements of the ventilation system, other communications, wires, etc. in them.
- Use of tension fabrics. To begin with, the mounted frame is attached to the surface. Then a polyvinyl chloride film is stretched over it using a heat gun to avoid deformation and ultimately obtain an evenly stretched material.
- Plastic hanging structures. Similar to the previous options, they have a frame to which they are attached. They are quite easy to assemble, are not that expensive and look very attractive.
Installation of electrical appliances
The next stage of apartment renovation after rough finishing is the replacement of all electrical appliances or their installation. Installation locations are chosen at your own discretion, according to the placement plan for future equipment. When installing electrical equipment, always remember the necessary safety measures: start work only after a complete power outage in the entire apartment.
Do not hurry
As you know, great things do not tolerate fuss. Renovating a rough apartment is also a great task in your life, which needs to be approached quite thoughtfully. Life itself provides you with time for such reflection, since your new home will have to go through a period of shrinkage, which usually lasts two years, during which it is simply not recommended to do major major repairs. If you rush, you will be punished for your haste by cracks in the ceilings and walls, which will inevitably appear after hasty repairs.
While waiting for the moment when your new apartment is ripe to fully take on the look that you want to see in it, you should be patient and limit yourself to economy-class cosmetic renovations.
How much does it cost to renovate an apartment with a rough finish?
The cost of repairs includes components such as:
- Who will develop the project for the future apartment - you or a hired designer?
- Are repairs carried out on your own or do you hire builders for these purposes?
- What quality and type of materials will be used?
- Which coating would you prefer?
- Will your plumbing, wiring, pipes, etc. be imported or domestic?
In addition to the listed aspects, other components also influence the final cost of repair work, so the price of the work is determined strictly individually.
Cooperating with is reliable and prestigious. The specialists working here are professionals of the highest level. operates throughout Moscow and the Moscow region.