No. 1. Ceramic tile
This is a universal material that is suitable for open and closed balconies and loggias. This option is often chosen by owners of unglazed balconies and those who prefer to use heated floors. Among the main advantages it is worth highlighting:
- high strength;
- water resistance;
- heat resistance;
- hygiene and ease of maintenance, which is important for open balconies;
- a huge assortment that allows you to choose material of any color, size, with any pattern you like, and tiles can be laid in many different ways;
- excellent thermal conductivity is a key indicator for heated floors.
It is worth noting that the latter property is a minus for owners of balconies and loggias without heated floors, because the surface of the tiles will always remain cold. Another disadvantage of the material is its slippery surface , which becomes even more slippery when water gets in. It is better to choose tiles with anti-slip properties: they have a rough or embossed surface, maybe with notches.
When choosing tiles for a balcony, you should make sure that the marking contains a foot icon - evidence that the material is intended for finishing the floor. It is important for owners of open balconies to take into account the water absorption rate - the lower it is, the more frost-resistant the tiles are.
Required materials and tools
To work you will need:
- drill with whisk attachment;
- tile cutter;
- roulette;
- putty knife;
- tile adhesive;
- level;
- ceramic tile;
- “self-leveling floor” mixture;
- vacuum cleaner;
- needle roller;
- baseboard;
- plastic crosses;
- grout.
On cold, open loggias it is appropriate to use linoleum and ceramic tiles, on glazed, warm balconies - these and other types of coatings
No. 2. Terrace board
Terrace boards will be an excellent solution for an open balcony, since they are distinguished from solid boards and block parquet by their production features. In fact, this is a type of lumber, but during manufacturing the solid wood undergoes high-temperature treatment or sawdust is mixed with polymer, and then each board is additionally treated with protective materials, which allows the material to be used in outdoor conditions.
The advantages are as follows:
- high strength;
- resistance to mechanical stress;
- resistance to temperature changes, precipitation, sunlight and aggressive environments;
- ease of installation and maintenance;
- decorative and environmentally friendly;
- ability to retain heat;
- The boards differ in color, so you can always choose the right option.
Since the material is treated with all protective agents during manufacturing, there is no need to worry about rotting and fungus. Deck boards are made from larch, tropical hardwood, or wood-polymer composite. The latter is made from sawdust, wood flour and a mixture of polypropylenes. The material is superior to solid wood in all respects, except, of course, naturalness. The main disadvantage of decking is its high price , which is more than offset by its appearance and resistance to negative environmental factors.
No. 3. Wooden floor
We are talking about solid boards and block parquet . Both materials can only be used for closed loggias and balconies, since wood will quickly deteriorate under constant exposure to moisture and sun. The advantages include :
- naturalness, environmental friendliness and chic appearance;
- warm surface;
- With proper care, a wooden floor will last a long time.
the disadvantages on their own: the tree is sensitive to temperature changes, humidity, sunlight, and pests. In order for it to serve for a long time, it is necessary to carefully care for it and use protective impregnations. On the other hand, a wooden covering that has lost its former appearance can be easily restored by removing the thin top layer and applying varnish or paint on top.
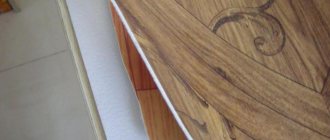
A wooden covering is incompatible with a heated floor system due to its low thermal conductivity, but the surface of the wood itself can hardly be called cold. To ensure that the coating lasts as long as possible, it is better to choose oak or yew wood, or, in extreme cases, birch. Boards made from linden, pine or cherry are much softer and will last much less.
No. 4. Parquet board
A solid wood board is quite an expensive pleasure. If you want to create a cozy atmosphere on your balcony or loggia and at the same time save a little money, then a parquet floor becomes a compromise solution. This is a three-layer material, and only the top layer is solid wood of expensive species. The two bottom ones are made of coniferous wood, which reduces the cost of the material, but does not greatly impair its environmental friendliness.
Parquet boards are an ideal solution for loggias and balconies combined with a living room. The main advantages of the material are:
- environmental friendliness;
- warm surface;
- sound absorption ability;
- excellent appearance and huge assortment;
- ease of installation;
- Possibility of use together with heated floors.
In terms of durability, parquet boards are inferior to piece parquet: the latter can be scraped an infinite number of times, but a three-layer parquet board can be restored only a few times, and this indicator depends on the thickness of the top layer. The disadvantages also include the fear of moisture and the possibility of scratching the surface.
Step-by-step work plan
All floor finishing is usually done precisely because of additional insulation, especially in cases where the balcony is located on the first floor or the neighbor’s lower balcony is not glazed.
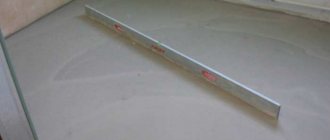
Leveling the surface
Leveling the surface is not difficult, but a very important step, since the final version depends on the initial surface.
- Finishing the balcony floor with your own hands begins with removing everything unnecessary that may interfere with the leveling of the floor.
Tip: If during the process of cleaning the floor you find through structural holes or cracks in the places where the plates join, then they need to be blown out with foam. In the case of small cracks, they can be filled with ordinary tow.
We level the floor using self-leveling mixtures.
- To perfectly level the surface, you will need to pour a screed, the thickness of which depends on the nature of the unevenness, but must be at least 3 cm. To fill the screed, it is best to use ready-made self-leveling mixtures.
They are sold in construction stores and are packaged in bags from 1 to 10 kg. Each bag contains instructions for preparing and using the mixture.
- The prepared mixture is poured onto the surface in full and distributed with a special plastic roller with spikes, which levels the screed and removes air bubbles. After the screed has dried, you can begin insulation work.
We remove air bubbles using a special device.
Necessary tools and consumables
To carry out all stages of work efficiently, you will need a tool such as:
- hammer drill for drilling holes for dowels;
- drill with attachments or screwdriver for screwing in dowels;
- hammer;
- pencil and tape measure for measuring and marking;
- electric jigsaw;
- polyurethane foam;
Tools for laying wood floors.
The consumables for creating the frame and insulation you will need:
- dowels;
- insulating material 5-8 mm thick;
- self-tapping screws;
- timber for installing the frame;
- Styrofoam;
- plywood.
Laying insulation
A two-layer system is usually used as insulation for a balcony, one of the layers is polystyrene foam or expanded polystyrene, the second layer is mineral wool or Pefonol.
Mineral wool today is already considered a slightly outdated material for floor insulation, and it has been replaced by Pefonol, which is a polyethylene foam material with a base of aluminum foil.
Pefonol is much thinner than mineral wool, but the heat-insulating effect is an order of magnitude higher, the material is not affected by moisture, does not emit toxic substances, and its price is slightly more than cotton wool.
The floor is insulated with penofol.
At the first stage, we lay Pefonol (photo) over the entire floor area with a slight turn on the walls, if necessary, we cut it in the corners or places around the structural elements.
You can lay several layers (if height allows) so that the top layer overlaps the joints of the bottom one. At this point, the installation of the pefonol is completed and we will no longer need it.
Laying the sheathing
The sheathing is a wooden beam onto which the plywood will be attached. It is important that the timber is the same width as the foam. Usually they buy 10x10 timber and foam with a panel width of 10 cm.
The timber is laid across the balcony.
Laying a wooden beam for subsequent flooring.
- To begin, measure the distance between the wall of the house and the balcony fencing at the edge of the end partition, stepping back 5-10 cm from it. Cut the beam to the required length and lay it on top of the insulation at a distance of 5-10 cm from the end wall. Each subsequent beam is laid at a distance of 40-45 cm from the previous one. If you have a modern house and use a concrete floor slab as a floor for the balcony, then each cross beam is attached to the floor with dowels.
- We place foam panels in the cells between the cross beams and cut them so that they fit into the cells as tightly as possible. After laying the polystyrene foam, we begin installing the longitudinal beams. If the height no longer allows for laying longitudinal beams, then you can stop at transverse ones.
The cells contain insulation: mineral wool.
- The longitudinal beams are laid at a distance of 30-40 cm from each other and, just like the transverse beams, the ends of the beams should not rest against the end walls, but move away at a distance of 5-10 cm. After laying the longitudinal beams, we fasten them with self-tapping screws to the transverse ones and again to the resulting The cells are tightly packed with polystyrene foam.
The longitudinal bars are attached with self-tapping screws.
- After the polystyrene foam, we cover the entire surface of the floor with plywood, on which the finishing material will be laid. At this point, insulating the balcony floor with your own hands can be considered complete.
The final stage of floor insulation is laying plywood.
No. 5. Laminate
Laminate is great for glazed balconies and loggias. In terms of the ratio of performance and price, laminate can be considered one of the most optimal materials.
Main advantages:
- ease of installation and maintenance;
- strength. Although class 21, 22 laminate is intended for residential premises, it is better to take material with a margin of safety. Class 32 is ideal, and besides, finding laminate of a lower class today is already problematic;
- Huge selection of colors. Laminate can imitate the structure of any type of wood, it can resemble stone, tile or any other material;
- safety. Today, there is still a myth that blames laminate flooring for the emission of formaldehyde and acrylic resins. It has not been confirmed, but for your own peace of mind it is better to purchase laminate from reliable manufacturers who provide their products with safety certificates;
- low price.
Laminate consists of several layers: fiberboard, moisture-resistant paper, film, patterned paper, and a layer of melamine resin. The wide variety of colors is explained by the fact that any design can be printed. Thanks to modern production methods, it is possible to create the necessary relief so that the laminate cannot be distinguished from wood at all. But such similarity is only external - the disadvantages of laminate are completely different.
The main disadvantage is the high noise level: the fall of a light object will be clearly audible. Laminate is afraid of water, but manufacturers have learned to deal with this problem by offering customers water- and moisture-resistant material. Often the disadvantages include a slippery surface, but a textured laminate or several rugs on top of it completely solve this problem.
Laminate can be used with a heated floor system. For this purpose, they even developed special brands of laminate: it differs from the usual one in lower thermal conductivity and higher heat resistance.
No. 6. Linoleum
Linoleum decorates many modern kitchens, hallways and living rooms, and is also used on balconies and loggias. Why do they love linoleum so much? Its main advantages:
- low price;
- a huge selection of colors and patterns;
- ease of installation and maintenance;
- high wear resistance, linoleum tolerates moisture well;
- excellent heat and sound insulation properties;
- There is no noise when objects fall, and dents are unlikely to remain.
There are not so many disadvantages compared to the number of disadvantages. These include:
- sensitivity to ultraviolet radiation, so it is better to use linoleum on glazed balconies and loggias;
- heavy pieces of furniture leave dents, but this is unlikely to threaten the floor covering of the balcony;
- The modern market is overflowing with linoleum from unscrupulous manufacturers, which may even have a characteristic unpleasant odor. It is better to spend a little more, but purchase material from a company with a good name.
Although linoleum has a fairly warm surface, many people prefer to use a heated floor system with it. In this case, not any material will do - you need to choose multilayer heterogeneous linoleum. All its layers have the same expansion, so when heated the material will not deform.
The process of preparing the surface of a rough balcony floor
Preliminary preparatory work, which is a mandatory step immediately before finishing the floor, will be the same regardless of what type of coating is planned to be installed. The starting floor (concrete slab) must be cleaned of all kinds of debris and dust; if there are cracks, bulges and depressions on its surface, they must be removed to create a flat plane. In addition, the subfloor must be completely dry.
If there are remnants of the old coating on the floor, it is recommended to dismantle it. It is not advisable to lay a new floor on top of the old one, forming a so-called “sandwich”, because As a result of such actions, the quality of the new floor finish will noticeably decrease, significantly reducing its service life. In addition, the old coating contributes to unnecessary weighting of the balcony, which, at best, will lead to the formation of cracks, and at worst, to a breakdown of the structure.
Preparatory work before laying wooden floors, carpet, linoleum, laminate
laminate on the balcony
First of all, a layer of insulating material must be laid on a clean, dry and flat surface. This is done to preserve heat and protect the interior from possible dampness. Penofol can be used as an insulating layer. The technical characteristics of this material make its use beneficial in terms of price-quality ratio, and the ease of installation allows it to be installed in the shortest possible time without the use of specialized tools. All you need to do is cut the material according to the size of the balcony and lay it on a concrete slab with a foil layer.
The next stage is the installation of wooden logs . They are laid parallel to each other at a distance not exceeding fifty centimeters. If additional insulation is necessary for the balcony, the distance between the wooden blocks is filled with insulating material. The subfloor is cut from sheets of plywood and attached to wooden joists using self-tapping screws.
The last stage consists of laying the selected floor covering and installing the skirting boards. Quite often, preference is given to moisture-resistant plywood or planed boards, which are necessarily treated with a compound against rotting and the formation of mold and fungi. It is highly not recommended to use chipboard, because... This type of floor is very susceptible to moisture.
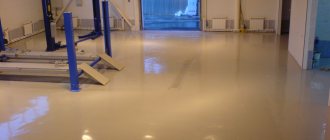
No. 7. Self-leveling floors
Today, Levl Coat flooring is in increasing demand, and is widely used not only on year-round sports fields, but also on open balconies and loggias. Among the main advantages it is worth highlighting:
- record wear resistance;
- moisture resistance;
- ease of operation;
- resistance to sunlight;
- stylish appearance.
Self-leveling floors can be safely called indestructible. They are made according to the principle of concrete screed, and the main disadvantage is the high price. In addition, the surface turns out to be quite slippery, so it is better to additionally use polymer mats.
Registration requirements
This part of the house will not always have a comfortable temperature if you are not going to seriously insulate it and install additional heating here. Therefore, first of all, it is necessary to select coatings that can withstand climatic temperature changes and changes in humidity at different times of the year. If the floor of an open balcony is being finished, then the requirements for coatings will be even stricter.
Cost will not be the last important factor. The budget determines your capabilities when purchasing coatings and you should start from this point. At the same time, the floor is often installed at the same time as the interior of the balcony is being finished, and this simplifies the task of choosing - you immediately buy materials for the walls and floors that match each other.
No. 8. Painted floors
Wood and concrete floors need painting . For the former, this is additional protection, for the latter, it is a simple way of decoration.
What paints are best to use?
- acrylic paints are universal, suitable for concrete and wood. They are resistant to sunlight, waterproof and frost-resistant;
- Aqualak is an excellent option for wooden floors; it has the highest moisture-resistant properties;
- alkyd varnish is another option for wood. It is resistant to ultraviolet radiation, moisture and temperature changes;
- polyurethane paint is suitable for concrete and wood. It is long lasting, easy to apply and water resistant.
If painted wood floors are a good option for an indoor loggia, then a painted concrete floor is the easiest and most cost-effective way to create a cozy feel on an outdoor balcony. Of course, the floor surface must be smooth and completely hardened before painting. Experts recommend ironing , which ensures the perfect smoothness of the finished surface. When the concrete floor has not yet completely dried, it is evenly sprinkled with dry cement and the surface is leveled with a brush. The process is similar to dyeing. When the floor dries well, it can be painted in the desired color.
The advantages of painting floors are obvious: low cost and simplicity.
Features of floor finishing on the balcony
The choice of material for finishing the floor on the balcony largely depends on the balcony itself. Is it insulated? Is there glazing? If not glazed, it is better to give preference to ceramic tiles. It is durable, not subject to corrosion, and can withstand sudden temperature changes, high humidity and even precipitation.
You can also consider the option of a wooden covering. But this is where the work gets complicated. To avoid the appearance of fungus and mold, and its destruction under the influence of unfavorable weather conditions, it is recommended to periodically coat it with special products.
Repairing a balcony is a fairly large-scale undertaking that requires a variety of construction and finishing operations.
They will help create a protective layer for the wooden covering.
Balcony glazing significantly expands the range of finishing materials for the floor surface. Now you can use samples that are afraid of moisture, frost and heat. After all, windows will protect you from their harmful influences. You can lay parquet, laminate, or linoleum.
When choosing a finishing material for the floor on a balcony, it is worth remembering that it is important to take into account the total weight of the surface and the number of structural supports.
For the same reason, natural stone and porcelain stoneware are never used for finishing.
