Due to the fact that plasterboard is used quite often today in repair and construction work, this sheet material serves as the basis for further decorative finishing of the surfaces of premises for various purposes. Thus, ceramic tiles are laid on drywall using special adhesives, which are flexible and easy to apply.
Construction of sheathing
The sheathing can be made from steel CD profiles with a section of 30 x 50 or 40 x 60 mm, as well as wooden blocks covered with two layers of drying oil.
On the ceiling, 40-60 mm away from the wall (depending on the evenness of the walls), draw a straight line parallel to the corner. Then, using a plumb line, transfer this line to the floor. These two lines indicate the plane in which the drywall sheathing should be located.
Vertical racks are attached to the wall using a self-tapping screw method in increments of 20 - 25 cm so that their ends do not extend beyond the lines marked on the floor and ceiling. The distance between the racks should be 60 cm, since the dimensions of a standard gypsum board are 2.5 x 1.2 m, which allows one sheet to be longitudinally supported on 3 racks. The installation must begin with the installation of the outer vertical posts, since it is unacceptable for any edge of the drywall in the corner to be left without support.
If there is a gap at the point of attachment to the wall between the stand and the base, then plates of the required thickness are placed there.
After installing the vertical posts, begin installing the horizontal jumpers, the spacing between which should be 40 cm.
Laying the first row of tiles
The most critical stage of all work, on which the final result directly depends, is laying the first row of tiles. After all, in the future it will set the position of all other tiles and will serve as the main guide. You need to start with clear markings:
- Usually the first row is the one that will be located directly above the bathtub, since many people believe that it is in this place, and not under the ceiling, that the entire tile should be visible. If you are of the same opinion, then measure the height of your bath taking into account the height of the frame on which it will be installed and transfer the mark to the wall;
- Next, using a building level, draw a strictly horizontal line at a given height across the entire wall;
- If it doesn’t matter to you how much the bathtub will overlap the tiles, then focus from the ceiling and draw a line that will correspond to the penultimate row from the floor. Don't forget to add thickness to the seams;
- Focusing on the line, screw a beam or profile to the wall, which will serve as support for the first row, allow you to respect the horizon and prevent the tiles from sliding;
- Lay the first tile in the corner, moving from left to right. Remember that the most visible corner should be the most beautiful and not undercut;
- Lay two more tiles in rows, placing crosses between them;
- Now move up;
- Lay 3-4 tiles, excluding the first one, in a vertical row. Don't forget about the crosses;
- Periodically check the evenness of the masonry using a rule;
- Complete the horizontal row up to the next wall and take a break.
It is necessary to take a break every 4-5 hours of work. The interval should be 30 min-1 hour. During this time, the stresses that arise in the foundation under load will be relieved, and you will have a little rest. If you have a laser level, you can draw lines on all the walls at once and attach guide strips. In this case, installation can be done around the room. Immediately remove excess and traces of glue from the surface of the tile with a damp cloth.
How to glue ceramic tiles to drywall
Before gluing ceramic tiles to plasterboard, a number of additional works will be required. Namely, priming is carried out, and only then we lay the tiles. The process is carried out in 2 stages, first the first layer is applied, then you need to wait for it to dry completely, and only then apply the second. The primer must have deep penetration.
Seal any joints between each joint board. Before fixing the tiles, the backing must be clean, clean, able to burn weight, free from dust, dirt, grease, oil or any contaminating materials and prevent adhesion. Frame and brace any areas that need additional support. Go through the plaster wall with an oscillating sander to easily remove shine or dirt. Remove dust with a broom.
For tiles larger than 900 cm², it is recommended to use the reverse oil method. Please refer to the product data sheet for instructions for use. In this case, the gypsum substrate must be primed before applying the tile adhesive. For tiles, it is recommended to have a joint width of 2 mm. Apply with a rubber spatula in a diagonal direction to completely fill the joint. Remove excess material from the surface with a damp sponge.
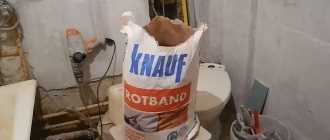
Preference should be given to products from well-known companies, such as:
- Knauf;
- Uniqma;
- Rothband and the like.
Among domestic manufacturers, the Monolit primer is in particular demand, as it has simply excellent technical characteristics.
When the solution dries, wipe it with a dry cloth. There is one more factor that will determine the success of your finished job: the quality and type of wall or floor surface you will be redoing. It should always be kept in mind that the two surfaces are not the same. Each type of surface has its own characteristics, so it pays to know the nature of each surface. These characteristics should be considered when choosing the right adhesive for the job.
Regardless of type, all surfaces must be clean, dry and free of all contaminants and existing surface coatings such as polishes, varnishes, sealants or paints. Listed below are the most common types of wall and floor surfaces you may have or encounter; And we offer important information and useful tips for tiling over these surfaces.
It has high penetrating ability, high adhesive properties, water-repellent effect, the ability to distribute evenly, antibacterial properties, which eliminates the formation and spread of fungus and mold, quick drying time, environmental friendliness, and safety. Before applying the primer, you need to make sure that the gypsum board coating is free of dirt, dust and even chalky coating with greasy stains. The primer needs to be sprayed or treated with a roller.
For best results, the concrete should be cured for a minimum of 28 days before it is covered. Steel grout concrete must be mechanically rough in front of the tiles or there will not be sufficient adhesion. All concrete dividers and curing joints must be removed mechanically. For cracks larger than 5mm, contact local suppliers.
Due to the expansion and contraction of wood, it is never recommended to stick ceramic tiles directly onto a wood floor. Drywall is a very common interior wall surface, but is not suitable for tiles without waterproofing. Tiling over drywall involves adhering the tiles to the surface of the paper, and while this will pose little problem in dry areas, if the wallboard is exposed to moisture it can deteriorate, causing it to fail.
Limiting the load on the plasterboard base
In addition to the obvious advantages of using such a base, you need to understand that it is not recommended to glue very thick and heavy tiles or porcelain stoneware, since the load-bearing surface of the gypsum board cannot be called sufficient for a massive finishing material. This even applies to mesh-reinforced sheet surfaces.
Thus, the reinforcing elements and the quality of the modern adhesive composition will not allow the sheets and tiles to collapse, but there is a high probability of deformation of the planes from prolonged exposure to the mass of the finishing material.
You should also take into account that in order to fix heavy hanging furniture on a plasterboard wall, for example, in the kitchen, it is necessary to use special fasteners and technologies specifically for load-bearing structures of this kind.
What type of drywall can tiles be laid on?
Manufacturers produce several types of drywall, which differ from each other in sheet thickness, as well as resistance to moisture and open fire. It is easy for buyers to distinguish different types of drywall from each other, since manufacturers, along with the abbreviation of names (GVL, GKLV, etc.), use color markings.
Tiles can only be laid on moisture-resistant plasterboard, which is designated as gypsum board and painted green.
In bathrooms and toilets - rooms in which tiles are most often used for finishing - plasterboard is not only used to level the walls, but also to construct various decorative cabinets, niches and boxes from it that cover utilities and elements of plumbing equipment. For example, the rigid metal frame of a wall-hung toilet is hidden behind a plasterboard wall, which is tiled and blends into the overall interior of the room. Therefore, for people who do not see the power of the hidden frame, wall-hung toilets raise concerns about the safety of their operation.
Preparing drywall sheets for tiles
After the sheet of drywall is laid on the wall, you need to putty the seams or, in other words, the joints between the sheets. It is preferable to use a special joining compound on a plasterboard board. Experts recommend using dry mixtures, since they can be diluted in the required quantity and the remainder saved until the next repair work. As for the manufacturer, the putty must not only be laid correctly, but also selected.
Sometimes, the actual pigment in the tile grout will stick to the face of the tile. This does not affect the grout cleaner, but can be removed with either denatured alcohol or lacquer thinner. Many modern tile grouts contain latex additives, which increase the flexibility and water resistance of the grout. You may have even added it during the mixing process. These additives may also stick to the tile surface and can be removed using the above mentioned solvents.
User comfort is our main concern
Especially in renovation work, it is important that the work be done quickly and cleanly, with minimal work on existing furniture and minimal comfort for the whole family. Dust is one of the main enemies of interior renovation work.
Simply by choosing a good adhesive, you can significantly reduce the amount of dust generated in your work area and get a faster, cleaner job.
To do this, you should pay attention to such manufacturers as:
- Uniflot;
- Tiefengrund;
- Fugen Füller;
- UNIQMA;
- Ceresite and the like.
If it is preferable to choose domestic manufacturers, then you should choose the Gipsomontazh or Forward brand
To prepare the joints of gypsum board sheets and lay tiles on it with your own hands, you need to pay attention to the features of the putty composition. It must be dry, white, crumbly and without lumps, with a water-repellent additive, made on the basis of polymers
In addition, the process of mixing with water is carried out quickly and without the formation of lumps, and after preparation, a plastic mixture with excellent adhesion is formed.
Factors to consider when laying tiles on drywall
Tiles can be applied to dry tiled walls or on the surface of light partitions. Tiles can be installed in any type of building, either in dry areas or in areas exposed to intermittent wet conditions. Typical applications include domestic and commercial showers, toilets, bathrooms and kitchens. The tiles are fixed using suitable adhesive. Gypsum boards must have hydrophobic properties so that they can be rolled in damp areas. In dry rooms, ordinary gypsum boards can be used.
Such putties are used exclusively for working with plasterboard sheets, and mainly when it is necessary to glue tiles. If the seams between the gypsum board sheets are too large, then additional reinforcing tape will be required. Some craftsmen with extensive experience use a solution for installing tiles for this process, which makes it possible to carry out the sealing with no less quality. As soon as the putty begins to dry at the joints, you need to clean it, holding the spatula at an angle of 30° to eliminate unevenness and unnecessary particles of plaster.
Drywall has a papery surface and is sensitive to water
Paper loses strength when exposed to water over a period of time. Considering the factors that influence the adhesive used to secure the tiles to that particular substrate are. To control the amount of adhesive, as well as to prevent water from seeping into the backing layer, use a high-performance polymer modified adhesive, which is designed for tiles on drywall, along with a notched trowel.
Make sure the drywall is strong enough to support the load on the tiles and adhesives
The recommended plate thickness is at least 5 mm. Increase the structural strength by attaching the noggins to additional frames to provide additional support.
Tips for choosing an adhesive composition
The reliability of fixing tiles to the base depends entirely on the adhesive composition. When laying tiles on a plasterboard surface, you need to select a composition that can be used simultaneously for both of these materials.
Based on their composition, the variety of mixtures can be divided into 3 groups:
- Cement based adhesive. It can be used for gluing tiles to drywall, since, in fact, we will be installing on thick paper, and not on the plaster itself. But you should be extremely careful and not purchase frankly cheap products. Pay attention to adhesives that additionally contain various plasticizers, otherwise an excess of liquid in ordinary cement-sand adhesive can lead to soaking and deformation of the surface;
- Elastic glue. It is also produced on the basis of ordinary cement, but contains various polymer additives, which makes its structure elastic even after complete hardening. This type of glue is recommended for use in buildings that have recently been built and can still “float” a little. Thanks to its properties, the glue will react quite flexibly to such shrinkage and compensate for stress, and the tile will not peel off. This mixture can be sold either in dry form or as a ready-made solution. Its cost is slightly higher than the first variety;
- Liquid Nails. Due to its high cost, it is rarely used for installing tiles throughout the room. More often used for gluing a single fragment that has come off or needs to be replaced. If you still decide to use this type of glue, be sure to choose moisture-resistant compounds.
Ask the seller or read on the packaging about the toxicity of the selected composition and the possibility of its use indoors. For direct installation of tiles, do not mix all the contents of the package at once, otherwise, if difficulties arise during installation, the composition may simply dry out.
The packaging also indicates the maximum time during which the glue will retain its properties. While you gain speed and get used to working with this composition, stir enough to cover approximately 1 square meter of wall.
How to lay tiles on drywall
Then, when everything is ready, you can proceed directly to the installation itself. It includes the following stages of work:
- Apply a coat of primer to the drywall. To make the surface more durable and airtight, it is better to apply the primer in two layers alternately;
- depending on the total area of the facing surface, subsequent steps will differ, but first calculate exactly how many horizontal tiles are needed and divide the length of the surface by the width of the tiles, taking into account the gaps;
- if the remainder of the division results in a number that is more than half the tile in width, then the laying process should begin on the side that is more noticeable, so that the remaining cut tiles at the end are in less noticeable corners of the wall;
- if, on the contrary, the number turns out to be less than half a tile in width, then work should begin from the central part of the wall, and cut copies will remain in the corners;
- preparing glue. The dry version is best suited in terms of quality and efficiency. It is prepared very simply and the procedure for diluting it can be found on the packaging. It is advisable to pour the dry mixture into a container, add the required amount of liquid and mix them thoroughly using a drill with a special attachment for mixing glue. There is no need to mix a huge amount of the mixture, otherwise during the work it will harden ahead of time. The best option is to prepare the required amount of glue for each square meter;
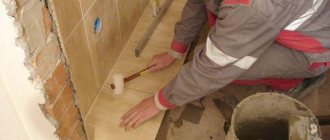
- Before laying the first row of tiles, attach a wooden strip to the wall at a height that will allow you to lay the tile row directly below it. To install the slats perfectly horizontally, use a level;
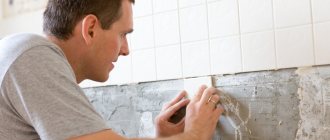
- lay ceramics on drywall either from the central part or from the edge. After laying the first tile on the plank, lay a vertical row at the top, proceed in the same way with the horizontal one, laying it to the left or to the right, parallelly filling the gaps between the tiles;
- to maintain the required distance between tiles, use plastic crosses, inserting them end-to-end between four tiles;
- The crosses are removed after the glue has hardened. Then the seams are cleaned, since there is a lot of mortar residue left on them, then fill them with grout. They can also be treated with liquid glass or silicone to protect them from moisture.
Our job is done, and we have successfully laid tiles in the bathroom on drywall with our own hands. If everything is done according to the requirements, then it will serve you for as long as possible and will not cause any trouble.
https://youtube.com/watch?v=jYrmerUyYSo
Selection of materials
It becomes important, first of all, to choose which surface and with what to glue the tiles, taking into account the characteristics of the room.
Drywall
To begin with, we note that the material itself is made from a combination of gypsum and cellulose paper. The end result is a unique material that is an excellent tool for all kinds of use in various conditions:
- Environmentally friendly, which does not release harmful substances into the environment
- Fireproof.
- High strength is noted.
- Quite good thermal insulation properties.
- To this it should be added that it is easy to process, which makes it possible to carry out and implement any ideas with ease and little time (compared to other materials).
- It is important to note that even a person who does not have special qualifications and work experience can do finishing with drywall.
This is a type of ordinary plasterboard sheet. For tiles it is better to use moisture-resistant, greenish color
When talking about what base the tiles are laid on, you should first decide what kind of drywall there is. In total, the production of material offers only two types for consideration:
- Standard plasterboard sheets for normal conditions. In particular, for use at stable temperatures with normal humidity levels. Mostly used for decorative finishing of walls and ceilings, as well as creating partitions in rooms.
- GKLV – moisture-resistant plasterboard. It is intended for use in finishing rooms with high levels of humidity, for example, a kitchen or bathroom. Moisture resistance is determined by the presence of hydrophobic impregnation, which actually allows tiles to be laid on it.
Type of moisture-resistant drywall
There is another type - fire-resistant plasterboard, but in this case there is no need to consider it.
We also note that the first option is not recommended for finishing with tiles, and in addition for finishing a bathroom. That's why it won't work. Accordingly, the only type that can be used is moisture-resistant plasterboard sheets.
And it’s time to consider what kind of glue is best for gluing tiles onto drywall. To begin with, you need to familiarize yourself with the types of compositions and then decide which one to choose, and only after that go to the store for a new purchase.
In total, the following types of mixtures are presented to our attention on the construction market:
- Cement composition. This is a standard mixture for laying tiles. Consists of cement, sand and additional plasticizers, as well as modifying components.
- A good option would be “Liquid Nails”, which are based on a water-dispersed substance.
As a rule, liquid nails are used for tile repair work.
It’s also worth giving a little advice here about the glue itself. You should only mix it in such an amount that you can use it in a short period of time, since such glue sets quickly and after the slightest drying it will no longer be possible to use it. In addition, you should dilute only according to the instructions.
And we come to the end, and finally, let's decide what kind of glue can be used to glue ceramic tiles to drywall. And here it is worth noting several options to choose from:
- In cases where there are constant changes in the microclimate (temperature and humidity) in the room, it is best to opt for elastic compounds, which will allow the tiles to adapt to certain conditions. Accordingly, in this case it will hold as tightly and efficiently as possible. In this way, you will be able to avoid various kinds of defects and cracks, as well as the tiles falling off.
- But at the same time, it is worth considering the saving side. In some cases, the lower cost of the cement composition simply forces it to be chosen. At the same time, it is also well suited for this type of work, and is not much inferior to epoxy compounds.
Let us note several of the highest quality and popular types of glue:
- The leader in the elastic adhesive market is Ceresit CM . This composition is suitable for almost any surface, and has many advantages, including frost resistance, moisture resistance, elasticity, resistance to deformation, compatibility with waterproofing, etc. This adhesive mixture is almost ideal for carrying out such work. The main advantage of the composition is to prevent deformation of the coating itself when there is stress in the base (which often happens with drywall).
Excellent and elastic tile composition
Another similar adhesive mixture is Elastic tile adhesive Moment . It is also suitable for all types of tiles, but is most often used for clay tiles. It has a high level of adhesion, is resistant to slipping of materials, and is also moisture resistant.
Gaining popularity
Next, it is worth noting the glue from the manufacturer of plasterboard products Knauf Flizin . This material becomes practically the best choice for a small budget, since it has the ideal combination of low cost and good quality. The adhesive mixture has low consumption, some elastic characteristics (insignificant, but perfect for use in a residential building with average intensity of use in rooms with high humidity). In addition, the adhesive mixture is excellent for laying tiles with high moisture consumption, and does not require pre-soaking. This tile adhesive is recommended by the manufacturer Knauf for gluing tiles to drywall.
Perhaps this is the most proven high-quality tile adhesive according to GL in terms of price and quality ratio
Having looked at several examples of the highest quality adhesive mixtures, the choice is yours. Ceresit CM 17 will best cope with the installation task , but such glue is quite expensive. The cost of adhesive compositions in different regions of Russia starts from 350-700 rubles per package of 25 kg. At the same time, a fairly high-quality and optimal solution would be to use a standard cement mixture with a small proportion of additives, for example, the above-mentioned Knauf , the cost of which is 2-3 times less. Here everything depends on your personal choice and financial capabilities.
When preparing tile adhesive, it is important to follow the instructions and monitor the lifetime of the solution. This is the key to quality.
In conclusion, we suggest you watch several videos that will tell you in more detail about laying tiles on drywall, preparatory work, including the selection of an adhesive mixture under different operating conditions of the coating.
After the grout layer has dried, it is covered with protective varnish, liquid glass or silicone sealant. This will protect the material from moisture and the occurrence of fungus and mold. After the grout applied to the seams has completely dried, they are treated with water-repellent varnish. This is relevant for wet rooms, as it allows you to enhance the waterproofing of the walls. The wall is ready for finishing. If everything is done correctly, the surface will be smooth, durable, and able to withstand a certain load.
If the wall is painted, you must avoid getting water on it. Otherwise, wipe immediately. Do not use detergents containing acids and alkalis. The use of plasterboard in construction makes it possible to greatly simplify the solution of most problems in the field of repair . This also applies to laying tiles on drywall in the bathroom.
The tiles are placed on such material without additional manipulations, in the form of leveling. Its surface has excellent adhesion, which allows you to firmly and securely fix the tiles to it.
- There is no need to level the walls due to the initially flat surface;
- Possibility to put an additional layer of insulation under the surface of the drywall;
- Easy to obtain material of the correct dimensions and desired shape, for installation in corners or at joints;
- A very simple process of laying tiles , which even a person with no construction experience can carry out;
- Minimum waste of time on all activities.
Waterproofing using tape
- You should mix the mastic and apply it with a brush or spatula to critical areas - water pipes. You have to work very carefully here. If mastic gets inside the pipe, it should be immediately removed with a rag or napkin.
All surfaces exposed to water - walls near the sink, bathtub and shower, floors and the lower part of the walls - should be protected by a waterproofing system applied under the tiles to the drywall in the bathroom. The fact that walls and partitions made of gypsum plasterboard can be successfully painted and wallpapered is confirmed by all experts. But there is some disagreement about tiling plasterboard surfaces.
Moreover, some craftsmen categorically refuse to glue tiles onto gypsum boards, believing that they can quickly fall off. Most often, plasterboard is used in construction for the purpose of constructing lightweight partitions, false walls, fitting niches for various purposes, and for installing arches and other openings of complex shapes. The choice of the type of plasterboard sheets depends on where exactly these structures are located and in what conditions they will be used.
Surface preparation
Surface preparation cannot be overestimated. The tiles have a large mass, so the plasterboard structure is reinforced, additional horizontal crossbars made from scraps of the supporting profile are installed.
Moisture-resistant plasterboard is used for cladding. If you choose a simple one, it will need to be treated with special impregnations. The guides of the wooden frame are treated twice with moisture-resistant impregnation. True, today few people make frames out of wood.
It will clean the surface of dirt, increase adhesion to the glue, and increase the moisture resistance of the base. This is done with a brush or roller.
Preparing gypsum boards for tiles
Requirements for drywall
It does not matter in what conditions the work will be carried out, since the installation of the tiles must be carried out on top of moisture-resistant drywall, even if the humidity level in the room is relatively low. This is not a requirement, but rather a helpful tip. There are three types of drywall available: regular, fire-resistant and moisture-resistant. Proper preparation makes it possible to use all of the listed types of materials, but when the adhesive mixture begins to dry, a simple sheet, without gypsum board markings, can begin the process of deformation. If there is no high humidity in the room, but instead there are increased fire safety requirements, then it is better to use material marked with GKLO. Ordinary material marked gypsum plasterboard can be used for interior design.
When choosing drywall for tiles, give preference to moisture-resistant, even if the humidity level in the room is quite low
Gluing plasterboard to the wall
Now let's look at how to properly lay drywall on walls that can be smooth, not quite straight, or completely uneven (crooked).
How to properly conduct wiring under drywall - video
Preparation
First of all, you need to take care of the electrical wiring, since then laying it in drywall will not work.
- In accordance with the diagram, markings for electrical wiring are made on the walls.
- According to the markings, holes for the socket boxes are cut out with a diamond crown.
- Before laying the drywall, wiring is installed, during which the wire laid in the groove is plastered.
- The walls are impregnated with a deep penetration primer.
Please note: The preparation of uneven walls differs only in that in those places where there are large recesses in the wall, there is no need to make grooves, and you do not need to worry about the subsequent installation of socket boxes in advance.
Smooth and not quite smooth walls
If you decide to level smooth walls with plasterboard, then the glue consumption will be small, but will increase significantly when working with a surface that has depressions.
We glue drywall to the wall - details and secrets in this video material
- Since the gypsum board area is large, it is advisable to purchase gypsum-based glue, which will take a long time to dry, which will allow you to adjust the position of the sheet, aligning it with the plane.
- The glue is mixed with a mixer (not by hand) in accordance with the manufacturer's recommendations.
- Holes for socket boxes are cut in the sheet so that they coincide with the holes cut in the wall. If you don’t want to rack your brains with matching holes, then a large hole will break in the wall, and the socket box will be held on by the drywall.
- To glue a sheet to a flat wall, tile adhesive is applied to it, just like on tiles, with a notched trowel (tooth no less than 10x10 mm). When the base cannot be called smooth, then glue is applied to the plasterboard (or to the walls) in spots.
- Now the sheet is pressed against the wall and aligned with the rule.
It is important! Do you know which side to mount moisture-resistant drywall? The front side of moisture-resistant wall cardboard is green, and the back side, which faces the wall, is gray.
The remaining sheets of drywall are glued to the wall in a similar manner, and only after this can the tiles be glued to the drywall.
Working with crooked and blocked walls
It’s worth noting right away that the method cannot be called cheap, but there is no dirt. In this case, you will have to level the wall with plasterboard in the same way as you did with profiles.
Installation of drywall on curved walls
To do this, ten-centimeter strips of plasterboard are cut, and “rack profiles” are glued from them to the wall. After such leveling, gypsum plasterboard or gypsum fiber board (gypsum fiber) is laid.
It is important! GKL, GKLV and GVL can be glued to the wall with mounting foam, but if you don’t have the skill, it’s better not to take on this task, since the foam expands, and the slightest wrong action will lead to bumps appearing.
It will not be possible to correct the situation - you will have to break it, remove the old sheet and glue a new one. It remains to process the joints of the sheets.
How to prepare for work?
Before gluing tiles onto drywall, you should prepare the paper surface for work. To increase strength and create a monolithic surface, it is recommended to fill the joints of the sheets with a mixture specially designed for this purpose. In this case, the marking of the putty should indicate that it is intended for processing gypsum board butt joints. There is no need to completely process the entire wall, since this procedure is carried out only to level out defects in the surface of the concrete base. However, the caps of the screws and damage to the gypsum board should be covered with putty. This will allow you to glue ceramic tiles to drywall without the risk that they will lie askew.
Careful processing of the corners of the room is required. The joints of the walls must be glued with a thin reinforcing mesh or sickle tape. After this, the corner is puttied and dried.
Before laying tiles on drywall, the surface must be primed with a composition suitable for the adhesive that will be used for finishing. The liquid must be applied with a roller and dried. The drying time should be indicated on the packaging, but in most cases it takes 45-50 minutes. After this, another layer of primer is applied.
When installing tiles in rooms where you need to cover the entire wall, before gluing the tiles onto drywall, you should calculate the number of rows. You have to start from the ceiling. This is done so that the cut tiles end up near the floor or the edge of the bathtub.
At the end of the rows with intact fragments, before gluing the tiles onto drywall, you need to attach a support strip to the wall. It must be aligned horizontally. We glue the ceramics starting from this strip, and we will install the cut tiles only after completing the work on laying the tiles on the drywall.
To work you will need the following:
- notched spatula;
- rubber mallet;
- tile adhesive or “liquid nails”;
- ceramic tile;
- cross-shaped inserts;
- grout and possibly hydrophobic varnish.
To successfully resolve the issue of how to lay tiles on drywall, the quality of the adhesive solution is important. When preparing the mixture, calculate its amount so that it is enough for 0.7-1 m2 of surface. Over a larger area, the solution may set before the master begins to glue the ceramics. This will inevitably affect the strength of the coating: high-quality stickers are only possible on a fresh layer.
Plasterboard tiling
Each stage of cladding is carried out in compliance with all nuances. It’s better to do everything correctly from the beginning, then you won’t have to redo anything later.
Laying small square tiles on a plasterboard wall
Working with the surface
This is a mandatory procedure that will help correct some defects and also increase the reliability of the surface. Preparation of drywall for tiles is as follows:
- Existing joints are opened. This is done with a construction knife. It is placed at an angle of 45 degrees to the center and each side is cut off.
- Next, the seams are covered with putty. Apply the first layer, which completely fills the empty space. Then reinforced tape is applied, it will prevent the formation of cracks. It is smeared into the surface, which is leveled.
- If required, then after the composition has dried, grinding is done. It will hide the protruding areas.
- GKL slabs require additional treatment with primer mixtures. They are selected taking into account that they must contain an antiseptic. The solution is applied in two layers, each of which is left to dry.
To increase adhesive properties, it is recommended to treat drywall with a primer
- Whether to do finishing putty is decided by each master individually. But this procedure is optional.
- Markings must be carried out, which immediately determines the location of the tiles.
Glue selection
It’s worth mentioning right away that you need to choose only high-quality compounds that will ensure reliable fastening.
The reliability of tile fastening depends on the correct choice of adhesive.
When purchasing glue, pay attention to its composition and scope of application.
- Cement based mortar. This material is not used for gypsum, but since the gypsum boards are covered with cardboard, it can be used.
- Elastic glue. An excellent option, which is available in two states: ready and dry.
- Various types of liquid nails. Many masters claim that this method can be used everywhere. This is a rather controversial decision. It is used mainly for spot work, when it is necessary to glue a lagging element.
Tile installation
After the second layer of primer has completely dried, you can begin gluing the tiles.
Ceramic tiles are laid on drywall starting from the second row. In order to prevent the elements from sliding, they are strengthened by installing a wooden lath or metal profile.
The tool is being prepared:
- container for mixing the solution;
- plain and notched spatula;
- rags and sponge;
- level;
- plastic crosses or tile leveling system;
- grater or rubber spatula.
Tool for laying tiles
The general cladding technology is as follows:
- The glue is prepared according to the instructions that each manufacturer develops independently.
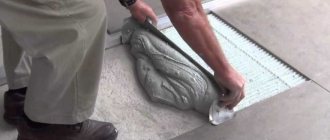
- The solution is scooped up with a simple spatula and spread over the area where the first element will be laid. The surface is smoothed with a toothed tool.
- The tile is slightly moistened on the reverse side and covered with a thin layer of the mixture.
- It is applied to a pre-marked area. Using a level, the accuracy of the installation is checked.
- If there was too much glue, the excess will come out at the edges when pressed. They are immediately removed with a spatula.
- The second element is being prepared. Similar procedures are carried out with him.
- Crosses or SVPs are immediately inserted between two products. These devices allow you to create a uniform joint.
- Tiles are laid on drywall in rows. When the first row is completed, begin the second.
- The fragments that require trimming are placed last. In particular, the bottom row is left for last. It is convenient to apply it after the floor work is completed.
- If glue leaks onto the front part, it is immediately wiped off with a rag.
After completing the installation of the tiles, you need to let it dry for several days, after which you can start grouting the joints
Now you should leave the surface for a couple of days. This time is necessary to consolidate the material. Next, the tile joints are grouted. It is as follows:
- The remaining mortar is removed from the seams and the plastic crosses are removed.
- Prepare the grout mastic.
- It is applied with a rubber spatula or grater.
- It is necessary to completely fill all the seams and remove excess mixture.
Grouting tile joints
Tiling over plasterboard has been completed. If required, an additional impregnation or sealant is applied after a few days.
Marking the base
The purpose of marking is to provide the tiler with starting points and guides. Performed using a hydro or laser level. The latter is much more convenient, but the water one is incomparably cheaper. For self-installation, it is hardly worth purchasing an expensive tool; the hydraulic level is highly accurate.
From a design point of view, it is important to determine the most visible places and calculate the order of installation in such a way that the composition is as seamless as possible. So, with regard to the vertical, priority is usually given to the ceiling - whole tiles should be at the top, and in terms of the horizontal, the focus is on the places that first catch the eye when entering the room.
When calculating the starting points, it is necessary to take into account the thickness of the distance crosses. If in a cramped room ignoring this requirement will not lead to serious displacements, then in a spacious room a mistake can be very expensive - the count can be tens of centimeters.
Usually, laying tiles on drywall begins from the second row (from the bottom), but if the floor is flat and there are no obstacles in the form of plumbing on the first row (this often happens), you can tiling it from the very “start”. You just need to leave a gap for the floor tiles (don't forget about the seams), since the wall tiles are laid on top of them for aesthetic purposes.
When calculating the layout of the tiles, take into account the location of plumbing and electrical appliances. Sometimes you need to sacrifice some of the integrity of the overall picture in order not to be faced with the need to perform complex trimming around the same pipes or socket boxes. It is impossible to give a complete list of recommendations - each case is individual, but the train of thought should be clear: the final composition must please with maximum integrity.
The good thing about laying tiles on drywall is that it is convenient to make pencil markings: gypsum plasterboard is a smooth and clean material. However, many tilers do not trust markers, preferring to pull beacon cords. This really increases the accuracy of installation, especially if the specialist does not have a good eye.
CATALOG
Correct seam sealing
To get a good result, you need to know not only how to glue tiles to drywall, but also how to seal the seams. This procedure is mandatory, let’s look at why. After the cladding is glued, small gaps remain between the elements. They are called sutures. Moisture easily penetrates them and gradually saturates the base and glue. As a result of dampness, mold and mildew appear, drywall and adhesive mixture are destroyed.
To avoid these problems, the seams are sealed with a special compound - grout. The mixtures differ in color; you can choose a material that is contrasting or the tone that best matches the shade of the tile. They produce special moisture-resistant grouts, which is what is chosen for rooms with high humidity.
Sealing work begins only after the glue has completely dried. Depending on the brand, this takes from one to three days. Grind the seams as follows:
- Carefully remove the plastic elements from the tile seams.
- Getting the grout ready for work. We dilute the mixture following the manufacturer's recommendations. The result is a paste with the consistency of thick sour cream.
- We take a rubber plastic spatula and apply the composition to the seams with precise diagonal movements.
- We wait until the mixture hardens. After an hour, remove excess paste with a sponge.
If you want to further protect the tile seams, you can treat them with water-repellent varnish or liquid glass.
There is no doubt whether it is possible to glue tiles to drywall. If you choose the right materials for the base and the adhesive mixture, the cladding will adhere perfectly. Leveling a gypsum board wall allows you to significantly save time and money and gives good results. If you wish, you can do all the work yourself.
Benefits of priming drywall
How advisable is it to prime drywall? Perhaps the right thing to do is to give it up?
Construction standards for finishing work state that priming is mandatory before puttying.
Scheme for sealing seams in plasterboard walls.
However, if the surface is clean and free of dust, then a primer is optional before painting or puttying. Also, the original clean seams do not need to be processed.
Why do you need a primer? Priming is intended to protect the joints of plates of materials, increase the strength and durability of structures. The primer is quickly absorbed into the sheet and further strengthens it. We usually prime for better adhesion of the putty.
The primer levels the working surface and serves as a preparatory step before subsequent processing. It ensures uniform absorption of paint into the surface and, accordingly, its uniform layer-by-layer application. Failure to do this may result in bumps forming in areas where more moisture is absorbed after several coats of paint are applied.
This procedure is most important when using such a popular finishing material as wallpaper. This type of treatment is simply necessary before wallpapering. For what? To remove dust by binding its particles into a single whole, which will prevent the appearance of unglued areas. Thanks to this, the wallpaper adheres well to the wall. Also, the wallpaper will not puff up or bubble.
Tiles can be used to finish drywall in areas with high humidity (bathrooms and kitchens). Before laying the tiles, it is necessary to make a sheathing from metal guides or timber. Tiles are a versatile and durable finishing material.
By laying a primer you can smooth out sharp horizontal corners. To prevent corrosion, it is recommended to paint the caps of the screws holding the sheets of drywall together.
When using any type of putty, normal adhesion (sticking) can be achieved. The primer does not take long and requires a small amount of material. At the same time, the technical characteristics of the structure are significantly increased, regardless of the choice of finishing material (wallpaper, paint or tiles).
The positive effect of priming leads to the conclusion that this type of treatment is advisable.
