Modern life does not stand still, but, like many years ago, the old style in the interior looks very good. This is why many people use it. Many things, furniture and walls of the house can be stylized as antique. This will allow you to create a unique interior in retro style. This is what many people use. It is quite problematic to purchase antique items or pieces of furniture, since they are not cheap. They are often made from solid oak or other heavy wood. However, to purchase them you need to have a fortune. Ordinary people simply cannot have it. Antique painting is the only way out of this situation.
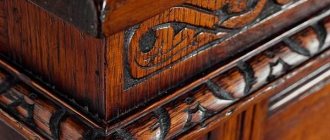
Walls with an “antique” effect give the house a noble and rich look.
Almost anyone can afford to buy all the tools and materials needed to carry out the work. Antique painting of walls involves preparing them, applying a primer and the actual work. It's not all that difficult to do. The most important thing is to follow the instructions so that antique walls can be painted quickly and with the highest quality possible.
A noble trace of time: antique design
Agree, columns, candelabra and excess gilding look ridiculous in our cramped standard apartments. It’s stupid to try to fill small rooms with the decoration of palace halls - let’s leave European-quality renovations of the 90s “under the classics” aside.
But it is possible and necessary to introduce light touches of history into a modern, contemporary interior - this will make the house more interesting, as if you are giving guests a casual hint of your intelligence and good taste. Let the living room be decorated with grandfather’s crystal chandelier or even a small, actually antique table: a small detail should attract attention.
It’s important to remember here: vintage is not a one-to-one recreation of an era, it’s a rethinking of it. Elements that have aged well should be successfully woven into modern design. You don't want to live in a dusty museum, do you?
Here's the main secret of a vintage interior:
- 1-2 actually old or vintage items;
- 2-3 artificially aged;
- the rest is fundamentally modern.
Moreover, the elements are not only furniture. Lamps, textiles, art, even a roll of vintage wallpaper, perfectly preserved in the attic, can work wonders. If only the old, aged and new combine well and play off each other.
And if everything is clear with the first point - you will take something from your grandmother’s inheritance or buy it at a flea market (or maybe really in an antique store), then you need to talk about aged interior elements separately.
Working on brick
Working with brick is the easiest, since it itself has an old-fashioned look. The instructions have only one simple step - painting with acrylic paints of the selected colors. The only difference between this type of painting and the usual one is the method of applying the paint.
So, antique-looking brick painting should be done with a sponge. It is simply dipped in paint and applied to the surface of the brick with light touches.
Brick painted antique with different paints
To enhance the effect of antiquity, before painting the brick antique, the joints of the masonry are rubbed with ordinary earth, making them darker or painted over with paint of any color.
Aging methods
Faded colors and patterns, elegant cracks, fading, light patina, wear and tear - all this beauty can be artificially imparted to objects using special aging techniques.
Patination
Remember the greenish coating on copper surfaces? This patina is the result of oxidation that forms on some alloys over decades. With the help of chemical compounds or simply artistic imitation, the process of patina formation can be significantly reduced. Modern materials make it possible to create this effect not only on copper surfaces.
Rust
Self-oxidizing metal panels have already become a fashionable trend in exteriors, and nothing prevents rust from being used inside homes as well. Special solutions allow metal to become covered with red-orange traces of rust in just a couple of hours. And decorative rust-look coatings will give the walls a fashionable effect without sacrificing comfort.
Limescale
This effect is most often used to give wood a dusty look. Special suspensions lighten the fibers, making wood surfaces look older.
Craquelure
Noble cracks are imparted to surfaces using compounds applied on top of a decorative material or between 2 layers of paint of different colors. You can vary the thickness and method of applying the composition, achieving bolder breaks or, conversely, thin, neat cracks.
Abrasions and mechanical stress
The fashion for luxurious shabbyness has passed into a separate interior style - shabby chic.
Aging paint
There are many ways to age a painted surface besides craquelure. The craftsmen apply it “not according to the rules”, achieving rapid crumbling, removing the top layers of paint - all to make the wall look a little frayed and careless.
Aging wood
To age wood, they use either the usual glazes and oils, which more clearly reveal the natural structure of the wood, or they do brushing - mechanical removal of the soft fibers of the wood. What could be more noble than old wood?
When the soul requires change, and the brick wall requires an updated design
A brick wall is excellent not only in its original form. There are many ideas with which you can add variety to this architectural element. We will share with you tips on how to decorate brickwork in an interesting and tasteful way.
Elegant white brick wall in a studio apartment
Basic option: how to paint a wall with varnish
Exposed brickwork without additional decoration is the hallmark of the industrial style. It is this direction that favors the use of building materials in their original form. But you shouldn’t leave the brick without additional protection, as there is a high risk of color and texture changes. In order to avoid this, you can paint the brick wall with varnish. It will help preserve the masonry and protect it from external influences.
Neat brick wall covered with matte varnish
The coating is selected depending on the interior design. Where reflections and play of light are appropriate, you can use a glossy finish. But if you want to leave a neutral design and not attract attention with unnecessary glare, it is better to cover the brick wall with matte varnish.
Full color fill
Another way is to completely paint the brick wall. This is a great opportunity to create an original accent in your apartment that will unobtrusively fit into the overall design.
Neutral brick wall in gray tones
By choosing a shade that matches the main color scheme, you can easily get an extraordinary wall that will stand out due to its texture.
How to age walls: decorative plasters
Is it worth reinventing the wheel by trying to age the walls if there is decorative plastering? Almost all of the effects described above can be created using plasters and glazes included in the kit. And not only walls: some decorative materials, for example Plasma 3D, can be applied to the surface of floors, furniture or, say, household appliances. The effect of shabby metal, peeling paint, rust, craquelure - all this is easily done with the help of decorative plasters.
Worried that plastering is expensive, difficult and inappropriate? We have already smashed myths about decorative plasters to pieces more than once; re-read this article if you are tormented by doubts. And if you have questions about how to select and how to work with this material, contact Loggia specialists for free.
Make your interior more soulful: a couple of vintage items or finishing elements will always find a place even in the most modern interior.
Working with metal
In addition to wooden objects, metal ones can also be aged.
The technology consists of the following steps:
- First, the surface is completely sanded and cleaned of dirt, grease stains, rust and other types of contaminants;
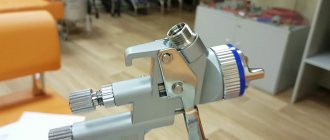
- Next, a layer of special paint – metallized – is applied to the surface. Such paints are popularly called “metallic”. It is best to apply with a brush, since the resulting pattern will already have an antique effect;
Metallized paints
- Afterwards, a layer of primer is applied to the dried paint. A craquelure primer must be used. This primer forms a transparent surface after drying;
Applying craquelure primer
- After priming, the metal is painted in an antique style with your own hands using a top craquelure coating. As this composition dries, cracks form. The deeper these cracks are, the thicker the coating layer;
Surface after the top coat has dried
- In order to enhance the effect of antiquity, apply a little burnt umber to a piece of fabric and rub it into the painted surface. All excess umber is removed, leaving them only in the cracks, which creates a finished image of the old item.
Rubbing the surface with umber
It must be said that metallized paints can be used not only for metal objects, but also for clay, wood, brick and others.
Advice! To ensure that such a layer of various paints lasts longer, before painting the metal antiqued, a special electrically conductive paint is applied to its surface.
As such protection, electrically conductive paint zinga, which consists of 96% zinc, can be chosen.
Zinga paint
As protection against high temperatures, for example, when it comes to fireplace doors, fire-retardant metal paints, polystil, can be used, which can withstand exposure to open fire for 45 minutes.
How to paint antique.
Today, antique painting is popular in interiors. The walls and furniture are given the effect of a noble antique finish. Such decoration will help to fit things into the overall interior, made in retro style. There are many ways to paint antique surfaces. To get started, just master a few design tricks.
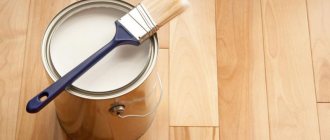
Primer for paint
Artificial latex paint
Long bristled brush
Bronze, gold and green paints
Prepare the wall for antique painting. First you need to clean it of dirt. There is no need to putty - just apply a special primer under the paint. Let it dry for 4 hours.
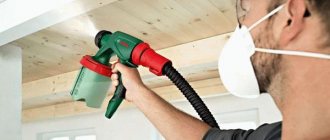
Buy paint that contains artificial latex. Choose a brush with long bristles. Start painting the walls in a circular motion. Press the brush onto the surface from time to time: “scuffs” will appear.
Scrub the painted and dry wall using a brush, sponge or sandpaper. The “time pattern” on the wall depends on your movements.
Let the wall dry completely. Then use a sponge to apply technical wall wax in two layers. Polish each dried layer with a soft cloth. The wax will dry for about 6 hours at room temperature. As a result, you will get a shiny wall with “antique” scuffs.
Antique paint your wood furniture. Old layers of drying oil, paint or varnish must be removed with sandpaper and solvent.
Choose a paint that suits your retro style. For example, bronze or gold. You can make 3 layers: green, bronze and green again. When the paints are dry, rub the top with coarse and then fine sandpaper.
Wait for the decorative layer to dry completely and cover the furniture with a special crackle varnish (“craquelure”). This is a product that cracks when it dries, creating interesting cracks. It is necessary to apply one type of varnish first, and then (when your hands stop sticking to the surface) another. The components of these two layers do not fit with each other, which is why an intricate web of cracks is obtained - crackle. Carefully read the instructions for varnishes No. 1 and No. 2.
Cover the cracks with grout to make them look more contrasting. Apply a bitumen patina to the varnished surface with a sponge - it is specially produced for the crackle technique. Your task is to rub the grout into the cracks and remove the excess with a rag soaked in vegetable oil.
Wipe the “aged” furniture with a towel, let it dry and apply any fixing varnish to it.
You can “aging” walls and furniture beautifully only if you have mastered this skill well. First, treat a piece of wood or an inconspicuous corner of the wall. Then decorate the interior in retro style. Now, if you wish, you can make the facade of the building using the same technique - all the decorative materials necessary for this are resistant to the environment.
When working with craquelure varnishes, rub the cracks very carefully! They are extremely fragile. If you want the web of cracks not to stand out too much, dilute the grout with white alcohol.
You can do without additional paints. Just buy two types of crackle varnish and bitumen patina from a specialized artist store. The first number of craquelure varnish with an amber tint is decorative in itself.
Tools and materials
So, first you need to decide on the tools and materials that will help you paint the walls in an antique style. Everything that will be presented below can be purchased without any problems in almost any specialized store. So, for work you will need:
Tools for painting walls.
- dye;
- sponge;
- brush;
- primer for paint;
- sandpaper;
- brush;
- technical wax for walls.
This is quite enough for high-quality implementation of all stages of work. Now we can talk in more detail about how antique walls are painted. And it is simply necessary to start the conversation by preparing the surface.
How to age walls, wood or metal by painting?
If you are a lover of old things or you simply have nothing to update the interior of your home, you can easily use the antique painting method. A large number of things are suitable for antique painting. This includes furniture, walls, and doors. In general, everything that gives your home a certain style.
Nowadays it is very difficult to buy antiques or furniture, and it is also expensive, which not everyone can afford. After all, previously all wood products were made mainly from oak or other massive types of trees. Therefore, the average income that the majority of the country’s population has is not enough to purchase them.
And only antique painting is an excellent and fairly budget-friendly way out of this situation. In addition, there are a huge number of methods and processing techniques that allow you to achieve an excellent aging effect with your own hands.
Some features and recommendations
When working, it is important to use only high-quality tools. It will allow you to achieve the maximum effect of antiquity. You should not abuse innovations. Every design decision has the right to exist. This also applies to the antique painting process. It is not necessary to use such techniques only in this form. You can achieve other effects appearing on the wall. Antiquity is simply one of the varieties and possibilities that do not necessarily have to be applied. Exactly the same movements on the paint can be used to create other drawings. This is a creative process that should help people realize what they are capable of.
https://moyagostinaya.ru/youtu.be/u2VEPzBmDag
Every person is capable of much. There is no doubt about it. If you create the effect of antiquity in your home with your own hands, then you can safely say that a person has learned to create. This is only a small part of the abilities that he can demonstrate at various stages of his development.
When the work is completely finished, you can decorate the wall with some decorative elements. These can be massive paintings, which will further enhance the effect of antiquity. An excellent solution for most modern apartments.
Painting the walls
It is from this important stage that the transformation of your room begins. And the quality and further appearance of the room depends on it. First you need to clean the surface of dirt, and most carefully walk along the partition. After processing, there should not be the slightest speck of dust or old coating left on it.
All previous material from the wall must be removed so that it does not interfere with further work. It is best to use a spatula for this. In addition to this, prepare:
- paint;
- sponge;
- brush;
- primer for paint;
- sandpaper;
- brush;
- technical wax for walls
The source material is a pure wall, ready for any flight of fancy, even the most impossible.
Next, you will need a special primer, which can be purchased at any store. After diluting it, you should not wait, but immediately apply it to the surface of the wall, as it tends to harden. After the primer has completely dried, you can begin painting.
The paint must be selected in advance, and one that contains latex. This particular paint is ideal for walls and is resistant to fading. Buy a brush with long bristles. The paint should be applied in a circular motion. Moreover, periodically you need to put pressure on the brush, as a result of which a scuffed effect will be created. It will be the main sign of antiquity.
But that is not all. After all, painting the walls does not end the job. After this, it needs to be properly rubbed. To do this, you need a brush with which to rub. Instead of a brush, you can use sandpaper or a sponge. The pattern of the antique will depend entirely on your movements with the brush. You can use all your imagination. In this case, experiments are encouraged.
After waiting for the wall to dry completely, you can apply wax to it. It is applied using a sponge. Then, after waiting a few more hours, you can enjoy the fruits of your labor. All DIY antique wall painting is ready.
How to paint walls antique
Before aging the walls, you need to carefully study the entire technology of such processing:
- Prepare the surface: remove the old coating and any existing dirt;
- Apply a layer of primer and allow the walls time to dry (at least 4 hours);
- Prepare paint containing latex and a long-haired brush for processing;
- Apply the composition with rotational movements, from time to time applying force to the brush, so that areas of roughness are formed, enhancing the effect of antiquity;
- Wait until the antique-painted wall has completely dried and apply technical wax.
Painting wooden products
If you want to paint a wooden surface, be it a wall, a door or furniture, then first you need to treat it. First you need to remove the old coating from the wood. After this, the wood needs to be cleaned and sanded with sandpaper, starting with coarse sandpaper, gradually selecting finer ones.
Then be sure to cover the treated wood with an antiseptic primer, which will protect the wooden surface from mold and rot.
To age wood, you need to use a special painting method:
- Apply the first coat of paint. For this it is better to use matte acrylic.
- After complete drying, sand the paint.
- A second coat of paint is applied in a thin layer.
- To age the wood as much as possible, you can rub individual areas with sandpaper again.
- Finish the work by sanding the entire product with fine-grained sandpaper.
The process of painting antique wooden products with your own hands is over. This painting method can age both furniture and doors.
Craquelure
There is another way to age wooden products with your own hands. It's called craquelure. It is achieved by creating fine cracks in the varnish. You can achieve this like this:
- Apply a layer of paint of the desired shade to the previously cleaned surface. This is the color the cracks will be.
- After it has completely dried, apply a transparent varnish - craquelure.
- When the varnish dries, apply another coat of paint in a color significantly different from the previous one. After which the varnish will begin to crack.
- To complete the paint job, coat the wood with a regular clear varnish.
Patina
Another way to age wood is patina - a special paint applied to any wooden product. It's very simple - apply a varnish based on polyurethane or polyester to the surface of the wood. A thin layer of patina lies on it.
After waiting for complete drying, treat the product with a metallic sponge. The aging effect depends on the intensity of treatment. At the end of the work, everything is varnished.
Features of painting doors
The door painting process has some features:
- first you need to remove all the old paint with a spatula;
- unscrew hinges, locks, handles and other existing parts;
- Wash the entire surface of the door to remove accumulated dirt and dust;
- sand the door using sandpaper;
- Carefully fill all cracks and scratches.
If the preparation process is completed, you can proceed directly to painting. First, decide on a color. After obtaining the desired color scheme, cover the entire surface of the door with stain. To do this, take a swab and cover the wood several times until you obtain the desired shade.
To give the item an antique look, add scuff marks to the corners, keyhole, and handles. This can be done using a wire brush. After this, cover the entire surface with colorless varnish in several layers. Once the door is dry, reinstall all removed hardware.
How to paint antique metal
Painting antique metal with your own hands requires the following steps:
- The metal surface must be sanded to remove rust, dirt and dust;
- Apply special metal paint containing metallized particles. The work is done with a brush;
- Dry and apply a layer of craquelure primer;
- Aged effects are achieved by applying craquelure varnish, which cracks after application, forming a decorative antique surface;
- To enhance the antique effects, burnt umber is rubbed into the dry surface with a soft cloth.
Not only metal surfaces are treated with these paints. You can also paint clay, brick, wood and many other surfaces.
Before painting antique metal, it is important to know that in order for metal surfaces to retain paint for a longer time, special electrically conductive paint compounds can be applied.
Painting of metal products
This technology is less in demand, since there are much fewer metallized products than wooden ones. Therefore, to age the metal, you can also resort to craquelure treatment. And to make the effect more pronounced, you can highlight the resulting cracks with burnt umber. It must be applied to certain areas before the composition dries completely. A prerequisite is that the umber should only be on the cracks.
Considering the fact that the color range of metal is very diverse, the surface can get a shade from gold to brass. Therefore, when it is processed with craquelure, it takes on an ancient look, and maybe even antique.
To achieve the aging effect, you must first coat the product with metallic paint. Then a primer layer of craquelure is applied, strictly following all instructions, without smudges and in an even layer. After it dries, apply the first layer of craquelure with a brush. When it starts to dry, small stripes will appear on the surface.
The thicker the varnish layer, the larger the cracks. Finally, coat the surface with a layer of clear varnish.
In conclusion, we can conclude that antique painting can be applied to any surface of different ages and conditions. The main thing is to have a desire to do everything with your own hands and imagination. Create, and the result will not keep you waiting.
Decor
Now you can proceed directly to the decor. Creating decorative effects There are a great many techniques to diversify a boring monotonous surface. With their help, you can create either a fairly calm striped wall or erect reliable brickwork. Using various tools, you can paint a romantic starry sky on the ceiling of your bedroom or decorate part of the living room wall with imitation crocodile skin. The possibilities of paint and methods of applying it are almost limitless! The simplest of decorative painting techniques is decorating with a rolling effect. The essence of this method is to apply darker or brighter paint using a special shaped roller onto a lighter and calmer first layer. In this case, glaze and often artistic paints are added to the paint to apply the pattern. Various stencils are used in the same way. On the first dried layer, by applying a stencil to it, a pattern is applied with paint of a different color. You can make such blanks yourself by transferring the pattern you like onto the surface of the future stencil and cutting it out along the contour.
Imitations of various textures
- The effect of a wooden texture is also achieved quite simply. First, the surface is painted with the first, lighter layer of paint. Then another layer of darker paint mixed with glaze is applied. And then, using a dry brush, remove excess glaze with vertical movements. In this case, veins are formed that resemble the structure of wood.
- marble looks very nice . The application technique is quite complicated, but the effect is worth the effort! The first layer of white emulsion paint is applied to the work surface. After it has completely dried, use a 2.5 cm wide brush to apply two slightly darker colors of glaze using random strokes. While the glaze is still wet, use a texturing brush to blend both colors. Next, using a wide soft brush, smooth out any rough color transitions left after work. The movements should be light. Then the marble veins are drawn with a thin artistic brush and also shaded with a soft brush. After complete drying, the drawing is processed with fine-grained sandpaper and varnished. The incomparable marbling effect creates a mood, changing depending on the lighting.
- The effect of an old wall is achieved primarily by old, half-dried, shabby materials. The roller should be dry, as if they forgot to wash it and the paint has thickened in the bath. It is better to paint mixed with different rollers with different shades.
An unusual and original decor can be obtained by using a sponge, a plastic bag, crumpled paper, fabric and other available “tools” when painting. This finish is not only highly aesthetic, but also practical. The paint does not fade, does not scratch and is protected from abrasions. Painted walls are characterized by a fairly long service life. They do not require any special care; simple wet cleaning is sufficient. Decorative painting is harmless and universal; it is suitable for almost any surface and room. You just have to show your imagination and make a little effort - and your apartment, house, or office will be transformed. The walls will bloom with an interesting, intricate pattern, emphasizing your taste. Be creative and create the space around you yourself!
Antique decorative plaster
There are things and phenomena that do not leave a person indifferent. One of these phenomena is time. Antique objects can charm you with the traces left on them by time. Therefore, antiques are valued not only for the skill of making things, but also for the flair of time. If there are no ancient walls, you can always create an imitation of the veil of time artificially. Antique plaster is used for this. Manufacturers offer special compositions for creating interiors that recreate the atmosphere of the distant past. This material is used in the interior of residential premises, cafes, restaurants, and other public places. House facades can also successfully “age”
Tool overview
Those who paid attention to truly ancient brickwork probably noticed a rather badly damaged surface: chips, cracks, the absence of some bricks in the wall and other signs of the effects of time. This is exactly the effect you need to achieve at home. To do this you will need the following tools:
Scheme for plastering brick walls.
- perforator;
- chisel;
- hammer;
- Bulgarian;
- sandpaper;
- blowtorch.
These are the basic supplies to get the job done, but if you wish, you can add to the list with whatever you have on hand. These can be any sharp objects that can damage brick or artificial tiles in the corresponding style (depending on the material from which the wall is built, as well as on the type of finishing). Today, artificial tiles are often used as a basis, with which you can make an imitation similar to a brick wall, which will be much thinner than the real one, which will save free space in the house.
As an alternative, another method that involves the use of sandblasting equipment can be used. This is a much more effective solution that requires less effort and time to implement. However, its complexity lies in the fact that not everyone who wants to quickly age a brick wall has the appropriate equipment. Therefore, it is necessary to consider in more detail the method based on the use of the listed tools.
Effects, advantages and disadvantages
The effect of time can be expressed through the texture of the surface or using special painting techniques. Antique decorative plaster combines both of these techniques, because it contains artificial latexes, which give the surface a special roughness when drying and tend to become lighter in places of greater friction. The microporous film formed during drying also protects the coating surface from high temperatures and mechanical damage.
The advantages noted by everyone include:
- versatility of application (facades and interiors),
- possibility of use in places where humidity does not allow the use of other types of plasters,
- high strength,
- fire resistance,
- excellent environmentally friendly qualities,
- easy to care for – can be washed with detergents, excluding those containing organic solvents,
- durability.
As for the disadvantages, these include, first of all, the difficulty of working with some textures, for example, antique Venetian.
Preparing walls for painting
Before painting, the walls must be thoroughly cleaned of all contaminants.
So, all the work begins with preparing the walls for painting. This stage is very important, because the success of all future work depends on how well the preparation is done. First, you must get rid of all contaminants that may be on the partition. There shouldn't be anything left here. We are talking not only about dust, but also about removing the old coating.
If there was wallpaper on the wall, then it must be carefully torn off in full so that it does not interfere with the future course of work. They can be removed using a special metal spatula. Next, smaller details also need to be eliminated.
A person should have a blank wall in front of him, on which he will realize his creativity. Now a special primer for paint is used. It is sold in almost any specialty store. There shouldn't be any problems with the purchase. It is advisable to apply it as quickly as possible after diluting it in a basin or bucket, as it can harden over time. After the entire wall is covered with a layer of primer, be sure to wait approximately 4 hours until it completely hardens.
Tools and surface preparation
The following tools and devices will be useful:
- spatula (stainless steel, plastic),
- trowel (for applying the composition and structuring the surface),
- roller for priming and painting,
- brush,
- sponge,
- rags.
For a coating that has an antique effect, the base for decorative plaster is prepared according to the technique by which this effect will be achieved. If the mixture is applied in a layer of 3 mm and structured using the touch-touch method, then minor cracks or unevenness in the base of the finishing painting will not spoil it. And if the antiquity is imitated by the Venetian, then the base must be leveled and prepared especially carefully. In any case, the base must be degreased, clean, level and dry. It is coated with a deeply penetrating primer, and then with a primer composition, the components of which include quartz sand or fine-grained marble chips. The ground covering must be dried.
The more professional the tool you use, the easier it will be for you to work, and the result will be noticeably better.
If a solution with an antici effect is used, then two layers of primer paint are applied with a roller, and it is better to take the color two shades lighter than the future finishing coat.
Surface preparation
The walls on which we will make a “brick” design must first be prepared. If they are painted, it is necessary to wipe off the dust and degrease them. If there is wallpaper on the walls, it must be removed. Read how to remove wallpaper correctly and quickly. Then apply primer or PVA glue diluted with water 1:2.
Application technology
The antiquity effect can be achieved by using:
- craquelure plaster (the use of which will give a wall covered with cracks),
- special composition of plaster with antique effect,
- special technique for applying a structural composition.
Some people consider the decorative plaster of the world map to be antique. Since it supposedly imitates a coating that has peeled off over the years. But the author of the article has the opposite opinion on this issue.
Three techniques that, using decorative plaster, create the effect of antiquity.
- Craquelure. First, acrylic paint is applied to the primed wall with a roller in an even layer. After 4-6 hours, apply craquelure varnish with a brush or roller. The main direction of future cracks depends on the movement of the tool during the application process. The movements of the roller can be horizontal or vertical or alternately in different directions. The thickness of the varnish layer determines the depth of the cracks that form when it dries. Different types of varnish can dry from 40 minutes to 2 hours. A layer of Venetian or structural plaster up to 2 mm thick is applied to the dry varnish with a wide spatula. The movements are made in different directions. Instead of plaster mixture, you can use acrylic paint (thickness - 1 mm), applying it with a roller. The layer dries quickly, cracks begin to form after five minutes, so it must be applied quickly. Apply the layer in wide vertical stripes, trying to avoid smudges at the joints. Complete drying in about a day.
- Composition of Antico paretto (old wall). The mixture, consisting of a transparent base, contains insoluble mineral inclusions that are crushed during the application process. The mixture can be tinted. The untinted mixture is applied to a colored substrate. The mixture is applied to the wall with a trowel in multidirectional strokes in a thin layer. Depending on the force of pressing the instrument, either prominent white spots or whitish stains are obtained.
- Antici plaster. Like all other ready-made formulations, the mixture is stirred before use. It is applied to the wall crosswise with a flat brush using short strokes. Having applied the mixture to the treated area of 1 or 2 m2, begin to smooth it. To do this, use a plastic spatula. Smoothing the wall with multidirectional movements, distribute the inclusions contained in the mixture over the surface of the wall.
- Antique structural plaster. The effect of an aged wall is obtained by forming the surface texture of a laid layer of structural plaster with fibers. First, a layer of the mixture up to 3 mm is applied with a trowel (the thinner, the finer the pattern can be obtained after texturing). After application, the formation of texture begins. Only the part of the working surface of the trowel close to the edge of the end is involved in the work (the rest of the working surface of the trowel is not involved in the process). Having applied a little solution with a spatula to the working area of the plane, it is lightly “glued” to the surface and slightly raised above the layer of solution, without letting it come off. The solution is drawn behind the tool and can be shaped by moving the trowel in an arcing, chaotic motion. Due to the fibers of the mixture, the mass stretches very strangely behind the tool. After half an hour, when the surface of the solution has stuck a little, it is smoothed with a clean trowel. When the wall is dry, all sharp roughness is smoothed off with sandpaper. Dust is removed with a brush.
Antique wall painting
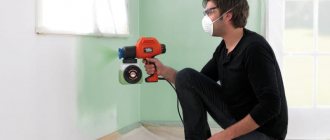
Antique-looking walls are painted using circular movements of the brush.
Now you can move on to painting the wall in an antique style. As is clear, there is no need to particularly prepare the surface for applying paint. Here you can only get by with a primer. No plaster or putty is used. The paint should be chosen so that it contains artificial latex. It is specially created for application to walls. At the same time, it has increased color fastness. The brush that will be used to paint the surface should have long bristles.
You need to paint not with simple movements from top to bottom, but in circular motions. In this case, be sure to apply pressure on the tool from time to time. In the place where pressure is applied, abrasions will form. This effect will give the surface an antique look. In fact, there is nothing complicated in the process of painting antique walls. The most important thing is to choose the right paint and brush, with the help of which all manipulations will be carried out. Pressing will prepare the surface for subsequent processing. After all, it’s not enough to just paint the wall, you also need to properly rub it down.
A brush is used for these purposes. With its help, the walls are rubbed. However, you can use other available means. For example, a sponge or sandpaper with fine grains of sand. They will also do an excellent job. The pattern of the antiquity on the wall depends on what movements are made with the brush. You can experiment here. There's nothing wrong with that.
Antique wall painting scheme.
Now the surface needs to be given a little time so that all the paint is completely dry. After this, technical wall wax is applied to it using a sponge. It is applied gradually, so each dried layer is first wiped with a soft cloth or rags. This work is quite painstaking, but after about 6 hours you will be able to see the fruits of your labor on the wall. It is important that the wall remains open when drying.
The room must be maintained at room temperature.
This will make the surface truly ideal without various types of defects.
The result is a beautiful shiny wall, on which the imprints of antiquity will be visible. This drawing can also be supplemented by the fact that antique furniture will be restored. This technique, combined with painting the walls, will be an excellent decoration for any apartment. Furniture is decorated using a slightly different method. Of course, the surface must first be cleaned. This is done using sandpaper. All layers of old paint, varnish and drying oil must be erased. After this, further surface treatment begins. But we can talk about this another time. Today we were talking about painting the walls in an antique style. As everyone was able to notice, there is nothing complicated in this matter. The most important thing is to do everything strictly in accordance with the instructions. It was given above.
Consumption and coloring
The craquelure obtained with a layer of acrylic paint, after drying, is covered with varnish or protective wax using a sponge. If the craquelure is obtained with a structural mixture, its surface is slightly sanded with sandpaper, after which the dust is swept away with a brush. Finally, the finish is coated with wax.
The structural coating is lightly sanded, then coated with a tinted varnish using a sponge using a brush or long-haired roller. Excess varnish is removed with a sponge passed over the top of the protruding relief. This lightens the top of the relief, and the result is antique plaster.
Painting with a silver or gilding effect looks good in classic interiors.
Since application techniques are different, the consumption of the compositions will also be different. For a thin coating, the consumption for craquelure is from 100 g/m2. The consumption of structural plaster for the fourth technique is up to 0.8 kg/m2 (depending on the thickness of the layer).
Working with wooden elements
Of course, in every house there are a lot of wooden objects, such as a table, a wardrobe, the walls themselves and others. For this reason, you should consider how to paint antique wood, what is needed for this and what materials to use.
Tools and materials
Tools you need to have:
- Rubber spatula;
- Screwdriver;
- Grinding machine or sandpaper;
- Brush or roller;
Materials you need to purchase:
- Stain;
- Fabric or cotton wool;
- Varnish.
Stages of work
Painting antique wood with your own hands involves a few simple steps:
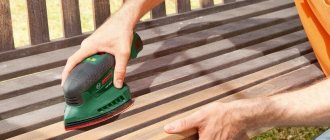
- First you need to prepare the wooden surface. Preparation consists of removing the old layer of paint or varnish. In addition, the surface needs to be leveled, which can be done with wood putty. After leveling, the entire surface is sanded, for which you need to use a grinding machine or sandpaper;
Sanding wood
- The second step is to cover the entire wooden surface with stain to determine the color;
After applying the stain, the structure of the wood becomes visible
Advice! To apply stain in the old style, you should make a special swab - wrap a small piece of cotton wool in a cotton cloth.
The stain is poured in small portions onto the cotton wool and applied to the wood with light touches. In such work, the main thing is that the stain does not flow out when you press the swab. The wood should be coated several times.
- Near locks, handles, and on the corners, the coated stain is sanded with sandpaper to achieve natural abrasions;
Working with sandpaper
- Then the entire surface is covered with two layers of colorless varnish.
Applying a layer of clear varnish
All wooden objects painted in this way will have a natural wood pattern, which is typical for old interior elements.
There are other ways to age furniture and any other wooden items. Let's look at one of them using the example of how to paint an antique table.
First comes the preparation. After this, apply a layer of paint of any characteristic color, for example, gray.
Advice! To ensure that the pattern of wood fibers is visible through the paint, only one layer is applied.
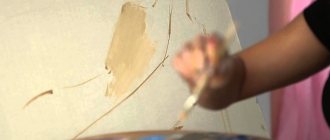
Next, they create a shabby effect, as in the previous method, and in the same places. The next step is to achieve the effect of the old paint appearing from under the new.
This is done simply: the brush is slightly dipped in paint of a color different from the first layer. Then it is wiped with a dry cloth, and then smeared with force over the surface.
The photo shows that one paint appears from under the other.
It turns out that not the entire surface is painted, which creates the illusion of antiquity.
Applying paint using a dry cloth method
Another way to age furniture is to create the illusion of dirt. For this, dark wax is used to cover the wood. It is worth painting unevenly. After painting, the wax is covered with dark varnish.
Uneven application of dark wax
Instructions
- Prepare the wall for antique painting. First you need to clean it of dirt. There is no need to putty - just apply a special primer under the paint. Let it dry for 4 hours.
- Buy paint that contains artificial latex. Choose a brush with long bristles. Start painting the walls in a circular motion. Press the brush onto the surface from time to time: “scuffs” will appear.
- Scrub the painted and dry wall using a brush, sponge or sandpaper. The “time pattern” on the wall depends on your movements.
- Let the wall dry completely. Then use a sponge to apply technical wall wax in two layers. Polish each dried layer with a soft cloth. The wax will dry for about 6 hours at room temperature. As a result, you will get a shiny wall with “antique” scuffs.
- Antique paint your wood furniture. Old layers of drying oil, paint or varnish must be removed with sandpaper and solvent.
- Choose a paint that suits your retro style. For example, bronze or gold. You can make 3 layers: green, bronze and green again. When the paints are dry, rub the top with coarse and then fine sandpaper.
- Wait for the decorative layer to dry completely and cover the furniture with a special crackle varnish (“craquelure”). This is a product that cracks when it dries, creating interesting cracks. It is necessary to apply one type of varnish first, and then (when your hands stop sticking to the surface) another. The components of these two layers do not fit with each other, which is why an intricate web of cracks is obtained - crackle. Carefully read the instructions for varnishes No. 1 and No. 2.
- Cover the cracks with grout to make them look more contrasting. Apply a bitumen patina to the varnished surface with a sponge - it is specially produced for the crackle technique. Your task is to rub the grout into the cracks and remove the excess with a rag soaked in vegetable oil.
- Wipe the “aged” furniture with a towel, let it dry and apply any fixing varnish to it.
- You can “aging” walls and furniture beautifully only if you have mastered this skill well. First, treat a piece of wood or an inconspicuous corner of the wall. Then decorate the interior in retro style. Now, if you wish, you can make the facade of the building using the same technique - all the decorative materials necessary for this are resistant to the environment.
note
When working with craquelure varnishes, rub the cracks very carefully! They are extremely fragile. If you want the web of cracks not to stand out too much, dilute the grout with white alcohol.craquelure varnisheswhite alcoholcraquelure varnisheswhite alcohol