Plastering work in winter
Is it really possible to plaster a wall in winter? Those with central heating are in luck. But what if you need to plaster in an unheated room or on the street? We answer questions that are popular among beginners.
For conventional mixtures, the optimal temperatures are +18 - +20°C. Therefore, if it is possible to warm up the room, this is the best option, since it will be possible not only to use conventional compounds, but also to maintain optimal conditions both for setting the composition and for gaining strength. A more difficult case is facade plastering.
Features of frost-resistant plaster for exterior use
Frost-resistant plaster for external use is a solution that is used to level walls on the external sides of a building, and also ensures reliability at all temperatures.
- Resistance to humidity. A solution used outdoors must have a low level of moisture absorption. This will prevent the formation of mold and destruction in the early stages of operation.
- Low temperature resistance. The plaster for the building will be used on the outside; it must be frost-resistant. The solution will retain its properties in all weather conditions.
- Steam escaping from the room. The solution does not interfere with the process, so one of the advantages of a frost-resistant solution is vapor permeability.
- Reliability. The putty will provide a durable surface to the building facade. Resistant to shocks and other damage
Features of plastering indoors and outdoors
When the season comes, even with slight frosts, it is no longer possible to use conventional mixtures and methods for plastering. In winter, in an unheated room the temperature is practically no higher than outside, but there is no wind or precipitation.
Plastering walls without heating indoors is performed in the same way as outdoors, but in this case, measures can be taken to heat the interior space of a private house or apartment. Therefore, plastering indoors and outdoors in winter has its own peculiarities.
Regardless of where the mixture is applied, the walls are cleared of ice before plastering,
Another prerequisite for winter plastering is that the walls must be dried before work. Wall humidity should not be higher than 8%.
If the plaster mixture is applied by machine, then warm conditions are organized for the mortar unit, maintaining the temperature continuously supplied to the mixture.
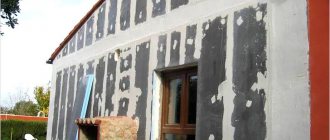
Winter plastering of the facade
It is impossible to warm up the facade in winter conditions.
Therefore, for outdoor work in winter:
- antifreeze additives are used;
- Apply the heated mixture (at minus temperatures not lower than - 20°C).
Do not plaster in winter when there is wind, precipitation or in case of an unfavorable forecast for the coming days.
Plastering in winter in an unheated room
If it so happens that plastering is planned in winter, then prepare for the period of negative temperatures in advance:
- in a new house, door and window frames, as well as blocks, must fit tightly;
- door panels are installed, windows are glazed;
- interfloor ceilings are insulated;
- cracks around door and window frames were sealed;
- slopes are plastered with insulation;
- block access to cold air from the attic;
- the walls are dried.
The above measures will allow you to heat the room quickly and with little heat loss. This makes it possible to provide the conditions required for application and hardening of the solution.
When warming up the room, monitor, first of all, the readings of the thermometer at the outer wall at a half-meter height from the floor and right under the ceiling, where the air warms up faster. The minimum permissible temperature of the walls is +8°C, the air in the room is +10°C, the maximum reading of the thermometer at the ceiling is no more than +30°C. When the air is heated to +23 degrees, the surface to be plastered is moistened.
Frozen walls are heated until they warm up to the middle of the thickness
Features of plaster
Hardeners have been added to frost-resistant mixtures.
All types of plasters for facades that can withstand frost are called winter plasters. They contain additives and hardeners that help maintain the characteristics of the material.
Such mixtures have a lot of advantages if you compare the material with conventional compositions.
In the table presented you can see the advantages and descriptions of frost-resistant plasters:
| № | Advantages | Description |
| 1 | Long service life | Comparing conventional facade mixtures, in which manufacturers provide a guarantee of up to 5 years, winter types of materials will retain their performance parameters from 10 to 25 years. |
| 2 | Waterproof | In terms of their properties, winter plasters are very similar to waterproof mixtures, which is why such materials are often called universal for finishing facades. |
| 3 | High temperature resistance | Frost-resistant mixtures have a high temperature resistance coefficient. Plaster can maintain its performance characteristics even if it is -50 or +70 degrees outside. Due to its durability, plaster can be used in almost any region. |
| 4 | The mixture dries quickly | The solution has a high drying rate even under adverse weather conditions. The solution sets a couple of hours after application, and it dries completely on the wall within a day. |
Although the advantages of this material are obvious, especially when compared with the standard mixture, winter plaster has some disadvantages. The disadvantages of the material include the difficulty of application. It is more difficult to work with winter mixtures and it is difficult to carry out finishing work yourself if there is not enough experience.
It is recommended to use the services of professionals and not to carry out the work yourself if you have insufficient skills.
The dangers of non-compliance with the temperature regime
It is necessary to clearly understand that the plaster solution contains water, which, when frozen, forms ice crystals, which increases its volume. When the water in the applied mixture quickly freezes, the crystals break the bonds that have begun to form between the particles of the composition. And the drying of ice, bypassing the liquid stage, leads to dehydration of the mixture.
If there is a short-term violation of the plastering temperature regime, the laid mortar simply slides off the wall after thawing. As a result of prolonged hypothermia after thawing, the plaster composition cannot form a durable stone-like coating. It easily crumbles, peels off and falls off the base.
Technology for applying frost-resistant plaster
Application steps:
- Surface preparation;
- Preparation of solution and selection of tools;
- Spray;
- Base layer;
- Primer;
- Final layer;
- Grouting, painting;
- Surface preparation, installation of beacons.
Preparation:
- We remove the old finish, clean it from dirt and dust.
- If the wall is made of bricks - jointing. We drive the mortar into the seams between the bricks.
- We prime the walls to smooth the surface. Carry out two or three procedures every three hours, wait for complete drying.
- Installation of plaster mesh and creating markings on the wall.
Lighthouses:
- Determine the height of the wall;
- Retreat 200-300mm from the corner of the wall.
“We’ll treat the fastening area with a spray bottle, this way the solution will adhere better to the wall.”
Apply the solution vertically to secure the beacon.
- We wait 1 hour, the solution will set.
- Carefully fill the empty space between the wall and the lighthouse.
Prepare the solution:
We mix the solution (with your own hands or you can buy a ready-made one).
“However, remember, you need to make the solution for 1 hour of work; if you leave it too long, the solution will begin to harden.”
The kneading is done in a bucket using a special mixer or a drill attachment.
Tool:
- Master OK
- Grater
- Putty knife
- Spray bottle with water
- Metal trowel
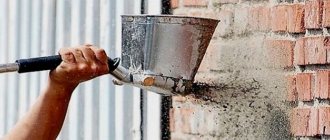
Spray
- Wet the wall with a spray bottle
- We take the solution in a ladle and spread the solution over the surface of the wall between the beacons.
- Let the solution dry a little (5 minutes)
- Base layer.
- Pull the solution from bottom to top. Spread the sprayed mixture evenly over the entire surface of the wall.
“Plaster thickness from 10 to 50 mm”
When the plaster dries, carefully remove the beacons.
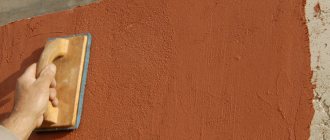
Grout
When the plaster is completely dry, we begin to wipe off the excess mortar. Smooth the surface.
Primer
After all the above steps, you need to treat it with a primer again. This is necessary to avoid shedding and settling of the paint.
How to dry plaster in winter
Plastering done in winter requires adherence to the technology of drying the walls after application. Since the compositions have different chemical compositions, they need appropriate conditions for drying. Lime-based mixtures require carbon dioxide in the air to cure.
Since the amount of it in the room space is not large, accelerating the drying of lime mixtures is not allowed. Lime and gypsum-lime mortars take up to 2 weeks to dry and require frequent ventilation of the room (at least a couple of times a day). Accelerated drying is fraught with cracks and low durability of the finish.
Cement compositions require a humid atmosphere to gain strength. Therefore, they and cement-lime compositions are dried in the absence of drafts. Drying lasts about a week. Gypsum plaster is also dried for a week. For ventilation, a narrow crack in the window is enough.
Ways to warm up a room for plastering in winter
If the room does not have a stove or central heating, then heat guns and air heaters can be used to heat it. Carbon monoxide generated when using air heaters is removed using a tube. That is, you can use temporary heating. However, you cannot warm the walls with hot water, since the bases must be dry.
Plastering in winter, if a number of conditions are met, is a feasible task. Naturally, in winter conditions it is more expensive and more difficult. In order not to waste effort and money, you should follow the technology and choose the right materials. By plastering your home in winter, you will gain time to carry out other work in the warmer seasons.
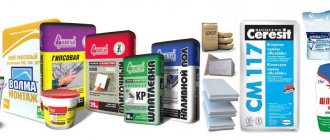
Frost-resistant facade plaster BOLARS, 25 kg
BOLARS Facade (frost-resistant) - weather-resistant, frost-resistant (work temperature -10 C +30 C), waterproof plaster on a cement-sand base using highly effective imported polymer additives. Does not shrink and forms a smooth surface. Contains modifiers that prevent the formation of microcracks, as well as waterproof additives that determine the durability of the coating during operation. Layer thickness 2-20 mm. It is used for both internal and external work.
Scope of application: BOLARS Facade (frost-resistant) is used for high-quality plastering of building facades and interior spaces with normal and high humidity. Apply to concrete, aerated concrete, brick and stone surfaces.
Preparation of the solution: dilute 1 kg of dry mixture in 0.21-0.23 liters of clean tap water (for 1 25 kg bag - 4.5 - 5.0 liters of water). Mixing is carried out manually or mechanized (drill with an attachment), evenly pouring the dry mixture into water until a homogeneous paste-like mass is obtained. Let the solution stand for 5 minutes, after which it is necessary to mix it again and the solution is ready for use. At a work temperature of -10 C, the serviceability time of the solution is 30 minutes; with increasing temperature, the serviceability time of the solution will increase accordingly
Preparation of the base, application: Before starting work, the surface must be hard, cleaned of old paint, dust, grease and oil contaminants. It is recommended to treat the surface with BOLARS Deep Penetration Primer. The plaster is applied to the base in a layer of 2 to 20 mm and leveled with a rule or spatula. Work should be carried out at air temperatures from -10°C to +30°C. Drying time 24 hours. Initial strength is achieved after 3 days. It is allowed to apply up to 30 mm in two layers with mandatory intermediate drying of 24 hours. Before applying the second layer, treat the surface with BOLARS primer.
Consumption: 13-14 kg/sq.m with a layer thickness of 10 mm. A bag of 25 kg per 18 sq.m (with a layer thickness of 1 mm).
Precautionary measures: Avoid contact of the solution with the eyes. If the solution gets into your eyes, immediately rinse them with plenty of water. It is recommended to carry out work wearing rubber gloves.
Packaging and storage: Plaster is supplied in 25 kg kraft bags. The guaranteed shelf life in a dry place and in undamaged original packaging is 12 months from the date of manufacture. TU 5745-031-56852407-09
Technical characteristics: Frost-resistant facade plaster
| Name | Meaning |
| Color | grey |
| Drying time | for a layer of 2 mm - 3 hours |
| Density of mortar mixture | 1.7-1.8 g/cu.m. cm |
| Amount of water per 1 kg of dry mixture | 0.21-0.23 l/kg |
| Average density | 1550-1650 kg/cub.m |
| Thickness of applied layer | 2-20 mm |
| Adhesion | not less than 4 kg/sq.cm |
| Compressive strength | not less than 100 kg/sq.cm |
| Work temperature | -10°С +30°С |
| Operating temperature | -40°С +60°С |
| Frost resistance | at least 50 cycles |
| Suitability time for the solution | at least 3 hours at -10 (40 min at -10°C) |
| Consumption | 13-14 kg/sq.m with thickness layer 10 mm |