Don't rush to throw away your old door
The issue of external transformation of doors is especially relevant for summer residents or those who are financially or morally not ready for global changes. In addition, for many, a dacha is a place where they can experiment and boldly implement design ideas that are not always appropriate in city apartments. I came across a few examples that seem accessible and interesting. Based on them, you can create something of your own, original and certainly pleasing to the eye.
I deliberately do not consider a full-fledged restoration of doors, which involves a complex process of removing all layers of paint (and there are very, very many of them), restoring or replacing glazing beads and other similar work that requires a lot of time, tools and skills. This is a selection of ways to quickly remake doors with minimal financial and time costs.
Ads by
How to prepare the door leaf?
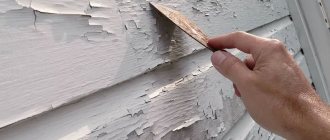
Interior doors made of wood, which can be seen in almost every home, are mostly coated with paint or varnish. If they have lost their attractive appearance, this does not mean that the wood under the layer of such finishing is in poor condition. Therefore, before you decide to restore a wooden door, you need to free it from everything unnecessary, including old paint or varnish.
Important! Before you begin restoring the door leaf, you need to remove the product from the hinges - this will make it more convenient for you to work. Don't forget to remove all fittings (hinges, handle, lock).
There are several ways to remove paintwork from the surface of a door leaf:
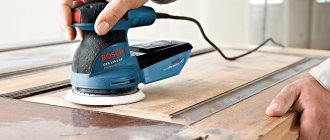
- Removing the layer using a sander. If you have such a power tool at your disposal, then this is the easiest of all methods. If not, then you can do manual sanding, but it is very difficult and time consuming. For hand sanding, use coarse sandpaper first, then fine sandpaper.
Related article: Double-leaf interior doors: types, sizes, variety of models
- Chemical removal of varnish or paint. In any hardware store you can find a universal remover that can remove any paint coating. However, this product must be used very carefully, preferably outdoors or in a well-ventilated area, since the pungent odor of the product is toxic.
- Using a hair dryer. This tool is designed to heat various surfaces. If you direct a stream of hot air onto a layer of varnish or paint, the coating will instantly soften and can be easily removed using a regular spatula.
In the video: removing old paint from wood (example with a hot air gun).
The next stage of preparing and restoring the canvas will be the elimination of visible defects, such as chips, cracks and scratches. They can be sealed with special means for this purpose. Thus, wood putty is more suitable for filling up serious damage and leveling the surface, furniture wax is good for filling small cracks, and a retouching pencil is easy to disguise small scratches.
You can also make homemade putty, which will be no worse than store-bought putty. To prepare it, just mix equal parts of wood dust and clear varnish.
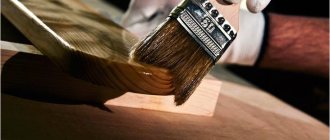
After drying, areas covered with putty or putty must be sanded to achieve a smooth surface. To do this, use a sander or fine-grained sandpaper. Clean the prepared door from any remaining wood dust, treat it with drying oil or stain if you want to give it the desired color.
Where to begin
You should start with a careful inspection and study of damage not only to the door leaf, but also to the frame, hinges, locks and other fittings. To do this, the canvas is removed from its hinges, and all fittings are dismantled. Even if it does not require repair, it will interfere with restoration efforts.
The main defects that force you to think about how to restore interior wooden doors are:
- changes in geometric parameters, due to which the deformed canvas does not fit into the box or does not close tightly;
- drying out, loosening of connections between paneled door elements;
- the appearance of dents, chips and scratches on the wood, through holes from old fittings;
- fading or peeling of the paintwork, indelible stains on it;
- tearing off hinges and handles, breaking locks and other malfunctions of door hardware.
This requires repairing not only the door itself, but also the frame with platbands Source takprosto.cc
After this, you can evaluate the upcoming scope of work and decide on the tools and materials that will be required for the work.
Possible defects
Restoration begins after determining the extent and type of damage. The defects of wooden doors of different designs may differ; to eliminate them, a suitable method is selected:
- Deformation of a multilayer door leaf. A curved product is almost impossible to close, or large gaps remain due to a loose fit to the frame. The defect is common for products made from several layers of wood. The reason is a violation of gluing technology, poor-quality material or intense exposure to moisture. Minor curvature is compensated by adjusting the frame. In case of severe bending, replace the top layer of sheathing to relieve stress.
- Peeling of covering sheets from the frame. The defect occurs as a result of the manufacturer using low-quality glue or when the recommended operating conditions are violated. It can be restored by re-gluing and then keeping the product under pressure. However, the solid frame and covering sheets react differently to moisture and temperature changes. When peeling, the decorative coating often cracks or breaks in pieces. Small cracks are hidden with putty. If the peeled sheet cannot be restored, it is replaced.
- Loosening of the glued door frame. The result of the defect is loose closure, as well as the formation of cracks. It can be assumed that the product itself is bent. To make the right decision, both structural elements are inspected. If the problem is in the box, it is strengthened by removing the trim.
- Door leaf skewed. Diagnosis begins with inspection of the loops. If the door is too loose, it may not close. If a misalignment is detected, which is often found on a frame where the elements are connected by a notch, leveling is done using wedges. Grooves are cut out in the corners of the structure and filled with glue. Wedges sharpened at an angle of 10° are driven in with a hammer until the frame is completely level.
- A slight increase in the gaps between the leaf and the door frame is likewise a defect. Heat escapes from the house through a loosely fitting sash, reducing the quality of sound insulation. The problem with small gaps is solved by gluing seals.
Don't miss: Interior doors in the interior: light and dark options for apartments and private houses, real examples and tips for choosing
Care Tips
In order for a veneered door leaf to last as long as possible and look like new, it must be properly looked after. It is forbidden to clean the veneer with abrasive materials, otherwise small scratches will remain on the coating and it will quickly lose its gloss. It is not advisable to install veneered doors in such a way that direct sunlight always falls on them. This will cause the cladding to fade; veneered doors will have to be updated quite often: apply varnish or paint.
It is allowed to wipe the veneer with a damp cloth, but it must be thoroughly wrung out. Literally washing with water; using the structure at high levels of humidity is prohibited. You also need to be careful when washing the floors, because the bottom of the door frame and sash will suffer from this.
Veneered doors, if properly cared for, will last for decades. Only in this case they cannot protect themselves from minor scratches and defects. Therefore, it is necessary to have an idea of how to reconstruct a veneered door with your own hands. This can be easily accomplished using available materials and basic tools.
Rivets
A meditative work that requires perseverance - decorating the door leaf with metal furniture nails. Rivets, buttons, and even gears and nuts will do if you want to create a composition in the steampunk style.
Fasten the parts along the contour of the panels or create a dynamic ornament by first making a sketch on paper and drawing the door with lines.
Veneering
Or you can update an old interior door using a step-by-step photo using the veneering technique. The work is done like this:
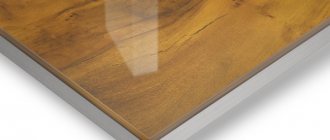
- Using a tape measure, take measurements from the door leaf, taking into account the width of the ends. There is no need to cut the film separately for them. We simply stretch it over the corners, using a hair dryer to heat it up.
- We apply the taken measurements to the millimeter markings on the back side of the self-adhesive film.
- We cut out the sections we need.
- We lay the door leaf, prepared in advance, on a flat, hard surface.
- We remove the protective layer from the back of the film by a couple of millimeters and apply it to the door.
- Now you need to gradually remove the protective film and simultaneously glue the laminate onto the canvas, expelling the air from under it. You need to act carefully, since decorative veneer sticks very quickly and if the work is done incorrectly, large bubbles can form.
- We heat the film at the corners and tighten the bends of the canvas.
Tip: if small bubbles still form, pierce them with a needle, release the air and press well to the base.
Important: in order to properly renew a door with laminate, the film is glued across the wood fiber.
Useful tips: how to update an interior door with your own hands
After painting the doors, you can begin updating them. Stencil or artistic painting will help turn even old Soviet wooden doors into a stylish and modern interior detail.
Hand painting requires minimal skill with brushes and paints. The ability to subtly convey colors and shades, draw small details and create shadows and penumbra is welcome. People with artistic talent usually produce real masterpieces. If you find a beautiful picture on the Internet or in a magazine and carefully redraw it, you will also get a worthy interior decoration.
A painted door will look beautiful in the interiorFor stencil painting, just find a template and carefully apply paint with it. Beautiful ornaments look amazing on interior and entrance doors. You can also make a stencil yourself by following simple tips.
Step-by-step instructions for making a template:
- Draw a pattern on cardboard or film with a thin marker;
- Carefully cut out all the details of the ornament;
- We fix the template on the surface with glue or adhesive tape;
- Apply paint with a brush or roller.
You can purchase ready-made stencils in large construction stores or order their production according to a personal project.
Make decoupage
An option no less impressive than painting, but more affordable - decoupage.
The point is that you transfer a ready-made drawing to the door, but thanks to the ultra-thin base and proper design it will look alive and natural. To decorate the door, you can use the decoupage technique. Photo from the channel Marina Fedorova But still, you can’t do without skill here. First, practice on any other surfaces, for example, on a piece of plywood, which you can then turn into a key holder or just a decorative element.

