Modern trends in interior design have again returned to the leading position the painting of walls with various types of paints. This is due, first of all, to the growing popularity of paintable wallpaper. In this vein, this type of wall decoration such as painting has begun to regain its position - it is beautiful, stylish, fits into any interior design style and, at the same time, is not too expensive.
Just a few decades ago, oil paint was used to decorate walls, since manufacturers of paint and varnish products did not offer an alternative. Everything changed with the advent of a line of water-based paints, as a result of which they no longer have equivalent replacements.
For information: water-based paint is a mixture (dispersion) of water with coloring pigments and tiny insoluble particles of polymers that are suspended. After the solvent (water) dries, a thin but very durable polymer film remains on the painted surface, which gives the painted materials an attractive appearance.
In such a kitchen, the appetite grows not only from the aromas of the food, but also from the beautiful interior.
The current situation was the result of many positive qualities of water-based compositions.
Advantages and disadvantages of water-based paint
Water-based paint has both strengths and weaknesses. The advantages include:
- the absence of a sharp unpleasant odor, which is imparted to other types of paint by a solvent, for example, acetone or white spirit;
- rapid dissipation of the damp smell that appears immediately after painting;
- environmentally friendly paint components - absolutely harmless to humans and the environment;
- Possibility of application to all types of wall materials;
- a fairly simple paint application technology, which makes it possible to paint walls with water-based paint yourself;
- Manufacturability: simply diluted, stirred, tinted and applied;
- variability of tinting with pigments - the paint can be given any color and shade;
- the ability to be easily washed off from tools, hands, clothing and the floor at the end of work;
- accessibility to the bulk of the population at a price;
- fast drying process;
- ability to fit into any interior and style;
- resistance to aggressive chemicals, primarily alkalis;
- vapor permeability allows the walls to breathe.
The disadvantages include:
- inability to withstand sub-zero temperatures - it cracks, and therefore cannot be used in unheated rooms (dachas, country houses, where visits are irregular in winter);
- significant labor costs in preparing walls for painting;
- susceptibility to colonization by fungus and mold, which multiply very actively in damp or poorly heated rooms.
Types of decorative compositions
Wooden and metal surfaces, ceramics, glass and plastic can be finished in gold. You can process everything - from ceiling to floor. Decorative acrylic paint is popular. It is superior to alkyd and oil compositions in many respects.
Advantages of acrylic compositions
- environmental cleanliness, absence of heavy metals and toxic substances;
- good adhesion to wood, plaster, metal, plastered surfaces;
- resistant to ultraviolet rays and precipitation, can be used for indoor and outdoor decoration;
- dries very quickly and forms a moisture-resistant film;
- wood or metal treated with the composition after painting does not require special care and is easy to wash and clean;
- Gold acrylic paint can be tinted, that is, you can give it the necessary golden hue for any color.
The composition can be used both for decoration and for restoration work on metal and wood. With its help you can paint polyurethane and gypsum stucco. Manufacturers produce the coloring composition in several types:
- classic paint in a sealed metal can - enamel;
- aerosol paint in spray cans;
- dry, in the form of a powder composition that needs to be dissolved.
Each type of decorative acrylic paint has different characteristics, color and application features.
Acrylic based
There are a lot of manufacturers of golden paint, and any enamel is of good quality. An example is Metallic Accents acrylic decorative paint.
The substance contains mica particles, which give the coating a golden shine and a magnificent shimmering effect. The manufacturer offers a varied color palette from light gold to dark brown paint. Enamel is suitable for any interior style; it can be used to paint wallpaper, wood furniture, walls, and it is suitable for ceramic tile floors. For work use:
- roller;
- brush;
- spray gun;
After application, the layer of acrylic enamel must be coated with a finishing varnish to protect and secure the composition.
To create a beautifully distressed antique look, Aerican Accents can be used with a light patina effect. Acrylic paint is produced by the manufacturer in a small jar complete with a base and top coat. It can be used to paint surfaces made of metal, plastic, plaster, wood, and ceramics indoors and outdoors.
An antique patinated coating is obtained by applying all enamel components:
- The first layer is to first apply the primer in cans (included in the kit) to the prepared, cleaned surface, following the manufacturer’s instructions.
- The second main layer - the enamel is mixed and applied in a thin layer. In the right places, the paint is immediately wiped down to the base layer to create a patina effect. The more second layer remains, the more aged the antique finish looks.
The composition is two-component. Dries in twenty minutes, suitable for interior and exterior decoration in an old style. In general, to get a brown patina, use any acrylic metallic paint of bronze and gold color. The surface is cleaned, degreased, base gold is applied, then bronze and clear varnish. As a result, you can get a spectacularly aged brown patina with an excellent antique imitation.
Acrylic paint in a can is a classic way to paint a surface, giving it the effect of an antique patina, antique coating, or Venetian plaster.
Required materials and tools
Painting walls with water-based paint requires the purchase of the following materials:
- water-based paint (you need to buy one batch - different shades are possible in different containers);
- pigment dyes (if the paint is purchased white) to give the water-based emulsion the desired color and shade;
- primers for painting (Knauf, Ceresit and others).
In addition to materials, you will need the following tools:
- ladder;
- screwdriver (electric drill) with a mixer for stirring paint;
- a set of paint rollers (for paint and primer);
- spray gun or paint brush (5-8 cm) for painting corners and places near the baseboard;
- small brush for color correction in hard-to-reach places;
- crepe (painting) tape;
- cuvette for primer and paint;
- plastic film to protect furniture and floors from paint splashes or cardboard (old newspapers);
- construction tape for fastening polyethylene.
Which paint to choose
The quality of the repair depends on many factors, but the determining factor has always been the choice of finishing material, which is carried out according to specific criteria. In relation to water emulsion it is:
- paint color;
- degree of gloss;
- hygroscopicity;
- possibility of care.
Color
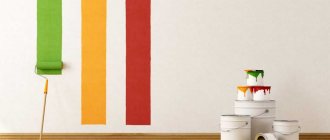
Water emulsion can have up to 200 colors and shades. It is unrealistic to produce paint with such color variety. Therefore, manufacturers took a more convenient path: they made white the base color, and at the same time launched tinting dyes for sale.
By mixing colors with white paint in various proportions, you can get complex colors that are not found on sale. In addition, by changing the proportions of various pigments, you can achieve different color intensities, moving from a rich tone to a restrained one, which in the language of designers is called the gradation effect.
This is what the color spectrum of water-based paint looks like.
You can mix paint with pigments at the seller (all major retailers provide this service) or at home. Tinting a house allows you to see how the walls will look after painting, since the color of the diluted paint does not match the color of the dried water-based emulsion.
Here a little trick comes to the rescue: the diluted paint is applied to the wall in a small area. After 2-3 hours you can see how the painted surface will look. If necessary, you can adjust the color by adding dyes to the paint container. Below is a tip on how to get some colors using several tints.
By mixing different pigments, you can get up to 200 colors and shades.
Gloss level
The appearance of the surface and the visual perception of the room depend not only on the chosen color and shade, but also on the degree of gloss. He can be:
- deeply matte - it looks impressive and respectable, but even a one-time cleaning with a damp cloth can disrupt the texture at the micro level (in plain language - you can’t rub, as shiny spots may appear);
- matte (the room visually increases in size, but on such a surface the slightest staining defects are clearly visible, it is difficult to wash with a damp cloth or napkin);
- semi-matte - maximum hides mistakes in preparing the wall for painting, is resistant to abrasion (washes well);
- glossy (emphasizes flaws, but maintenance is not a problem);
- semi-gloss - washes well.
The best option is to buy semi-matte or semi-gloss paint.
Hygroscopicity
There are always rooms in the apartment with different humidity levels:
- dry (children's room, bedroom, living room);
- with high humidity (hallway);
- with a high level of humidity (bathroom, toilet, kitchen).
For rooms with excess moisture in the air, moisture-resistant types of paints are produced. This point should be taken into account when purchasing a water-based emulsion.
Ease of care
Produced water-based paints can be:
- unsuitable for wet cleaning (clean only with a vacuum cleaner or dry cloth);
- washable (can be cleaned with a wet cloth or sponge using detergents);
- indelible - wash only with clean water.
Affects the final finishing result and the type of water-based paint. She may be:
Mineral. Mineral water-based paint is a budget type of paint, since it is based on cheap cement or lime. Applies well to concrete, brick, plasterboard, wood. However, the short service life (fades out quickly), high hygroscopicity and the impossibility of wet care have led to a drop in sales.
Acrylic. This is the most popular water-based paint. It has a long service life, low consumption per 1 m2 of wall, the ability to heal microcracks up to 1 mm wide, and easy maintenance. And most importantly - the most optimal combination of price and quality.
Semi-matte acrylic water-based emulsion, when applied in several layers, at least 3, perfectly hides minor surface defects due to the presence of acrylic resins, which do not allow the polymer film to deform, repeating all the irregularities on the wall. In addition, painted walls can withstand temperature changes and significant mechanical impacts, preventing the paint layer from breaking.
Disadvantages include low vapor permeability, which negatively affects the quality of paint when finishing poorly dried surfaces.
Silicate. Due to the introduction of potassium liquid glass into the composition, silicate paint forms a thin glass film on the wall after drying. This paint has a number of advantages:
- does not fade until the end of operation;
- serves for a long time - more than 20 years;
- resistant to temperature changes;
- does not burn;
- easy to clean;
- excellent resistance to fungus and mold;
- has a low price.
However, the disadvantages still outweigh:
- poorly tinted;
- there is no plasticity, and therefore all microcracks and other defects are not hidden, but, on the contrary, are emphasized;
- does not withstand high humidity well (you can only paint the living room and bedroom);
- does not adhere to porous and loose materials, as well as wooden walls.
As a result, the editors of the site advise you to refrain from purchasing silicate paints.
Silicone. The latest achievement of manufacturers of paint and varnish products is silicone water-soluble dye. It has no disadvantages, only advantages:
- good vapor permeability while being waterproof;
- high elasticity, which allows the paint layer to heal microcracks;
- resistance to mechanical stress;
- long service life;
- high aesthetic characteristics, etc.
Naturally, high quality corresponds to a high price.
For reference: many experts classify polyvinyl acetate paint materials as water-based paint. They are based on PVA glue, to which plasticizers and dyes are added. In our opinion, this type of paint does not fit into the classical understanding of water-based emulsion, and therefore is not considered in this material.
For clarity, we summarize the main parameters of water-based paints in a table.
| Properties\Types of paints | Mineral | Acrylic | Silicate | Silicone |
| Vapor permeability | low | high | average | high |
| Film strength | high | good | good | good |
| Color fastness | average | good | high | good |
| Fire resistance | No | average | high | average |
| Elasticity | average | high | No | good |
| Resistance to washing off | high | average | high | low |
| Mold resistance | average | low | high | average |
| Color palette | high | good | average | high |
| Hygroscopicity | high | low | No | average |
| Price | low | average | low | high |
These tables confirm preliminary conclusions: silicone dyes are the most effective. But in terms of price/quality ratio, acrylic paints are the leaders.
Calculation of the required amount of paint
When carrying out repair work, it is always unpleasant when the purchased material is not enough. This problem is most acute when purchasing water-based emulsion. After all, after an additional purchase, it is almost impossible to achieve the same shade if the paint is tinted yourself. Therefore, the question of how to calculate the amount of paint for walls needs to be given special attention. The whole process can be divided into III stages.
Stage I. The area of the surface to be painted is determined. To do this, measure the perimeter of the walls and then the height of the ceiling. When multiplying the resulting numbers, the total area of the walls is obtained. Windows and doors are measured. Their area is subtracted from the previously obtained result.
This is approximately how the wall area is calculated.
Stage II. The preliminary amount of paint is determined. To do this, the area to be painted is multiplied by the paint consumption per 1 m2 (always indicated on the packaging), the average value is given in the table and by the number of layers (minimum two).
Table 2. Average consumption of water-based paint per 1 m2.
| Water-based paint | 1 layer, g/m2 | 2 layer, g/m2 |
| Mineral | 340-370 | 200 |
| Acrylic | 250 | 150 |
| Silicate | 400 | 350 |
| Silicone | 300 | 150 |
Stage III. The obtained result is corrected. Let us immediately clarify that the packaging shows the paint consumption for a perfectly smooth surface, which has been primed in advance. Coloring:
- unprimed plastered surface increases consumption up to 10%;
- drywall without putty and primer by 40%;
- wallpaper for painting by 40-45%;
- trellises for painting with a relief surface of up to 70%.
The walls are painted not only with putty, but also with wallpaper for painting.
It also matters what tool you use to apply the paint. When using a roller and spray gun, no further adjustments are made. A paint brush requires an increase in the amount of water-based emulsion by about 5%.
You can save on painting materials by:
- a perfectly flat surface that can be obtained during the preparatory work;
- applying primer to the walls;
- Observe the order of painting: first, paint the corners with a brush, then the wall near the trim and baseboard (it’s still better to remove them). Only after this the rest of the surface is painted with a roller or spray gun. If the order is reversed, 1-2% of the water-based emulsion is lost.
Manufacturers
The production of water-based paint has been established for a long time and is very widely represented on the market.
We recommend rubber paint as a wear-resistant and easy-to-apply alternative to water-based compounds. As an interior material for walls and ceilings, this coating is primarily attractive for its ease of cleaning from grease and other contaminants. This is especially useful in families with small children - you can easily remove marks from felt-tip pens or watercolor paint. The coating is environmentally friendly, safe for health and odorless. However, you should beware of inexpensive rubber paints, where the price reduction is achieved by the presence of styrene-acrylic latex in the composition. With regular exposure to the sun (namely, UV rays) or water, the coating begins to crack and deteriorate. In a living room on the sunny side, even one month of operation will be enough for such consequences.
Styrene-acrylic latex is absent, for example, in the durable rubber paint “Mizar” Rezolux Universal. The service life declared by the manufacturer is up to 10 years. In addition, due to its increased water resistance, the material can be used to cover walls even in bathrooms and toilets. The advantage of “Mitsar” Rezolux Universal compared to analogues is its increased coverage; paint consumption per square centimeter of surface is about 150 grams. This is approximately four times lower than the popular rubber coating Super Decor Rubber. Thus, with the same area, the cost of purchasing Mizar products will be four times lower.
O is a St. Petersburg manufacturer that has been producing paint and varnish materials for 12 years; special attention is paid to achieving the best key parameters along with the lowest price - among all foreign and domestic analogues. For these reasons, the company constantly wins tenders for the supply of materials for State Defense Order enterprises
The company is known for its products adapted to extreme operating conditions, with increased mechanical loads, low/high temperatures and exposure to aggressive chemical environments. In the last few years, defense enterprises-customers in tenders, instead of parameters and requirements for paintwork materials, immediately indicated specific Mizar products. This is a clear sign that the experience gained confirmed the correct choice in favor of the materials of this particular company from St. Petersburg.
You can choose any unknown manufacturer, perhaps with a lower pricing policy, or you can spend money on higher quality paints from well-known manufacturers such as Dulux, Dufa or Tex. Their palette includes paints of all types and purposes, both matte and glossy, as well as semi-matte and semi-gloss. These manufacturers have confirmed their reputation by the time they have been on the sales market and the quality of their products.
To learn how to paint walls with water-based paint, see the following video.
The best way to apply water-based emulsion
Painting technology allows the use of 3 types of painting tools:
- brushes;
- roller;
- spray gun.
It takes a long time to paint with a brush, which increases paint consumption. Buying or renting a spray gun is expensive for the family budget. Therefore, there is only one thing left to do: pick up a roller and paint the walls. However, difficulties arise here: which roller is best to paint walls with water-based paint? After all, there are dozens of types and varieties of paint rollers on store shelves.
Which roller is better to choose and how
Rollers are made from several types of materials:
Foam rubber. This is the simplest and cheapest type of paint roller. The low density of the material allows it to absorb a large amount of dye, which, on the one hand, is convenient - there is no need to frequently dip the tool in paint. On the other hand, a large amount of paint on the roller leads to the formation of many microscopic bubbles on the painted surface.
Velor. Among specialists, there is an ambiguous attitude towards such a tool, so it can only be found on sale in specialized retail outlets. The peculiarity is that the dense structure of the velor does not cause splashes and applies the paint evenly. But this coin also has a downside: you have to constantly dip the roller into paint, which for specialists means loss of income.
Fur. Available in natural and faux fur. When purchasing, you can not pay attention to the type of material, since there is practically no difference between them. But you need to look at the length of the pile. Short fibers splash heavily (i.e. abundantly and far) with paint. Long pile tends to come out of the base and also splashes, but not so abundantly. Therefore, the most acceptable option is a fur roller with medium-length pile.
Painting technology
Painting walls with water-based paint yourself is a simple process. But violating the manufacturer's recommendations can ruin the final result.
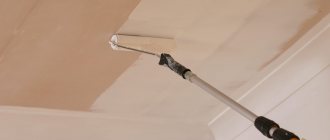
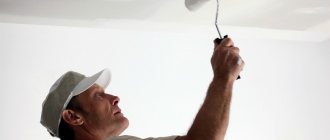
Roller painting
The dyeing technology is as follows:
- The surface prepared for painting is primed before starting work to save the finishing layer in order to avoid high absorption of the base and damage to the properties of water-based paint due to it. Painting tape is applied to protect the ceiling.
- For ease of application, use a roller with a long handle and a tray of suitable sizes. The diameter of the roller is about 50 mm, width 15-25 cm. The choice of pile when painting with your own hands by a non-professional is an important point: the shorter the pile, the thinner and more uniform the layer. The long pile is convenient for painting decorative plaster.
- The roller is moistened in the mixture and rolled out over the tray to evenly distribute and remove excess.
- Painting the walls occurs by alternating movements up and down and diagonally for better smearing. During the initial painting, it will not be very easy to create an even layer, so there should be more distributing movements.
- Corners and edges are painted with a flat brush.
- If the mixture is too thick, dilution with water is acceptable; this is not necessary when using freshly opened containers. It is worth considering that adding water will change the color and reduce the elasticity index.
- First, the entire surface is painted in one layer. After coating, wait for it to dry for the time recommended by the manufacturer, then proceed to subsequent painting in a second, or, if necessary, third layer.
Important! The desire to paint everything with just one thick layer will spoil the surface, smudges will appear, a visible difference in color due to the thickness of the application
Spray painting
Painting walls with water-based paint yourself will be much easier using a spray gun. A modern tool guarantees uniform application and a thin layer. To do this, it is necessary to prepare the mixture: stir, strain through cheesecloth. Water-based paint is poured into a tank and applied to the surface with a spray bottle.
Such work requires the absence of furniture or its very good protection with special bags. Painting a wall with a spray gun with water-based paint also takes place in several layers, but they dry much faster. The instrument is washed very easily in a timely manner, using plenty of warm running water. You can rent it at a hardware store.
Important! When painting walls with a spray gun, you must wear a mask.
Features of applying textured paint
Textured water-based paint is applied with a trowel, a rough brush, or a roller. The final pattern on the wall depends on the painting method, the grain size of the mixture, and the number of layers.
To create an additional decorative effect from painting, stencils and curly rollers are used on the walls. With the help of imagination, the material allows you to create your own unique design, but even without using various effects, you get an interesting wall texture.
Important! This mixture can be deformed within 15 minutes, then becomes viscous, the surface is already deteriorating from the impact. Formation should occur immediately after painting the wall
An interesting master class on painting from a manufacturer of textured water-based paint is presented in the video:
Preparatory work
In the instructions on how to properly paint walls with water-based paint, special attention is paid to preparatory work. The final result largely depends on their quality. During their execution it is necessary:
- empty the room of furniture, cover the floors with film or newspapers;
- remove old finish;
Even with a strong desire, you cannot paint such a wall.
- inspect the walls. If necessary, remove old plaster, seal cracks and crevices;
- treat the walls with primer;
- level the surface using drywall or cement (gypsum) plaster;
- apply a primer under the putty;
- putty the walls using a technology that involves applying the last layer of finishing (fine) putty. If finishing putty was not purchased, and the walls were sanded using the starting composition of the putty solution, it is advisable to prime the surface.
It's a pleasure to work on putty walls.
Attention: the detailed process of preparing walls for painting can be seen in the work “Aligning walls for painting.”
How and what to prime
It is not at all necessary to prime the walls for water-based paint. Apart from increased consumption of materials, no other serious consequences are observed. This, by the way, is what apartment owners do in most cases when carrying out renovations. However, the high price of paint, especially silicone, forces the walls to be primed - the technological operation is justified by financial savings.
We should not forget that the primer allows:
- improve adhesion between the wall and the paintwork;
- strengthen the surface to be painted;
- protect walls from fungus and mold.
Of the variety of primers, it is best to use the acrylic primer of the famous brands Knauf or Ceresit. Russian primers are not much worse: “Prospectors”, “Tex” and others (price per 1 liter - 30-100 rubles).
The primer is applied with a brush in one pass, with a roller in two.
Priming the walls makes the job easier and saves paint.
It is equally effective to use homemade soil for walls. To do this, the paint is diluted with water in a ratio of 1:2, where 1 part is paint, 2 parts water. This composition, when painted in two layers, significantly improves the quality of painting.
How to prepare surfaces for painting
A layer of paint, no matter how thick it is, cannot hide significant unevenness in the walls or ceiling or disguise cracks and crevices. In addition, surfaces that are too smooth or covered with a greasy coating (spots, stains) do not provide a suitable base for paints - the coating simply does not adhere to such a base. Therefore, the main stages of preparing walls and ceilings for painting are:
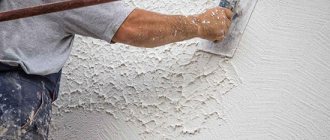
- surface leveling. Large unevenness and differences in relief (“littered” corners, convex or concave walls) are leveled out with “beacon” starting plaster. The optimal option is considered to be machine plastering, which allows you to reduce the consumption of materials and quickly obtain a fairly smooth wall;
- creating an even layer of finishing plaster or the desired relief, for example, simulating brickwork using improvised means or applying paintable wallpaper. Water-based paint looks good on decorative plaster, for example, “bark beetle”;
- applying a layer of primer. For surfaces pre-pasted with wallpaper “for painting,” this step is not necessary, since the adhesion of wallpaper to paint is already quite high;
- preparation of the paint itself - dilution, tinting (adding color pigments). This is done immediately before starting work. You can select the desired shade and calculate the required amount of pigment immediately upon purchase, using a special program.
Important: if you are painting previously painted, wallpapered or otherwise finished surfaces, you must carefully remove all coatings (especially varnishes, oil paints, tiles), level the surface and remove contaminants - grease, mold, mildew, dust, etc. This can be done using wet cleaning
The surface must be completely dry before applying paint.
It is also necessary to protect other surfaces from contamination with water-based paint. If the walls are covered with wallpaper, you need to attach a film or other protective material to the top, securing it with masking tape. The same goes for flooring, especially wooden parquet or laminate flooring.
Painting instructions
How to paint walls with water-based paint? There is nothing difficult to understand or implement. Even a beginner can do the job. You just need to follow the rules:
- Painting is carried out using a completely dry primer or putty.
- The second and subsequent layers of paint are applied to completely dry previous layers (from 2 to 12 hours).
- Under sunlight, wet paint changes color. Therefore, work must be carried out either in the evening or with the windows covered with plastic film.
- Drafts contribute to the appearance of stains due to uneven drying of the applied paint. The same situation is observed when walls are forced to be heated with a heat gun or electric heating devices.
- A coat of paint should be applied to one wall within 15-20 minutes, which eliminates breaks and smoke breaks.
- According to technology, each layer of paint requires a new roller. In practice, they do it a little differently: thoroughly wash the used roller and then dry it. In terms of the quality of paint application, a previously used roller is not inferior to a new one.
- When changing the consistency of paint or tinting it, special attention must be paid to the periphery. It is on the sides of the container that poorly mixed paint is most often found, which is especially unacceptable when coloring pigments are introduced into its composition.
- The corners and narrow sections of the wall adjacent to the ceiling and floor are always painted first with a brush.
- If the trims and baseboards cannot be dismantled, they must be sealed with masking tape.
- For the first layer, the paint is diluted a little more.
Painting
When purchasing material, study its technical characteristics. Find out the composition, how to dilute it correctly, find out how to calculate how much material is needed to complete all repair work. Don’t forget to check the expiration date; do not purchase an expired product, otherwise you may not be happy with the results. If you have leftover old paint at home, look at the date of manufacture and expiration date.
The paint should be applied evenly to the surface. This can be achieved if you use a spray gun, but in order to produce high-quality painting and quickly complete the work, training will be required. This method is suitable for painting ceilings and walls.
Using brushes and a roller you can paint any surface. In those places where it is inconvenient to apply the composition with a roller, brushes will come to the rescue. These methods will allow you to quickly complete the job and reduce material consumption.
Using the advice of experienced specialists, we begin to paint the right corner from the window, moving towards the door, then move towards the window again. You need to pour the paint into the tray and roll the roller several times until it is saturated.
There is a certain technology for correct application of the composition. You need to roll out the paint in small areas, moving from the ceiling to the floor. You can move the roller in different directions, parallel or sideways, grabbing a little paint, this way you will avoid streaks.
After painting 3-4 meters, rinse the roller with clean water, so you will get rid of dirt and dust that has fallen on it. If you've painted the walls and some dirt and sand remain, wait until they dry completely, remove them with a razor blade, and then look again to see if you'll need to repaint.
It takes 10-15 minutes for the paint to dry slightly, so all work must be done quickly.
Try not to take breaks in your work, then you can complete it quickly. If you do take a break and the paint has dried, the border may differ. It should be painted 2-3 times. You should not try to paint the room at once, applying the maximum layer. Wait for the layer to dry, then repeat the process.
If there are greasy stains on the wall that can show through, you need to clean these places and paint them several times. On putty surfaces, the paint applies smoothly and easily, leaving no drips or streaks. After puttingty, be sure to wait until the coating is completely dry. If you plan to glue wallpaper after painting, just apply one layer.
Greasing the uneven surfaces and sanding is carried out in preparation for improved painting. In this case, several mandatory operations should be performed: carry out an initial primer with partial priming, sand the greased areas, the next step will be the second priming and painting.
Preparing the Paint
When opening a container of paint, its consistency is almost always much thicker than required for the job. Therefore, the paint is thoroughly mixed, adding water in small portions so as not to dilute more than necessary.
This operation is most conveniently performed with a screwdriver with a mixer attachment. If you don’t have a power tool, you can stir with any object, but it takes a long time and the quality is a little worse.
The easiest and fastest way to stir paint is to use a screwdriver with a mixing attachment.
If the wall design is creative and involves the surface shimmering under streams of light, it is at this moment that various sparkles are added to the paint. But such ideas come to owners quite rarely.
If small grains appear on the surface of the paint in the funnel, the water-based emulsion must be filtered through 3 layers of gauze.
Paint tinting
Giving paint a certain color and tone at home is carried out according to the following algorithm:
- The water emulsion is poured into a large container (usually a 10 liter bucket) so that it is enough to paint the walls in one room, since it is almost impossible to obtain the same color and shade again. As an exception, for a wall with a window you can make the paint a little lighter, as a result of which the room will visually appear larger;
- adding water in small portions, the paint is brought to the required consistency while mixing;
- Tinting pigments are added to the water-based composition, after which the paint is thoroughly mixed. If necessary, the resulting color is adjusted: new pigments are added or the number of those already added is increased. Everything gets mixed up again;
To see the final result you need to paint a small section of the wall.
- With the resulting paint, a small section of the wall is painted so that after about 2 hours you can see the real color scheme of the interior. If the result is not satisfactory, the tinting process continues.
Choosing paint and roller
The final result depends on this stage, so it should be taken seriously. It is worth thinking in advance what kind of paint and additional tools will be used, and what kind of roller is needed. There is a formula: high-quality paint material + suitable tools = ideal painting quality. Plus, you will need basic skills in working with water-based emulsion.
When buying paint, it is a good idea to consult with the seller. He will tell you which composition is suitable for a particular room, and also announce the rules of use. A good paint is one that has a certificate or certificate of conformity. The best manufacturers of paints and varnishes:
- Tikkurila;
- Dulux;
- Marshall;
- Alpina.
After purchase, you need auxiliary tools and materials for work:
- hard brush;
- soft plastic brush;
- sandpaper;
- masking (construction) tape;
- rollers and handles for them;
- dry rags;
- putty knife;
- bath for rollers;
- acrylic based primer.
Advice! Buy work clothes and shoes, or choose from old items. During the work process, it will not be possible to avoid dirt and paint drops.
Which roller is better? It all depends on the type of work being performed. When painting an uneven or textured wall, use a roller that has the ability to remove the top coat. The pile is medium or long, depending on the texture of the surface. When working with a flat surface, a short-nap roller is better. To reach the ceiling, you need an extended handle. You cannot paint the corners with a roller, so you will need a brush 5-15 cm wide.
Painting technique
You can paint walls with a brush, roller or spray gun. There are technologies developed over the years for this.
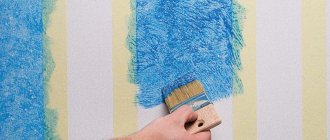
Painting with a brush
For those nostalgic for the good old days, we recommend painting the walls with a brush. But we warn you right away. This takes a long time, is not of very good quality, and the paint consumption is a little higher (some will end up on the floor in the form of drops, some will remain on the wall in a thicker layer of paint).
Before starting work, the brushes (a large flywheel and a small corrective one will be required) are soaked in water so that no bristles remain on the wall during the work.
The paint is poured into a cuvette if the packaging is large, or remains in the jar. In the latter case, the water emulsion is stirred regularly, approximately every half hour, to maintain a homogeneous composition.
The brush is dipped about 1/3 of the way, after which excess paint is removed with light blows against the wall of the jar or tray. The coloring starts from the upper left corner and goes down in narrow stripes. The coloring composition is applied in a thin, uniform layer. The brush is held almost perpendicular to the wall, the pressure is light.
The application technique may vary, but experts advise first applying a vertical stroke, and then blending it with zigzag movements. This way you can ensure that the wall is free of smudges and streaks.
The second technique involves applying one layer with vertical movements, the second with horizontal movements, without shading. With this application, omissions are eliminated, but the likelihood of smudges and streaks increases.
Roller
Painting the walls with a roller is carried out in the following sequence:
- paint is poured into the tray;
- the roller is wetted around its entire circumference. To do this, it is dipped into the paint and then rolled along the ribbed surface of the cuvette. And so on several times until the fur is saturated with the water-based composition. If you skip this work, there will be “unpainted” marks on the wall that are not visible when wet;
- wet the roller again and, rolling it along the edges of the ditch, distribute the paint evenly over the entire circumference;
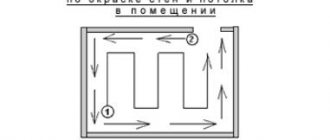
Use a roller to paint in a W-shaped motion.
- you need to start painting from a corner, any corner. Lead from top to bottom according to a pattern reminiscent of the Latin letter “W”. The color stripe is about half a meter. The stripes are applied with an overlap of 5-10 cm;
- paint drips are removed with a used (dry) roller - the pile will absorb the drips. In this case, the movements of the roller should also be similar to the letter “W”.
How many times does a wall need to be painted with a roller? 2 layers are enough. The second layer of paint is applied to the dried first one.
Spray gun
Using a spray gun to paint walls not only gives excellent results, but also brings pleasure from the work - it is easy and pleasant. The technology consists of several steps.
- The paint is diluted (more than usual), mixed, and then filtered through cheesecloth (small particles can clog the nozzle).
- The supply of dye is regulated, for which an unnecessary object is dyed within a few seconds.
- After stabilizing the paint flow, the nozzle is brought perpendicular to the wall at a distance of 30-60 cm. The movement for the first layer is horizontal, for the second - vertical, at a speed of approximately 1 m per 5 seconds.
- Coloring starts from the top. Paint in sections. The next square is started after coloring the previous one. The pace should be even. Any delay leads to a thick layer of paint that begins to flow down. Therefore, it is better to underpaint than to overpaint - the next layer will hide the defect.
- Improved painting of walls with water-based compositions when using a spray gun is achieved by painting 3 times - three layers are applied.
How to paint a wall
Tool selection: brushes and rollers
Basic set for painting vertical surfaces.
The quality of coloring depends significantly on the choice of tools. The most commonly used are rollers and brushes. The roller can ensure even distribution of the emulsion. Brushes should be used in areas such as edges and joints. The sponge is used to create decorative effects.
Recommendations for using painting tools:
- For uneven and textured surfaces, it is best to choose fleecy sheepskin options.
- A roller with removable covers is suitable for large areas. The main rule for choosing a fur coat: the smoother the wall, the shorter the pile on the roller should be.
- Do not use a device with a foam structure. Air bubbles may form, which subsequently burst and leave indentations.
- Painting the upper part of the wall must be done with a tool with an extended handle.
- For painting corners and edges, it is better to use brushes of 150 and 50 mm sizes.
- For work, it is better to choose a nylon polyester brush. Regular bristles absorb the composition and change shape, but nylon repels it and does not deform.
- A high-quality brush has cone-shaped, thick, long bristles. The bristles of this brush easily restore their shape after bending.
For work you will need the following materials and tools:
- capacity;
- special ribbed tray;
- ruler;
- putty knife;
- primer;
- putty;
- masking tape.
Preparation
Preparatory activities are an important part of the work. The composition is applied in a small layer, so the surface must be as smooth and even as possible, free from defects, chips and height differences.
Before you start, you need to carry out the following activities:
Before carrying out work, the surface must be prepared.
- If present, remove any remaining old coating and clean. You can use soapy water for this.
- Let dry and inspect. Alignment or reconstruction is likely needed. As a rule, one layer of plaster is enough to achieve smoothness. To remove depressions and cracks, it is advisable to choose gypsum putties, and for leveling - alabaster putties.
- After leveling it needs to be primed. This stage should not be neglected, since the primer not only improves the adhesion of materials and strengthens the base, but also reduces the consumption of the composition.
- Frees space from foreign objects.
- Cover the floor, seal the joints with the ceiling and adjacent walls with masking tape.
- The water emulsion has a very thick consistency, so it needs to be diluted with water and stirred. For mixing, you can use an electric drill with a mixer attachment or a simple stick. When the required consistency is achieved, you can tint it by adding the required pigment in the required proportion.
- When the area to be painted is very large, it is imperative to ensure that one batch is sufficient for the entire area. It is quite difficult to achieve the desired shade again without automatic tinting.
Coloring
Let us describe the stages of work:
- Pour a small amount of the composition into a ribbed tray.
- Dip the brush and apply to the perimeter.
- Place the roller in the tray and let it soak thoroughly.
- Roll out on any clean surface (cardboard or board) until the pile is saturated.
- You can start work from any place, but probably the best option is on top of the wall. With this sequence, drips and drops will not spoil the painted areas and will then be rolled out with a roller.
- Coloring occurs in 2-3 layers.
- Each subsequent layer is applied when the previous one is partially dry.
If you study the technology of work very well, you can easily transform the interior design of absolutely any room. Compliance with all the specifics of painting work guarantees you high-quality and uniform coverage.
Decorative painting
Uneven painting of walls is becoming increasingly popular - their surface looks unusual, emphasizing the unconventional thinking of the owners. There are many techniques and design techniques for decorative painting. Some of them have already been discussed in the work “Wall finishing with decorative plaster”.
We will describe some below (the amount of work does not allow us to consider everything).
- A wall with a pattern is obtained by applying 3 layers of paint with a two-part roller, where one roller wets the second with a cut-out pattern in the paint. The technique is clearly visible in the photo below.
Drawing is very simple.
- Stencils with a pattern are cut out of a dense but thin material, onto which paint is applied. It is best to work on a stencil with a sponge or, in extreme cases, a used roller. Otherwise there will be streaks under the stencil.
- With a homemade roller you can get an unusual, chaotic pattern. You can understand how this works from the photo below.
Any material at hand can become a decorating tool.
A painted wall can be changed beyond recognition with the help of auxiliary tools.
- Another non-standard painting technique: spraying. The first layer of paint is applied to the wall. The second is applied with a brush, but not with strokes, but chaotically.
A more impressive effect can be achieved by using textured paint. Water-based compositions do not belong to this type of dye. But if you thicken the water-based emulsion (evaporate some of the water), then it behaves like textured paint, which makes it possible to have unusual walls.
So, if you add metal particles and reflective quartz sand (commercially available) to a light brown thickened water-based composition and then apply it unevenly, you will get a relief called “Atacama”.
This is what the Atacama texture looks like.
Preparing the surface for paint application
Before painting, you need to properly prepare the base. To do this you should:
- Remove traces of dirt, grease stains and other defects with a sponge and soap solution. This is necessary for uniform distribution of the substance without the formation of lumps.
- Degrease and dry the surface with a special product.
- Give the surface a rough effect using light grit sandpaper. This requirement will allow you to evenly distribute the paint and obtain maximum adhesion to the surface.
- Tape areas that do not need to be painted with masking tape.
Before painting, the surface is cleaned of dirt using a sponge and soap solution.
Tips for further care
Water-based emulsion has poor abrasion resistance. Therefore, it is necessary to clean and wash carefully. First, conspicuous stains are removed. They need to be wiped point by point, without greatly affecting the paint nearby. The movements must be circular, otherwise the top layer of paint can be erased. It is best to do this with melamine sponges, but only carefully, without strong friction.
Can't be cleaned often. For washable paints, you can use dishwashing liquid. If the water-based composition contains latex particles, you can wash it with soapy water - the dirt will be easily washed off.
Painting walls with water-based paint fits into any interior, complementing or emphasizing the chosen design style. The painting technique does not have points that are difficult to understand and perform, which allows you to do the apartment renovation work yourself.
Painting technology
Painting walls with water-based paint yourself is a simple process. But violating the manufacturer's recommendations can ruin the final result.
Roller painting
The dyeing technology is as follows:
The surface prepared for painting is primed before starting work to save the finishing layer in order to avoid high absorption of the base and damage to the properties of water-based paint due to it. Painting tape is applied to protect the ceiling. For ease of application, use a roller with a long handle and a tray of suitable sizes. The diameter of the roller is about 50 mm, width 15-25 cm. The choice of pile when painting with your own hands by a non-professional is an important point: the shorter the pile, the thinner and more uniform the layer. The long pile is convenient for painting decorative plaster. The roller is moistened in the mixture and rolled out over the tray to evenly distribute and remove excess. Painting the walls occurs by alternating movements up and down and diagonally for better smearing. During the initial painting, it will not be very easy to create an even layer, so there should be more distributing movements. Corners and edges are painted with a flat brush. If the mixture is too thick, dilution with water is acceptable; this is not necessary when using freshly opened containers. It is worth considering that adding water will change the color and reduce the elasticity index. First, the entire surface is painted in one layer. After coating, wait for it to dry for the time recommended by the manufacturer, then proceed to subsequent painting in a second, or, if necessary, third layer.
Important! The desire to paint everything with just one thick layer will spoil the surface, smudges will appear, a visible difference in color due to the thickness of the application
Spray painting
Painting walls with water-based paint yourself will be much easier using a spray gun. A modern tool guarantees uniform application and a thin layer. To do this, it is necessary to prepare the mixture: stir, strain through cheesecloth. Water-based paint is poured into a tank and applied to the surface with a spray bottle.
Such work requires the absence of furniture or its very good protection with special bags. Painting a wall with a spray gun with water-based paint also takes place in several layers, but they dry much faster. The instrument is washed very easily in a timely manner, using plenty of warm running water. You can rent it at a hardware store.
Important! When painting walls with a spray gun, you must wear a mask.
Features of applying textured paint
Textured water-based paint is applied with a trowel, a rough brush, or a roller. The final pattern on the wall depends on the painting method, the grain size of the mixture, and the number of layers.
To create an additional decorative effect from painting, stencils and curly rollers are used on the walls. With the help of imagination, the material allows you to create your own unique design, but even without using various effects, you get an interesting wall texture.
Important! This mixture can be deformed within 15 minutes, then becomes viscous, the surface is already deteriorating from the impact. Formation should occur immediately after painting the wall
An interesting master class on painting from a manufacturer of textured water-based paint is presented in the video:
What types of gold paint are there?
Gold finishing can be done on any wood, metal, plastic, glass or ceramic surface. Gold paint is suitable for walls and ceilings, floors and small decorative details. There are several types of such paints on the market, which differ in composition:
- acrylic;
- alkyd;
- oil;
- water-dispersed.
Each type of dye has its own characteristics and purposes. For example, water-based gold paints are best used for interior work; they are recommended for painting surfaces in a dry room. Alkyd and oil types are mainly gold paints for metal, which, in addition to decorative functions, also have anti-corrosion properties.
Heat-resistant paint is also on sale - ideal for painting surfaces and products exposed to high temperatures (fireplaces, stoves, barbecues, etc.).
Advantages of acrylic paint
Decorative acrylic paint is popular among craftsmen. It has many advantages compared to other formulations, including:
- safety, absence of toxic substances;
- good grip on any type of surface;
- UV and weather resistance;
- dries quickly and creates a moisture-resistant film;
- the surface is easy to maintain, it washes and cleans well;
- Possibility of tinting the paint to give any golden hue.
The acrylic composition can be used for painting the surface, its restoration, and for the purpose of artistic painting.