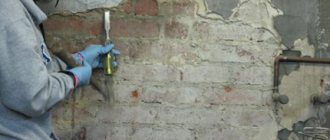
I'm glad you stopped by my blog, dear readers! Today I want to tell you how I made partitions from plasterboard. It was necessary to divide the large room into two: the children grew up and wanted to have their own personal space. I took drywall from Knauf and added Shumanet BM soundproofing so that the guys wouldn’t disturb each other. I chose a profile of 75 mm with a sound insulation thickness of 50 mm: according to the technology, there must also be an air layer in the partition. Even my picky boys were pleased with the result. Let me tell you how to do everything correctly.
What is the Code of Standards and Rules, what provisions does it include?
According to the decision of the Construction Committees, as well as the Directorates for Standardization, Technical Regulation and Certification, Article SP 55.101.2000 was adopted in 2000. Its points must be taken into account and carried out during the installation of partitions.
Factors taken into account when drawing up the requirements:
- The type of building for which the partition is to be constructed - residential, public, administrative or industrial building;
- Statistics of seismic data in the area where these structures are located;
- Type, brand of building materials used during installation, compliance with the specifics of the work being carried out;
- General climatic and microclimatic household indicators.
These norms and rules, abbreviated as SNiP, formed the basis for the formation of installation technology.
Requirements for drywall
The marking of plasterboard sheets accepted by SNiP standards is as follows:
- GKL - for construction in rooms with normal humidity (less than 70%) and temperatures from 5 to 30 degrees C. Available in gray color without special impregnations that resist moisture or heat. Recommended for designing structures in hallways, living rooms, bedrooms and other rooms;
- GKLV is a hygroscopic material with high resistance to moisture, painted light green. Used in damp areas (more than 70%). Thanks to impregnation with antiseptic substances and concentrates, it does not lose its linear dimensions and is not exposed to dampness. Designed as a finishing material in bathrooms;
- GKLO - has increased fire-resistant properties due to the presence of fibers and compositions that prevent combustion. Available in yellow sheets, suitable for covering a partition installed in the kitchen;
- GKLVO - plasterboard with improved fire and moisture resistance (up to 90%) in a soft pink color.
The thickness of the sheets should be 12.5 mm - optimal indicators for ensuring the strength of the structure and its sound insulation. Thickness of 6.5 and 9 mm is insufficient.
What formats of gypsum boards can be used
SP for 2000 allows the use of plasterboard formats with edges:
- UK - for sealing joints with putty;
- PC - suitable for the inner layer of multi-layer frame cladding without sealing seams;
- ZK - for sealing joints with plaster;
- PLC and PLUK - when sealing seams without reinforcing tape.
An ordinary miracle: a durable plasterboard partition
However, in modern construction there is a gradual replacement of the traditional methods for constructing interior walls made of brick and concrete in our country with more modern lightweight soundproof plasterboard partitions. Let's look at why this happens
A modern plasterboard partition is a full-fledged construction system that has the characteristics of sufficient strength that are required for the internal enclosing structures of modern buildings. In addition, it allows you to implement the most daring design ideas, providing the premises with the necessary level of sound insulation and aesthetic comfort.
When, before starting repair work, we begin to delimit the internal space, we must first ask ourselves, why do we need the strongest possible plasterboard partition? Do we face the task of hanging additional building structures, household appliances, furniture on a finished plasterboard wall, or do we need to ensure the strength of the partition under mechanical stress? Depending on this, you need to select elements of the plasterboard system, which manufacturers offer in a wide range.
Factors affecting the strength of plasterboard building systems:
- strength of building materials and elements used in the system;
- reliability of butt joints when applying mechanical load;
- build quality of the structure, i.e. compliance with installation technologies;
- compliance of the building system with the scope of its application.
Metal profile is the basis!
First of all, when choosing components for the partition frame, you need to pay attention to such a complex structural component as a metal profile. It should not only be durable, but also easy to install, and should not weigh down the structure, i.e. be of optimal thickness.
Professionals who directly work with various types of profiles agree that only a profile with a thickness of at least 0.5 mm can be considered reliable, and it is completely unacceptable to use a cheap profile made of smooth sheet metal, the thickness of which is up to 0.25 mm. Such a thin profile will not provide any guarantees of the strength of the system, since it easily bends, twists into a spiral, and sometimes even sag under its own weight.
Recently, we often come across an interesting development for the construction of a durable partition frame - the reinforced corrugated metal profile GYPROC-Ultra, which is produced using the patented technology of cold hardening of UltraSteel® steel sheet by GYPROC (Gyproc) - one of the world's leading manufacturers of modern plasterboard systems. Independent tests of GYPROC-Ultra as part of a plasterboard partition at the Test Center of the St. Petersburg Military Engineering and Technical University indicate that the partition frame made of a corrugated GYPROC-Ultra profile 0.6 mm thick is 25% stronger than the same partition, but with a smooth metal profile the same thickness.
Experts working with GYPROC-Ultra claim that the corrugated surface ensures quick and convenient screwing in of self-tapping screws, helps to effectively hold them in places of fastening, speeds up installation, allowing labor-intensive work such as “cutting” to be omitted. If you try to pull out a screw that is screwed in from the GYPROC-Ultra corrugated profile, a harpoon effect will occur, which means that even a heavy shelf can be hung on a wall with such a strong frame and such a structure will last a long time.
Some practitioners recommend installing rack profiles very often to increase the reliability of the partition frame. However, this is not always advisable and leads to unjustified waste of materials. GYPROC technical specialists recommend installing a rack profile in increments of 60, 40 or 30 cm, depending on the tasks being solved (structural strength, height, tiling, etc.). Following these recommendations ensures sufficient stability of the plasterboard system not only in residential premises with normal operating conditions, but also in places where internal structures are constantly exposed to mechanical stress (gyms, shopping centers, industrial facilities, etc.).
Establishing strong connections
The resistance of the partition to various mechanical influences, shocks, and shakes largely depends on the strength of the sheet and the reliability of the butt joints. GYPROC is constantly looking for improvements to its products and the result of these scientific experiments is one or another improved element of the system or technology. Thus, it was found that the strength of butt joints of plasterboard sheets is significantly influenced by the shape of the sheet edge. Pro-Edge sheet joints made according to the technology were tested for susceptibility to cracking in an independent laboratory of the Research Institute of Building Physics of the Russian Academy of Architecture and Construction Sciences.
In testing, Pro-Edge joints were found to be 30% stronger than joints with a conventional thinned semicircular edge. In other words, plasterboard structures made from GYPROC sheets with Pro-Edge are much more resistant to cracking under strong mechanical stress.
Strength tests
An important and objective criterion for the reliability of a particular integrated solution offered on the market today is whether the manufacturer has confirmed test results in independent research centers. This requirement applies both to the strength of individual materials and to complex solutions as a whole. The GYPROC company regularly tests the following strength tests of plasterboard materials and systems: resistance to linear horizontal load, resistance to destruction upon impact by a large inelastic body, etc., hardness of the front surface, swelling, resistance of butt joints of sheets to cracking. One of the traditional tests that any new GYPROC plasterboard product in Russia undergoes is the bending test. A sheet of drywall placed on two supports must withstand the load determined by Russian and international standards, depending on its thickness. Successful passing of the test is a guarantee of the durability of the material and its reliability during the regulated service life.
Conditions for the longevity of a plasterboard system
The durability of the structure depends on proper assembly in accordance with the recommended technology. Violations in the method of fastening sheets, the use of improvised materials instead of high-quality sound insulation, sealing seams without reinforcing tape, the use of artisanal finishing methods - all this seriously reduces the safety of the structure and negatively affects the image of plasterboard materials in construction.
Along with compliance with installation technologies, it is important to pay close attention to the recommended area of application of materials: do not use sheets intended for dry rooms, etc., for wet rooms. The disastrous result of such an error can be collapse of structures, biocorrosion, or excessive swelling of a material that is not at all intended for this type of room.
The safety of materials and building systems is also determined by their fire and environmental characteristics, which must remain unchanged throughout the entire life cycle of the structure.
Products must meet the highest hygienic standards in order to be used wherever the safety of human health comes first - in medical and health care institutions, schools and educational centers. In this regard, GYPROC also confirms its reliability - all the company’s products, as well as the production process cycle, are recognized as environmentally friendly according to the conclusion of the independent EcoStandard laboratory.
Moreover, GYPROC takes an active approach to ensuring a favorable indoor microclimate - take, for example, the innovative Gyptone ActivAir® ceiling system, which is not only made from environmentally friendly materials, but also actively helps improve indoor air quality throughout its service life: through neutralization formaldehyde molecules present in the room atmosphere (chipboard furniture, floor coverings, etc.), it reduces their concentration to a safe level.
Acoustic advantages of plasterboard partitions
Compared to brick, block or concrete walls, plasterboard partitions can significantly increase the usable area of a room, reduce loads on floors and foundations and, very importantly, provide better acoustics. The GYPROC company confirms this with numbers: “The weight of one square meter of a plastered brick partition with a thickness of 140 mm, made of solid ceramic bricks, is about 280 kg,” notes GYPROC technical manager Ivan Smirnov. — The weight of the same section of a plasterboard partition with a thickness of only 100 mm, with a two-layer plasterboard cladding, taking into account the frame, insulating layer and metal fasteners, is approximately 41 kg, that is, 7 times less. At the same time, the soundproofing characteristics of these two systems are the same.”
Thus, the acoustics in rooms with plasterboard partitions (if the system is correctly selected and installed) are much better than in rooms with walls made of brick or other block materials. This is explained by the fact that the plasterboard system is a multilayer structure consisting of materials of different densities, which makes it possible to achieve high sound insulation with a relatively low weight of the structure.
The widespread use of plasterboard systems in construction is also supported by the increased cost-effectiveness of construction by reducing the costs of logistics (transportation, storage, lifting of materials) and preparation for final finishing of the premises.
A reliable guide is the key to the success of your project
In conclusion, it should be noted that GYPROC provides all recommendations that increase the reliability of modern plasterboard systems in detail on its website.
Achieving high strength indicators for plasterboard systems is now not difficult, say GYPROC. You just need to follow the carefully developed recommendations of the company’s specialists. By going to the GYPROC website, you can use the Electronic Navigator to select the right system, the Calculator for calculating materials, and download the product catalog. Through the website it is also convenient to ask for help from a team of technical specialists who are always ready to help. They will select materials, provide the necessary certificates, calculate any structure with specified reliability parameters (loadable weight, fire resistance), etc.
In January 2015, GYPROC began running a video channel on YouTube, where you can watch videos about the company’s activities, GYPROC plasterboard production technologies, learn about the product range and rules for installing plasterboard systems, and much more. Channel address: https://www.youtube.com/channel/UC39XAT8lHow6TNHkBPBPo1Q
Requirements for choosing a profile for plasterboard partitions
According to SNiP, partitions are assembled from cold-formed metal profiles based on galvanized steel. You can also use blocks of wood. The humidity of the latter is 12+/-3%, cross-section 40x25 mm.
The metal profile is used in 2 types: rack-mount (marked according to SNiP - SP or CW) and guide (PN or UW). Their thickness varies between 0.55-0.8 mm. The guide is available in several formats: 50x40, 75x40 and 100x40 mm, 3 m long each.
The width of the rack is not 40, but 50 mm, since the main load from the plasterboard sheets is concentrated on it. Reinforced rack type - 100x50 mm format bar. It is designed for the installation of complex curved and massive partition structures.
The height of the structure depends on which format is used. So, for a standard partition consisting of a single frame of a 50x40 mm SP profile with a single-layer gypsum board sheathing, the permissible height is 3 m, from 100x40 mm - 5 m.
Dividing profiles into types
Profiles create the frame of the structure and are responsible for its strength. You won’t get a good partition from a profile with your own hands if you don’t know about the division of this material into types.
- the guide is attached along the perimeter of the future structure;
- rack-mount is installed between the guide profiles in the internal space. The cladding material is fixed to these profiles.
There is also a division of profiles, and until we study these varieties, we will not tell you how to make a frame for a partition from a profile. Profiles are divided according to the material that was involved in their manufacture. Metal profiles can be presented in the following varieties:
- Galvanized is completely hidden behind the skin.
- The aluminum profile remains open, giving the frame a framed appearance. The facing material is inserted into the perimeter of the frame. Such structures are often erected in modern residential complexes, offices and retail facilities. You should build aluminum partitions yourself in the bathroom, since such a design will not be affected by moisture.
- Steel profiles are used for the construction of fire-resistant structures and partitions, which have high requirements regarding strength.
In addition to metal profiles, there are also PVC materials. This material is chosen for partitions with glass elements.
Now that we're done with the theory, you can move on to practical actions and get acquainted with how to assemble partitions from a profile.
Types of plasterboard partitions
Types and technical data of structures:
- C111 - partitions made on a single frame 3-5 m high, which are sheathed on 2 sides with gypsum plasterboard sheets, number of sheathing layers - 1. Used for rooms with normal humidity levels. Standards for the thickness of the entire structure are from 75 to 125 mm, sound insulation index 41/43/45 dB, respectively;
- C112 - made of a single frame on a metal profile, covered with 2 layers of plasterboard on both sides. Thickness – 100/125/150 mm, height – 4-6.5 m, sound insulation – 47/49/50 dB;
- C113 is a standard frame, sheathed on 2 sides with 3 layers of gypsum plasterboard. Permissible height – 4.5 m, structure thickness – 175 mm, sound insulation indicators – 54 dB;
- C115 - made of a double metal frame, sheathed on 2 sides in 2 layers. Thickness 155/205/255 mm, height according to SNiP is 4.5-6.5 m, sound insulation coefficient - 53/54/55 dB;
- C116 - double frame structures, between which there is space for communications. Sheathing – 2 layers of gypsum board on both sides, minimum thickness – 220 mm, sound insulation – 49 dB, height – 4.5/6/6.5 m.
According to the SP (Code of Rules), partitions, the standard sizes of which are listed above, are insulated from the inside with an insulating mineral wool board. This standard is specified in the GOST standard 9573-62 and corresponds to the M50 material grade.
Double skin technology
In addition to those listed, there is another effective way to strengthen the frame. It is used if you are not satisfied with the strength of a 75mm product. In this case, double cladding is usually performed when installing a profile with a width of 50 mm. Of course, the thickness will be greater (100.0 mm), but the strength will also be significantly enhanced.
The technique of double skinning with intersecting seams strengthens a plasterboard partition quite well. Also, this technology contributes to good sound insulation of rooms.
To guarantee a barrier to noise, it is recommended to lay a layer of mineral wool. The wall is already a good obstacle to sounds, but the internal cavity still contributes to resonance and their propagation. Filling with insulating material will additionally perform a thermal insulation function.
Installation of plasterboard partitions
According to SP 55-101-2000, the installation technology is as follows:
- A drawing is drawn up that details the parameters and shape of the future structure. Consumables are calculated and their labeling is selected.
- Based on the calculations of the drawing, marking is performed.
- An NP profile is installed on top of the insulating tape on dowels and anchors at 60 cm increments to the floor and, similarly, on the ceiling. Its length is equal to the length of the future structure.
- A rack type is installed perpendicular to it, close to the wall on which the insulating tape is glued.
- The pitch of the SP profile is from 400 to 600 mm; the smaller the distance, the stiffer and more stable the structure.
- In the place of the passage opening of the partition there is a rack profile. The interior is reinforced with inserts of wooden planks.
- It is recommended to install stiffening ribs at a distance of 50 cm along the height of the rack profile.
- GCR is installed on top of the frame. Installation of sheets begins from the wall in a checkerboard pattern to avoid overlap of seams; the edge of the drywall should be in the middle of the joint venture profile. The next plate is on the second half of the metal strip.
- When the partition is sheathed on one side, wiring, communications are laid, and thermal insulation is installed. Moving on to the finishing trim.
- GKL joints and sheets are puttied, treated with protective mixtures and covered with decorative finishing materials.
Find out how to install
partitions, based on SP standards, using the video example.
Examples of calculations
As an example, let’s do some calculations of a partition with our own hands for various requirements for it.
Space saving
If the main priority is saving the usable space of the room, the minimum wall thickness will be equal to the sum:
- Transverse size of the rack profile (5 centimeters);
- The total thickness of two gypsum board sheets (9.5 or 12.5 mm).
Total - 50+9.5+9.5=69 or 50+12.5+12.5=75 mm.
It couldn’t be thinner: a frame made of 50 mm profile and single-layer cladding.
The thickness of plasterboard for partitions of 9.5 millimeters is permissible only if it does not experience mechanical loads in principle. A sheet of ceiling gypsum plasterboard is easily and naturally broken by an accidental blow from the elbow or knee.
Thin but durable
If you want to combine space savings with maximum wall strength, its optimal design is a reinforced frame made of a thin (50 mm) profile and double cladding (single-sided or double-sided).
How can you strengthen the frame?
- Wooden mortgages made of 50x50 blocks, inserted into racks;
- Pairwise connection of rack profiles with a standard step between them of 60 cm;
- Reducing the pitch between the posts to 40 cm.
The final thickness with double-sided two-layer sheathing will be 50+12.5x4=100 mm.
The photo shows a wall with a reinforced 50 mm frame and two-layer cladding.
Noise insulation, hidden laying of communications
If you plan to install a water supply system, a 50- or 90-mm sewer inside the frame, or if the wall must provide maximum sound insulation, it is wise to opt for a frame of maximum thickness - from a 100-mm profile.
In the absence of special requirements for strength, the wall cladding is made in a single layer. The final thickness is 100+12.5x2=125 mm.
Frame made of profile 10 cm wide.
Extreme sound insulation
To absorb maximum noise, it is necessary not only to fill the frame cavities with sound-absorbing material, but also to acoustically decouple the sheathing on both sides of the partition. How to do it?
- Build two parallel frames from a 50 mm profile with a minimum (5-10 mm) gap between them;
For better sound insulation, a damper tape is laid under the guides. It eliminates the transmission of acoustic vibrations from the profile to walls and ceilings.
- Fill the frame with slabs of glued mineral wool. Its standard size (600x100 mm) allows you to do without additional fastening: the plates are installed spaced between the posts;
The best sound insulation is glued mineral wool.
- Cover the resulting structure with plasterboard on both sides. It is better to resort to two-layer sheathing. The price of several additional sheets of gypsum board will be paid off by the greater strength of the wall and its lower permeability to high-frequency sound.
The maximum thickness of such a wall will be equal to 50 + 50 (two frames of thin posts and guides) + 5 (the gap between them) + 12.5x4 (two-layer gypsum plasterboard wall covering on each side) = 155 millimeters.
Structure and thickness of soundproofing partitions (C115 and C116).
Finishing options for plasterboard partitions
According to the SP standards for 2000, finishing materials are chosen from the same manufacturer as the brand of drywall. For example, to fasten the edges of Knauf brand sheets, it is preferable to use Fugenfüller putty. For PLUK edges without reinforcement, use Knauf Uniflot putty mixture.
It is recommended to use self-tapping screws, dowels, hooks and anchor elements designed specifically for the installation of structures with an air cavity as fastening elements. The load on the anchor with a single-layer sheathing should not exceed 20 kg, with a 2-layer sheathing - 30 kg. The conformity of the quality of structures upon completion of installation is checked by SNiP standards (Articles 2.08.01, 2.08.02, 2.09.02, 2.09.04 and 21-01).
Marking for radius partition
You can create identical lines on the floor and ceiling so that the partition does not stand askew using the following methods.
- You can mark the radius using a ready-made figure, even from drywall. It will be applied to the same points on the ceiling and floor and will serve as a pattern.
- You can also create something like a compass, for example, from a screw screwed into the same point on the ceiling and floor, shoelaces and a pencil.
- The cord can also replace a piece of profile, that is, you will get a clearer radius meter.
- You can also use a professional marking tool.
Installation of partition frame guides
Along the finished line, which is marked on the floor and transferred to the ceiling, you will need to install a guide metal profile. On one side it will be cut to take the required shape around the circumference.
You can cut the profile using a grinder or metal scissors. The smaller the radius, the more often the cuts will occur, and vice versa.
The finished profile is installed along the marking line and secured every 10-15 cm. Standard fasteners are used for this - dowels and screws.
Then we install exactly the same profile on the ceiling, then we fix the racks between the ceiling and floor guides.
The rack profile must be installed very evenly, using a level or plumb line. The horizontal installation step is 30-40 cm, fastening using self-tapping screws or a cutter.
To strengthen the partition, it is recommended to install wooden beams in the outer vertical posts.
Calculation of drywall for a partition - consumption rates, calculator
Drywall is often used to create partitions inside the house.
For its installation, a metal profile is used, as well as various auxiliary elements (dowels, screws, protective film, etc.).
But what is the consumption of the profile and drywall for the partition? And what types of partitions are very popular in Russia? The article below will address these issues.
Calculation of drywall and profile for partitions
To install a partition in a house, you need three main elements - a plasterboard sheet, a metal profile and fastening hardware. Installation can be carried out according to two schemes:
- Single layer construction . In this case, a profile is located in the center, on both sides of which there will be drywall. Self-tapping screws and dowels are usually used for fastening. Before carrying out work, the drywall is cut into small rectangular fragments. After this, a profile is attached to it, and the resulting structure is attached to the axial profile.
- Double layer construction . This scheme largely repeats the previous one - a central axial profile, drywall on the sides, hardware for fastening individual structural elements to each other, and so on. The main difference is that the plasterboard material is installed on both sides not in one, but in two layers. To make the structure more durable, individual sheets of drywall are additionally fastened together using long self-tapping screws.
Covering the frame of the future partition with plasterboard
Is the frame on the partition installed? All that remains is to sheathe one side of the partition, lay insulation and soundproofing materials inside the structure, and, if necessary, cables or pipes. Then sew up the back side of the partition and complete the process with decorative work. So, first of all, we sew up the front part.
To do this we need to bend the drywall. Whatever method you choose, you need to work with gypsum board very carefully so as not to spoil the material. Installation of plaster on the frame begins along the bottom edge, from either side, but very slowly. The sheet is screwed with self-tapping screws to the lower outer radius every 10-12 cm, along the vertical posts - every 20 cm.
Installation occurs sequentially, but with the obligatory exclusion of cross-shaped joints. If the edge of the sheet does not fall on the center line of the profile for fastening, it can be carefully trimmed on the spot.
Now we put everything we need into the partition, and proceed to covering the partition along the inner radius. Here you will need even more patience, because the inner fold is even more complex. By and large, the process is practically no different, but you will have to make a difference in laying drywall of about 60 cm. This is necessary to improve the quality and stability of the radius partition made of gypsum plasterboard.
Selecting a profile for a plasterboard partition frame
Profiles are most often used as components of the frame. It consists of U-shaped strips of durable steel tape with a thickness of 0.5 to 0.8 mm. These elements can add rigidity to the structure without weighing it down. There are several types of profiles, each of which has its own characteristics and functional purpose. In order to mount the frame of a gypsum plasterboard partition with your own hands, we will need:
- Guide profile – PN (English UW). The product has a U-shaped (channel) shape, and according to size it is divided into four types: PN-50, PN-65, PN-75 and PN-100. Digital marking of profiles determines the width of the “back” - the base of the profile. Note that its “shelf” - the side parts - has the same size of 40 mm, regardless of the brand of the product. The back of the guide profile is most often equipped with 8 mm diameter holes for dowels. The length of the products is 3 m.
The PN profile is attached to the floor and ceiling of the room and serves as a guiding basis for the future structure. In a vertical position, the following frame element of the gypsum board partition is attached to it:
- Rack profile - PS (English CW). The upper edges of the side parts of the U-shaped structure of this product are rounded in the shape of the letter C. The width of the back of the profile is similar to this indicator for the PN, since the products will be inserted into each other during installation. Consequently, the marking of rack parts also comes in four types: PS-50, 65, 75, 100. The length of the profile is 3, 3.5, 4 and 6 meters, and is selected taking into account the following rule: it is extremely undesirable to increase it with high ceilings.
The shelf of the rack profile for gypsum plasterboard partitions has three special marks - grooves. The one in the middle determines the joining point of the drywall sheets, and the two outer ones are intended for centering the fastening material (screws).
Since the rack profile bears the main load of the mounted structure, the surface of its back has stiffening ribs in the longitudinal direction. When planning the creation of a partition, it is necessary to take into account how much weight it will have to withstand during operation. If the expected load is 50 kg/m2, then it will be enough to use a profile with two stiffeners, and 75 kg/m2 will require three.
Varieties
Using plasterboard partitions to remodel a room is a very simple procedure, so you can choose the most suitable plasterboard design for yourself. As practice shows, most often consumers choose the following options.
Plasterboard construction with sliding door
When creating this partition, several points should be taken into account:
- Do not place insulation and electrical wires in the middle of the partition. This only applies to the section of the partition into which the door leaf will “retract” when opened. Due to the fact that only half of the building is insulated, it will not be able to fully retain heat.
- It is not recommended to install such a door on carpets or rugs. Villi tend to get stuck in the mechanism, which will cause it to jam and break.
- The correct functioning of the mechanism is ensured by the construction of a double sheathing (between its layers there will be space for the door to move).
We make a structure from gypsum plasterboard with a sliding door:
- Create a detailed diagram of the partition.
- Mount a double metal frame.
- Install the door tracks.
- Make double-sided drywall sheathing.
- Lay the finished floor.
- Install a sliding door.
Making a sliding door:
- Attach a wooden strip with a cross-section of 50*50 mm, 2 times the width of the door, to the profile on top of the opening.
- Attach the top door track to this rail, and the bottom track to the floor.
- Put up a door.
- Cover the rail with a decorative strip.
Sliding door design
Corner design
Such a partition can divide the room into two parts or 2/3. The installation of such a partition is not difficult, but it should be started only after installing the corner frame. Its elements must be placed in the corner of the building and connected with self-tapping screws. The remaining actions are similar to the construction of a direct structure.
Round or curved construction
A figured partition will be very useful if the interior of the home contains curved shapes. Divide the guide profile into sectors 5-10 cm wide, then secure it to a previously prepared radius. It is mandatory to use at least one self-tapping screw on each frame segment. Place a stand on the curves every 30 cm. It is better to use arched sheets of plasterboard placed in two balls for the sheathing. If you are using regular wall sheets, wet them a little and roll them with a needle roller to bend the material. Such a wall can be equipped with electrical fittings. The finishing process is similar to the principle described above.
Curved building
Types of drywall for partitions
Having considered the types of profiles that will be required for installing the partition frame, let’s move on to another structural element. The sheets that are used in its cladding are slabs consisting of a gypsum base of a special composition and a shell of thin cardboard (hence the name “plasterboard”). This material is divided into several types that have specific markings:
- GKL - the general name for plasterboard sheets - also implies a common material that is used in rooms with normal humidity conditions (dry). Sheet color: blue, gray.
- GKLO is a material with increased resistance to fire (fire resistant). The gypsum included in its composition is impregnated with a special solution with reinforcing additives and fired. Fire-resistant plasterboard is used when installing fireproof partitions made of gypsum plasterboard. Material color: gray, red.
- GKLV – moisture-resistant plasterboard. Used in rooms with high humidity levels. The cardboard covering of the material is treated with a water-repellent composition, and hydrophobic and antifungal substances are added to the gypsum “core”. Sheet color: green, blue.
- GKLVO is a material that combines the properties of several types of drywall - moisture resistant, with high resistance to open fire. The elements that make up the sheets undergo complex processing. Material color: red.
The most popular products of this kind are from the German company KNAUF. Drywall sheets produced by this manufacturer comply with all SNiP requirements. GKL partitions, which are installed using the company’s building materials, are reliable and durable.
It should be noted that recently there has been an increased demand for gypsum fiber sheets (GVL), an environmentally friendly material that is also available in moisture-resistant versions. The difference between GVL is that cellulose fibers are added to its “core”, which provide the sheets with additional strength. There is also a special acoustic plasterboard - a material with increased sound insulation.
All plasterboard sheets are rectangular in shape and are most often produced in the following sizes: thickness - 12.5, 14 and 18 mm; height – 2, 2.5 and 3 meters. The width of all types of material is standard and is 1.2 m. The choice of drywall thickness will directly determine the final weight that the partition
.
Factors
What influences the choice of frame and sheathing sizes?
- Requirements for the stability of the partition with respect to horizontal loads. This parameter is especially important in rooms with high traffic (corridors, hallways, kitchens) and in cases where a plasterboard wall encloses a room with a suspended ceiling made of PVC film;
Reference: when tensioned, the vinyl sheet creates a horizontal load of 70 kgf per linear meter on the baguette.
- Requirements for wall strength in relation to impact loads. A typical example of a room with high demands is a children's room. Thin single-layer drywall can break when an aborigine hits it with a wooden machine or a pirate's cutlass;
Quiet games? No, we haven't heard.
- Requests for the soundproofing capabilities of the wall. The thicker it is, the larger the layer of noise-absorbing material placed between the frame posts can be;
- The need for hidden installation of engineering systems . Electrical wiring and a local network, water supply and sewerage, ventilation ducts and air conditioning lines can be mounted in the wall.
The procedure for installing a plasterboard partition
So, having decided on the materials, let’s move on to installing the partition. We will not describe in detail the entire technology of work; we will only talk about the main stages of this event and the sequence of their implementation, conditionally dividing the entire process into several stages:
- Marking the location of the partition.
- According to your project, using a dye cord or a cord breaker, mark a line on the floor in the place where the partition
. - Using a plumb line, we transfer the completed mark to the ceiling and walls. It is necessary to remember about the doorway, which may be included in the partition project, and be sure to mark its location.
- Frame installation.
- We attach the PN profile to the ceiling and floor using dowels (in increments of no more than 1 m). Important: the profile must be secured to the surface using sealing tape or sealant!
- We install (and immediately fix in it) the PS profile into the guide profile. The optimal distance between the racks of the gypsum plasterboard partition frame should be 60 cm.
- Installation of equipment. Inside the frame we install embedded parts for fastening the equipment provided for by the project (supports for wall cabinets, shelves, sconces, wall lamps, etc.). Next, we install the necessary electrical wiring (in a protective casing - corrugation), pipes and other communications.
- Frame covering. We install and secure sheets of drywall on one side of the frame. The material is fastened with self-tapping screws in increments of 200-250 mm.
- Laying material for sound insulation. We lay insulating material in the cavities between the posts. It’s important - when building a gypsum plasterboard partition with your own hands, you don’t need to save on sound insulation; you need to fill the frame with it as tightly as possible!
- Full frame covering. We attach the GVL sheets to the other side of the frame. Note that if the structure has a multi-layer coating, then each subsequent layer of sheets is installed with an offset of 60 cm relative to the seams of the previous one.
- Surface finishing. Upon completion of the sheathing, it is necessary to putty the seams between the sheets of drywall and the screws with which they were fastened. The surface must be primed for further decorative finishing.
DIY installation
The work sequence includes the following operations.
Layout and marking
First stage of installation. The main task of marking is to draw vertical lines on the walls along which the wall profile will be attached. To mark a straight partition, you can use a plumb line.
- Attach a plumb line to the top point at the installation site and mark the bottom vertical point using it. If the installation location is on the floor, then the top point should be marked using a plumb line from the bottom point. Using a beating cord, draw a vertical line between the marked points.
- Make the markings on the other wall in the same way.
- Mark the horizontal contour lines of the structure onto the ceilings and floors.
- In the case of a curved partition, the curve should be drawn on the ceiling, and then transferred along a plumb line to the floor.
- If it is necessary to make a doorway, mark the extreme points of the opening on the ceiling and floor.
Construction of the base for the partition frame
- The outer side of the guide profiles should be covered with sealing tape to improve sound insulation and a tight fit to surfaces.
- The guide profiles are attached with dowels to the base according to the markings. Each profile section must have at least three attachment points. In this case, the pitch between the dowels should not exceed 1.0 m.
Formation of doorway elements
- According to the markings along the edges of the opening, install two rack profiles. If a door frame is installed in the opening, the width should be increased by 5 cm.
- The load on the profile when installing the door leaf will increase, so it needs to be strengthened by installing a 50 mm wooden block in the profile or inserting an additional profile.
Installation of vertical racks
- For installation, use a grinder or metal scissors to cut the vertical posts to size.
- The center-to-center distance between the posts is no more than 600 mm. Insert the top and bottom of the rack profiles into the guides and secure with self-tapping screws.
Do not allow the screw to turn while tightening! In this case, the profile fastenings will be unreliable.
- Instead of self-tapping screws, you can use a cutter. In this case, metal consumption and labor intensity will be significantly less.
Installation of horizontal crossbars and wiring
The horizontal crossbars of the frame serve to impart rigidity to the structure and fasten the gypsum board to the frame. It is necessary to mark the horizontal crossbars according to the height of the drywall sheet . You need to use the markings to guide the installation of the horizontal jumper.
Note! The gypsum board at the junction with another sheet according to the markings should cover exactly half the width of the horizontal jumper (profile).
- Secure the crossbar blanks to the posts with self-tapping screws, controlling horizontality with a level or perpendicularity to the vertical post with a square.
- Before laying electrical wires, one side of the partition should be sewn up. Cables should be laid in a corrugated pipe , which has fire safety certification, through holes in the vertical posts of the frame. If the self-tapping screw is close and threatens to damage the insulation, its sharp end must be bitten off or the cable moved to the side. This installation method reduces the likelihood of damage to the wiring to a minimum.
We recommend: How to build three-layer walls?
Thermal and sound insulation
Heat and sound insulating materials should be installed side by side after covering with a sheet on one side. Cut mats or sheets to size between the vertical posts, taking into account the expansion allowance in the profile.
Cutting and installation of gypsum board sheets on the frame
Sheathing the gypsum board frame should begin from the bottom. Sheets can be installed both vertically and horizontally - it depends on the design of the frame. If the height of the partition is greater than the length of the sheet, the missing part should be cut off. To do this, you can use a drywall knife.- Attach the sheets to the metal profile with self-tapping screws in increments of 15-20 cm. When using a screwdriver, adjust the torque so that the self-tapping screw does not break through the sheet, but is recessed by 2-3 mm.
- After sewing one side, lay electrical wiring and insulating materials (described above). After this, the septum is sutured with plasterboard on the other side in the same way
Sealing joints on the surface of the partition
Before sealing the seams, you should carefully inspect the surface of the sheathing and check the gypsum board fastenings. Protruding screw heads should be recessed.
To carry out puttying work, the room temperature should not be lower than 10-12˚C and should not change until the putty dries.
Make sure there are no drafts. For puttying, all work associated with high humidity should be completed or interrupted (plastering, priming, floor screed, etc.). High humidity in the room often causes destruction of the putty joint.
Seal joints between gypsum boards only using reinforcing tape (serpyanka). For work use gypsum putty.
Sealing a seam with a thinned edge
- The joints can be left unprimed by wiping them with a damp cloth. After applying the first layer of putty, use a spatula to press the reinforcing tape into it. It should be in the center of the joint along the entire sheet.
- After the first layer has dried, the second layer is applied - the covering one. After the second one has dried, a third one is applied - leveling. The resulting surface should be smooth.
Sealing end and cut seams
- End and cut seams are sealed with preliminary chamfering, and the joint is treated with a primer.
- Press the putty into the joint with a spatula, removing excess. After the first one has dried, the reinforcing tape is pressed into the next covering layer in the center of the joint. After drying, a leveling layer is applied, small irregularities are removed with sandpaper.
If you plan to paint the gypsum board, you need to putty the entire surface of the partition.
We recommend reading: Installing drywall on walls
Installing a curved plasterboard partition
Having examined the installation process using the example of a standard Knauf gypsum board partition, we will also talk about curved structures. Note that drywall is a material that has sufficient plasticity when moistened. After the plasterboard dries, the specified shape is retained.
There is a “dry” method of bending the material, which consists of applying multiple cuts to one side of the sheet. But it is used less often, as it is extremely labor-intensive. Also on the building materials market there is an arched type of gypsum board - it is thinner (6.5 mm) and narrower (60 cm) than the usual one.
To install a curved gypsum board partition, it is necessary to choose sheets with a thickness of 9-12 mm, since these structures have only a decorative purpose. A special arched profile, which has all the strength characteristics of conventional material, will help you mount an oval-shaped frame. Also in the design you can use a regular profile, curved using special equipment.
Choosing the thickness of drywall
Of course, the main size of the false wall in terms of thickness is determined by the profile, but plasterboard, which is available in thickness in 3 standard sizes, also makes its contribution.
The thickness of plasterboard for partitions can be:
- 12.5 mm is the most suitable type (and thickness) for creating partitions;
- 9.5 mm – a type used primarily for suspended ceilings;
- 6.5 mm is the narrowest type of drywall, also called arched. It turns out to be indispensable when installing on a curved frame made of metal profiles. This type of drywall bends even more easily.
Summary characteristics of partition thickness
Thus, the total thickness of the plasterboard partitions is determined by the width of the profile used and the width of the plasterboard sheet used.
The following more widely used options for partitions in thickness can be cited (without taking into account the insignificant error in fastening and finishing, which can give an increase of 2-4 mm):
- 125 mm – 100 mm PS profile plus two sheets of plasterboard on both sides. This thickness one hundred percent meets the long-term standards for the execution of internal walls, made in a serious manner during panel construction;
- 73 mm – arched PP profile of 65 mm plus two sheets of the narrowest plasterboard on both sides. The narrowest partition that can be obtained in a plasterboard-profile-plasterboard composition. Such a thin false wall is only decorative; you should not place any hopes on it based on the load. (see also the article Profile for plasterboard partitions: false wall frame base)
Other options for increasing hardness
The given two sizes are limiting in terms of rigidity - the largest and the smallest. But design goals from time to time force us to create a variety of compositions. You can take a risk and apply a layer of the narrowest drywall completely on the widest PS profile, even, moreover, combining several layers at once. With all this, however, you will have to stock up on a significant additional number of screws.
The calculation here is as follows:
A standard 2.5 by 1.2 meter sheet of drywall requires about 60 screws. If you decide to lay two layers one on top, then the first layer will require no more than 6-8 screws 2.5 cm long - they need to be placed in increments of 1 meter. But the 2nd layer will already require 4 times more fasteners with a length of 3.5 cm - with all this, the installation step should be 25 cm.
Essential advice! When placing plasterboard sheets on both sides on an iron frame, follow the long-standing construction rule of staggered placement. Shift the sheets on the reverse side exactly one-half the width of the sheet. This simple technique allows you to noticeably increase the hardness of the entire structure.
A good design requires maximum use of all available interior space.
By creating a wider false wall, you can provide yourself with such additional space - at the wide end of the partitions. In this situation, the only thing you will have to take extra care of is increasing the reliability of the frame by introducing a huge number of additional horizontal cross members into the structure. (See also the article How to make a niche from plasterboard: tips and advice) Not a single annotation will teach you how it can be done - imagination and design ideas dominate here, and the initial material is still the same - 4 types of iron duralumin profiles, reinforcement and photos of possible implementation options.
Drywall for partitions
For quite some time, drywall has been a material that is used in almost all types of construction and repair work. This is a kind of universal material that is used to create ordinary walls, and for the construction of partitions (both low and solid), and for finishing the ceiling, and for building the necessary drawers, and for much more. In other words, drywall is constantly finding new uses in repairs and construction. This material is popular largely because it has a very low cost, is very easy to install, and allows for a high level of heat and noise insulation. And these are not all the advantages of drywall. The most common repair is the installation of partitions without doors made of gypsum plasterboard.
Types of drywall
Metal profile for the frame of a plasterboard partition
Diagram of a plasterboard partition on a metal frame.
The most popular are 2 options with which the frame is built. Installation involves attaching drywall to a metal profile or to a frame made of wooden blocks and boards knocked together. The first option is preferable if you are erecting a partition without a door in a room that has a high fire hazard. The metal profile is made from high-quality galvanized steel using the cold bending method. This profile is used in almost all premises - in utility, industrial, and, of course, residential buildings. The fact that galvanized steel is used in the manufacturing process of the profile allows us not to use any insulating materials when sawing it out or other external influence on the metal.
Galvanized steel allows you to reduce the possibility of metal corrosion to a minimum. Typically, factories produce profiles according to strictly defined dimensions. If you need special conditions, then some of these factories provide the opportunity to order a profile of your own size. But at the same time, it cannot be shorter than 50 cm and longer than 6 m. In order for the profile to be attached to the ceiling, floor or wall as firmly and reliably as possible, various brackets, rods and hangers are used during its installation.
In addition, it is necessary to use special fastening tools to install the profile to the gypsum board. These include anchors, dowels, screws and other screws. They allow both the wall and the partition to bear a more significant load, on which not only paintings, but even heavy boxes can be hung in the future. In a variety of rooms, you can use several options for fasteners: nylon or polypropylene dowels. If special strength of the partition is required, then metal dowels are also used. It is impossible to install gypsum boards on nails, as they can crumble the plaster.
Installing wiring
In order for plasterboard partitions that you install yourself to meet safety standards, you need to install the wiring correctly.
Having completed making the frame, use a drill to make holes in the metal profile for installing pipes with wires. Lay the cable to the site of future installation of electrical fittings in a plasterboard building. Sockets and switches must be installed after installing the drywall.
Note! Having placed the cable in the partition, do not rush to connect it to electricity, as the risk of an accident during subsequent construction work increases.