General information about plastering work
Plastering work is the work of applying leveling and protective coatings. These coatings can be binder based, hydraulically or air cured. They are applied to the external and internal surfaces of building structure elements. Plaster is needed primarily to hide masonry errors and to close the seams. That is, it's just decoration. The second task of plastering is more practical. It serves as insulation against moisture penetration, improves the sound and heat insulation properties of the wall. If the surface is wooden, then the plaster
also serves as fire protection.
What is plaster
Plaster is a composition designed to form a smooth base for the finishing coating, protect structures from aggressive influences, increase sound insulation and thermal insulation of walls.
The plaster layer itself can serve as a decorative finishing coating.
The reliability and durability of structures and finishing depends on how correctly the type, composition and technology of its application are chosen.
Decorative plaster in our catalog:
There are two types of plastering work - external and internal.
Plaster is used to finish walls made of brick, small-sized other materials, or large-porous sand-free stone, if without plaster the air permeability of these walls does not meet the standards currently determined by SNiPA. Plaster is also used in the renovation of buildings whose walls were previously plastered; plaster is used if different areas are made of different materials; for finishing window and door slopes, plinths; plaster can be used as protection against fire, replacing it with cladding made of fireproof materials, if it is impossible to use them or is simply impractical. Walls near ventilation or smoke openings are also finished with plaster.
History of the composition of plaster and dry building mixtures
At the beginning of the 20th century, dry building mixtures (abbreviated as SCC) were mixtures of a binder (it could be lime, cement or gypsum) and sand. They were called “gartsovka.” These mixtures could only be applied in a thick layer - 10-20 mm - because if the layer was thinner, the material sucked out water and the mixtures became non-plastic, it was impossible to work with them further, the plaster simply crumbled. Another disadvantage was that cement-sand mixtures were good in compression, but they did not work well in bending or tension. They also did not adhere well to low-absorbing substrates.
The situation changed dramatically in 1912 due to the fact that in Germany the chemical concern Hoechst found a method for producing cellulose, which absorbed and retained water very well.
And already in the 20s of the last century, mass production of cellulose ethers began, which are currently the main components of CC.
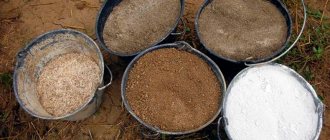
About the types of material depending on the base used
Previously, users hardly thought about choosing a solution. The only available option was considered to be a mixture of cement and lime, or cement and sand. In today's market, buyers have much more choice.
Cement variety
Usually we mean cement-lime mortars for plaster, or cement-sand standard types of mixtures. They are made with the addition of water, following certain proportions. An excellent option for treating rooms that constantly maintain a high level of humidity inside. This is true for the kitchen and bathroom.
Plastering with cement-sand mixture
Cement-sand types of plasters are often used to level walls, as well as when bringing surfaces to zero.
The main advantages of the material include the following characteristics:
- Low cost. Materials are available to literally every buyer.
- High level of adhesion. Thanks to the components in the composition, a high level of adhesion to the surface is ensured. It doesn't matter what material it was originally made from. There is no need to use a primer to ensure the surface is pre-treated.
- Strength. Cement plaster outperforms many other materials in this regard. A reliable coating appears on the surface of the walls.
But there are also disadvantages that also need to be assessed before purchasing.
- It takes as long as 3-4 weeks for the materials to harden.
- Plastering itself often becomes a very labor-intensive process. Includes several stages simultaneously. Each of them needs to spend a certain amount of time.
- It is important to first accurately calculate what load the walls will experience. It is necessary to carry out calculations based on the thickness of the coating. After all, cement options are characterized by significant mass. This is important when using plaster on bathroom walls.
Gypsum types of materials
Already from the name it is easy to guess that gypsum acts as the main component. It is combined with lightweight fillers, thanks to which material consumption becomes less. There are also modified high quality supplements. They are designed to increase the adhesion of the composition. Ready-made plaster for interior work has the same effect.
Plaster with gypsum mixture
Used for leveling surfaces before decorative finishing. You can apply wallpaper and paint to the top.
The benefits will be as follows:
- Environmentally friendly. Much higher than standard cement mortars.
- High level of vapor permeability. When the material hardens after application, it forms a porous structure. Due to this, the surface will be able to “breathe”. There is no need to worry about mold growth even when humidity levels rise.
- Elasticity. Gypsum mixtures have good viscosity. Therefore, it is permissible to apply layers of greater thickness to the surface. You don’t have to worry about spreading or the appearance of defects.
- No shrinkage. Which helps to obtain a perfectly flat surface. As the solution hardens, no cracks appear. This is what makes soundproof wall plaster different.
There are also negative sides, but they are fewer:
- Negative impact on metal objects upon interaction. Relevant for screws and nails and other elements. The process of rust formation accelerates, the structures become unsuitable for further use while they are located in the thickness of the plaster.
- Unlike the cement composition, the strength is also at a lower level.
- The material cannot be used for finishing rooms with high humidity. It is better when a different internal plaster is chosen.
About polymer materials
This material cannot be used when rough surface treatment is required. Most often it is chosen for decorative functions.
The basis for production is polymer resins or other substances of synthetic origin. When finished, plaster can have a plain or colored surface.
The advantages include the following characteristics:
- Resistance to low temperatures.
- A large number of finishing options.
- Resistant to moisture.
- No need for additional finishing.
- Drying is fast and even. The result is an even and smooth material. And interior wall plaster becomes the optimal means of protection.
Properties of silicone compounds
Under such circumstances, the main component becomes silicone resin mixed with various types of fillers. Usually their role is played by substances of the mineral group or fabric fillers.
Components are added to the composition that help improve strength. They also protect materials from temperature changes and high humidity differences.
Decorative finishing using this material is carried out on almost any base.
Among the advantages that these types of plaster solutions have are:
- Good vapor permeability.
- High-quality adhesion.
- Durability of the coating. The service life reaches 25 years if all conditions are met.
- Water resistance.
- Elasticity. Ready-made plaster mixtures for interior work often have this advantage.
There are only two disadvantages. This means a high price level, combined with the need for pre-treatment. During this process, silicone primers are used.
Tools for applying plaster
Let's look at the tools that will be useful to you when plastering at home. First of all, you will need a trowel (Fig. 1) to level and compact the plaster mark. It consists of a canvas and a handle. For its production, polyurethane foam is most often used. With a grater you rub the surface of the plaster layer. Sometimes a grater is used for this purpose, but this time it is metal or rubber. Or a trowel (Fig. 2) To transfer the plaster from the container in which we mixed it, we use a falcon (Fig. 3). We also use it to level the plaster layer.
To apply the mortar to the surface to be plastered, the master can use a plaster trowel, a plaster spatula, or a trowel. They can be different in shape:
- Trapezoidal (Fig. 4). This is a finisher's trowel
- Triangular (Fig. 5). This is a concrete trowel.
- Drop-shaped (Fig. 6). This is a plasterer's trowel.
- Corner trowel. (Fig. 7) This trowel is used for finishing internal and external corners.
- In order to seal thin seams, the master uses a seam trowel. (Fig. 8)
- If the surface is too large and you need to apply a lot of mortar at once, you can use a plaster ladle (Fig. 9)
- The tool, which is shaped like a bay leaf, has several names - a cutting tool, a plaster knife, a small plaster spatula. (Fig. 10) This is a canvas that is used to unstitch seams and correct them. It also cleans sinks and cracks.
- The master uses tools such as a scraper and a spatula (Fig. 11) to free the surface from the coating that was previously applied to it. In addition, a spatula is used to apply putty.
If you need to apply a primer or other solution, the master can use rollers, brushes and many other tools. Also, in the work you cannot do without a box for mortar, a cord, a plumb line, a reinforcing façade corner, a construction hydraulic level, a fiberglass mesh and much more.
Plasters on various binders
To be considered good, mineral plaster must meet a number of requirements:
- It should fit well to the base.
- It absorbs water poorly and repels it well.
- It must have a high degree of vapor permeability.
- It must be resistant to mechanical and atmospheric influences.
Depending on what binders are used, different types of plasters can be distinguished: lime, cement, gypsum-lime and gypsum. DIN 1850 defines plaster as follows: “plaster is a coating applied in the form of mortar to walls and ceilings in one or more layers of a certain thickness, which achieves its final properties only after curing on the base.”
Classification by type of mixture application
Rice.
5. Plastering by hand and mechanized Plasters are applied to walls in two different ways:
- Manually
- Using special devices.
Manual technology is known to everyone. The plasterer applies the mortar to the wall with a spatula and distributes it manually. The mechanized technique is a technique for applying plaster using plastering stations. They come in different types and complexity of design, and differ in the way they are fed. The devices are united only by the task they perform. This is mixing the solution and applying it to the wall.
All plastering stations consist of the following elements:
- loading box;
- mixing chamber;
- supply pipe.
Automation of all processes allows us to improve the quality of work performed. No plasterer can mix the mixture the way a machine can. Only a plastering station is capable of delivering ready-made mortar to the wall under pressure. This increases the degree of adhesion of the solution to the surface. The result is a uniform layer that is easy to level by hand.
Comparison of the cost of mechanized and manual methods
Is the mechanized method much more expensive than the manual method? It's not like that at all. There are several reasons for this.
- Mixtures for automated application are cheaper.
- Material consumption is much less due to correct calculation of proportions and waste-free supply.
- One operator can handle the automation. There is no need to pay for the working hours and services of several plasterers.
- There is no need to pay a team of craftsmen for urgent work. Operators with automation will complete the task much faster.
Decorative effect of the layer after plastering
It is a mistaken opinion that decorative mixtures cannot be applied using a mechanized technique. Automation quickly performs the most difficult part of the plasterer’s work. She applies the solution to the wall. This is what the master spends the most time on. Further operations on material distribution and finishing are carried out by specialists manually.
Rice. 6. Mechanical plastering inside the house and simultaneous leveling
In addition, there are types of decorative plastering that cannot be performed without the use of automation. Having saved time and effort on the most labor-intensive process, the master can pay more attention to the decor of the coating.
Types of plastering stations
Plastering stations are either stationary or mobile. The first ones are quite bulky and are used on construction sites.
Mobile stations are maneuverable vehicles on a wheel base. Large samples are equipped with a trailing mechanism. With its help, the units are transported like a trailer to a car.
The main parameters of such equipment:
- mains voltage – 220V or 380V is required for engine operation;
- device power – from 1.5 kW to 21 kW;
- productivity - depends on the size of the outlet nozzle;
- supply range – the indicator determines how far horizontally or vertically the solution is supplied.
To choose a unit, you need to evaluate the size of the room. Low power stations are used for interior work in small rooms. Powerful models will be needed for large-scale work, when the surface area to be processed is significant.
For large premises, the supply range and performance of the equipment are critical. Installations with small diameter nozzles are suitable for work in residential areas. Plastering walls in public buildings or industrial facilities will require the use of a powerful station with an increased nozzle diameter and a long delivery range. Working with low-power models will increase the time required to complete the work.
Plaster layers
Monolithic plaster consists of several layers. Their technological sequence depends on the type of plaster. The first layer is called the spray layer. It must be applied with a plaster ladle and is approximately 8-9 mm. You should not apply this layer with a plaster trowel, because in this case the necessary adhesion to the base is not achieved. This layer should be approximately as thick as thick sour cream. It is applied by sharply throwing the solution out of a plaster ladle from the same distance. The second layer is applied after the spray has set. This layer is called soil. It is applied in the same way as spraying with a plaster ladle. But this layer should be thicker, dough-like. Its thickness should not exceed 20 mm, since if the layer is thicker, it will not adhere well. After applying the solution, excess must be removed. Excess solution is removed using the following rules. Movements are made from bottom to top in a zigzag manner. Alignment alone is usually not enough. The excess solution that collects on the rule is dumped back into the box and leveling continues. Complete leveling is done with a trowel until the surface becomes almost smooth. Not perfectly smooth, because the covering layer will still have to adhere to it. If the primer layer should not be thick, 5-6 mm, then it is not thrown on with a ladle, but applied with a trowel. Keep in mind that if the surface of the base is smooth and hard, then you should not apply it with a trowel, because the applied layer adheres to the base worse than the one thrown on. The last layer is the covering layer. Its thickness is no more than 2 mm and it is applied to a rough primer layer after the latter has set. Then it is carefully rubbed and smoothed. The master applies the solution with a trowel to a wooden trowel and then applies it to the surface of the primer layer. The solution is applied in a zigzag motion, trying to apply it evenly over the entire surface, rub it in as far as possible with a trowel, and then smooth it with a steel or plastic grater. The covering layer should be rubbed while it is still wet. To do this, the grater is pressed tightly against the surface and the grout is done in a circular motion. The excess is cut off and falls into the recesses in which there was not enough solution. The topcoat is the final step, so the grout must be done carefully. You can finish it with a wet brush. There is also a so-called decorative covering layer. Its thickness is no more than 7 mm. Its application is carried out with a wide spatula or, alternatively, with a Swiss grater (Fig. 12).
Which plaster mixture to choose
Before buying a mixture or ingredients for preparing it yourself in a store, you need to clearly determine in which part of the house the work will be carried out and how much solution will be needed.
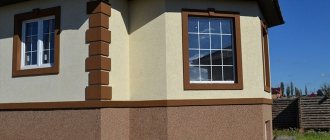
For facade
To level the outside walls of a country house, only cement and cement-lime mortars are used. They are cheaper than gypsum ones, and in addition, they are easy to prepare yourself, thereby further reducing costs. The financial factor in this matter is not the only one; the main thing is the technical characteristics of the finished product.
Expert opinion
Sergei Shablovsky
Plasterer
Cement-based plasters have the following advantages over gypsum plasters: strength and moisture resistance.
For interior work
Inside the house, the choice of the optimal material depends on the type of room. Gypsum is sensitive to moisture, so the bathroom, toilet and kitchen are finished with cement-sand plasters.
For bedrooms, offices, and hallways, any mixture is suitable based on its physical properties, but gypsum is more convenient to work with; they contribute to the formation of a more favorable microclimate due to increased vapor permeability. Gypsum solutions also have good thermal insulation properties.
Preparing surfaces for plastering
In order for the plaster to be durable and last a long time, first of all you need to ideally prepare the base surface. All work is aimed at increasing adhesion. This can be done in different ways:
- You can use a mechanical method (chopping the surface).
- Can be physico-chemical (primed)
- You can create a load-bearing frame (filling shingles)
But first you should evaluate the quality of the existing foundation.
New stone, brick and concrete surfaces
If the masonry is rough and you can see that there is dust on it, it needs to be cleaned. To do this, you can sweep with a hard broom and rinse with water. The seams, if they are filled with mortar, must be cleared of at least 1 cm of it. When the surface is dry from water, you can apply a penetrating primer to it. If you have to deal with concrete elements, then simply clean them of dust and rinse them with water. After this, you should either apply a primer or scratch the surface. If the concrete was made in planed wooden or metal formwork, then it must be notched. Particularly dirty areas will have to be cleaned with steel brushes; if possible, you can simply cut them down and apply a special primer for concrete “Concrete Contact”. This primer has a very high adhesive ability, so the plaster can be applied directly to it. Surfaces that have not been plastered for more than a year and are heavily soiled must also undergo mechanical treatment. After chopping, they should also be primed. Particular attention should be paid to areas contaminated with clay or painted with oil paint. If the surface has already been plastered, then it should be carefully inspected. If you hear a “rumbling” sound when tapping, it means that the plaster has peeled off in that area. Be sure to delete it. On the contrary, simple scratches on the surface should be left. They will increase the adhesive ability of the surface. If you notice that an area has developed microorganisms, treat that area with extreme care. If the damage is minor, simply clean the area with a wire brush and rinse with water. If they are too strong, remove this section of plaster completely. In any case, you must treat the affected area with a special fungicide preparation.
Preparation of wooden surfaces
If you have to plaster a wooden surface, then first prepare the shingles for it. Shred is a base made of wooden slats 3-5 mm thick. The shingles are divided into prostyle (bottom) and output (upper). Thicker and even shingles are suitable for output, while thin, crooked or narrow ones are also suitable for the bottom. The width of the shingle should be 15-20 mm. No more and no less. Because if the shingle is thinner than 15, it will split when driving nails, but if it is wider than 20mm, then it can get wet, deform and ruin the plaster. The thickness of the exit shingle should not be less than 3 mm, so that when the output shingle is applied to it, voids will form between them. These voids will subsequently be filled with a solution that will adhere well to the exit grout. You should not use particularly thick shingles, because the thicker the shingles, the thicker the layer of plaster should be. At an angle of 45 degrees. First, the floor rows are nailed to the floor, and the exit shingles are nailed onto them. The tilt angle remains the same. The shingles additionally fasten individual boards of wooden surfaces, thereby increasing the rigidity of the wall. The distance between the rows of shingles is recommended to be 45 x 45 mm on walls, 40 x 40 mm on ceilings. On top of the shingles on the protruding corners of the wooden structure, reinforce strips of steel mesh, the width of which should be 15-20cm, to strengthen the corners. If the surfaces to be plastered were made of different materials, then the places where they meet should be covered with metal mesh. The mesh should extend 4-5 cm on both sides.
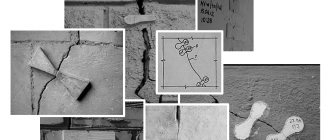
Surface marking
Naturally, the plastered surface must be flat. To achieve this, so-called beacons are used. These are guides made of gypsum mortar that are applied to the surface. Beacons are made as follows. Nails are hammered into the corners of the wall from below and above, which recede 3 cm from the surface of the wall. Then, cords are pulled between these nails horizontally, vertically and diagonally. The cord should extend 18 mm from the surface, but in no place should it approach the wall closer than 8 mm. Plaster marks with a height of 15 mm and higher are made under the cord. When hanging a wall, the first nail is driven in at a distance of 30-40 cm from the corner and ceiling. Above the surface of the wall, the nail should protrude to a height equal to the thickness of the future plaster. A plumb line is applied to the nail head and suspended. At the bottom of the wall, at a height of 250 mm from the floor, a second nail is driven in so that its head touches the cord. Depending on how high the room is, intermediate nails are driven along the cord. Do the same on the opposite side of the wall.
Next, you should pull the cord diagonally. If you see that the cord touches the wall in any place or the thickness of the plaster is too small, then the top nail should be driven in taking into account the minimum thickness of the plaster. If there are small irregularities somewhere, you can simply cut them down. Then the hanging is repeated and new nails are driven in. Following the same procedure, we determine the level and hammer in intermediate nails horizontally. Thus, the nails, protruding, show us the thickness of the plaster in one place or another. Plaster marks are placed around the nails. We coat the nails with gypsum mortar and level the top mark to the level of the nail head, after which we give it the shape of tetrahedral pyramid marks. Ceilings are hung in the same way, only instead of a plumb line you can use a building level. If it is impossible to hammer nails into the ceiling, you can make plaster stamps instead. The sequence is the same as when driving nails.
Beacons made of gypsum mortar are installed according to the brands. To do this, apply a rule or other even strip vertically to the marks and secure it with gypsum mortar. The space between the wall and the rule is filled with mortar. After the mortar has set, a strip equal to the width of the rule remains on the wall surface. In some cases, with small areas of the wall, two vertically installed wooden or metal slats are used as beacons. In this case, the length of the slats is selected so that they do not reach the ceiling and floor at a distance of 50 mm, and their thickness corresponds to the thickness of the plaster layer. In places where the batten is not adjacent to the wall, the space between the batten and the wall is filled with mortar to prevent the batten from bending. As you probably noticed, installing beacons by brand is an incredibly difficult and troublesome task, so in our time it has been practically abandoned. Instead, another idea has become widespread - installing beacon profiles. (Fig. 15) This work, on the contrary, is very fast, simple and convenient. On the surface that you are going to plaster, a solution is applied pointwise every 30 cm, into which the beacon profiles are pressed. After this, according to the level rule (Fig. 16), they are aligned in one plane: vertical and horizontal. Please note that there must be at least three beacon slats across the width of the rule.
Plastering edges and corners is also a very difficult issue, since it is on them that all the errors in the work are especially noticeable. This can be done in two ways.
- You can simply place a flat board against the edge of the wall so that it extends above the wall onto a layer of plaster. Then we plaster the wall so that the finishing layer of plaster is in the same plane as the protruding edge of the board. After the plaster has hardened, the board must be carefully removed. It is better to reinforce the corners with mesh or steel strip.
- You can do it even simpler by applying the solution to the inside of the corner profiles in increments of 20 cm. The profile is installed on the corners. We start from the center and move to the edges, making sure that the profile is in the same plane as the beacon profiles.
There are several types of corner profiles:
- Protective corner profile for plaster. In it, the edges of the corner are made with special perforations, which form a mesh. This allows you to apply thicker layers of plaster. (Fig. 17)
- There is also a special corner profile for putty. It is also called a paint corner (Fig. 18). There is a regular perforation. The arched corner also belongs to this type (Fig. 19). Its difference is that it can bend, repeating spherical edges (both convex and concave).
- Another type of corner profile is a profile for the facade. It is distinguished by the presence of a fiberglass mesh and is usually used for outdoor work.
Preparation of plaster solution
Naturally, in order to plaster something, we need a solution. Let's consider its preparation. First, fill the tank with water. It should be kept in mind that for 30 kg of dry mixture we need approximately 18 liters of clean water. We pour 5-7 trowels of plaster into a tank of water and stir thoroughly. Next, pour out all the plaster and mix using a construction mixer. The result should be a completely homogeneous mass that does not contain any lumps. You can try to mix it by hand, but you are unlikely to get a really good solution.
Here's what you need to know about the mixer.
- There are plastering and painting mixers. For plaster mortars, the mixer blades are made of rods (Fig. 20), and for painting mortars, the blades are made of planes (Fig. 21). These mixers should not be confused and try to replace one with the other.
- The power of the drill for mixing should be at least 650-700 V.
- Do not remove the mixer from the solution until it has completely stopped. You can add water or mixture while mixing, doing this in several additions, maintaining intervals of five minutes. But you cannot add water or dry mixture to the solution that you are already applying to the surface. Also, do not add foreign components to the solution.
Surface finishing with decorative and special plaster compositions
A decorative covering layer 5–50 mm thick is applied in two or more stages onto scratched, hardened, well-cleaned and water-moistened soil from a regular solution in the usual way without or with subsequent processing. During subsequent processing, the plaster is trimmed, scraped, finished with relief rollers or combined methods, etc. When trimming with brushes and brushes, a texture of varying degrees of roughness is obtained. To give the surface a hatched appearance, cycles are used. A repeating pattern is pressed onto the surface using relief rollers.
When installing stone plaster, a solution of the following composition is used: Portland cement; lime dough; marble flour; alkali-resistant pigments; crushed rocks (marble, granite, limestone, dolomite, etc.) with a particle size of 0.3–5.0 mm; quartz sand. The thickness of the decorative layer depends on the size of the aggregate and the method of its processing.
The decorative layer is applied in two steps on a prepared base moistened with water. The second layer is applied after 1–2 hours, carefully leveling and compacting it with trowels. For 8–10 days, the surface is watered and protected from sunlight. Then the stone plaster is processed to the desired texture.
The “under a fur coat” texture is forged with bush hammer. Coarseness factors depend on the coarseness of the aggregate and the size of the bush hammer teeth.
The texture of a “ragged” stone is obtained using chisels. They are hammered into the plaster in various places and, applying side blows, break into individual sections of the plaster (its thickness should be 40–50 mm).
The texture of hewn sandstone is obtained by chipping away semi-hardened plaster with a chisel or scrapers.
Terrasite plaster is made from a solution containing fluff lime; 20–30% cement; quartz sand; marble chips; pigment; mica.
It is applied on a lime-cement base either mechanically or manually. After 2–4 hours, the surface is finished with scrapers (steel plates with teeth) or nail brushes, exposing the grains of marble chips and mica.
For colored lime-sand plaster, a solution of the following composition is used: lime paste, white cement, quartz sand, alkali-resistant pigments.
The decorative layer is applied on the prepared base, kept at a positive temperature for 6–7 days. The thickness of the decorative layer is 5–7 mm. The covering layer can be applied mechanically through a mesh or manually with a broom (brush), obtaining a “fur coat” finish.
In a semi-plastic state (1–2 hours after applying and leveling the solution), an even covering layer can be finished with scrapers or nail brushes.
Waterproofing plaster is made from a conventional cement-sand mortar with a composition of 1: 2 – 1: 3, which is applied to the insulated surface with a cement gun (shotcrete plaster) and from a cement-sand mortar with sealing additives (liquid glass, ceresite, sodium aluminate, bitumen and latex emulsions, etc.).
Sound-absorbing plaster is made in the usual way over a spray layer of cement-sand mortar.
X-ray protective plaster is made on barite filler; its thickness should not exceed 50 mm. If the thickness is greater, monolithic plaster is replaced with cladding made of barite concrete slabs.
Acid-resistant plaster is intended for finishing premises of chemical enterprises. Its resistance to aggressive agents is ensured by the use of acid-resistant cement as a binder, and crushed quartzite as fillers.
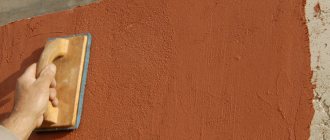
Applying plaster
Once you have mixed the solution, start using it. You should use it within 20-25 minutes. If you are plastering the ceiling, then you should apply the solution “on yourself” with a plaster falcon. You can apply the mortar onto the wall using a trowel or spread it with a trowel from bottom to top. Then do not forget to level the solution using a trapezoidal rule or just a flat lath. Movements should be zigzag. If the layer must be thick, then apply the first layer while it is still soft, using a notched metal spatula or trowel (Fig. 12). You can apply the second layer no earlier than a day later. If the size of the area to be plastered is small, then you can apply the solution with a trowel, then leveling it with a trowel. Bases made of CBPB and expanded polystyrene must be plastered with reinforcement over the entire surface with a fiberglass mesh with a cell of 5 x 5 mm, which is embedded inside the plaster layer to a third of the thickness (Fig. 28). The overlap of the mesh layers should be at least 10 cm (Fig. 29).
Leveling the surface
45-60 minutes after mixing the solution, it will begin to set. At this time you should level the surface. This can be done with a wide metal spatula or simply a metal strip, cutting off the excess and filling the recesses. On corners and slopes you must carry out work using corner trowels (Fig. 30)
Grouting the surface
If you are preparing the surface for wallpapering or painting, then soak the plaster for about 15 minutes, and then moisten it generously with water and rub it in a circular motion. You can use a stiff felt or stiff sponge float for grouting. This is done to remove marks after leveling the surface with a lath or rule.
Smoothing the surface
Smoothing the surface is the final touch before wallpapering. It is worth smoothing the surface some time after grouting, when the surface has already become matte. This can be done using wide movements using a wide spatula or a stainless metal grater. After the surface has dried, you can safely glue wallpaper on it. They will hold up well. If you need a glossy surface for painting, then 2.5-3 hours after mixing the solution, the plaster should be moistened with water again and thoroughly smoothed with a metal float.
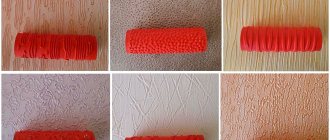
Surface structuring
Depending on your wishes, you can structure the surface. It can be made with a pattern or texture. To do this, you must roll the not yet hardened surface with a relief roller or give it the desired structure using a forming tool (Fig. 31) or a trowel or a stiff brush.
If you are working on a facade surface, you can give it the desired structure using a pneumatic plastering gun. (Fig. 32)
Decorative (structural) plaster
If you want the plastered surface to be decorated in an original way, you can use not only special graters, rollers and other devices, but also structural plaster itself. The composition of structural plaster for walls includes various structural additives - “grains”. They come in different sizes, which is why they are called coarse-grained or fine-grained. The surface treated with such plasters also looks different. If the plaster was fine-grained, then the surface was almost smooth. Coarse grain creates a more voluminous pattern. It may look like transverse or longitudinal round grooves. This pattern can be different, because plaster can also be applied in different ways: with a roller, a spatula, and even a sprayer. Structural plaster on sale is always white, but you can easily fix this. Firstly, you can simply buy the pigment of the color you need and add it at home. You just have to be very careful not to add too much of it. And secondly, you can do professional tinting in stores that sell plaster and pigment.
Structural plasters have many advantages:
- They can be used to plaster any surface, be it brick, wood, drywall, etc.
- They are good for hiding surface imperfections if, for example, there are any cracks or swellings on the surface.
- Structural plasters are waterproof. This means they can be washed.
- They can withstand a very wide temperature range - from -50 to + 50C.
- Since they are porous, the walls can “breathe”.
- They are resistant to mechanical stress.
- Their price is a big plus. Of all the decorative ones, they are the most accessible.
- They are durable.
- They are highly plastic and allow you to create various reliefs.
Application of decorative plasters
Preparing the wall. As with any plaster, the surface must be dry and clean, but it does not have to be perfectly smooth, because the plaster itself will level the surface due to its relief. Of course, there should not be large depressions or protrusions. Priming can be done with absolutely any priming solutions. Applying plaster. The plaster should be applied only after the primer has dried. It can be applied in different ways and with tools, it all depends on what kind of surface you need. To see scratched grooves on the wall, you must take fine-grained plaster with the addition of natural stone granules or simply coarse grains. It is better to apply with a textured roller. If you want the wall to look like natural stone, then apply coarse plaster using a circular motion with a spatula.
What types of plaster are there?
In order not to get confused in a store filled with buckets, plastic cans, craft bags, it is enough to get acquainted in advance with the types of plaster finishing compositions, their advantages, and their disadvantages.
Dry
The words “dry plaster” are used by amateurs to describe two different types of finishing materials – dry plaster mixtures and sheet material – plasterboard. Finishers use this word only to refer to the finished sheet covering. This is a ready-made gypsum coating (~90%) with additives, covered on both sides with sheets of cardboard or thick paper for strength. Role: leveling walls for finishing, for example wallpaper. The sheets are glued to the surface of the walls.
Pros:
- the cost of effort is reduced, the speed of finishing increases (2-3 times);
- ease of wall alignment;
- the coating acts as a soundproofing screen;
- gypsum is not flammable and prevents the spread of flame;
- environmental friendliness;
- drywall is cheaper than SGShS;
Minuses:
- the strength is low (you cannot hang heavy objects on the wall);
- the ability to get wet when exposed to strong moisture (if the apartment is flooded, sheets of drywall will have to be replaced;
- in case of uneven walls, installation of a frame is necessary.
Monolithic
“Wet” or monolithic plaster is a plaster composition, a coating made from construction or decorative mortars.
Varieties:
- regular (applied in an even layer);
- decorative (finish coating);
- special (coating with additional properties).
Regular is divided by quality into:
- high-quality (smooth finish, used where quality requirements are high);
- simple (which is used for facades, basements, and other auxiliary rooms);
- improved.
Decorative differs in color and texture. This is a finishing finish that does not require painting or cladding. Types of decorative plaster:
- textured;
- colored;
- sgraffito;
- stone.
Special ones include:
- X-ray protective;
- acid-resistant;
- thermal insulation;
- acoustic;
- waterproof.
Decorative
Partially replaces conventional plaster and finishing at once. Plaster compositions on various bases are used (mineral, acrylic, silicone, etc.). The effect is created due to color (tinting), relief, multi-layer translucent coating (Venetian, Moroccan), structure, techniques for applying patterns or molding. There are smooth (requiring a flat base) or textured (hiding uneven walls).
The components of the used plaster solutions determine such qualities of decorative coatings as: strength; vapor permeability; durability; fire resistance; intractability to rot; environmental friendliness and others. Likewise - with shortcomings. Of the advantages of decorative plasters, the first place is beauty and uniqueness, the second is the fun of making patterns with your own hands.
The disadvantages of many types of plaster for interior decoration include the difficulty or impossibility of repairs without leaving marks. The downside is the high price of ready-made mixtures.
Decorative compositions prepared with your own hands are cheaper than store-bought ones. And to apply patterns they use improvised objects: films, paper, nets, brushes, spoons, etc.
Stone
Liquid stone or stone plaster is a material in which acrylic or polyurethane translucent glue serves as a binder. Crushed, washed, fractionated stone materials are the filler for such mixtures. Sometimes stone chips are painted for decoration. Stone crumble can be one type of stone - granite, shungite, marble, quartz, tourmaline, malachite, etc., or a mixture of rocks.
The ready-made mixture is not so often found on the shelves; craftsmen make it themselves. In addition to the type of rock, such plaster compositions differ in the size of the filler grains. For finishing the walls of premises, fractions from 0.5 to 2 mm are recommended, compositions based on acrylic glue, which do not emit harmful substances when applied and hardened.
Advantages of stone finishing:
- service for many years;
- high strength;
- UV resistance;
- elasticity of the finished finish;
- resistance to atmospheric and mechanical influences;
Terrasite
This variety is most often used for facade work. Components include:
- fluff lime;
- Portland cement (~ a third of lime);
- stone materials (sand, flour, mica, crumbs);
- additives.
Fine (up to 2 mm) fraction fillers are used for interior work. The solution is tinted with pigments. The addition of mica gives a rainbow glow effect on a sunny day.
Ready-made terrasite dry mixtures are diluted with water. They are distinguished by number or letter designations (depending on the size of the filler):
- No. 1 (M) – grain 1-2mm (fine grain);
- No. 2 (C) – size 2-4mm (medium grain);
- No. 3 (K) – 4-6 mm (coarse-grained).
Pros:
- Versatility (for indoor and outdoor work);
- using special techniques, different textures are obtained, for example, torn stone with a natural shine;
- durability depends on the brand of cement (50-100 years);
- simple technology;
- high maintainability;
- washed under pressure from a hose using household chemicals;
- environmental friendliness.
Minuses:
- Application and processing are a little more complicated than lime-cement compositions.
- To remove the worn-out film that appears during grouting, you need to scrape, during which up to a quarter of the plaster composition used for application crumbles off.
Sgraffito
Colored plaster made using a technique known since ancient times. The essence of the technique is expressed by the word “carved”. A multi-layer coating is made from layers of colored plaster of different colors. Then, to obtain the desired color in the pattern, the layers of coating lying above the layer of the desired color are cut out.
In ancient times, they mixed a white solution, divided it into parts and colored each one.
Finishing is simple in execution, accessible to beginners, and does not require complex tools. You can prepare the solution yourself from:
- lime paste and quartz sand 1:3 (parts by volume);
- cement additives (10-15% of the dough volume);
- pigments.
Carving tools are divided into three groups:
- for cutting mortar;
- to select it;
- for cleaning.
There is another sgraffito technique - applying a colored solution using stencil templates.
Venetian
Luxurious decoration of the room - Venetian plaster. The smooth multi-layer coating attracts the eye and makes you want to touch the wall with your hands. It is performed on a smoothly leveled wall using solutions containing stone flour. In addition to the classical technique, there are other application methods. There is only one layer in the Venetian - the base layer can, with a stretch, be called rough. The rest, in their own way, are finishing. Using special application methods, the effects of craquelure, polished marble, silk fabric, and cork are achieved. The surface is covered with wax or varnish.
The composition of the plaster mortar can be prepared independently, even from putty. In this case, manufacturing the finishing will cost much less, since ready-made decorative compositions are expensive. These are mainly mineral compositions with lime, or acrylic.
Venetians use only stainless steel tools.
The main advantage of this finish is aesthetic. This is always a unique decor. The main disadvantages are high cost, difficulty of application, and high labor costs.
"Venetian plaster
One of the types of decorative plaster is Venetian plaster; it is fundamentally different from all that we have described here before. To get the desired effect, it is not enough to simply apply the solution to the surface; you must do it correctly. The composition of this plaster includes marble flour, slaked lime and water emulsion. When you look at the coating treated with “Venetian” plaster, it seems that it is made of transparent marble. Columns and cornices are decorated with “Venetian” plaster. But to create such a miracle, you really need to be a master of your craft. You can find “Venetian” plaster on sale in ready-made liquid form. It is sold in cans or buckets. It must be applied to a perfectly flat, clean surface. Do not forget that this material is transparent, so all surface errors will be clearly visible. This plaster can also be tinted with any color, but professionals advise mixing several shades of the same color. This will make the surface even better and look more like marble.
To achieve the required transparency and depth of coating, you need to apply from 4 to 10 layers of plaster. It is applied using a special technique, using small strokes with a triangular spatula or special trowels. (Fig. 33) After the wall is dry, it must be covered with natural beeswax. This is done in order to protect the coating. The wax is absolutely transparent and does not affect the color. True, there is also such “Venetian” plaster on sale that does not need to be covered with anything. Everything is already included in its composition.
Venetian plaster has its advantages:
- There is a large palette of colors;
- It has the effect of a marble surface
- With its help you can create “marble” mosaic effect
- It is waterproof. It can be washed and cleaned without fear that it will dissolve.
Application stages
Surface preparation. The surface must be ideal in all respects. There should be no unevenness, no dirt or dust on it. It must be dry. Once this condition is met, you apply several layers of a special primer. You can apply one coat of vinyl (acrylic) paint instead of a primer.
Application of "Venetian" plaster. You can start working as soon as you see that the primer layer has dried. This work is very sensitive. The coating is applied very carefully using a spatula. Large strokes can be applied with trowels. To avoid unevenness, each layer is allowed to dry and then sanded. You can apply the first layers wide, but the last ones are best applied with a narrow spatula. About 20 minutes after you have applied the final coat, you can begin sanding the surface. This is best done using fine sandpaper in a circular motion. You should not use varnishes when working with “Venetian” plaster, as they can make the surface cloudy and the plaster will lose its main advantage - beautiful transparency.
Colored plaster “stone chips”
Stone chips are real small pebbles that are mixed with adhesive and binding materials. Stone chips can be multi-colored, but in any case, each color consists of several shades. Stone chips are applied to the surface with a spatula and leveled evenly over it. If you are going to finish the facade, then it is better for you to take large stone chips, especially for finishing the base. If you have to do interior work, it is better to take small crumbs. There are quartz, marble and granite chips. Stone chips withstand any weather conditions well.
Although this coating is considered heavy, since it includes inclusions of natural stones, it still has a number of advantages:
- It withstands any mechanical stress especially well.
- Hydro-, heat- and frost-resistant.
- Very durable.
- It can be applied to concrete and foam concrete.
- Perfectly hides any surface irregularities.
- Due to its porosity, it allows the surface it is applied to to “breathe.”
Application stages
Surface preparation. As always, the wall should be clean and dry.
Priming. When priming, you can use any paint.
Application of colored stone chips. To make the mass less thick and easier to apply, you can add a little water to it. Then mix the mass very well. It is better to apply crumbs by throwing them on the wall and spreading them from top to bottom. Use a spatula to remove excess mass. Keep in mind that the crumbs can rub off, so do not run a spatula over them more than 2 times. The plastered surface must dry for at least 6 hours.
Applying varnish. After two weeks you can varnish the surface. This will keep the crumbs brighter over time.
Plaster for the stove. Compositions of solutions
Despite the fact that most houses now have centralized heating, there is still a demand for laying stoves. Firstly, they are still often found in villages, and secondly, houses are often decorated with fireplaces. Since the surface of the stoves is special, plastering the stoves involves a special technology. This plaster must withstand fairly high temperatures. Below we present compositions that can be used when plastering the stove.
- One part gypsum, two parts lime paste, one part sand, 0.2 parts asbestos No. 6-7.
- One part clay, one part lime paste, two parts sand, 0.1 part asbestos No. 6-7.
- One part clay, two parts sand, 0.1 parts asbestos No. 6-7.
- One part clay, one part cement, two parts sand, 0.1 part asbestos No. 6-7.
All dry ingredients must be mixed together and then water must be added. The mixture should be quite thick. Asbestos is added to give the plaster strength.
See also on this topic: Article “Decorative plaster: creating masterpieces.”
"World of Paints" is a retail chain that unites more than 60 retail outlets selling paints and varnishes and related products, as well as an online store with the possibility of delivery throughout Moscow and the Moscow region. You can always buy decorative plaster from us.
Required tools and materials
The main advantage of plaster is its accessibility, since the components of the mixtures are always available in abundance in any hardware store, and the application technology is simple and understandable.
Main types of materials and tools for plastering work:
|
This list can be supplemented: to perform all types of plastering and painting work you will need a lot of patience, because the process is quite labor-intensive.