Features of aerated concrete as a wall material
The construction market is saturated with different types of blocks, which are popular due to their unique characteristics. Gas silicate or aerated concrete blocks, filled with expanded clay or polyurethane foam - these are all materials of the same type, but with different strength and heat-saving abilities.
Aerated concrete is often used to build walls
All elements have standard sizes, they are more economical when constructing walls than brick and are not subject to rotting like wood.
The main differences between these materials are the composition and the presence of additional fillers. Aerated concrete blocks are made from Portland cement and sand, and
azosilicate - based on lime and silica mixture, which gives the same characteristics to finished products as cement.
Building materials of this type are characterized by low thermal conductivity and resistance to humid environments, but the porous structure requires mandatory surface treatment.
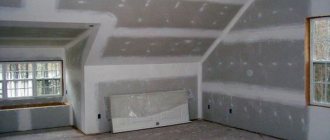
Plastering aerated concrete is a mandatory process that eliminates the accumulation of moisture in the porous structure of the blocks and gives walls with a not very smooth surface an aesthetic appearance. Finishing includes a whole range of works that increase the service life of buildings.
Plastering walls made of gas silicate blocks or aerated concrete is no different. Building materials have an identical surface structure and are subject to the same processing.
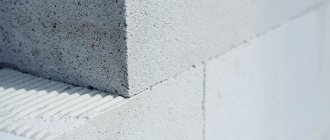
Gas silicate blocks
Aerated concrete blocks
Features of aerated concrete
Aerated concrete is a building material from the family of porous or cellular concrete. There are many varieties within the family:
- aerated concrete;
- foam concrete;
- gas silicate;
- fiber foam concrete, etc.
The basis for the manufacture of these materials can be cement, lime, and, somewhat less commonly, gypsum or ash. The physical and technical properties of all varieties are approximately the same, but in terms of the combination of cost and performance qualities, aerated concrete is the leader. In second place is foam concrete, which is cheaper to produce, but lags behind in strength and ability to bear loads. It is necessary to take into account that aerated concrete has a lot of varieties, differing both in the method of production (natural hardening and autoclave material) and in the degree of strength (depending on the number and size of gas bubbles in the mass).
The main feature of aerated concrete (like all cellular concrete) is the combination of working qualities:
- light weight;
- high heat saving ability;
- a smooth and geometrically accurate surface, ensuring high quality masonry even when work is performed by unqualified builders.
Low weight allows you to save on the construction of foundations, which ultimately reduces the total cost of construction by 30-40%. The ability to retain thermal energy (or low thermal conductivity of masonry) allows you to save on heating, which is an important and attractive quality for most regions of our country. However, these advantages come at the price of low strength (aerated concrete is not able to withstand high pressure and multidirectional loads), as well as increased hygroscopicity.
As a rule, each block has special grooves and projections. During laying, they fit into each other, ensuring the exact position of each block in the masonry. The result is a high-quality and even wall plane, which allows you to reduce the thickness of the finishing layer. When choosing the best way to plaster aerated concrete, you can consider finely dispersed compositions with a smooth surface. If you plaster the walls with a sufficiently high quality, you can obtain a surface suitable for applying a topcoat without preliminary preparation (sanding and putty).
Buildings made of aerated concrete cannot be left unfinished, since autumn rains will wet the walls, and night frosts will create conditions for their destruction due to frosty expansion of ice. Many builders perceive this feature of the material as a critical drawback that does not allow the material to be used for residential or critical buildings. However, if the masonry is protected in a timely manner, the useful qualities of aerated blocks will be preserved, and the danger of destruction will be eliminated. According to new GOSTs, aerated concrete and gas silicate materials are combined into one group. Their working qualities are very similar, therefore, when deciding how to plaster aerated silicate blocks, you can consider the relevant information on aerated concrete.
Why do you need aerated concrete plaster?
This type of finishing is universal; it is used both indoors and on building facades. Plaster does not change the basic properties of the blocks and creates protection from moisture, mechanical damage and additionally increases the heat and noise insulation characteristics.
Covering the walls with mortars will be the basis for subsequent finishing; high leveling properties create an even base on the surface for wallpapering or painting. Materials in the form of tiles will adhere better to plastered surfaces than to aerated concrete. Finishing improves the appearance of buildings unless other types of cladding are provided to cover the walls.
Fact!
The coating protects the porous structure of the block from rain, which during cold periods can crystallize inside and destroy the building material.
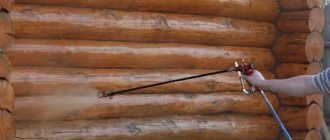
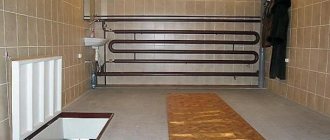
Plastering is an inexpensive and effective way to protect aerated concrete walls
Basic requirements for plaster
Interior plaster for aerated concrete must meet many requirements that must be taken into account when purchasing materials. The characteristics of solutions for walls made of aerated concrete from the outside and inside are almost identical, but to protect external surfaces, additional resistance to cyclic freezing is required during the operation of buildings in winter.
Basic requirements for plaster for gas silicate blocks:
- vapor permeability (the vapor permeability coefficient must be at least 0.11 mg/m∙h∙Pa for aerated concrete with a density of 1000 kg/m3 and 0.14 mg/m∙h∙Pa for aerated concrete with a density of 800 kg/m3);
- good adhesion to aerated concrete (adhesive strength of at least 0.4 MPa);
- compressive strength, preventing the appearance of cracks on the surface during the operation of buildings;
- resistance to moisture and mechanical damage;
- the viability of the solution is at least 60 minutes, otherwise the porous structure of the material will not provide proper adhesion to the base.
Most mixtures have these characteristics, but it is worth considering that finishing materials have different purposes. There are compositions for use in rooms with high and variable humidity, dry living rooms, or intended for performing facade work.
Vapor permeability of plaster
Aerated concrete is a lightweight porous material that is vapor permeable. This property allows the walls to “breathe” and prevents the accumulation of moisture inside the wall, which affects the indoor microclimate.
The vapor permeability indicator depends on the density of aerated concrete, for example:
- for a density of 800 kg/m3. – 0.14 mg/(m h Pa);
- for a density of 900 kg/m3. – 0.12 mg/(m h Pa);
- for a density of 1000 kg/m3. – 0.11 mg/(m h Pa).
Important!
The higher the density of the gas block, the lower its vapor permeability.
Facade plaster for aerated concrete must be weatherproof
In the process of leveling walls, it is important to use special grades of plaster in order to maintain the performance characteristics of aerated concrete. If we neglect this, then the heat-insulating and vapor-permeable properties will sharply decrease. Undesirable consequences from this may be the following:
- formation of cracks on the internal plaster and on the facade;
- increased humidity levels in the room, stains on the walls;
- formation of fungus and mold.
When choosing mixtures in a store, pay attention to the vapor permeability coefficient of plaster for aerated concrete walls. A good indicator would be something close to the building block. This way the walls will “breathe” and not accumulate moisture.
How to increase the vapor permeability of the mixture
Ready-made mixtures that are sold in stores contain all the necessary components that provide the desired characteristics, but if the solution is prepared independently, then you need to buy additional additives.
To increase the vapor permeability of plaster, there are special additives. For example, consider the additive Ceresit CO 84. It is used for cement-sand plasters and allows you to increase the porosity of the plaster up to 25%. Thus, with its help it is possible to modify a conventional cement-sand mixture, thereby giving it the required vapor permeability characteristics.
What you need to know about aerated concrete
To understand the essence of facade plaster on aerated concrete, you need to know the technical parameters of this masonry material. So, we have already drawn your attention to the fact that it has a porous structure, and any pore in size can be from 1 to 3 mm in diameter. This feature of aerated concrete gives it both positive and negative properties.
Important! Vapor permeability is another very important parameter of aerated concrete. It can be used both for the benefit of the structure and for the detriment. So, this quality can serve as the basis for creating a favorable microclimate in the house. If, however, the external finishing is done incorrectly and the vapor permeability of the walls increases in the direction from outside to inside, then this will inevitably lead to the opposite result.
You also cannot ignore one more aspect - aerated concrete is characterized by low bending strength. Taking this into account, if it is chosen as a material for the construction of walls, then the following measures are mandatory:
- installation of a monolithic foundation;
- reinforcement of the masonry itself, the floors, as well as the rafter structure.
| pros | Minuses |
| High strength index | Afraid of moisture |
| Low bulk density | Shrinkage |
| Low thermal conductivity | Formation of cracks |
| Ease of processing | Unpresentable appearance |
These technical subtleties are directly related to the topic of facade plaster on aerated concrete, since only by taking them into account can you count on obtaining a durable, beautiful exterior wall finish.
Types of mixtures for plastering aerated concrete walls
There are a large number of aerated concrete mixtures on the market for interior and exterior use. Gypsum and cement plasters are mainly used. These varieties have their own areas of application and their own performance characteristics.
If the house is new, then there is no need to rush to plaster the premises. For the first time in six months, the building is shrinking. If you neglect this feature, the protective layer will quickly crack and become fragile. It is recommended to plaster a house made of aerated concrete blocks at least 6 months after construction.
Several types of plaster mixtures are suitable for processing aerated concrete slabs
Cement-sand
Cement plaster is used to level aerated concrete walls in wet areas such as bathrooms and kitchens. The surface of the wall on the side of the wet room should not allow moisture to pass through and cause the aerated concrete to become wet. Gypsum plaster is not suitable for covering aerated concrete in a bathroom, as it is not moisture resistant. Cement plaster, on the contrary, copes with this task perfectly.
This type of mortar is also used for plastering facades made of aerated concrete; it has sufficient strength and resistance to precipitation.
Many novice finishers wonder whether it is possible to plaster an aerated block with cement plaster in dry rooms. The answer is no. Conventional cement mixtures cannot be used in dry rooms, as they have low vapor permeability. Thus, the plaster prevents air exchange in the pores of the aerated block and creates conditions for the accumulation of moisture.
Gypsum solutions are widely used for interior finishing of aerated concrete.
Lime-cement
Lime-cement is one of the most popular mixtures for wall finishing. The solution is quite plastic and creates a durable layer when applied to the surface. To give additional characteristics, plasticizers are introduced into the composition, which provide moisture resistance and are able to withstand strong temperature changes.
You can plaster the surface with lime-cement mixtures yourself. The permissible application layer is 5-20 mm; with a minimum value, reinforcement may not be used if the work is carried out indoors.
Plaster
Gypsum plaster is ideal for leveling aerated concrete walls in dry rooms. All brands of gypsum plaster have good vapor permeability and heat-insulating properties, are plastic, easy to apply to aerated concrete wall surfaces, and have good adhesion. Other advantages include low weight, no shrinkage and short drying time.
Which side of the wall to start plastering on?
In most cases, it is recommended to plaster the interior first. As a rule, aerated concrete already contains water vapor. The base becomes even more moistened when the plaster is applied, and the wall partially absorbs water from the mortar. Accordingly, it is necessary for this water to evaporate as soon as possible. And the easiest way for it to evaporate is through the outer blown surface of the wall. Therefore, work begins with the inner wall, so that moisture moves towards the outer wall.
If you neglect this rule and plaster the facade first, the accumulated moisture will not be able to quickly evaporate and will begin to move towards the inner surface of the wall. Then, when the interior plaster is completed, the surface will be further moistened thanks to the solution. In cold weather, condensation will form under the interior plaster, causing peeling and cracking.
On a note!
The exception is houses located in close proximity to rivers, lakes, and seas. In this case, it is necessary first of all to protect the outer surface from moisture and wind.
The façade of aerated concrete houses should be plastered last.
Which side should you start finishing a house made of aerated concrete from?
Let's conduct a comparative analysis of several popular options for the order of wall finishing.
Option 1 First, the exterior of the house is finished using aerated concrete.
There is an opinion that the most important thing is to protect the gas block from the street, because... it picks up moisture. However, this is not so, even after standing without protection (but primed) for the whole winter, the aerated block will “give up” the accumulated moisture in the spring. And if it is closed from the outside, where will the vapors be directed? That's right, indoors. This will not only increase the drying process and delay the interior finishing, but also risk the appearance of cracks inside the room.
Note. An exception to the finishing order is for houses that are built on the seashore, river or lake. Here the priority is to protect external walls from moisture and wind.
Option 2 First, the interior decoration of the house is made from aerated concrete
With this approach, the pores of the aerated concrete block are partially closed during the finishing work. And if they are plastered on the outside first, the accumulated water vapor will simply have nowhere to go. Moisture settling inside the block will contribute to its destruction. Plastering aerated concrete walls indoors will avoid this situation.
After the plaster has touched the internal walls and has dried well, you can begin finishing the external walls.
Option 3 Simultaneous finishing of the inside and outside of the house
The method is the least preferred. The moisture that the gas block will “pull” simultaneously from the outside and from the inside will not have the opportunity to quickly escape.
Despite the fact that plaster for aerated concrete has good vapor permeability, the speed of this process is not so high. Which is especially critical in the cold season (at night temperatures below zero). In this case, water vapor will settle in the form of condensation and may ultimately lead to peeling of the plaster layer from the aerated concrete. In practice, this option will lead to the destruction of the gas block as quickly as possible.
Theoretically, each of the options has the right to be implemented. But the second one is correct.
How to plaster aerated concrete walls with your own hands
The question of whether it is possible to plaster aerated concrete has been sorted out. Now it is important to understand how to do this correctly, without damaging the aerated concrete to allow moisture to pass through.
Plastering aerated concrete blocks is not fundamentally different from performing work of a similar type on other materials. The putty application technology differs only in a few details that will be emphasized.
Necessary tool
Do-it-yourself plastering of walls made of gas silicate elements and aerated blocks requires a basic set of tools to complete the work. You need to prepare all the necessary tools, scaffolding and mixing containers in advance so as not to be distracted from the technological process.
What you will need when performing plastering work:
- a ladle, a falcon, a trowel and a trowel for applying mixtures to the wall;
- mixing container;
- grater, grater, rule for leveling the solution;
- rollers and brushes for applying compositions to walls;
- spatula and cutting edge for finishing.
In addition, you need to have a scaffold or stepladder. Stainless steel beacons and fiberglass construction mesh equal to the area of the walls for surface reinforcement plus 15-20%, and a primer for preparing the base.
Advice!
If you mix the solution yourself, then a drill with a mixer attachment can be useful to get a homogeneous and high-quality mixture ready for application to the wall.
The quality of finishing work depends on the choice of tools for laying plaster.
How to plaster aerated concrete indoors
Professionals know how to plaster aerated concrete, but for beginners, in order to achieve a durable and reliable layer, you need to adhere to a mandatory technological cycle.
Work begins to be carried out only on the prepared surface - this consists of applying compounds that ensure good adhesion of the porous base and solution.
Using a primer for aerated concrete allows you to reduce the moisture absorption of the wall, while maintaining the vapor-permeable properties. The composition fills the pores in the blocks, creates an additional protective layer and creates optimal conditions for applying solutions.
Before applying the primer, it is recommended to remove dust from the surface of the aerated concrete; to do this, you can moisten the brush with water and walk along the wall once. This will not only improve the quality of application of the composition, but will also reduce its consumption.
You can apply the primer to aerated concrete walls manually with a brush or roller, or you can use a spray gun to speed up the process and spray it in an even layer over the entire surface of the wall.
For better absorption, you need to apply two layers of deep penetration compounds with intermediate drying of the base for 24 hours.
Important!
It is not recommended to use a concrete contact primer for aerated concrete. Concrete contact is intended for smooth, weakly absorbent substrates; you need to choose compositions intended for porous surfaces.
Installation of beacons
This is carried out if the thickness of the planned plaster layer is more than 10 mm. Beacons are necessary to obtain a perfectly flat surface. A metal beacon profile is usually used, but plastic products designed for plasterboard sheets may also be suitable. Beacons begin to be installed by stepping back from the corner by 15-20 cm in increments equal to the length of the rule; this will allow for perfect leveling of the surface.
Applying the first layer
The first stage of work is called spraying, which creates irregularities on the surface that will serve as the basis for the plaster. If the walls have obvious unevenness and deepening of the seams, then it is recommended to first level them with cement-sand mortar, wait until dry and then start spraying.
The first layer is applied with a thickness of no more than 5 mm. To do this, prepare a liquid “creamy” solution, after which it is evenly thrown with a sharp movement onto the surface using a ladle or trowel. No leveling is required for this layer.
Plastering aerated concrete walls indoors should begin with surface preparation
Forming corners
To ensure a smooth connecting element of the walls, it is recommended to use a special profile. You can perform the work using a building level and a special cutting tool, but this does not guarantee an even angle. A special profile consists of a metal or plastic corner and a 15-20 cm mesh around the edges, which is attached in the right places with screws or dowels and plastered.
When using special profiles, corners are formed before spraying. If the work is carried out using cuts, then the initial leveling stage should be done at the stage of applying the base.
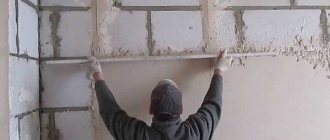
Laying the second layer
Laying the second layer is the main stage of plastering and will be the basis for subsequent leveling of the walls with the mixture. A thicker solution is prepared for it, which is applied using a spatula, evenly between the beacons.
The thickness of one layer of plaster on aerated concrete should not exceed 20 mm. If the technological process requires a thicker application, then it is necessary to reinforce the surfaces before applying the spray.
Grout
Using the construction rules, the mixture is leveled. Pay attention to how to properly float the plaster. You need to start work from the bottom of the wall. The process is performed from the bottom up, with the rule being moved in a zigzag motion from side to side. The removed excess mortar is poured onto the free sections of the wall. Thus, leveling continues until the excess solution is removed as a rule.
After the plaster has dried, the beacons are removed, and the resulting recesses are filled with mortar.
Finishing
When the plaster is completely dry, apply a “covering” with a thickness of 1-3 mm. The mixture is also leveled by the rule. After drying, the surface is rubbed with a construction float or sandpaper in a circular motion.
After all stages of work have been completed, the surface is primed and will be ready for wallpapering, painting or tiling.
After the finishing layer has completely dried, grouting is performed.
Plastering external walls made of aerated concrete
Facade finishing requires more thorough surface preparation. Outdoors, the coating is exposed to aggressive external factors, so a full cycle of work is required. Most novice craftsmen do not know how to plaster a gas block outside a room and may get confused in the stages of the technological process.
Applying a thin layer
Applying a thin layer is done with a mixture of the usual working consistency 5 mm thick. The first layer will become the basis for reinforcing the surface, which will increase the service life of the coating and make it more resistant to mechanical damage.
Mesh reinforcement
Many novice craftsmen doubt whether a mesh is needed when plastering aerated concrete - this is a mandatory step when carrying out work on facades and in damp and unheated rooms.
The mesh is necessary to prevent cracking of the plaster. It is recommended to use alkali-resistant fiberglass mesh.
The canvas is applied to the surface immediately after applying the first layer and is embedded in the plaster without sagging or pulling. To avoid cracking at the junction points, the mesh is fixed in the solution, overlapping each other by 10-15 cm.
Mounted mesh
Align to Grid
Leveling creates a base for applying finishing coatings and is applied in a layer 10 mm thick. To perform work in several stages, it is recommended to place beacons on the surface in order to create a perfectly flat surface in the future. After applying the plaster, the walls are dried for at least 24 hours until completely hardened, then the next application of the solution can be carried out.
Laying the third layer
Laying the third layer is necessary to completely level the surface and eliminate pronounced defects. It is applied after dismantling the beacons, if they were used for plastering the walls. In this case, the solution is applied in a layer of 5-10 mm and leveled with a rule over the undried surface. If necessary, the wall can be moistened with water or the primer that was used to prepare the base.
Mashing
Rubbing is carried out if the surface is being prepared for painting and a perfectly flat base is required. The slightest defects will be visible under the paint and varnish compositions; this stage of work will remove the last irregularities and cover up the cracks that appear after drying.
To do this, you will need a liquid solution, which is applied to the wall in a thin layer of 1-2 mm and rubbed with a float with a soft base in a circular motion over the entire surface.
A mesh with small cells is laid on the prepared surface.
Finish stage
The final stage involves applying a decorative layer. This could be tinting the walls in different colors, applying relief plasters “lamb”, “fur coat” or “bark beetle”. As well as smooth coatings in the form of Venetian mixtures or “stone-like”.
Whether the walls are covered with tiles or wall panels, which option to choose depends on personal preferences and the design of the facade.
Important!
The final stage of work is carried out only after applying primer compositions in two layers. This will strengthen the plaster layer and prepare the surface for decorative finishing.
Hydrophobization
Hydrophobization is carried out after the finishing layer has undergone a freezing cycle. If cracks and chips appear on the surface, they will appear in the spring after the winter period. Defects that appeared in the first year of operation need to be repaired and the finishing layer restored, then protective coatings can begin.
Hydrophobization is advisory in nature and is needed to protect and extend the service life of the decorative coating. Protective compounds penetrate deeply into the layer and create a matte or glossy film on the surface.
Hydrophobization of facade plaster
Facade plaster on aerated concrete: algorithm in a nutshell
When applying plaster to a porous material, the following sequence of operations must be observed:
- High-quality exterior finishing of aerated concrete walls necessarily involves priming the surface with a special composition.
- Using self-tapping screws on the facade, you need to secure a reinforcing mesh made of fiberglass that is resistant to alkali.
Important! The use of a special reinforcing mesh is a very important factor, since the traditional one will collapse in a very short time, which will cause the formation of cracks in the plastered surface.
- A special porous plaster mixture, characterized by high vapor permeability, is applied to the walls. It is important to take into account that the thickness of the outer layer of plaster should be twice as thin as the thickness of the interior finish.
- The fully stabilized plastered surface is given a decorative appearance by painting it with a special vapor-permeable paint of the selected color. As an option for facade finishing, apply a special three-layer external coating.
- After 1.5-2 years, a well-seasoned layer of plaster on aerated concrete should be hydrophobized in order to increase its service life.
Attention! Plaster mixtures used to create surfaces with increased vapor permeability involve the inclusion of light perlite sand and slaked lime in the formulation.
Optimal conditions for applying plaster
It is prohibited to carry out work in direct sunlight, in windy weather and at temperatures of 10 degrees and below. At minus values, additional frost-resistant components are introduced into the mixture, but it is better to plaster the facade of a house made of aerated concrete at a temperature of +5-25 degrees and a humidity of up to 75-80%.
When plastering indoors, the same requirements for external conditions are adhered to, which provides sufficient time for the solution to adhere to the surface. The optimal time for applying solutions to interior walls is spring, when there is good humidity in the air and the temperature is not too high.
When carrying out work that does not comply with normal conditions, the likelihood of cracking and peeling of the coating from the base increases. This will manifest itself in the first winter of operation of the building.
It is better to do facade plaster on aerated concrete walls in the spring, when optimal external conditions are provided
What should the plaster be like?
Another factor that should be emphasized when considering how to plaster the facade of a house made of aerated concrete is the characteristics of the plaster mixture. The modern market provides consumers with unlimited freedom to choose finishing materials, including facade plaster.
However, no matter which brand is preferred, plaster that is “suitable” for application to aerated concrete must have the following qualities:
- High compressive strength.
- Resistance to temperature fluctuations.
- Resistance to external factors.
- Excellent adhesion.
- Frost resistance.
- Vapor permeability.
In principle, these are general requirements that most special mixtures intended for application to surfaces made of both aerated concrete and other cellular materials meet. To understand what you need when choosing, you need to carefully study the packaging of the product. If there is appropriate marking there, then everything is in order.
By the way: high-quality facade plaster will be accompanied by certificates of compliance with the highest European quality standards. A special designation on the packaging will also inform the consumer about this.
Before plastering the facade of a house made of aerated concrete, you need to understand what budget you can allocate for such an event. If you do a comparative analysis of plasters, it will be obvious that the compositions for application specifically to aerated concrete are somewhat higher in cost. We would like to warn you that this is not a reason to save money and purchase cheap analogues of dubious “reputation”. In practice, it has long been proven that both the appearance of the facade and its performance will suffer, including the following:
- violation of air exchange;
- formation of cracks;
- high humidity;
- peeling plaster, etc.
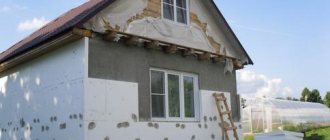
Insulation of aerated concrete walls
One of the insulation options is to use thin blocks identical in material to the wall (5-10 cm thick), but with a lower density (D100-D200). The material is vapor permeable and therefore does not interfere with the natural removal of moisture from the walls. When performing work, the functionality of the walls is not impaired and heat loss is significantly reduced.
Stages of installation of block insulation on the surface:
- Priming the walls in two layers with a deep penetration compound.
- Installation of insulation panels to the surface using a special glue with good vapor permeability.
- Additional fixation of blocks with dowels at four points.
- Reinforcement of the surface with construction mesh.
- Plastering walls using the above technology with vapor-permeable plaster.
- Finishing.
Calculation of the required material
The calculation of the material depends on the choice of the type of finishing mortar and the quality of the masonry. If cement-sand mortar was used when constructing block walls, then the seams between the blocks are 1-2 cm, and this requires additional consumption of plaster.
When constructing structures using special glue, virtually no seams are formed, which has a positive effect on saving finishing material.
The average consumption of mineral and cement mixture is 16-18 kg per 1 sq. m of surface with a layer thickness of 10 mm. Gypsum plaster – 9 kg per 1 sq. m. Silicate, silicone and acrylic compounds are applied in thinner layers, and their consumption on average is 2-4 kg per 1 sq. m. m of surface when applying every 1 mm.
All manufacturers indicate the need for their material on the packaging, but in order not to make mistakes in the calculations, when purchasing, you need to add 15-20% of the total mixture consumption to the result obtained.
To increase the permeability of plaster from the inner wall to the outer one, an important condition must be met: the layer of inner plaster should be approximately 2 times thicker than the outer one. This will allow moisture that has penetrated into the aerated concrete from the inside of the wall to quickly evaporate through the outer surface of the wall.
Plaster consumption is indicated on the packaging
Having built their own house from aerated concrete blocks, many ask themselves the question of whether it is necessary to plaster the walls, the correct answer is absolutely necessary. This stage of work can be completed independently and without incurring additional costs for inviting craftsmen. Knowledge of how to properly plaster, choose a mixture and carefully prepare the base will help you obtain a high-quality coating suitable for further finishing.
Useful article? Share in the comments!
The most common mistake when designing a facade
Practical experience shows that often construction work when building a house, including those made from aerated concrete blocks, ends closer to winter. Next, according to the logic of things, the design of the facade should be carried out, and already in the winter period comes the turn of interior transformations. This working scheme will be correct in many cases, but is not applicable to buildings made of cellular aerated concrete blocks.
Attention! Plastering of the facade should be carried out only after all “wet” internal finishing work has been completed without exception - plastering of structures, pouring screeds, puttying.
In short, the facade can be “made” only after excess moisture has been completely removed from the premises. In order to understand the importance of this point, you need to know the “physics” of the processes.
- So, in any case, if the decoration of walls, ceilings or floors involves solutions for the room, which means one of the main ingredients is water.
- It gradually evaporates and is removed through the ventilation system and through pores in the walls.
- If these mechanisms are started at a time when the external environment is in a low-temperature regime, then water in a vapor state will begin to condense in the wall structure or at the border of the outer area of aerated concrete and facade plaster.
- Further, freezing of the collected moisture will inevitably occur and, accordingly, destruction of the facade finishing. Moreover, it is worth noting that a similar fate awaits plaster of even the highest quality.
- As in any business, it is not enough to use only high-quality materials; a prerequisite for achieving success is strict adherence to the work technology, taking into account the climatic characteristics of a particular region.
In principle, this is all the information that a “handy” homeowner needs to give a building made of porous masonry material a presentable and functional appearance. We hope that the topic of how to plaster the facade of a house made of aerated concrete is now clear to our readers in all aspects. We also recommend that you watch the topical video.