Until recently, wall decoration was limited to simple whitewashing and wallpapering old canvases. Cracks in the walls in some areas were sometimes repaired with putty. Modern materials require a special preparation scheme for finishing, which includes finishing putty. This step is designed to achieve the smoothest surface possible. Thanks to finishing putty, the shortcomings of the starting putty layer are eliminated, sound insulation is improved, surface strength and adhesion between materials are increased.
Why do you need finishing putty?
Final putty is the final stage of preparing the surface before decorating it (painting, wallpapering). But why should it be placed?
Without this step, flaws will be present even if the surface is carefully treated. This is not so important when gluing wallpaper with a rough texture, but for those who plan to use silk-screen printing or fabric wallpaper, the absence of putty will not only not be able to hide the unevenness of the wall, but, on the contrary, will emphasize it.
It should be puttied with finishing putty for those who want to hang wallpaper with a small print.
Reviews
What do you think is the best putty for certain types of work? Share your opinion in the comments.
Purpose of finishing putty
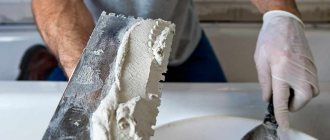
The finishing putty consists of fine particles, which distinguishes it from the main putty mixture. Has high adhesion rates .
The purpose of the material used is determined by the functions performed. Finishing putty is used for:
- leveling the surface, filling minor defects in the form of scratches and cracks;
- protection of the base coating from damage for a long time after repair work;
- endowing the surface with aesthetic qualities;
- use as a complete finishing coat without painting or other treatment.
Putty: types of mixtures according to purpose, their characteristics
Putty hides flaws well on walls and ceilings, and masks seams in areas where cracks were sealed with plaster. The material is presented on the market in a huge range. Each variety is designed for a specific type of work.
Putties can be starting, finishing or universal
There are several types of putties for interior work:
- starting;
- finishing;
- universal.
Starting mixtures are used at the initial stage of repair work. They allow you to level the relief of ceilings and walls. The material completely masks marks from self-tapping screws and eliminates damage - chips and cracks. Leveling putties contain large particles. Thanks to this, the coating is strong and durable. Starting mixtures can be applied in a thick layer.
Leveling putty dries quickly and is practically impossible to sand. The surface treated with this mixture becomes rough. Most often, starting compounds are used to level brick and concrete walls. They even allow you to avoid applying a layer of finishing putty. However, in this case the surface will be unsuitable for painting or wallpapering. As an alternative, wall panels can be used.
Note! Starter putties are not suitable for eliminating deformations larger than 5-7 mm.
The putty is sold as a dry powder or ready-mixed
Universal compositions can be used both for leveling and for creating a finishing layer. This type of mixture is suitable for any surface. It should be noted that the cost of the universal composition is higher than the price of finishing putty.
The use of universal formulations has its advantages:
- the coating is even and smooth;
- Damages on walls are well masked;
- the treated surface is completely ready for any type of finishing;
- the coating has a large margin of strength.
This coating is easy to sand. However, despite all the advantages, the combination of starting and finishing mixtures still gives a better result than a universal putty.
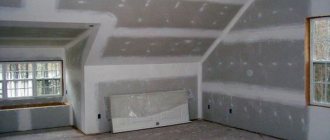
In addition, the specialized mixture “Shov” is considered separately. Craftsmen use it for finishing drywall putty to hide the joints between sheets. This type of mixture is suitable exclusively for minor repairs.
Special putty mixtures are used to work with drywall
Types of putty mixtures
Depending on the purpose, mixtures of different compositions are used. At the final stage of puttying, polymer and acrylic mixtures, as well as cement or gypsum putties, are used. Each composition has its own disadvantages and advantages. To find out which finishing putty is better , let's look at the main mixtures in more detail.
Cement composition
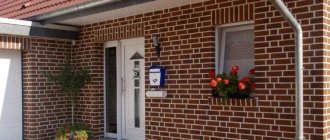
The cement option is popular due to its ease of use and low cost. It is used for finishing surfaces in rooms with high humidity - kitchen, bathroom or toilet. In addition, it is used before painting in entrances and for finishing building facades.
The cement composition is moisture resistant, gives the surface durability and strength when exposed to external factors.
Among the disadvantages are the possibility of cracks appearing, as well as shrinkage of the mixture after drying if the technology is not followed.
Attention! Grinding of cement putty is carried out until it dries completely. The dried coating is difficult to mechanically influence.
Gypsum putty
Using gypsum putty, a uniform white surface is created that can mask surface imperfections. It is recommended to use before gluing thin textured wallpaper with a fine structure, or to create a perfectly flat surface .
Attention! The gypsum composition dries in about two hours, depending on the manufacturer, and must be applied within approximately 30 minutes after mixing. Otherwise, the mixture loses its original qualities and becomes unsuitable for work. This applies to quick-drying compounds.
It is recommended to use gypsum putty in dry, heated rooms - bedrooms, corridors and rooms where you plan to apply a decorative coating.
Due to low waterproofing, the scope of application of the material is limited. However, such mixtures are characterized by affordable cost and ease of use.
Polymer option
The composition is prepared in the form of a ready-to-use mixture, which is the best option for people with minimal experience in carrying out repair work. Polymer putty only needs to be thoroughly mixed before use. Apply a thin layer to the prepared surface. Thanks to the composition, a smooth, uniform plane is created. Among the disadvantages is the high cost. Treating a large room will cost a lot of money. Thanks to the composition, the mixture adheres perfectly to the surface.
The super-finish version is distinguished by the presence of the finest particles in the composition , due to which it is used for artistic decoration when delicate decoration is required.
The polymer material is characterized by high plasticity and moisture resistance. The appearance of cracks is excluded, which is the reason for the long service life of the finish.
Types of putty materials
Materials for finishing putty work are supplied ready-made or dry. Dry mixtures are affordable and have a long shelf life. For people who are putting putty on walls for the first time, it is best to use ready-made compounds that do not require pre-mixing.
Ready-made finishing putty - does not require thinning
The following components are used as a putty binder:
- Cement. Mixtures based on it are used for puttying walls in damp rooms and for finishing facades, since this material has a high degree of water repellency. The disadvantage is the ability to shrink, as a result of which cracks may appear on the surface.
- Gypsum. It is used for interior decoration, dries in about two hours and is excellent for treating walls with low air humidity (corridors or hallways).
Important! The gypsum mixture is in a suitable state for about 30 minutes, after which it loses all its properties and cannot be used for further putty.
- Polymers. It is better suited than other materials for applying the finishing layer when decorating living rooms. This putty creates a perfectly smooth surface and makes the painting process easier. The only drawback is the relatively high cost, which makes this finishing putty unprofitable when processing large areas.
Polymer putty is an ideal option for painting.
Polymer finishing putty is considered the best for painting walls in apartments and houses, especially for decorative finishing. The layer of this mixture has a fine structure, while effectively eliminating all existing defects and bonding well to the wall surface, eliminating the risk of peeling.
Requirements for putty
Correctly selected finishing putty ensures high quality repairs and improves the technical characteristics of the base. The modern market offers many options for finishing, but you should choose the material that meets the following requirements:
- Effectively eliminates any, even the most minor cracks, chips and other wall defects.
- The superfinish mixture must have the finest particle size so that it can be applied in a thin layer and achieve the smoothest possible finish.
- After drying, it has an even white color, allowing the use of light-colored materials for finishing and decorative finishing.
- Does not form lumps, is easy to apply to the surface and does not drag with a spatula.
- Holds firmly after hardening and does not crack under the influence of temperature changes.
Base for painting
To obtain color durability and brightness, it is advisable to choose the finishing putty wisely. The quality of the material affects the final result of finishing the walls with finishing putty.
It is recommended to give preference to materials of such brands as:
- Knauf HP-finish. Thanks to its composition, this wall putty can be easily applied to a concrete base, drywall or cement plaster in an even layer. The process is not labor intensive. Drying time is within 15−24 hours.
- Vetonit LR+. It is used to work with concrete surfaces, as well as with plasterboard or gypsum fiber sheets. Used in dry residential areas. Dries within 24 hours.
- Eunice Premium. A universal material that can be used in all types of rooms, both dry and with high humidity. A smooth, uniform surface is created, ideal for painting. Dries 3-5 hours after finishing.
When using such putties, the paint will look perfect on the surface, maintaining uniformity and color saturation.
Quality criteria for finishing putties
How to determine the quality of putty on a wall? Masters name the main properties of a good composition, which is best used for repairs:
- Homogeneity of the mass, the possibility of forming a thin surface layer. This will mask minor imperfections remaining after basic puttying.
- The composition hardens, and the surface remains intact, no cracking is observed.
- Consistency is important: the mixture should not flow or stick to the tool, or stretch after the spatula.
It is also worth paying attention to the color - there are no other tint inclusions in the high-quality finishing composition.
Craftsmen say that high-quality finishing putty will need from 0.5 to 1 kg per m2. Approximate consumption is calculated based on the total area. A popular gypsum mixture will require approximately 600 g, a cement mixture - a kilogram. Consumption Vetonit lr - 1.2 kg.
When purchasing, you should take 10-20% more of the composition than was calculated. During the work, additional defects may be revealed, and the finished finishing or super-finishing putty hardens on the walls of the buckets and the surface of the spatula - losses occur. Several layers of the mixture are sometimes applied to the wall surface. Ready-made solutions are sold in different volumes: you can buy buckets with 10 or 20 kg of any brand of composition. Professionals recommend using the start and finish options of the same brand.
Types of putty application
Having decided on the type of material, it is necessary to choose the method of its application. Putty is usually applied using three traditional methods:
Mechanical method of applying putty
For mechanical application, special installations are used, with the help of which the finished mass is sprayed onto the surface of the walls. This application is convenient, fast and high quality. But, of course, purchasing special equipment for household needs is impractical. And, as a rule, putty is applied in a similar way by specialists in the field of finishing work, when working on an industrial scale, large volumes, and so on.
Semi-mechanical method of applying putty
The semi-mechanical method also requires a compressor or pressure tank - in this way the putty is “sprayed” onto the walls, which is also much faster than applying it manually, although slower than in the first case.
Manual method of applying putty
Well, the most common way is to apply it manually. Since this is what is used most often by both professional builders and those who decided to make repairs on their own for the first time, we will consider it in more detail. For application, a ready-made putty mass is used - prepared independently from dry powder or already purchased in ready-to-use form.
- using a flat paint spatula and a small float
A small amount of putty is scooped onto the working surface of a flat spatula and applied and distributed over the wall using a small trowel. This method is simple and convenient even for those who have never done such work.
- putty "bloopers"
This name speaks for itself: with a small spatula, putty is applied to the wall in the form of “bloopers” - large spots, and then, using a long trowel, the mass is evenly distributed over the entire surface. This method allows you to complete the finishing quickly, but it is physically more difficult than the previous one, since in order to level the material with a smoothing iron, a length of fifty centimeters, you will need muscles.
- using two spatulas: main and auxiliary
The main spatula should be approximately two to two and a half times longer than the auxiliary one. For example, spatulas with a length of 45X20 cm or 35X10 cm go well together. The longer the main spatula, the more force is required to work with it.
During the application process, the putty is distributed over the main putty using an auxiliary spatula and is then transferred to the wall. It is important that when distributing the mass, the pressure on the spatula is the same over the entire surface to be treated - then the material will be distributed evenly. The basic principle of applying putty: from dry to wet. That is, it is necessary to work in such a way that each subsequent finished section is connected to the previous one and they can be immediately compared with each other - then the work will be done accurately, without unevenness and sag.
Applying putty is not a complicated process, however, it requires care and a certain skill. Starting for the first time, you can practice on not too noticeable places, get your hands on. When muscle memory remembers hand movements, the work will go faster and better. Manual putty is available to anyone; there are no particularly critical nuances in it.
Choosing a finishing putty
Beginners often ask: which putties are best? What to prefer - ready-made compositions or made by yourself?
Homemade mixtures allow you to save money, but the result does not always live up to expectations. There is no universal advice, and the use of putty depends on many factors. For example, Vetonit lr is excellent in warm, dry rooms, but is unsuitable for finishing rooms with an unstable microclimate or for outdoor work.
All finishing fractions must correspond to the dispersion of the base.
Finishing putties and super-finishing variations help correct defects and make walls or ceilings snow-white, suitable for any decoration. You need to buy a composition that is appropriate for certain operating conditions. There are small trial packages or economical buckets of solution, bags of dry composition of 20 kg.
Classification of finishing putties by composition
There are many finishing compounds on the market. To understand which putty is best for the walls of your room, you need to get acquainted with the properties of different types of finishing materials. Depending on the components included in its composition, finishing putty can be: cement; plaster; polymer. Cement finishing putty is distinguished by its high water resistance. This putty can be used to cover walls in rooms with high humidity - in the bathroom, toilet, sauna, swimming pool. Due to its water resistance, this type of putty is suitable for outdoor work: it is used for finishing building facades.
Cement-based mixture Working with a cement-based mixture is relatively simple: its hardening time allows you to correct shortcomings in application. The main disadvantage of this finishing material is its tendency to shrink, which leads to the formation of cracks. Gypsum finishing putty is characterized by sensitivity to moisture: it is not suitable for use in damp, unheated rooms. Gypsum does not shrink, does not crack, forms a beautiful matte surface, and is environmentally friendly. Due to these advantages and relatively low price, this type of putty is most often used when finishing residential premises. Gypsum-based mortar can be applied in a thicker layer than cement. Gypsum sets quickly, so you need to putty the walls before painting faster, which requires certain skills.
Polymer finishing putty began to be used relatively recently. Like gypsum, it is only suitable for use in heated rooms with low humidity, but has a longer hardening time. The undoubted advantage of polymer-based putty is its elasticity, thanks to which you can apply a very thin layer (up to 0.2 mm) and easily distribute the material over the surface. Another plus is the durability of the finished solution: it can be used for three days. This is the only finishing putty that allows you to obtain such an aesthetic surface that after applying it you can refuse to paint. But the price of this finishing material is much higher than that of other types of finishing putties.
Composition and technical characteristics
Putty mixtures are usually divided according to composition:
- Based on gypsum. This putty contains gypsum, polymer substances and fillers. It is best used indoors with low humidity levels. The material is non-toxic, elastic and has no unpleasant odor;
- Cement based. The main components of the product are cement, sand and water. It is distinguished by its short service life in diluted form. The solution must be used within 5-24 hours. The putty is not elastic and has a yellow tint.
- Polymer putty. It can be either acrylic or latex. Suitable for working with plasterboard sheets, cement, concrete, gypsum or polyurethane surfaces. The product is non-toxic and has high elasticity.
- Water-dispersive putty. Used on various types of surfaces. Suitable for processing concrete, brick, aerated concrete, wood, stone, etc.
Choose a composition that meets European quality standards or domestic GOST requirements.
Layer thickness and material consumption
Depending on the type of putty mixture and directly on its composition, the consumption of finishing putty per 1 m2 and the thickness of the product layer can vary greatly. In addition, environmental factors can significantly influence the final result. Peculiarities
Today, the use of final putty is not unusual. When carrying out repair work, upgrading the walls is carried out in several stages. Each subsequent processing layer differs from the previous one in the product used and the technical characteristics of the plane. For the final stage, good adhesion to the finish is necessary.
Applying a topcoat has the following features and serves specific purposes:
- Provides a smooth surface by filling microcracks with the composition;
- Increases the service life of an object, protects walls and ceilings from damage;
- Protects the starting layer of putty from possible negative environmental factors;
- Prepares the surface for decorative finishing.
SPECIAL ADDITIVES
In the names of some dry finishing mixtures you can find the word “polymer”. This note declares that the composition includes the smallest polypropylene fibers - fiber. Their length does not exceed the size of the grains of the mixture, and they perform the function of dispersed reinforcement.
The result is truly impressive. The strength of the finishing coating with dispersed reinforcement is several times better. After all, this parameter is now determined not only by the crystalline hydrates of the binding component, but also by the evenly distributed hairs of the polypropylene reinforcement.
The side effect of the fiber supplement is even more attractive. Polypropylene fiber gives the coating a silky smooth surface, ideal for painting.
Putty for painting
To get a bright color and a durable layer of paint, you need to choose the right finishing putty, because the final result of the repair work depends on its quality.
So, experts recommend choosing products from the following brands:
- “Knauf NR Finish” - applied to concrete, plasterboard, cement plaster. This mixture is applied in an even layer, making painting walls and ceilings as easy as possible. Drying time varies from 15 hours to a day;
- “Vetonit LR+” is compatible with gypsum fiber and plasterboard sheets, as well as concrete products. Allowed to be used in residential but dry areas. Dries in about a day;
- "Unis Premium" - used in all types of premises, including rooms with high humidity. Creates a mirror-smooth surface that is convenient for painting. Dries within 3-5 hours after application to the surface.
These mixtures are ideal for finishing walls before painting, as they will make the color of the paint more vibrant and saturated.
The best finishing putties
The following are most suitable for applying to the starting composition:
- Prospectors. This is a gypsum-based finishing putty with additional additives. Suitable for wet areas. It dries quickly. Costs about 240 kg for a 12 kg bag. Sold dry. Dries in 12 hours.
- WEBER LR+. This is a polymer composition from the Vetonit company. The putty can be applied in a layer of up to 5 mm. In this case, the prepared solution may not harden for up to 48 hours. This means you won't have to rush too much. Suitable for mechanical and manual application. It costs about 840 rubles per 25 kg bag.
- Danogips Sheetrock SuperFinish. This is another plastic composition with vinyl additives. The putty is elastic and hardens quite quickly. After applying a 2 mm layer, it is enough to wait only 5 hours. But, since this is not dry, but ready-made material, it costs more - approximately 1,300 rubles for a 17-liter bucket.
If we talk specifically about painting walls, then it is worth considering the Unis Premium compositions, as well as finishing mixtures from. Some dry in 2-5 hours, while others take up to 15 hours.
Ceiling putty
A gypsum finishing mixture is often used to decorate the ceiling. It creates a matte thin coating on the surface. In addition, they lay easily and evenly on the ceiling and dry quickly.
On average, hardening time varies from 14 hours to a day. After the putty has completely dried, paint or any other substance can be applied to the surface to decorate the ceiling.
It is necessary to distinguish between two types of finishing putty for the ceiling: in powder form and ready-made.
The first should be diluted in the appropriate proportion and immediately applied to the ceiling, otherwise it will quickly harden. The finished putty does not require any additional manipulations; you just need to dispense the required amount of product from the tube and treat the surface.
Putties for rooms with humidity
The bathtub, toilet and kitchen can also be puttyed during a comprehensive home renovation, however, these rooms have high humidity, so it is not recommended to use gypsum and polymer putties there.
They do not have sufficient adhesion for a strong grip on a surface that is constantly exposed to moisture.
Cement finishing putties contain moisture-repellent substances, due to which moisture does not penetrate walls and ceilings.
Therefore, if you plan to cover a wall or ceiling in a room where there is a high concentration of humidity, give preference to cement finishing putties.
The products that have proven themselves best in the repair goods market are “Sitek”, “Ceresit” and so on.
As we see, the main thing is to have enough information about finishing putty products, and then you will be able to choose the most suitable product so that the repair will delight you with its durability for many years to come.
Technology
After proper installation of lighting you should:
- spray the surface of the wall with liquid and wipe thoroughly with a sponge to clean and increase adhesion;
Cleaning with a sponge
- create a mixture of glue and water and apply a primer;
- scoop the prepared putty into a narrow spatula;
- work in a vertical direction, apply the composition to the wall;
- carefully treat the plane area;
- Use a wide spatula to spread the putty, wiping the spatula with a dampened sponge from time to time (the thickness of the coating should not be more than one and a half millimeters);
- cover the surface with a substance;
- the final putty should adhere and dry;
- Use fine-grit sandpaper to remove any bulges.
Grinding
Ceiling preparation
The preparation of the ceiling mainly depends on its condition. However, after bringing the plane into a uniform state, you need to putty the ceiling for painting or whitewash it.
By grinding bricks, pumice, rock, and metallurgical waste, a very high-quality material is produced - crushed stone. Here is the density of crushed stone.
Today, the construction market offers a large assortment and selection of different brands of cement. Here are the characteristics and features of Portland cement M400.
Using plaster you can not only make the wall thicker, but also level the entire surface. By clicking on the link you will find out how long it takes for plaster to dry on the walls.
For facing operations, various materials are used, some of which may include multi-purpose, initial and final mixtures. In addition, reinforcing mesh is used - this reduces the number of holes.
The final mixtures are the most watery. They should be applied after applying the starting putty. So, the process of applying the final putty is quite simple.
As a result of the manipulations performed, the finishing putty for painting provides a perfectly flat surface.
For more information about ceiling putty, watch the video:
Preparing the surface for finishing
To acquire an attractive ceiling surface without wasting extra time, you can simply paint over it. Painting the ceiling begins before the priming and puttying process. First, the surface is carefully cleaned and primed.
Surface cleaning
In most situations, the best result is considered to be the use of a deep penetration - a high-quality base is applied with a paint roller, and in inaccessible areas it is practical to use narrow brushes. There must be at least two layers.
As a result of the special liquid completely drying, the surface is puttyed with the original substance. For the base, the deepest cracks and voids are sealed.
Sealing cracks
For the best result, a reinforcing mesh is used (smoothes the surface).
Application of reinforcing mesh
The prepared starting putty is beaten with a spatula and applied to the ceiling in a thin layer.
It usually takes approximately eight hours for the original cover to dry.
It is not recommended to make the layer greasy. The composition must be laid in the same way, trying not to leave marks from the spatula. After drying, the sanding stage begins and again needs to be treated with a primer consistency.
Primer
Application of the substance
The layer of finishing putty should be thinner than the previous, original one. To apply it, it is better to use a wide spatula. The composition is prepared in accordance with the instructions printed on the packaging (until thick sour cream is created).
Then a portion of the substance is taken from the container onto a spatula and distributed in a layer of 2 millimeters. Then it is dried and smoothed with P80 sandpaper.
Sandpaper P80
A second layer is applied to 1 layer, which is overlapped. With painstaking work, you can create a perfectly smooth surface.
Application
After the coating of finishing putty has dried and sanded, the painting stage begins.
Painting
Finishing putty for painting has the following price for the work performed:
- wall finishing for painting (4 layers) 350 RUR/m2;
- alignment of walls according to beacons 350 RUR/m2;
- wall putty in 2 layers 200 RUR/m2;
- gluing fiberglass (cobwebs) 120 RUR/m2;
- finishing putty on walls and ceilings in 2 layers 200 RUR/m2.
What tools are needed
When planning work, experts recommend purchasing a basic set of tools:
- Mixer or a special mixing attachment for a drill. With its help, putty is quickly mixed in buckets or other containers.
- Spatulas that will make it easier to apply finishing putty - special for working in corners and near joints, large for forming a layer on a wide surface, small for spreading the solution.
- Brushes of arbitrary sizes. Useful for priming that increases the adhesion strength of finishing compounds, including category lr.
- Rule and level. Needed to create a perfectly flat surface.
- Empty containers. Preferably large ones that can hold 10-20 kg of mixture for large-scale repairs.
You will also need individual ingredients to create the finish or ready-made formulations. Solutions in sealed containers are preferred by many craftsmen who deal with interior decoration. They argue that it is wiser for inexperienced beginners to purchase such finishing putty on the wall.
Tools for work
A drill with the right attachment is very helpful in preparing the solution; with such a mixer you can quickly make the solution we need, bringing it to a homogeneous mass.
For the work itself, you need two spatulas, the first 18 cm, with which you scoop up the solution in small portions, and a wide spatula 50-60 cm long for uniform application on the wall. If necessary, it is recommended to process corners using a corner spatula. It has an iron blade bent at 90 degrees. Without such a tool, it is very difficult to get a good angle.
A set of tools you will need to putty walls
The final processing of the wall is carried out with two tools - an orbital grinder and a hand-held whetstone. Using a power tool will help save time and provide better processing. An abrasive mesh of a certain grain size is put on these two tools. Mesh No. 150 with paintable grain, does not leave scratches and will get the job done quickly. To treat a wall for wallpapering, a grid numbered 100 or even 80 will be sufficient. It must be remembered that the higher the grid number, the more elaborate the work will be.
Knowing all these nuances, you can make repairs in your apartment without hiring specialists.
- How to create and use flower stencils for walls
- Installation and operation of moisture-resistant panels for bathtubs made of fiberboard, MDF and chipboard
- The advantage of Penetron waterproofing