How and what is the best way to decorate a bathhouse inside
Arranging a bathhouse is not an easy task. In this building there are always several rooms, each of which performs its own function. Those materials that are optimal for a dressing room and rest room are not always suitable for finishing a steam room or washing room. Therefore, the owner of a bathhouse needs to know what the criteria for choosing the design and cladding of each room are.
The interior decoration of the bath can be made of the following materials:
- lining;
- planed boards;
- salt panels;
- brick;
- porcelain stoneware;
- natural and artificial stone;
- plastic panels;
- moisture-resistant gypsum plasterboard and gypsum fiber board;
- ceramic tile.
Listed are materials that can be safely used for cladding walls and ceilings of any room. The environmental friendliness and durability of these products have been tested by many years of practice. With the right choice of materials, finishing a bathhouse can be complicated by only one thing: not knowing how to lay, stick or mount them correctly.
Which lining to choose for a bathhouse
There are 4 types of lining, differing in the profile of the boards:
- Eurolining.
- Standard (otherwise called “peasant”).
- Block house (imitation logs).
- American (imitation timber).
Popular brands that have proven themselves to be of high quality:
- "Calm";
- "Soft Line";
- "Classical".
All of them belong to the eurolining category and differ in size and profile. Boards, regardless of their type and brand, are often called lamellas.
Finishing a bathhouse with clapboard is a traditional, frequently used solution. It has gained so much popularity for many reasons. Lining is a natural and therefore environmentally friendly material that is beneficial to human and animal health. When choosing, it is extremely important to consider several points:
- type of wood;
- grade of material;
- resistance to moisture;
- coefficient of thermal conductivity.
Which one to choose
Installing lining in a bathhouse is a rather important undertaking, to which it is necessary to pay due attention at the stage of selecting materials.
When choosing lumber, the following criteria should be taken into account:
- Room temperature;
- Humidity level;
- Possible changes in temperature;
- Financial opportunities.
Board types
The lining can be divided into the following types:
- Classic. This type of board is not very wide in size, and it is easiest to mount it vertically;
- Eurolining. This type has wide boards and comes in a variety of designs. In terms of quality characteristics, it is almost completely similar to classic lining.
To finish a bath, it is best to choose eurolining, and there are a number of reasons for this:
- The first thing to note is the large size of the tongue-and-groove system;
- On the reverse side of the eurolining there are compensation slots that provide unobstructed ventilation;
- No additional surface treatment of the panels is required, since the eurolining is initially treated with a special impregnation.
Where to start
It is very important to initially decide on the material of the product. For each of the bath rooms, it is recommended to use lining with the lowest thermal conductivity. Such materials include abashi, alder, linden, cedar, and aspen.
Attention! It is worth noting that for lining the inside of a bathhouse with your own hands, you can only use northern cedar, since it contains much less resin.
Of course, the clear favorite is the wood of deciduous trees, because it is much more pleasant for tactile contact, and it is absolutely impossible to get burned on it. The price for this type of lining is higher, but it is absolutely justified.
DIY aspen
Aspen lining has a rather pleasant orange tint. It is distinguished by its resistance to moisture, since upon contact with water, the wood of this tree only hardens, but does not collapse.
You can decorate the inside of a bathhouse with aspen lining both in the rest room and in the washing room.
It is worth noting that the price of this material is quite high, so it is rarely used for covering a dressing room or steam room.
Linden steam room
Very often, linden wood is used to decorate the inside of a bathhouse with clapboards with your own hands. It does not heat up even when exposed to very high temperatures, has a pleasant texture and light color.
Important! If the linden lining is not treated with antiseptics, fire retardants and special impregnations, then it will very soon begin to darken and rot.
How to cover the walls of a bathhouse with cedar clapboard
The use of coniferous species for clapboard cladding of the steam room is undesirable, however, cedar has a low density, which is why it is often used for these purposes.
When heated, cedar releases essential oils that have an antiseptic effect. Consequently, cedar lining will not only please the eye, but also have a positive effect on the health of those steaming.
Alder steam room
Alder wood is suitable for finishing any of the bath rooms, including the steam room. It has an interesting pink hue and a velvety texture.
It is distinguished by its heat and moisture resistance, since it is not afraid of either critical temperature changes or high humidity.
Rules for choosing lining grades
Manufacturers offer several options for grading boards:
- "A" - first;
- “B” – second;
- “C” – third;
- "Extra" is the highest.
What “highest” is is not specified in the state standards. This indicator is not used anywhere in the world except Russia. Domestic manufacturers often pass off “A” grade wood as “Extra”, and “B” grade boards as “A”. This is what caused the appearance of premium lining on the market. Recommendations for choosing grades are as follows:
- the interior decoration of the bathhouse can be made of second-grade boards;
- For rooms with high humidity, the presence of rot and wane in the wood is unacceptable.
Rules for visual inspection of boards and assessment of their condition
The following must be taken into account:
- Pay attention to the quality of the chips. The boards must have a flat and smooth surface. This directly affects the economic benefits of finishing work. If the front side of the lining is rough, finishing will be complicated by the increased consumption of antiseptic and paint materials.
- The moisture content of the boards should not exceed 12-16% (GOST requirement). It is visually impossible to determine whether the material offered by the manufacturer meets this criterion. Therefore, it is necessary to request documents confirming compliance with GOST. If the wood is not dry enough, there is a high risk that it will suffer during the first years of operation of the finished premises.
- Pay attention to the depth and evenness of the groove. These indicators determine the quality of installation. And it doesn’t matter how it will be done: using clamps, nails or staples. If the groove is shallow, there will be nothing for the fasteners to grab onto.
An important characteristic of boards is width. Often there are lamellas on sale that are wider than standard ones (more than 88 mm) and managers assure that it is more profitable to buy such lining. This is not true, since such a finish will be less durable and there is a high risk of wide boards bending when exposed to moisture.
Criteria for selecting wood species
The finishing of the walls and ceilings of the bathhouse can be made of the best types of wood.
| Material | Advantages | Flaws |
| Spruce | Low price, wood does not darken over time, small number of knots, low degree of resin, dries quickly. Finishing with second grade boards is acceptable | Often leads |
| Pine | It is a source of phytoncides that heal the body, is resistant to moisture, and has low thermal conductivity. It is recommended to finish with first grade boards | Gnarly, resinous |
| Aspen | An excellent antiseptic, highly resistant to moisture, has a pleasant color tint, and is not tarry. Finishing steam rooms with aspen is a recognized option for arranging these rooms | Possible hidden rot |
| Linden | Low price, structural integrity, small number of knots | The softness of wood, which complicates the installation process and operation |
| Alder | Beautiful texture and color, high moisture resistance, low thermal conductivity, strength. Alder finishes are suitable for recreational areas | High price |
| Larch | The best moisture resistance among other types of wood, low thermal conductivity, impressive texture, small number of knots. Larch finishing is suitable for any bath room | High price |
| Cedar | The best indicators of therapeutic and health characteristics, high strength, hardness, high-quality noise absorption, not susceptible to rot and insects. Cedar finishing is the best solution for steam rooms and relaxation rooms | High price |
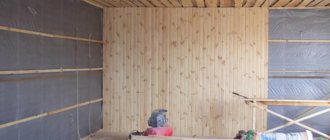
Stages of covering a bathhouse with clapboard
Covering a bathhouse with clapboard is no different from a similar process for finishing facades and premises for any other purpose. To complete the task without errors, simply follow our installation instructions.
How to attach lining in a bathhouse
Installation of lining in a bathhouse begins with choosing a method for attaching the boards and preparing the tools necessary to perform this work.
The following options are used:
- Finishing using the method of hidden fastening of the lining. Claimers are used. These are metal products that are inserted with one side into the groove of the board, and the second part, protruding from the groove, is attached to the sheathing posts. For this purpose use: – nails (included in the package of clamps) and a hammer or nailing gun; – flat head screws and a screwdriver; – galvanized metal staples and an electric construction stapler.
- Finishing using the open method of fastening the lining. With this installation method, galvanized finishing nails are used, which are driven directly into the lining boards from its front side. Against the background of wood texture and knots, fasteners are invisible. After the paintwork is completed, they are barely visible.
- Stages of attaching lining to clamps. Using a tape measure, a pencil and a building level, mark the location of the first lamella on the sheathing posts. Turn the board with the groove down and apply it to the sheathing, focusing on the previously made marks. Place the clamp into the groove of the lining and attach it to the sheathing post using the chosen method: with a bracket, screws or nails. Repeat the process at all points where the boards intersect with the sheathing.
Lathing for lining in a bathhouse
Fastening the lining is possible either directly to the wall or to the sheathing. In the first case, impeccable flatness of the base surface is required, which is rare. Therefore, clapboard finishing is traditionally done on the sheathing.
For its installation, well-dried wooden blocks with a cross section of 30x40 mm, 40x40 mm, 40x50 mm, 50x50 mm are used. The parameters of the racks are selected depending on the area of the wall. If it is small, then bars of a smaller cross-section are suitable. Finishing large areas requires thick and durable lumber.
If necessary, thermal insulation materials can be laid between the sheathing posts: mineral wool slabs, penofol, sheets of expanded polystyrene. Most often, the first option is chosen, because polystyrene foam, when exposed to high temperatures, begins to release styrene that is harmful to health.
High-quality interior finishing is important in a bathhouse. It is unacceptable to use materials that may reduce the usefulness of hygiene procedures.
The stages of installing the sheathing for the lining are as follows:
- Calculation of the amount of lumber. In order to properly make the sheathing, you need to draw up a drawing of it. It is important to maintain the recommended pitch between the posts: 45-60 cm. The thinner the selected lumber, the smaller the distance between the bars should be. The lathing consists of horizontally laid upper and lower guides and vertical posts located between them. Draw up a drawing for each wall, indicate on it the dimensions of the room and calculate the required amount of lumber.
- Wood preparation. The purchased lumber is brought into the room and left there for 1-2 days. During this time, the wood will have time to “acclimatize” and acquire the desired temperature and humidity. After which, each block is covered with a layer of antiseptic on all sides and ends. This task can be accomplished in two ways: – cover all surfaces with a paint brush; – prepare a container of such length that you can pour an antiseptic into it and immerse the bar in it.
- Leave the lumber to dry for the period recommended by the manufacturer of the antiseptic solution.
- Marking the walls. To carry out marking work you will need: – a plumb line; – construction bubble or hydraulic level; – roulette; - pencil; - construction square.
- Using the listed tools, marks are made on the walls in accordance with the previously drawn up drawing. In this way, the location of all the sheathing bars is found.
- Installation of sheathing. Wooden blocks are attached to the walls in any convenient way: using nails or self-tapping screws. The distance between fixation points should not exceed 40 cm.
Fastening the slats
There are several ways to decorate a bathhouse with clapboard. The slats can only be laid horizontally or diagonally. It is also possible to combine these techniques. In this way, they create the design of the room that is most pleasant and beneficial for the owner.
It should be noted that when installing boards diagonally, it is necessary to reduce the distance between the sheathing posts. This method of attaching lamellas entails a greater consumption of materials than with traditional horizontal laying of lining. Finishing walls with diagonal direction of the boards is complicated by the greater labor intensity of the work.
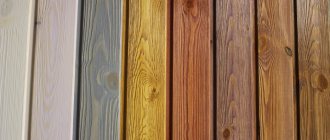
Which lining to use: practical recommendations
Bath lining
The main thing is to choose the right material. For interior decoration, spruce, larch or alder are best suited, depending on the specific room of the bathhouse. More detailed information regarding possible cladding materials is given in the following table.
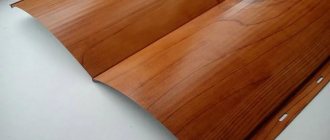
Packaging of eurolining
Table. Lining materials
| Material | Description |
| Conifers | Coniferous species are characterized by high moisture resistance, however, it is better not to use such lining for finishing the steam room itself: the released resins can cause certain problems. It is believed that pine resins are beneficial for humans. When they are inhaled, the work of the cardiovascular system is stimulated, but in combination with high temperature, such a combination will be extremely dangerous. In view of this, it is better to leave the pine needles for finishing the rest room - they are ideal here. As for specific species: - pine. It has a high density, stands out with an attractive golden hue and interesting ornaments; — cedar is an expensive option with a pronounced pine smell. It has a long service life, excellent texture and antiseptic properties; - spruce. Well suited for interior decoration of a bathhouse. It has a neutral odor and an attractive appearance; - larch. Fills the air with substances beneficial to human health. The material is characterized by the highest resistance to moisture and similar density. |
| Hardwood | Most often, hardwood is used for the interior lining of bathhouses. This lining is characterized by higher thermal insulation properties, which is an additional advantage, and also helps to improve ventilation in the room and create the most healthy microclimate. Several types of wood are used to make lining: - oak. Expensive, durable and strong. Among other advantages, the material is characterized by an expressive structure and generally has an attractive appearance; - Linden. This lining has a beautiful light honey shade that does not change over many years of service; - alder. Hygroscopic and beautiful material with antimicrobial properties; - ash. Quite dense wood, resistant to deformation and has an expressive pattern. |
Helpful advice! When choosing a profile, give preference to the tongue/groove configuration. This finish has the most favorable finished appearance and lasts as long as possible.
Before starting the sheathing, the slats must be dried and allowed to get used to the conditions of the room being renovated within 24 hours - thanks to this, in the future the boards will fit as tightly as possible to each other.
The delivered euro lining must first be stacked, allowed to air out in the wind for a week, then brought into the room where you plan to install it for the same 1-2 days, and only then nail it to the wall
The most interesting options for clapboard lining a bathhouse and more are presented in the following images.
Options for clapboard lining a bathhouse Options for clapboard cladding a bathhouse
How to cover the walls in a bathhouse
The interior decoration of a bathhouse can be done not only with clapboard. The list of materials suitable for this purpose is wide. An effective technique is finishing with salt panels and blocks. This is an expensive material, so it can be used for installing partitions or panels.
Salt slabs have high heat resistance, but are not recommended for installation in rooms with high levels of air humidity. As a result, this finish is suitable for relaxation rooms and Finnish saunas with dry air. A cozy and comfortable atmosphere can be created by facing with salt slabs in combination with their lighting, internal or external.
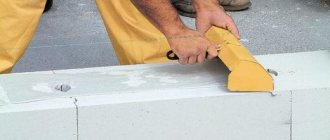
The panels are attached to the walls using a two-component adhesive based on caustic magnesite. If small blocks are purchased, they can be glued to inexpensive liquid glass. This finish will be more economical, but no less durable and aesthetically pleasing. Salt panels can be attached to any surface. These facing blocks are used if the bathhouse is built of brick, wood, concrete, plastered, lined with gypsum fiber board or gypsum board.
You can't help but pay attention to the ceiling. It is sheathed with materials that harmoniously combine with the walls. The bathhouse cannot boast of high ceilings, because they are not needed. For this building, rapid heating of the premises is important, which is possible with low walls.
If the bathhouse is built of timber or logs, the ceilings in the rooms do not need to be tiled, but rather covered with varnish or a tinting compound. In this case, it is necessary to perform high-quality insulation from the attic.
If the bathhouse is built of brick, foam or aerated concrete, the ceiling can be finished with the same facing materials as the walls. The methods for cladding horizontal and vertical surfaces are the same. But, before attaching wooden slats or other material to the ceiling, you need to make sure the strength of the load-bearing surface.
Mounting methods
After the material has been selected and purchased, you need to decide how to lay the lining in the bathhouse. It is impossible to unequivocally answer the question of how to fix the lining in a bathhouse (vertically or horizontally), since every experienced craftsman has his own opinion on this matter.
Of course, we can draw some conclusions by summarizing the many opinions and user reviews on this matter, which we will do next.
Vertical or horizontal in the steam room
First of all, let's look at the vertical method of laying lining in a bathhouse.
Do-it-yourself installation of lining in a bathhouse along the wall is becoming more popular due to the ease of installation, which does not require a lot of time and money.
The advantage of this arrangement is that the water does not linger, but flows down the vertical panels.
Attention! When the lining is mounted vertically, moisture flows down freely, thanks to which the tongue-and-groove system is maximally isolated from water ingress.
Horizontal lining in the bathhouse prevents the movement of air, and vertical panels do the opposite, due to which the heat inside the steam room accumulates more. This mounting option is perfect for dry steam saunas.
Fasten horizontally
Many people think about how to attach the lining to the wall in a bathhouse.
Let's take a closer look at the horizontal installation option.
With this arrangement, the wooden panels are fastened with the tenon facing upward, so that it is protected from water penetration.
For horizontal fastening, it is necessary to make a vertical sheathing under the lining in the bathhouse, which makes it possible to ventilate the space between the wall and the panels.
Information. One of the arguments in favor of a horizontal arrangement can be given such an advantage as updating the lining in the bathhouse.
This can be explained by the fact that the floor is the wettest place in the bathhouse, and due to constant excess humidity, the bottom boards quickly deteriorate or rot. When the lining is mounted horizontally, the bottom panels can be easily removed and replaced with new ones. If this happened with a vertically located lining, then all the panels would have to be replaced.
So, let’s summarize all the advantages of a horizontal arrangement:
- If the panels close to the floor deteriorate, replacing them will be quite simple and quick;
- Water does not get into the joints, making it much easier to dry the lining;
- Better air circulation under the panels, thanks to vertical lathing;
- Among other things, the vertical sheathing is a kind of barrier for mice;
- The installation process is much easier.
Drawing conclusions, we can say that each of the methods is good in its own way, but the horizontal arrangement is more suitable for wet Russian baths, and the vertical one for baths operating in dry sauna mode.
Headlining
The decoration in the bathhouse will be disharmonious if the walls and ceiling are covered with materials that are identical in appearance but of different quality. This method is used only for the sake of economy. A high ceiling can hide differences in color shade or other surface features. But the bathhouse is traditionally built with a height of no more than 280 cm.
In order for the design of the room to correspond to the mood evoked by hygiene and relaxation procedures, environmentally friendly and aesthetically attractive materials are used in the cladding. If the walls are covered with wooden slats, most often the ceiling is made in the same way. The installation rules are the same. A sheathing is also built on the ceiling, having previously drawn up a drawing of it. The lamellas are attached to the bars using the same method as for wall cladding.
Step-by-step instruction
Before lining the inside of the bathhouse with clapboard, you should decide whether the ceiling or just the walls will be covered.
We cover the bathhouse with clapboard with our own hands, starting from the ceiling. However, before you start covering, you should take care of thorough thermal and waterproofing.
We start with insulation
Before covering the steam room with clapboard with your own hands, the room needs careful thermal insulation.
Every bathhouse needs an insulating layer, especially in the steam room. An exception is a small summer bathhouse made from a log house, since in this case only the steam room is insulated.
Fire-resistant and environmentally friendly basalt wool is chosen as the insulation material. You should not choose insulation materials like polystyrene foam, as this is completely unsafe for your health.
Before laying the insulation, a sheathing is installed under the lining in the bathhouse, relaxation room and other rooms that need finishing. A vapor barrier is attached under the sheathing, then insulation, on top of which a waterproofing film is attached. For better reliability, you can cover the entire pie with foil. It is attached between the sheathing using buttons or a special construction stapler.
Preparing panels
Important! Before attaching the paneling in the steam room, it should be removed from the packaging and allowed to sit for several days.
The fact is that after drying, the finished material is immediately placed in a sealed package. That is why, immediately after opening, the lining absorbs moisture from the air, which can cause it to swell.
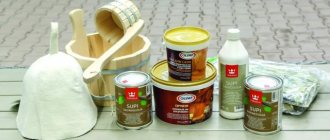
You should also take care of the impregnation of the panels. We recommend choosing special impregnations for baths, which contain antiseptics and fire retardants that prevent fire and the appearance of various microorganisms.
How to nail it correctly
As mentioned earlier, decorating a bathhouse with clapboards with your own hands starts from the ceiling. Before attaching the lining to the ceiling in the bathhouse, you should measure the length of the ceiling and cut the lining to the required size.
The first panel is attached opposite the door in one of the following ways:
- Using small nails at a forty-five degree angle. In this case, the nails will not be visible, and the ceiling lining will look like a single whole;
- To the sheathing, right through the wood panels. This method is most often used for eurolining; at the end of the work, the nail heads are closed with wooden plugs.
Just as the lining in a bathhouse is attached to the ceiling, it is placed on the walls. You should start from the most visible corner of the room, moving further along the perimeter.
Before lining the inside of the bathhouse with clapboard (as in the case of the ceiling), you need to measure the height of the room, then adjust the panels to the required dimensions.
More about the mount
How to nail lining in a bathhouse is a question that interests many developers.
The first thing to remember is that covering a bathhouse with clapboard is done with your own hands using hidden fasteners.
There are a number of reasons for this:
- If the fastenings are made through, then when the room heats up it will also heat up, and this can lead to burns;
- The metal fastening on the surface of the lining may succumb to corrosion, which will subsequently damage the panels;
- The aesthetic aspect, because the fastenings that are open to view look quite sloppy.
What is the best way to mount the lining in a bathhouse:
- Nails;
- Kleimers;
- Self-tapping screws.
Attention! The self-tapping screw must be hidden with a special wooden plug.
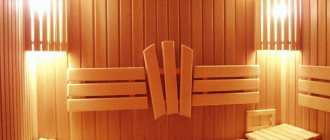
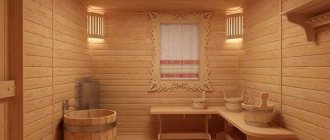
Decorating the rest room
The bathhouse is always perceived as a place of relaxation from everyday worries. Each room in it is intended for its own purposes. The name of the relaxation room speaks for itself: this is where you relax after water treatments. Therefore, it is important to create a cozy and relaxing environment in it.
Proper finishing of a relaxation room in a bathhouse is not an easy task, the implementation of which can be entrusted to specialists: designers and artists.
A cozy environment is created through the correct choice of facing materials, furniture, accessories, organization of lighting and illumination of various zones and architectural elements of the room.
Advantages of using lining in a bathhouse
Cladding in a steam room involves the use of wood, and the small thickness of the panels reduces the cost of constructing a steam room.
The advantages of using lining are:
- Adjusting the humidity in the bath, preventing the possibility of condensation and fungal infection;
- Ease of processing, obtaining a perfectly flat surface;
- Good heat and sound insulation;
- Environmentally friendly material and beautiful appearance;
- Long service life while maintaining original characteristics.
The most optimal solution would be to use not just lining, but eurolining. Its difference is that the tongue-and-groove connection is increased to 8 mm, and the material has previously undergone forced drying. Having compensation slots on the reverse side of the lamellas, the eurolining does not crack. In addition, it participates in the ventilation process of the coating. Read also: “How to cover a steam room in a bathhouse - how to choose the right wood.”