The bathhouse is a national form of relaxation and a great way to maintain normal health. To be able to use your own bathhouse, you can easily and cheaply build a bathhouse from foam blocks. Compared to other materials, the construction of baths from foam blocks has a number of significant advantages.
Bathhouse made of foam blocks
Foam concrete is a modern material that successfully replaces traditional technologies.
Foam block baths have the main quality required of a bath, high thermal insulation. The construction of a bathhouse from foam blocks also ensures high fire resistance of the structure. Due to the light weight and standard dimensions of the material, which simplifies construction, a do-it-yourself foam block bathhouse is available to many.
Do-it-yourself bathhouse made of foam blocks
During operation, a bathhouse made of foam blocks is resistant to any temperature, is completely restored after freezing and does not warp from high temperatures.
A house or bathhouse made of foam blocks is second only to wooden buildings in terms of environmental friendliness and is far superior to brick and concrete structures. Unlike brick or ordinary concrete, a bathhouse made of foam blocks makes it easy to carry out interior finishing, since nails and other fastening methods are easily included in this material. If you take into account the reviews, a bathhouse made of foam blocks is one of the best solutions in terms of construction.
The fastest way of construction is a turnkey bathhouse made of foam blocks, in which there is no need to interfere with construction and solve many issues. Prices for baths made of foam blocks depend on many factors, primarily size, complexity of the project, conditions and construction time. You can build a bathhouse from foam blocks yourself, without resorting to the help of hired construction crews.
The process of building a bathhouse from foam blocks
You can build not only a one-story structure from foam concrete; the presence of a second floor will not make the structure too heavy. If openings of more than 2.5 meters are provided, then the structure is reinforced with lintels made of reinforced foam concrete. For such construction, a set of construction tools for processing blocks is required.
Since the shape and size of the blocks are standard, they require almost no additional work. Where a standard block does not fit, it can be easily reduced in any direction with a regular hacksaw. Masonry made of foam blocks is simpler than brick, due to the larger size and lighter weight of the blocks.
Interior decoration
Interior decoration of walls made of expanded clay concrete blocks can be done using wood. It is especially popular for cladding baths, because... is a safe and environmentally friendly material (see also the article “Finishing a window opening: methods of implementation”).
The use of wood when cladding a bath
It is best to line the steam room with wooden clapboard.
The tree should be selected based on certain characteristics.
For example, not all of its breeds are resistant to high humidity and temperature changes.
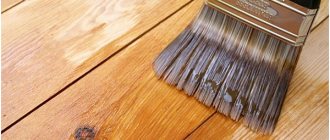
Note! Select only high-quality lumber that has undergone special heat treatment. It protects the tree from negative factors and significantly extends its service life.
- For the steam room, choose those types of wood that have the lowest possible level of thermal conductivity and heat capacity. This is especially true for the upholstery of shelves and sunbeds.
- Inspect the planks and sort out any knotted or resin-covered material.
- For ceiling cladding, use the cleanest boards without resin pockets. Heated air can melt the substance, and it will begin to drip onto bathhouse visitors.
- The instructions recommend lining the steam room with wood only of deciduous varieties. In all other rooms, coniferous species can be used.
The best types of wood for cladding a bath are below.
Abash is the best type of wood for a steam room.
- Abash has a low level of thermal conductivity. Therefore, lumber from this tree is optimal for steam rooms. In addition, it has a beautiful texture and color. It should be noted that the price of abasha is quite high.
- Linden does not turn black from constant humidity, retains its original appearance for a long time, and when heated, it emits a healthy and pleasant smell of honey.
- Siberian and Canadian cedar has beautiful honey-pink wood and emits the aroma of pine needles.
- Larch is most valued when used in damp rooms. It has the unique ability not to rot under the influence of moisture, but on the contrary to become stronger, gradually turning to stone.
- The most inexpensive types of wood are pine and spruce . When the interior decoration of a house is made from aerated concrete, they are most often used.
Steam room cladding
Fasten the lining in a secret way.
This room is usually lined with wooden paneling.
Note! It should not be too wide. Otherwise, the planks may become deformed due to temperature changes and high humidity.
- After covering, the lining should not be coated with paint or varnish. In this case, when it heats up, it will begin to release toxic substances and unpleasant odors.
- Fix the planks using a secret method, otherwise the heads of the screws or nails may burn users.
- Leave a ventilation gap between the insulation and the sheathing.
- The floors in the steam room are best made from tongue-and-groove boards laid on joists.
Decoration of other rooms
Covering the sink with plastic panels and tiles.
In the sink, dressing room, rest room, walls and ceilings, in addition to wood, can also be sheathed with plastic. These can be sheets, lining or panels. The colors, patterns and sizes of such facing materials are varied (also find out how to decorate a bathroom yourself).
So, choosing a finish will not be difficult for you.
- The plastic interior decoration of a house made of expanded clay concrete blocks has good moisture resistance and is relatively durable.
- This coating is installed quickly and easily. Therefore, the work can be done on your own.
- Plastic can be used for both internal and external cladding of a block bath.
Coverings made from this material must be attached to the sheathing.
This is best done with a stapler.
- The lining strips and panels are joined together with end locks.
- Sheet plastic is mounted on the sheathing with staplers or small self-tapping screws.
Floors can be made of ceramic tiles.
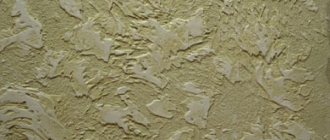
The block walls of baths are also often plastered and then painted or covered with ceramic tiles. There are also concrete blocks with decorative external decoration in the form of patterns and designs.
As for floors, they can be earthen, plank, concrete, or covered with ceramic floor tiles.
Construction of a bathhouse from foam blocks
We build a bathhouse from foam blocks ourselves and choose the appropriate project and construction technology. The construction of a bathhouse from foam blocks is close in quality to wooden construction. They provide a high level of warmth, allow air to pass through for natural ventilation, and are easy to cut and drill with almost the same tools as wood.
The peculiarity of building a bathhouse from foam blocks is that the building necessarily needs external finishing, since foam concrete is not a decorative material. Due to the fact that foam concrete is a porous material, fixing finishing materials is not difficult. There are options when you build a bathhouse yourself from other materials, and foam concrete is used to make internal partitions as a reliable sound insulator.
Typical projects with photos and drawings
In order to choose a suitable project for a bathhouse made of foam blocks, you must first decide on the site that is at your disposal, as well as what you expect from your structure. Meticulous planning is a mandatory item in the “preparatory” program, but if you do not want to deal with the distribution of key zones, then use ready-made projects. They already provide for the separation of a sink and a steam room, and there is also an allocation of space for a relaxation room, a dressing room, and in some cases a veranda. Information on how many foam blocks are needed for a bath is in each size section.
3x3
How many foam blocks are needed: 134 pcs. (4.82 cubic meters)
Project options for those who want to build a compact bathhouse. Both separate washing and steam rooms are allowed, as well as combining two zones into one.
4x4
How many foam blocks are needed: 196 pcs. (7.06 cubic meters)
A selection of bathhouse projects with one of the most common sizes. The square base allows you to make good use of every centimeter of usable space.
3x4
How many foam blocks are needed: 172 pcs. (6.19 cubic meters)
A very viable rectangular and quite compact solution will undoubtedly appeal to those who do not have a reserve of square meters at their disposal.
6x4
How many foam blocks are needed: 245 pcs. (8.82 cubic meters)
An excellent selection of bathhouse projects that provide literally everything: a spacious dressing room, a relaxation room, and a veranda. The layout of bathhouses with an attic allows you to include in some cases a games room with a billiard table.
5x5
How many foam blocks are needed: 267 pcs. (9.61 cubic meters)
A project with the placement of functional areas for a spacious square bath.
How to properly build a bathhouse from foam blocks
Before starting construction, it’s worth seeing what a foam block bathhouse looks like, a video of which was made during construction. Having carefully familiarized yourself with the various stages of building a bathhouse made of foam blocks, photos of which help clarify the sequence of construction manipulations, you can begin construction.
The foundation for a bathhouse made of foam blocks does not have to be powerful, since foam blocks are a lightweight material. If the soil is not complex, mobile or unstable, use a strip foundation with a sand base underneath. A waterproofing material, most often roofing felt, must be laid on the foundation to protect the structure from moisture penetrating from the soil.
For the first row, foam blocks of the highest density are taken and connected with a cement mixture. All subsequent rows are secured with specialized adhesive mixtures, making sure to ensure compliance with the vertical and horizontal levels of the masonry.
When deciding how to insulate a foam block bathhouse, remember that foam concrete is an exceptionally warm material and additional insulation may be minimal.
Hidden electrical wiring in a wall made of foam concrete is done without the same effort as in brick or concrete, and does not require additional insulation, as in wood. Other requirements for construction, installation of doors, windows, floors and roofing work are similar to other building materials.
Exterior finishing
When decorating the outside of a building, in addition to making it beautiful, it is also necessary to carry out external hydro- and thermal insulation work. Moreover, the principle of action here is the same as inside. Using a wooden frame, a heat-insulating layer is formed around the building box and waterproofing is created. Variations are possible in the use of materials that will directly determine the appearance of the bathhouse.
It can be finished with plastic or metal siding. This is a very common way to give a building a nice, elegant look.
It is based on galvanized steel or aluminum. Such material always decorates the facade.
This finishing material is not afraid of temperature changes, does not rot and does not attract the attention of living creatures as food. Despite the fact that it is not classified as flammable, it can melt in a fire. It can be mounted on the wall either vertically or horizontally.
It also makes sense to use ceramic siding, which is made from fiber cement. He is immune to fire and frost. Externally imitates other materials. If you want to have a traditional-looking bathhouse, you can just choose siding that looks like brick, wood or stone. Those who have used this material in construction claim that it does not fade for a very long time. And such finishing will last up to thirty years.
Although no one forbids using real facing bricks to give a foam block bath a decent appearance. We must keep in mind that it will be more expensive, and it is much more difficult for a non-professional builder to cope with such work on his own.
Since the basement of the building gets very hot in the summer, and at other times gets wet from rain and snow, the use of this particular material in this case is not without reason.
If you don’t want to use siding for the exterior decoration of the bathhouse, you can use a special lining that imitates timber. Its width is fifteen centimeters with a thickness of one centimeter. In such “clothes” the bathhouse will look like a building built from real timber.
A material that imitates a cylindrical beam is a blockhouse. This is a natural material that goes through a drying stage even at the manufacturing stage. Its humidity level at the time of sale should be no more than twelve percent.
Thanks to any of these materials, a bathhouse created from gray foam blocks will get a quite representative or even traditional look.
Foam block bath projects
Typical design of a foam block bathhouse
Many design firms offer pictures of bathhouses made of foam blocks. When choosing ready-made designs for bathhouses made of foam blocks, it is necessary to take into account the needs of the family and the size of the area that will be allocated for the construction of the bathhouse. The specific purpose of the bathhouse limits the number of options for its construction. Among the exterior finishing options, brick facing or siding is mainly used.
If none of the proposed options is suitable, it is possible to order an individual design for a bathhouse made of foam blocks, but this will significantly increase the cost of the building. There are one-story, two-story, bathhouse projects made of foam blocks combined with other buildings. Often a terrace, veranda or large enclosed porch is provided.
Project
Just as for any construction, before you start building a bathhouse, you need to choose a location, carefully plan, select and calculate the necessary material. Also find out what the roof will be like, for example, pitched.
It is advisable to immediately imagine what you want to see in the layout of your bathhouse. In the classic version, the drawings of almost all baths include a steam room and a sink; a relaxation room is also desirable. In different cases, areas are distributed according to emerging requests. There may be options with a large steam room and a small sink, also with reverse distribution, a large relaxation room is possible and many other options.
Choosing the appropriate option will not be difficult. Each person has his own idea of the functionality, proper use and organization of the premises of the building being built.
Particular attention should be paid to the construction of the vestibule if you plan to use the bathhouse for its intended purpose in winter
Also, the location of the doors is of no small importance; they must be planned so as not to take up too much space.
The stove must be selected taking into account the volume of the steam room, not forgetting that it is usually heated from the dressing room, therefore, part of the heat is spent on heating it. Based on these parameters, the furnace power is selected.
Currently, the bathhouse serves not only for washing, it is often used for emotional and psychological relief. Based on the requirements, a construction project is selected and implemented.
It may include not only the classic set: steam room, wash room, locker room, but it may also include the premises of a relaxation room, terrace, attic, swimming pool.
The most economical option would be to implement a project to build a bathhouse with three rooms.
There are a great variety of bathhouse designs, the most common of which are those where the rest room is combined with a locker room. At the same time, it is advisable to make it larger than other rooms, due to the placement of the necessary furniture in it.
Plans for bathhouses with terraces are very common. The terraces are equipped with the necessary furniture in the form of chairs and tables, barbecues and barbecue ovens are installed. The building is built under a single roof and has an appropriate design. Instead of a terrace, you can add, for example, a garage or another extension. The original idea is a country house combined with a bathhouse building.
Quite often, an attic is built as a second or third floor. This two-story building can be used as living or guest rooms or for relaxation after procedures. Such structures can also be one-story. The most commonly used sizes are 6 by 4, 3 by 5, and 6x6 meters.
You need to approach the selection of a construction site with all responsibility. The site must comply with all fire safety rules and the requirements of SNiP 30-02-97.
Based on these requirements, the building must be located at a distance of one meter from the fence, while the distance to the neighboring house must be at least eight meters, including five meters to the border of the site.
Bathhouse made of foam blocks: photo
Photo of a bathhouse made of foam blocks
Having assessed what a bathhouse made of foam blocks looks like, photos of which are presented on the Internet, you can achieve a similar result on your site. We must not forget that a photo represents a more realistic appearance than a drawing or three-dimensional image using 3D graphics. But the latest versions of the image show the exterior design and interior layout in more detail than photographs that reflect only part of the structure.
People who decide to have a bathhouse in their suburban area often use foam blocks as a building material. Even an amateur can handle foam blocks. But, despite the ease of use, it is necessary to take into account many details: instead of a cement mixture, it is better to use a special glue, then you need to perform priming and insulation, without this the foam blocks may begin to collapse.
This follows from the physical properties of foam blocks - the thermal insulation of a cement mixture is different, but a special glue has a thermal insulation comparable to foam concrete. It absorbs water well, so walls made of foam blocks need insulation from moisture.
Along with moisture insulation, we also recommend adding thermal insulation. These works are all finishing. Next, we will learn more about the internal and external decoration of a bathhouse made of blocks, foam blocks and bricks.
First of all, in a foam block bathhouse, the interior decoration should improve the internal appearance, give it zest and originality, neatness and completeness.
There are also technical indicators of finishing, which should not only not spoil the properties of the main building material, but only improve them. The finish needs to be very vapor-tight to prevent heat loss. It should also absorb moisture to a minimum in order to prevent rapid deterioration of the finishing material.
WALL INSULATION
Much has been said about wall insulation above - it is necessary if you do not want to spend a lot of fuel on maintaining the required temperature in the bathhouse and if the thickness of the foam concrete blocks is not enough for your region. Often, when using blocks 20 or 30 centimeters thick, additional insulation is not necessary.
Note: if you heat the bathhouse only in the summer, then 10 centimeters will be enough.
- The most environmentally friendly material for this purpose remains mineral wool, which has other advantages besides the fact that it does not emit harmful substances: it does not grow mold, it does not support combustion and retains heat perfectly.
- In addition to it, there is also cheap polystyrene foam or polystyrene. It is usually glued to the wall, then reinforced with mesh and plaster is placed on top. It can be used for baths, but its vapor permeability is lower than that of mineral wool.
- Bath walls can be insulated with basalt and stone insulation. They have excellent insulating properties, they are also environmentally friendly, non-flammable and (as a plus) mice do not like them.
- Glass wool can also insulate a bathhouse, but it cannot be used on the walls of a steam room - over time it will not withstand its temperatures.
As you can see, the choice of foam blocks as the basis for building a bathhouse has many consequences arising from the characteristics of this material, in particular, its readiness to absorb water. Compliance with the above rules will completely eliminate this drawback. Finishing a bathhouse from foam blocks makes this building material a very suitable option when it comes to choosing materials for building bathhouses.
Building a bathhouse is still half the trouble; the interior finishing of the steam room, washing compartment, and installation of a sauna heater stove still lie ahead.
Today, on the construction market there are a huge variety of different types of finishing materials, both for home and for bathhouses. Basically, for interior decoration, insulation, a vapor barrier in the form of foil film, or foil itself, and lining are used. To decorate the interior, namely the steam room, it is best to use linden lining for this purpose, but the price of this product can sometimes be very high. If the entire bathhouse is decorated with linden lining, it will turn golden))).
But the craftsmen came up with a little trick: the steam room is small and you will have to fork out for it and decorate it with linden, but the washing compartment can be decorated with a pine car, which costs several times less. Moreover, the temperature in this room is more gentle than in the steam room. And you don’t have to worry that the lining will begin to release resin.
Some people also do the following: in the steam room, they line it with pine clapboard at a level of a meter from the floor, and continue above with linden. It turns out the following: below the level of 1 meter, the concentration of fresh air and a gentle temperature prevail, which has a beneficial effect on the condition of the pine lining, namely, it does not emit resin.
The author decided to decorate his steam room with linden lining, since he is doing it for himself, for the soul, and saving in this case does not make sense. He will do all the interior finishing work himself.
Materials:
bars, lining, tiles, boards, bricks, metal sauna stove, heater stones, tile adhesive.
Tools:
hacksaw, hammer, trowel, mallet, level, ruler, tape measure.
And so the first thing he does is sew bars onto the walls.
Starts finishing the ceiling.
Installs a sauna stove and paints it with special heat-resistant paint.
Makes a chimney.
They lay tiles in the washing department; by the way, it’s a very good decision to use tiles as a floor, because compared to wooden floors, they will last for decades.
In the steam room, the floors are also tiled; the tiles are located at a slight slope towards the center, where the sewer drain hole is located.
Next, we begin installing the doors.
Lays stones for the heater.
And begins to decorate the steam room.
Moves on to finishing the washing compartment, installing benches for those washing, tanks for cold and hot water.
And the last thing he does is decorate the entrance and porch.
So I finished the interior decoration of the bathhouse, it turned out very well, sincerely, the eyes are happy to see such a fascinating steam room. Our
builder
very pleased with the work done. As can be seen from this article, there is nothing complicated in finishing, you just don’t need to be afraid and persistently move forward towards your intended goal. Everything will definitely work out.
Become the author of the site, publish your own articles, descriptions of homemade products and pay for the text.
More details here
.
People who decide to have a bathhouse in their suburban area often use foam blocks as a building material. Even an amateur can handle foam blocks. But, despite the ease of use, it is necessary to take into account many details: instead of a cement mixture, it is better to use a special glue, then you need to perform priming and insulation, without this the foam blocks may begin to collapse.
This follows from the physical properties of foam blocks - the thermal insulation of a cement mixture is different, but a special adhesive has a thermal insulation comparable to foam concrete. It absorbs water well, so walls made of foam blocks need insulation from moisture. Along with moisture insulation, we also recommend adding thermal insulation. These works are all finishing. Next, we will learn more about the internal and external decoration of a bathhouse made of blocks, foam blocks and bricks.
First of all, in a foam block bathhouse, the interior decoration should improve the internal appearance, give it zest and originality, neatness and completeness. There are also technical indicators of finishing, which should not only not spoil the properties of the main building material, but only improve them. The finish needs to be very vapor-tight to prevent heat loss. It should also absorb moisture to a minimum in order to prevent rapid deterioration of the finishing material.
Differences in interior decoration
Cinder block baths and their interior decoration are characterized by high temperatures and high humidity, so a vapor barrier must be provided and installed on site. It is very often performed with the following materials:
- Foil (has 100% vapor permeability); Tiles and ceramics; Roll materials.
The first step is to cover the walls with paper without any impregnation.
Next comes a layer of thermal insulation (mineral insulation can be used as it). The next layer is the vapor barrier itself, which is paper with a layer of foil, which does not allow moisture to penetrate into our insulation. Sheets of foil are connected to each other with special tape.
Because of all of the above, condensation will not form in our bathhouse, causing the foam blocks to deteriorate and lose their properties.
External insulation also helps get rid of condensation.
This occurs due to the fact that the temperature inside and outside the bath is equalized.
Next, we move on to the next stage, which is responsible for the aesthetics and attractiveness of the interior decoration of the aerated concrete bathhouse as a whole.
It is advisable to finish a bathhouse made of logs using wooden materials that are environmentally friendly and do not emit substances hazardous to human health when heated.
In this regard, the interior decoration of a bathhouse made of foam block and wood is not much different.
The most popular and economical finishing materials are cedar, larch and linden. The formation of condensation and loss of properties of a bathhouse made of logs, unlike a bathhouse made of foam blocks, is minimized.
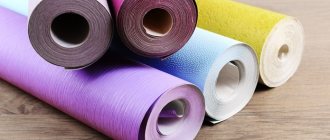
Plastic panels for finishing baths
Additional elements for mounting plastic panels.
The advantages of using this material are:
- plastic finishing materials are presented in a wide variety of types and colors;
- plastic is a moisture-resistant material and is quite durable;
- finishing is easy to do with your own hands;
- prices for plastic finishing materials are quite affordable.
To install plastic panels on foam block walls, you will need to install lathing. To do this you will need the following materials:
- bars and boards;
- building level;
- wood screws;
- electric jigsaw;
- construction stapler;
- sealant;
- plastic finishing material.
You need to make a sheathing from bars and boards on the surface of the walls. Some owners prefer to make it separately and then attach it to the surface, but it is better not to do this. The process turns out to be more labor-intensive and will take more time.
Scheme for installing plastic panels on the ceiling.
The sheathing structure is made up of guides, load-bearing and auxiliary ones. To fasten the elements of the wooden frame together, self-tapping screws are used, which are screwed in with a screwdriver. To attach load-bearing elements to the surface, you will need dowels. They will provide the entire structure with good strength.
The lathing must be installed on the entire surface that is intended for finishing. Plastic elements are attached to it using a construction stapler. The plastic panels are connected to each other using special locks, which are provided at the ends of the elements.
The process of finishing interior walls with clapboard
Many people perform cladding using wooden lining. The advantages of wood are obvious to everyone - it is durable and beautiful, but when using it, all the nuances must be taken into account.
For example, lining made from coniferous trees cannot be used where temperatures are always high, that is, in steam rooms, since when it is heated, sticky resins are released. They are dangerous to the human respiratory system. Quite often mold forms in bathhouses.
Antiseptics of various types help to cope with this, so it is better not to decorate the washing room with clapboard. Cheap pine paneling is used in dressing rooms.
Deciduous trees are needed in the steam room. The most reliable and durable oak lining. However, currently aspen lining is most often used.
By all accounts, aspen is the best type of finish. The advantages are aroma, environmental friendliness, and health benefits, because when heated, some wood species release phytoncides into the environment.
Move the lining into the bathhouse itself - it should absorb excess moisture.
Before installing the finishing, complete the wiring of all communications.
Next, you need to make a wooden sheathing (for this it is better to use special screws intended only for working with foam blocks) and then everything is covered with a special solution that prevents the formation of mold.
Next, the insulation is installed. The vapor barrier material is attached with a stapler to the sheathing previously prepared for this.
Next, the lining is secured either with nails or secret clamps. Claypers are used at the finishing and decorating stage.
Finishing and arrangement
For finishing you should choose a suitable tree. We are talking about oak, cedar, larch or linden. The sheathing should not be made of resinous species such as pine. Before installation inside, it is better to treat the wood with oily substances. Such impregnation will reduce the hygroscopicity of the material. Decorating with clapboard starts from the ceiling. It is mounted on the sheathing using a tongue and groove mechanism or secured using clamps.
When the lining is mounted on the ceiling, work begins with the walls. The covering will go in parallel with the installation of shelves and will occur in a certain sequence. First, use a level to mark the surface of the walls. At the same time, markings are being made on how the sunbeds with all the elements, including backrests, will be placed.
After this, the side and front parts of the shelves are covered. After this, the remaining walls are sheathed. Now all that remains is to install the skirting boards, both ceiling and floor. Sheathing parts are usually used only in a special case, if at the joints they are fitted one under the other very sloppily. It should be said that this point must be approached carefully, because moisture may begin to collect in the gaps, which may cause the development of fungus and mold in these places.
Already at the end of the work, doors are installed, as well as various lamps and fixtures. The wires must be carefully insulated so that moisture does not get on them and a short circuit does not occur with subsequent fire.
It should be noted that the most beautiful bathhouses come from those who want to introduce some of their own ideas into it and do something non-standard. And a steam room is a room where any material can become a work of art, be it wood, stone or metal. The main thing is that your imagination and finances allow you to realize your ideas.
You can make a steam room with your own hands, although this requires a considerable amount of knowledge. At the same time, if you do everything really correctly, then you can be sure that it will turn out just as good as if you ordered the development of the project and its subsequent implementation from professional builders. In addition, the technology for independently creating such a building has already been tested by more than one person and has proven its high quality and viability. In general, if you want to build a steam room with your own hands, then thanks to the knowledge described above, you can implement such an idea without any problems.
Installation of beacons
After all of the above, you should measure the parameters of the walls and begin manufacturing a wooden frame or beacons according to the measurements taken. The guide beacons must be fixed at a distance of about 0.6 - 0.9 meters from each other, vertically. This is usually done with self-tapping screws.
Beacons must be level. To do this, cut plywood and timber are installed underneath them.
Check whether the guides in the sashes are installed correctly using twine or rope. First, a rope is pulled above the floor level, then the same is done in the middle of the wall and under the ceiling. The lace should not be deflected by the beacons in the other direction and no gaps should form between the sheathing and the lace.
Finishing
Finishing is necessary both externally and internally.
Insulation from outside
If you do not do external finishing, the walls will simply be blown through. So you need to at least prime (with Ceresit ST-17 primer), and then plaster (ST-24) with a layer a little more than half a centimeter thick. You can continue finishing after installing doors and windows. Since aerated concrete is a fragile structure, the frames should be wide and attached to the concrete with anchor bolts as large an area as possible, and caulked with jute or tow. More complex external insulation consists of many elements that are attached on top of the sheathing made. The prepared facade can be covered with plastic siding or decorative plaster.
Insulation of aerated concrete from the outside
Insulation inside
Craftsmen advise covering the steam room and the bathhouse as a whole with foam glass tiles - simply placing them on glue. It is heat-resistant and has low thermal conductivity.
Foam glass is laid like tiles
Then the walls can simply be covered with clapboard.
Covering a block bathhouse with clapboard
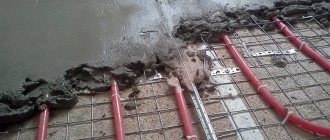
A “warm floor” is laid on the floors, and tiles are placed on it.
Warm floor under tiles
Important! Before interior finishing work, you need to install all electrical cables and install taps for the water supply system and drains for the sewerage system.
After laying the tiles, ladders are installed.
Tile with ladder
Let's assume that we have overcome all the difficulties and our bathhouse is ready.
About insulation and vapor barrier
The most important and basic thing for a steam room is that it must retain heat very well.
At any time of the year, there must be the required temperature inside the steam room. If the vapor barrier is not completed, the steam leaves the room through the walls, after which condensation forms between the walls and the finish. As a result, the wood begins to rot and mold forms on it.
A professionally completed installation of insulation and vapor barrier will keep the bathhouse structure in its original form and protect it from destruction.
Also, in a comfortable bathhouse with the thickest walls possible, it is necessary to provide ventilation.
When the human body lacks air, a feeling of dizziness, nausea and weakness appears, this is especially dangerous for people with the initial stage of diseases of the cardiovascular system.
Ventilation is intended for the following purposes.
- Redistribution of air masses in the steam room; Formation of fresh air and its influx. This is especially necessary when using an electric heater as a heating element, since it burns oxygen.
Insulation
The rule for increasing vapor permeability has already been mentioned above. If you act according to it, then the insulation of the walls must be carried out from the outside, because the vapor permeability of the wall is lower than that of the insulation and membrane. But there is also an opposite argument, which says that a bathhouse insulated from the outside still manages to cool down so much during a week’s downtime in cold weather that it is almost equal in temperature to the surrounding air.
Therefore, when you start heating it, and the insulation is external, the entire mass of frozen walls located inside the “fur coat” will actively absorb heat. And you will have to heat them to the end. (More details about the external insulation of baths here.) On the other hand, internal insulation causes condensation, for example, in the thickness of the insulation.
In any case, there are disadvantages, but they can be compensated for. In order not to heat the walls, you can use foil as a vapor barrier, and fight condensation in the insulation with the help of vents and ventilation gaps. The main reason for internal insulation may be a poorly or not insulated foundation or the fact that external insulation does not cope with the task. However, the topic of insulation was thoroughly analyzed in the article on the insulation of a bathhouse made of foam blocks. We advise you to read it.
Additional Information:
- Advantages and disadvantages of natural insulation materials, in particular clay with sawdust and sawdust with cement.
- How to insulate the floor in a bathhouse? It depends on what kind of floors: on screw piles or poured, with a layer of insulation, dry or poured
- When is it necessary to insulate the roof of a bathhouse and when is there no point? Roof thermal insulation technology
Sheathing material
This process can be done with your own hands without the involvement of specialists.
In order to calculate the required amount of lining, you need:
Let's calculate a bathhouse measuring 4x4 meters, with a ceiling height of 3 meters. We will trim and sheathe all the walls and ceiling; Let's assume that the bathhouse has two compartments - a 3x4 meter steam room and a 1x4 meter dressing room; Next, you need to calculate the area of the steam room lining.
Calculation of ceiling area: 3x4=12 m2. Calculation of wall area No. 1: 4x4 = 16 m2. Calculation of the area of a short wall: 3x3 = 9 m2; We calculate the total area of all compartments: 12 (ceiling) +16 (wall No. 1) +9 (wall No. 2) +3 (wall No. 3) +3 (wall No. 4) = 42 m2;Next, we carry out calculations for the dressing room.
Ceiling area: 1x4=4 m2. Area of two walls No. 1: 4x3=12 m2. 12x2=24 m2.
Wall area No. 2: 1x3 = 3 m2. 3x2=6 m2. Total area: 4 + 24 + 6 = 34 m2; The total finishing area is 42 + 34 = 76 square meters; Then we count the window and door openings, their area, then add about 15-20 percent for trimming the material.
Design ideas
We talked a lot about wooden details, but we didn’t take into account one unusual idea for a bathhouse - an interior made from saw cuts! Assembling a mosaic from wooden elements is certainly more difficult than nailing down clapboard. But this design looks much more original. Transverse cuts are used separately or alternated with longitudinal slabs.
The second option will appeal to lovers of oriental motifs in bathhouse design. It is not necessary to build a hammam on the site for the room to “smell” of the charm of Turkey or Morocco - just take a small mosaic or ordinary tiles with various patterns as a basis. It is convenient for finishing showers, but it can also be used in steam rooms.
Installing a heater also requires a design approach - firstly, wooden walls should be protected from excessive heating. To do this, the space near the stove is made of stone or tiles. Secondly, it is important to protect visitors: build a fence around the system so that no one accidentally touches the hot surface with their foot or hand.
Having adapted a well-known saying, we can say: if you love to wash in a bathhouse, you also love to select the finishing. Now you know how to make your bathhouse last for many years to the delight of you and your guests!
Subtleties of design
When developing a drawing of a future bathhouse, you must take into account its size. Only knowing the exact scale of the structure can you correctly draw up a project for such a room
This scale is small, so you need to be careful when designing these rooms. The design must simultaneously accommodate a steam room, a washing room, and often a shower room with a changing room. As a rule, in these cases, most of the space is set aside for the steam room. Often such baths have a window.
There may even be two openings (in the washing room and steam room). They act as necessary ventilation. Often, projects of such small rooms are combined with other residential buildings (garages, guest houses) to make the structures look more beautiful and solid.
In this case, many experts strongly recommend creating such areas outside the room. Today, a considerable number of projects for the design of larger baths have also been proposed. Their size is 6x6 m, some designs may be larger (+ 2-3 sq. m). Premises of this size can easily accommodate all the necessary rooms (shower, locker room, washing room, vestibule, steam room). In addition, such buildings often contain small recreation areas for the owners.
In these types of baths it is worth installing window openings. Their size must correspond to the dimensions of the room itself, since large structures require good ventilation. It is better to place windows in several rooms at once. Often such large-scale baths are made two-story. Moreover, the second tier is also made of a rather large size. Most often it is reserved for a swimming pool or a large recreation room.
The second floor of such premises does not necessarily need to be additionally insulated. Warm steam from the first tier will penetrate the room, warming it up. Due to the uniform distribution of heat, the temperature of the upper zone will not be too high, it will remain optimal. When building two-story bathhouses, experts and designers do not recommend combining them outside with other buildings. After all, they can completely ruin the beautiful appearance of the bathhouse and make the structure too overloaded. Therefore, it is better to place all other additional structures separately.
With swimming pool
Often, when building baths from foam blocks, swimming pools are placed in them. But it should be remembered that they should only be installed in structures with a large area. Otherwise, the design will be cumbersome and will cause significant inconvenience. If you are building a two-story building, it is better to place such an element on the second tier.
Today, on the building materials market, anyone can see various options for swimming pools for baths. They can be of various shapes (round, rectangular, square, semicircular). The choice of the appropriate option depends on the internal layout of the building. At the same time, we must not forget that the design of such premises with a swimming pool will cost the owners a lot.
With terrace
You can often find projects of bathhouses with a veranda. It can be included in projects of small buildings. According to some experts and designers, the terrace can fit perfectly into any type of design, regardless of size. If you are building your bathhouse from foam blocks, the veranda can be made from this material. But options are possible in which terraces are made from a different base (wood, metal, plastic, decorative stone).
Some designers advise placing small pieces of furniture (tables, sofas, chairs) on terraces. It is worth remembering that the veranda cannot be overloaded. Otherwise it will look ridiculous. If you are arranging a two-story bathhouse, then such structures should be placed on the upper tier.
Small buildings
Today, experts can offer designs for bathhouses made of foam blocks with dimensions smaller than standard ones. Such premises often include only a washing room and a steam room. Other zones in similar structures may be too small or cannot be accommodated there at all. Often, in order to increase the area of a small bathhouse, owners build a second floor of the same scale.
On the upper tier you can place a shower room, a relaxation room, and a small swimming pool. If you do not want to build another floor, remember that it is better not to load such structures with verandas and other additional elements. Even in small bath rooms it is necessary to place window openings. For these structures, two small windows are enough. In small-scale baths this will be enough for ventilation.