For aesthetic and practical reasons, they try to make the walls in the room even. Straight surfaces without cracks or other defects create a feeling of well-groomedness and order; they are a convenient basis for all types of decorative finishing.
In this article, I have collected all the basic rules and nuances for leveling walls with plaster: which one is better to choose, how to properly plaster it yourself. I tried to make detailed and complete instructions on the technology of each stage of work.
Ways to level walls
Before finishing the walls, you need to find out the degree of their unevenness. If the surface is not perfectly smooth, then any finish will lie unevenly.
Plastering is a process of finishing walls required to level them
The most accurate device for determining the evenness of walls is a plumb line. You need to use it like this:
- Drive a nail into the wall at a level of approximately 30 centimeters from the ceiling, 20 from the floor. The head of the nail creates a gap of 25 millimeters.
- Tie a plumb line and nail a nail along it using the same method. Repeat the procedure on the other side of the wall being tested.
- To check the middle, the cord is tied to a nail located at the top and to the bottom.
A laser level is also used to identify irregularities. With a perfectly flat surface, the rope should not touch the wall (the gap is at least 5 millimeters). If there are unevennesses, leveling methods using plastering are used:
- on a plane, using the rule (beacons are not needed);
- using beacons (special profiles designed for smooth plastering);
- on a reinforced mesh (applied directly to the wall to be leveled).
Plastering is usually used if the surface is fairly smooth and requires minor correction. Alignment using beacons is necessary if the wall has significant unevenness or other defects.
Plastering is usually used if the surface is fairly smooth and requires minor correction
Why treat walls?
For high-quality finishing work, be it painting or wallpapering, smooth, straight surfaces are required. Although not perfectly flat, they comply with established building standards, with errors in width and length of 1 m: up to 1 mm for residential premises, up to 2 mm for building facades and up to 3 mm for non-residential premises.
To level the walls, plastering work is carried out. Along with the main task, this procedure increases fire safety, vapor conductivity and insulation of surfaces.
For a beginner, plastering walls with his own hands will take much more time than for a specialist, but he will gain invaluable experience and self-confidence.
What is the best way to plaster walls?
The most common mixtures:
- plaster;
- cement-sand;
- cement-lime.
Each of the mixtures has its own characteristics. This determines which plaster is best for plastering the walls in a particular case.
Gypsum plaster fits tightly onto the walls, creating a smooth base for further finishing. It is not subject to shrinkage, has high ductility, and a high level of adhesion. Provides additional sound and thermal insulation and allows walls to breathe. The only negative is that it is applied in a layer no thicker than 5 centimeters.
The answer to the question: “Which plaster is best for plastering walls?” depends on the location of the surface. Cement-sand mixture is used for building facades. It is heavy and cold, it is advisable to use it in rooms with high humidity. For convenience, a metal mesh is pre-attached to the surface of the facade. This is especially true for walls made of sand-lime brick.
Cement mortar for plastering walls
Cement-lime mixture is often used for plastering the walls of country houses. It is warm, just like gypsum. It is optimal to use it in areas where there is enough space for storing plaster mortar and installing a concrete mixer. An important advantage: cement-lime mixtures have a low price compared to gypsum. The disadvantage of this plaster is its low strength.
Solution. How to make the right choice?
A solution for plastering cement-based walls is prepared as follows. Cement is mixed with sand in a ratio of 1/2. In addition, you can increase the amount of sand to 5 parts.
The composition is thoroughly mixed, then water is gradually poured into it. The solution should resemble dough.
To prepare cement-lime mortar you need cement with sand and lime. For one part of cement there are 6-8 parts of sand and up to 3 parts of lime.
First of all, cement and sand are mixed. Lime milk is poured into the resulting composition. All ingredients are thoroughly mixed together.
If the solution turns out to be too thick, you need to dilute it with water. After adding liquid, all ingredients must be mixed again.
If the walls are lined with facing bricks, their plastering should be entrusted to professional builders. Plaster does not adhere well to materials with a polished surface.
It will be difficult for a beginner without experience to properly plaster the surface. As a result, the plaster may peel off and fall off the wall in pieces. Professionals, in addition to their knowledge and skills, use reinforcement with a special primer.
If a smooth concrete wall is to be plastered, gypsum with quartz particles is added to the cement mixture. The latter give the surface the roughness necessary for good adhesion to the solution.
Lime-gypsum solution is prepared from gypsum (1 part) and lime (3 or 4 parts).
First, water is poured into the solution container, then gypsum is poured into it, and everything is thoroughly mixed. The consistency of the mixture should be semi-liquid. Lime is added and all parts are mixed again.
For a rough concrete wall, you can use “Betonokontakt”, and solutions are used on both cement and gypsum bases.
Before plastering, foam concrete walls are treated with deep penetration primers. You can choose gypsum or cement mortars at your discretion.
A photo of wall plaster demonstrates the best design ideas for the interior. The coating will be of high quality if you choose it wisely. You can consult with the manager of the hardware store.
The modern market offers a wide range of mixtures that are easy to prepare. To get the finished composition, you just need to mix them with water. An example of such a mixture is “Rotband”.
Aligning walls with beacons
To effectively level the wall with plaster, the uneven surface is pre-marked. The purpose of installing beacons is to bring them into one plane. For this, the following basic rules will be useful:
- the optimal tool for installing beacons is a laser plane builder (it sets both planes at once, which simplifies the installation of beacons);
- beacon profiles are installed vertically (the optimal pitch is 1000 - 1200 centimeters);
- the distance from the corners of the room to the lighthouse is up to 500 millimeters;
- Beacons can also be installed horizontally (a more labor-intensive method).
Properly installed profiles - beacons line up a flat vertical plane.
Pulling out the plaster along the beacons
You need to start installing the beacons from the corners, using a square for accuracy. The beacons are attached to the mortar that will be used to plaster the walls. Next, the distance between the beacons is filled with the solution; it must dry completely. The same work is done with finishing plaster, and after complete drying, the beacons are removed from the walls.
Lampshades of different shapes for the bathroom
The most familiar picture for us is sconces on both sides of the mirror. Similar light sources could be seen before in many apartments when illuminating mirrors in the hallway or bedroom. When the lamps are placed sideways, the face will be illuminated evenly from above and from the sides. This design is appropriate:
- for retro and country style (with shades made of frosted glass or plastic);
- for a nautical style (imitation of ship lanterns);
- for a classic or palace style (light sources - in the form of candelabra or models with pendants, where transparent cut glass or crystal is often used);
- in minimalism or for small bathrooms (as an option, white matte balls that provide soft light that does not hit the eyes);
- in Tiffany style (colored glass, forged elements);
- in high-tech style (if you use cold light in a cylindrical or curved model);
Lamp shades can be protruding or completely adjacent to the wall.
The direction of light from the lampshades near the mirror in the bathroom
schoerner
The direction of light affects both the proportions and dimensions of the room, as well as the perception of one’s own appearance.
1. If the lampshades are directed upward, the ceiling reflects the light and distributes it evenly throughout the room, especially if the walls and ceiling are made of highly reflective materials. This light is saturated, but does not irritate the eyes.
2. Light sources can be placed not only on both sides of the mirror, but also above it. If the light flux is directed downwards (direct light), then a “subway effect” can be obtained, which helps to focus attention on skin imperfections.
3. Sometimes in cylindrical or tubular lamps the direct light has a double direction: up and down. This allows you to use the ceiling, walls and even the surface of the tabletop as reflectors, achieving brightness with small lamp sizes.
4. Scattered light sources distribute light evenly in different directions (for example, matte spheres).
Placing the lighting only at the bottom visually deforms the face.
Beacon profiles - types
Metal beacons are thin profiles made of galvanized metal. They have pre-punched holes for fastenings. Beacons act as limiters.
Plastic profiles are an alternative to metal ones. They are also attached to the wall with screws. The only drawback is the fragility of the structure (it is destroyed by strong blows).
Temporary plaster beacons are a practical option. There is no need to groove the wall to install them, then seal the holes. They are plaster strips. Their installation is as follows:
- Attach the screws to the wall to be plastered and level them (optimally using a laser level).
- A metal profile is temporarily applied to the screw heads.
- Holding the profile with one hand, apply gypsum mortar under the metal strip.
Unnecessary plaster is removed, then the profile is removed. The resulting plaster strips serve as guides.
Beacons for plastering walls
Required tools and supplies
To carry out the work you need to prepare:
- plaster mixture;
- primer (for concrete surfaces or acrylic);
- beacon profiles (size from 3 to 10 millimeters);
- perforator;
- dowels;
- screws;
- bubble level;
- Phillips screwdriver;
- grinder;
- plumb line;
- hammer;
- aluminum rule;
- metal spatula;
- tray and roller for priming.
Take gloves to protect your hands.
Aluminum rule, double grip, 2 stiffeners
Features of plastering indoor surfaces
Do-it-yourself plastering work Using some rules, you can plaster the walls with your own hands:
- The first rule is the required temperature. Any coating is applied at temperatures from 5 to 30 degrees. Humidity does not exceed 60%. This regime must be followed for three days.
- The second rule is to study the instructions. To save time, it is better to first study all the nuances of the work.
- All instruments must be clean and free of old material.
- Apply the plaster mixture 2-3 times. After each coating, wait until it dries completely.
- If it is necessary to plaster the ceiling and walls, we begin with the ceiling part first.
Plastering process
Before plastering the walls, you will need to carefully study the rules for plastering walls:
- work is carried out at a temperature of +5 – +30 degrees;
- be sure to follow the manufacturer’s recommendations when preparing the mixture;
- instruments are cleaned and washed after each use;
- when applying plaster in several layers, each subsequent layer must be dried;
- When plastering internal walls, work is carried out from top to bottom.
Partitions and walls must be plastered strictly following the sequence of actions. How to properly plaster vertical surfaces:
- Mark the walls and install beacon profiles.
- Attach the beacons to the plane.
- Apply plaster, drying each layer.
- Grout the plaster.
The final finishing is carried out after the solution has completely dried.
You need to mount beacons on the wall
Preparing walls for plaster
Plastering walls with your own hands also involves preparation. Any finishing begins with preparation; the better the surface is prepared, the less chance you have of cracking or pieces of mortar falling off. Below we will look at different options for preparing walls and the features of plaster. Let's start with primer and what it is.
Padding
Preparation may include different stages, it all depends on the condition of the surface. One of the most important stages of semi-preparing is priming the walls (I devoted a separate article to this). It comes in several types, but we will need a maximum of two:
Deep impregnation primer - Liquid composition, sold in cans, yellow or white. It is often concentrated, so dilution is required in the proportion indicated on the canister. Applied with a brush or roller, it penetrates the surface and binds small particles both outside and in the depth of penetration.
Sand primer, putzgrunt, betonkontakt - Primer designed for better adhesion of smooth concrete surfaces. It contains quartz sand. Mix well before use. It is advisable to pre-prime the surface with a deep-penetrating primer. Apply with a large brush in different directions. After application, you need to wait for complete drying, preferably a day.
General preparation
We remove the old wallpaper, everything that rings does not hold well and falls off. Do I need to prime? Any surface must be primed before plastering or puttying. If your surface is well prepared, that’s a third of the success.
Removing old plaster
If you need to level old walls, then initially you need to tap it, you may need to knock off poorly adhering pieces of old mortar or knock it all down. We'll talk about how to shoot down a little lower. Then we remove as much dust as possible from the surface and prime with deep penetration soil. Wait for the primer to dry completely.
How to remove old plaster? what to beat off with? For this we need:
- Rotary hammer, with spatula attachment
- Hammer
- Respirator, gloves, headphones
- Garbage bags
Plastering walls usually occurs in several stages, one of them is preparing and dismantling the old coating. We begin to beat off the layer of solution from the places where it best comes off and falls off. If a conventional hammer drill does not cope with its task, then you will need a large, powerful hammer drill (you can rent it for the day) and things will go much faster. When everything has been cleared away, we dust the surface, either vacuum it or sweep everything off the surface. We collect the collected waste in bags and take it away. After we managed to remove the old plaster and collect all the debris, we prime the surface with deep-penetrating primer, preferably 2 times.
Wall marking, priming and installation of beacons
Sequence of work:
- Inspect the walls using a level to determine the degree of unevenness. Found – mark with a marker.
- Make preliminary markings for beacons. First, mark the place for the beacons in the corners and on the side of the doorways.
- The markings must be done so that for plastering the rule is a distance of 130 - 160 centimeters.
- Draw a line near the doorway. Having retreated 160 centimeters, draw a second one. The distance to the next line is 2.3 meters, it must be divided in half.
- Returning to the side lines, retreat 15 centimeters from the floor. Make holes, hammer in dowels with self-tapping screws. Pull the cord horizontally between them.
- Step back 245 centimeters from the driven dowels and repeat the procedure. The result should be 2 parallel stretched cords. In places where the cords cross the markings, make notes with a marker. Holes are drilled through them and dowels are hammered in without self-tapping screws.
The result is 2 rows of holes with self-tapping screws. It is recommended to remove the corner ones, it is recommended to leave the dowels. The next stage is primer. It is necessary for better adhesion and removal of moisture from the surface. When leveling smooth surfaces, it is rational to apply mixtures of the “Concrete Contact” type. Absorbent, porous ones are covered with high penetration primer.
After drying, marking the wall continues:
- Tighten the 2 outer and 4 upper self-tapping screws. Attach the rule to the caps, check against the top screw.
- Make sure that future beacons do not stick out. Pull the cord diagonally over the caps. Adjust the screws to the center.
- The same for the bottom row.
At each level you will get 8 screws.
Priming walls before plastering
Installation of beacons
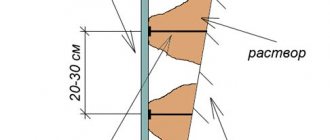
After the primer has dried, you can install beacon strips. In most catalogs of building materials they can also be found as a beacon profile “PM 23x6”. “23” is the width of the base, “6” is the height of the lighthouse in mm. If you are plastering large protrusions, the beacon can be taken at 10 mm. The standard slats are 3 m high.
The beacon is installed in a vertical position. The rail is attached to the wall on alabaster, placing construction plaster at several vertical points for one lighthouse.
The placement of beacon slats begins with attaching two slats to the wall at opposite ends of one wall. For this:
- Mix a small amount of gypsum with water;
- We apply the mixture to the wall at several vertical points in the place where the beacon is supposed to be attached;
- We immediately attach the beacon to the alabaster.
The evenness of the beacons, their verticality and horizontality should be checked using a building level.
These works are carried out at a pace, but not in a hurry. If you do plastering yourself, without much experience in finishing work, you need to be especially careful.
Remember: the mixtures dry quickly (two minutes are enough for complete hardening), and therefore you need to apply alabaster to the wall and then attach the profile to it at a pace.
So, you have secured two beacons at opposite ends of the wall. The attachment points from each other should be at a distance of no more than 50 cm. If you are installing the profile not on a brick, but, say, on a plasterboard, you can attach it using ordinary self-tapping screws, slightly pressing them so that the beacon does not bend. Between the two installed beacons, two parallel threads are stretched, at the top and bottom.
The remaining center beacons must be installed as follows: the top of each profile after installation should lightly touch the thread you pulled. The distance between the profiles is determined based on the parameters of the plastering tool that you are going to use. If you work as a rule with a length of 2 meters, then between the beacons there should be a space of 180 cm wide.
This completes the process of preparing for plastering.
Applying plaster - technology
There is a simple algorithm for how to properly plaster walls:
- Preparation of the solution. Add the dry mixture to 1/3 of the water and mix with a mixer. This action is carried out strictly according to the instructions. On each package of the mixture it is written how to prepare a solution for plastering walls.
- Walls that absorb liquid must be moistened. This will prevent future cracking.
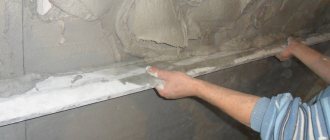
- The professional way to apply the solution to the wall is to spread it onto the surface with a spatula.
- Alignment is carried out in the direction from the ceiling to the floor, starting from the lower border of the beacons.
Applying plaster mortar to the wall
If bubbles and irregularities form, remove them. The solution is again poured onto the area and leveled. Repeat until the upper border of the beacons. Near doorways and windows, the plaster is applied overlapping. The beacons are removed, the grooves are sealed. Dried plaster should not fall off when pressed. Before quickly plastering, a beginner needs to prepare his tools and mixture in advance.
Pros and cons of plastering surfaces using a robotic plasterer
Today, nothing is impossible, and a robot plasterer comes to the aid of workers, who successfully not only applies plaster, but also levels any surface.
This unit is still far from perfect; its use is only possible when working with walls, but not when applying mortar to the facade of a building. Currently, this machine is gaining more and more popularity due to the many advantages of its operation.
- Inexpensive material can be used for the work, since, unlike a plastering machine, the robot is unpretentious to the quality of the solution. You can even use cement-sand mortar in a ratio of 1:4 or 1:6. The sand should be fine and dry. This solution adheres well to the surface and does not need to be leveled or rubbed.
- The cost of work is reduced, since fewer craftsmen are required to operate the unit. Experts say that a small cottage can be completely plastered using a robot in 3-4 days.
- Machine-applied plastering work is carried out quickly, since the robot is capable of processing 40-80 m2 of surface per hour. True, this is the case if the surface is initially flat.
- The work is done efficiently. After the plaster has dried, the deviation according to the two-meter rule is 2-3 mm. This is considered a natural process of shrinkage of cement mortar.
- A robot plasterer quickly pays for itself, since the work goes much faster and there is no need for a large number of craftsmen.
However, mechanized plastering work using a robotic plasterer also has its disadvantages.
- To operate, the unit requires a perfectly flat surface of the floor and ceiling, since the robot must be securely fastened at the top and bottom.
- The ceiling height in the room where machine plastering work is carried out should not exceed 5 m. Otherwise, deformation of the metal profile is possible.
- If the volume of work is large, additional equipment may be required - a plastering station, a mortar mixer or a ready-made plaster mortar, since a simple concrete mixer cannot cope with such a volume of plaster composition. Experts recommend using a plastering station in this case, since it can be used to quickly apply the solution and also apply a preliminary layer. But here we cannot fail to mention one feature of these machines - the stations cannot cope with cheap building mixtures, so it is better to use gypsum plastic building mixtures when working with them.
- The robot's large weight (about 100 kg) makes it difficult to move it from place to place, and its design is not very convenient to move.
- In order to operate the unit, workers require special technical knowledge. The robot requires special care - after finishing work it must be cleaned.
Every day more and more advanced equipment appears, which is designed to facilitate the process of applying plaster. In the coming years, machines and robots will be modified, becoming even more efficient and complex. But for a long time, the basis of plastering work, the guarantee of obtaining completely smooth surfaces, will be the highly qualified master, even if he uses such simple tools as a trowel and a rule.
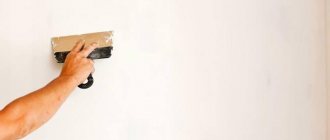
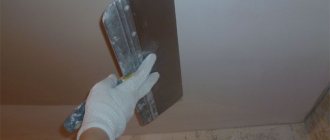
Grouting plaster
The last stage is the grouting of the applied plaster, which is carried out until the solution dries completely:
- The plaster is diluted in small portions. A surface area of 1 m2 is moistened.
- The solution is applied to the malka, after which it is spread in a thin layer over the surface. Holding the tool at an angle of 45◦, level the area.
- It is necessary to smooth the area until the mixture stops accumulating on the fry.
The procedure is repeated with the entire surface of the wall. It is recommended to work without breaks. The exception is when preparing a fresh portion of the mixture.
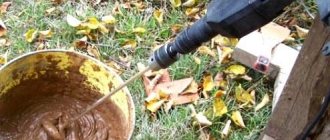
Preparation of cement mortar
The proportions of classic cement mortar are 1 part cement and a little more, 3-5 parts sand. Its quantity directly depends on the brand of cement. For example, when using M400 cement, the proportions will be 1:3.5.
The brand (that is, strength) of the resulting solution is often indicated in the literature. We repeat, not cement, but the already obtained solution! (see photo). Naturally, the higher this number, the stronger the surface will be.
Proportions of sand-cement mortar
M150-200 cement is best used only for interior work. For finishing facades, more durable mixtures with the addition of M300-M400 cement are used. Since its quality has not been up to par in recent years, it is better to play it safe and even use cement M300 and higher even for interior work. To level places with increased mechanical load (corners, doorways), it is better to take mixtures with the addition of M400-M500 cement.
Sand is used only clean, dry, without admixtures of stones and clay, preferably river sand. To prevent the plastered surface from cracking, you should not add too fine sand. The size of its fractions should be 0.5-2 mm.
The amount of water is determined experimentally. The mixture should not be too liquid and run off the trowel. Water is always added only after mixing the dry ingredients, in small portions.
Please note that the solution for applying the base (primer) layer is thicker than for the coating mixture and spray. We will discuss the last two types of solution below.
Recommendations
For independent and correct plastering of walls, the material from which the internal wall or facade of the building is made is taken into account. The choice of solution depends on this. To save time, you can use ready-made plaster mixture. The durability of the finished coating directly depends on the quality of the primer and solution.
Do not neglect the information on the packaging of the products, because it indicates how to prepare a solution for plastering walls, at what temperature you can plaster, as well as the order of work, using cement density m500
Based on our article, you will be able to carry out various innovative and design solutions over time. For example, decorative concrete plaster will look great in the hallway or kitchen. Before decorating a large surface, practice on small volumes. Cement-sand mixture for plaster creates a beautiful surface.
Plastering walls is a complex, time-consuming process. But with strict adherence to technology, even an inexperienced person can handle it.
Preparing various surfaces
I repeat that different surfaces are prepared slightly differently, that’s all the difference. As much as I would like to write the same thing, demand creates supply.
Aerated concrete, gas block, foam block
Clean with a spatula (35cm) from excess glue and poorly adhering particles. Without sparing the primer, we saturate the wall with deep penetration soil. How to plaster foam blocks inside and outside? The inside can be plastered with either gypsum or cement. But on the outside, only with cement plaster, having previously reinforced the surface with façade fiberglass mesh. Plastering walls with your own hands from gas silicate blocks is carried out in exactly the same way as on other surfaces.
Brick
The protruding mortar and protruding bricks are beaten off with a hammer and everything is also primed. The whole difference in plastering brick and other surfaces is the preparation, although the preparation all boils down to the fact that we remove it, beat off the excess and prime it well. The plastering technology is the same as on other walls, read below in the chapter about technology. If a brick is chipped, or there is a large gap between the ceiling and walls, then it is better to seal such brick gaps with a cement-sand mortar 1:4 (sand-cement). This type of masonry mortar has much better load-bearing characteristics than the plaster mixture.
Arbolite slabs
Preparation and plastering of wood concrete slabs is carried out in the same way as on brick surfaces.
Panel house, concrete walls
All excess is removed from the concrete surface. We carry out a thorough cleaning; if the walls are plastered with gypsum plaster, then the concrete is primed with sandy soil or concrete contact. If it is cement, then it is simply primed. Wait for the primer to dry completely. And only then the solution is applied.
Wooden surfaces, SIP panels, OSB(OSB), Plywood
Such surfaces CANNOT BE PLASTERED! They are initially flat and must be mounted level and flat, so there is no technology for plastering OSB and plywood. Large differences can be smoothed out with special compounds by first sanding the surface and gluing all the seams with sickle tape. Then the entire surface is covered with reinforcing fiberglass mesh, but only then can large differences be leveled with specially designed mixtures.
Whitewash
Is it possible to plaster over whitewash? no, you can’t, you need to thoroughly wash off the whitewash, if possible, scratch it with a hatchet or hammer drill, then prime it 2 times, wait until the layers of soil dry.