The finishing of the facade should not only reliably protect the base from the harmful effects of the environment, but also create the desired decorative effect. Vertical siding is becoming increasingly popular for cladding houses and cottages, being an excellent alternative to the horizontal variety. Naturally, working with such a product has its own characteristics that must be taken into account.
A little about the upcoming work
Additional elements
As in the option with finishing the house with a horizontal profile, you need to start work with the installation of additional elements.
- The first step is to install door and window frames, corner and J-profiles.
- Then the base (starting) panel is installed, which can be replaced with an edging profile.
- The final stage of preparatory work is the installation of the lower ebb.
Purpose of each element
Note! If you want the cladding to stand out visually, replace the J-profile with a universal platband.
What it is
Vertical siding, used for exterior decoration of a house, appeared relatively recently.
This is a cladding material that consists of panels, and along their edges there are longitudinal curved grooves. These are special locks that match each other and fit in shape.
When covered, these vertical strips form a flat surface that becomes impervious to rain or wind.
Vertical panels differ in their arrangement. This made some changes to installation and provided builders with additional options.
Vertical siding installation methods
Based on the design, there are two ways to cover a house with this material.
Option #1. From the corner of the building.
First, a corner profile is installed at the corners of the house, and siding cut to size is inserted into it along the hooks. Specialists (knowing that there are no hooks in corner profiles) additionally equip it with finishing profiles in advance.
Note! To make the result of the work look neat, craftsmen recommend maintaining symmetrical installation of profiles relative to the middle of the vertical axis.
Option number 2. From the center.
In this option, as the name implies, installation is carried out from the middle. To ensure symmetry of the work, first one or two starting strips are installed strictly along the central axis. As an alternative, you can choose an H-profile with two J-profiles inserted into it.
Where are they used?
See also
Terracotta panels for facades: what they are, how installation is performed
Sheathing using siding with a vertical direction is becoming more and more popular and in demand.
In this case, the material is used not only for exterior decoration of the house. Here the material of manufacture and the appearance of the products play a role:
- Vinyl and acrylic panels are suitable for finishing cottages, as well as private homes with large dimensions. They are used to cover facades and pediments;
- Aluminum panels are expensive, and therefore are mainly used for finishing shopping centers and industrial and public buildings;
- Galvanized steel is suitable for residential buildings, industrial buildings, and warehouses. They are good for covering fences and architectural structures;
- Zinc siding is not used almost anywhere in our country because the price is too high.
Making a choice is not difficult, but the main thing is to use high quality material.
Be sure to prepare your tools
Installation tools
Before you begin installing vertical siding yourself, prepare all the necessary tools. You will need the following:
- hammer for fastening the sheathing;
- a hacksaw for wood and for cutting metal, will greatly facilitate the work of a jigsaw;
- square and tape measure;
- spirit level for precise control of horizontal and vertical elements;
- screwdriver
Note! If the work is carried out in the warm season, then you will not experience problems with cutting the siding. In cold weather, experts advise using a fine-toothed tool instead of ordinary metal shears.
Let's start preparing
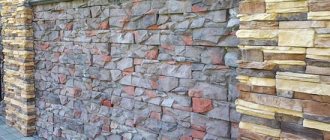
Installation of vertical siding can be carried out on any finishing option (stone or wood), the difference will only be in the preparatory process. For example, installation on smooth wooden walls can be carried out without additional preparation, but before installation on brick or concrete walls you will have to make lathing.
Before you start arranging the sheathing, you need to remove all extraneous fasteners from the surface. In wooden walls, it is necessary to caulk the seams and, if necessary, lay thermal insulation.
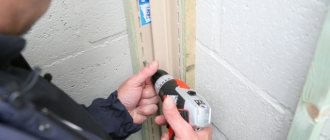
Lathing
Metal profiles or wooden blocks are used as the material for the sheathing. If the second option is used, then the tree must be dried, because it can “lead.” This will interfere with the accuracy of the siding installation. You also need to take care of the safety of the material and treat the wood with special protective compounds.
Note! It is better to choose a block of such length for work that it completely, without joints, covers the length of the wall. This especially needs to be taken into account when finishing log walls, where it will be very difficult to align individual pieces.
Varieties
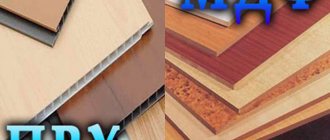
When choosing vertical siding, you need to look at what the panels are made of.
There are several possible options:
- vinyl;
- PVC;
- metal;
- acrylic;
- fiber cement.
The most common are PVC and vinyl products. Plus, the acrylic option is gaining popularity. Acrylic and vinyl panels are two-layer. One layer gives strength, and the second provides the necessary decorative properties. This includes finishing with wood, stone, as well as siding for a block house, brick and other materials.
Metal siding is made from aluminum or galvanized steel. There are even zinc-based products.
The least popular option was the fiber cement option. This is due to their heavy weight, complexity of installation, as well as high cost and limited range.
If you decide to buy vertical products, then pay attention to trusted manufacturers. These are Grand Line, Docke, Alta Profile, etc.
Installation technology
Starting bar
- The first panel is pushed into a pre-installed gutter of the corner profile. Having inserted the panel, you need to hook it with the locking hook on the starting bar and pull it up until you hear a characteristic click.
- Make sure the fastening is secure by pulling it from side to side, check whether the panel can slide in the lock, move it so that a temperature gap is formed between the receiving groove and the edge of the siding.
- Install the fasteners strictly in the center of the hole.
Rules for installing fasteners
- When installing the panels, make sure that they do not sag and maintain uniform tension on all edges. A misalignment in the installation of even one panel will affect the result of the entire work.
Installation of framing profiles
Note! If there are any obstacles on the working wall (power line traverse, watering tap), recesses must be cut in the panels to be laid so that they fit exactly along the contour of the place.
Corner cladding
Installation in corners
If the corner plank exceeds the height of the wall, then you need to measure a distance on it equal to the height of the corner (plus 3 mm), it is placed against the corner of the building, leaving a gap of 2-3 mm, and secured. Afterwards, they are aligned vertically and secured along the entire length. The fastening connections are spaced in 20 cm increments, and it is important to leave a gap of 1 mm so that they do not press the profile tightly against the wall.
What is siding and its types
Before proceeding with installation, you should understand the concept of siding, translated from English siding - external cladding.
Siding is finishing panels made of different materials that are easily mounted and fastened together, forming a single whole.
Siding performs two functions:
The first is decorative, since the panels can have different patterns, colors and embossing.
The second is protective, the panels protect the walls from harmful environmental influences (ultraviolet radiation, rain, hail, snow).
There are a wide variety of siding types:
Wood. Glued panels are made from wood fibers, the process occurs at high temperature and high pressure with the addition of a binder component.
Additionally coated with varnish or paint.
Not durable, prone to ignition - these are the main disadvantages.
Cement. Mainly composed of cement and cellulose fiber. The main disadvantages include the large weight of the elements, high cost, and personal protective equipment is required during operation.
Ceramic. Recently invented by Japanese developers, it is quite rare. The composition includes clay with the addition of natural natural materials.
Vinyl . Made from PVC. It has many advantages, such as low cost, environmental friendliness, durability, large assortment.
Aluminum - made of aluminum alloy. The panel turns out to be light, about 1.5-2 kg. per 1 sq.m. One of the most popular materials.
The service life with proper installation is about 50 years.
Easy to install and use for all types of finishing work.
Metal – these are panels made of galvanized steel. It is considered the most popular material. A polymer coating (pural, plastisol, polyester) is applied to their surface.
But the color range is limited to 8 shades. Another type of coating is powder coating. The color range with this method of painting is much larger.
As we see, the variety of siding is great.
But in most cases, aluminum siding is used in Russia and there are a number of reasons for this:
Service life is about 50 years.- Retains color for quite a long time.
- Environmentally friendly material.
- Decorative.
- Easy to install.
Complete with panels, there are decorative elements that give the facades a finished look.
Installation work begins with preparatory work.
Finishing elements and additional tips
Transition from horizontal to vertical siding
A J-profile is used for this. To bend, you need to make cuts in the nail strip. With a larger required bend radius, a larger number of cuts are made. Be sure to lay waterproofing under the profile.
Before installation, you need to measure the bevel angle and cut exactly according to it. Installation is carried out in the usual way: one edge is inserted into the corner strip, then the other into the arched frame.
Docking options
When carrying out work, also take into account the advice of specialists who will help carry out all the work more efficiently.
Docking on the wall
- Since the service life of siding is about 50 years, it is advisable to use anti-corrosion fasteners.
- All elements of the fastening connection must be of sufficient length so that they fit into the wooden sheathing by at least 3–4 cm; it is also better to choose nails with a large head diameter, and purchase self-tapping screws with a press washer.
- When fastening, screw the screws straight in only. Small distortions can lead to surface deformation when exposed to temperature.
- The temperature gap must be taken into account by relying on the air temperature during installation work. For example, in the heat, vinyl material expands, and in this case the gap needs to be made small.
Gable trim
After reading the work tips, you can install vertical siding yourself. To consolidate the information received, watch the video on how to install vertical siding.
Setting the chamfer
It would be more correct to call this element a vinyl pier or wind board, but you have to use the name that siding
, who sometimes call it fascia, distorting the English word into the Russian way.
Rice. 8. Installation of chamfer (dimensions in mm): a - without spotlights; b - with soffits; c — increasing the length of the chamfer; g - bending of the chamfer; 1 - chamfer; 2 - final profile; 3 — hooks; 4 — wooden wind board (bracket); 5 - F-profile or J-profile; 6 - fold line; k - vertical or horizontal temperature gap; e - overlap
Wooden windshields, like the rest of your home, need protection from the elements. To provide this protection, they are fitted with vinyl or aluminum bevels. There are two ways to install chamfers: one for a chamfer with a soffit, the other for a chamfer without a soffit. Installation of a chamfer without soffits (Fig. begins with docking a vinyl finishing profile to the upper edge of a wooden wind board. After that, the distance from the gutter of the finishing profile to the bottom of the wooden pier is measured. The vinyl chamfer is marked according to the obtained size, taking into account the temperature gap between the upper edge of the chamfer and the bottom of the receiving grooves of the final strip. The chamfer is cut. Having once again checked the height of the chamfer on the upper part of its front strip, hooks are cut with a punch in increments of 15-20 cm. On the lower front strip, using a puncher (if possible) or a drill, holes are made for fasteners in increments of no more than 40 cm. The holes need to be made oval so that they do not interfere with the linear thermal expansion of vinyl; in general, they need to be made approximately the same as they are on other sidings
.
The manufacturer does not make holes on the chamfers, since wooden piers can be of very different sizes and the manufacturer does not know where exactly the nail holes will be needed. This circumstance, unfortunately, very often misleads builders
, both non-professional and professional. Without reading the instructions, they think that since there are no nail holes on the chamfer, it means that the manufacturer allows it to be fastened through vinyl - they are mistaken. Even the v-shaped grooves located on the front form factor of the chamfer are not applied here by chance and are not at all for beauty - they are convenient for cutting the chamfer to the height of the wooden pier. True, the distances between the grooves are maintained in the American system of calculations, that is, they are multiples of fractions of an inch and do not always coincide with our standards for board heights. After the hooks and holes are made, the chamfer can be attached to the pier. The hooks are inserted into the receiving groove of the finishing rail, and fasteners - nails, screws or staples - are installed in the holes made. Horizontal chamfers are installed according to the rules for fastening horizontal elements, that is, all fasteners are placed in the centers of the perforated holes. Inclined chamfers are attached according to the rules for installing vertical elements, that is, the first nail is driven into the upper edge of the hole, the rest at the centers of the perforated holes.
When installing chamfers with soffits, in addition to installing the final profile, you need to install the receiving profiles of the soffits and the soffits themselves. In this case, the chamfer is snapped on one side to the hooks in the final profile, and on the other side to the form factor of the receiving soffit F or J-profile. This chamfer does not require any other fastening. If the chamfer you purchased does not have a hook on the lower front surface, then it can be riveted to the receiving soffit profiles with vinyl or nylon pistons.
The ends of the chamfers are covered with a piece of profile, trimmed and bent 90°. When lengthening the chamfers, the elements are joined in the same way as all other linear profiles, that is, an overlap of 2-2.5 cm is made on the front side and the invisible part is trimmed to the amount of the temperature gap. Which is selected depending on how the chamfer will be installed: if horizontally, then you need to use the gap size for horizontal elements, if obliquely - for vertical ones.