One of the most popular types of wooden finishing materials is lining. It has a different profile, due to which the surface has a different appearance - from a smooth wall with small grooves, to waves of different sizes. It’s just that wooden walls do not fit into all interiors, so there is often a need to paint the lining indoors - at home or in the country.
You can paint the lining in different colors
How to treat lining inside a house
In general, many people believe that it is better not to treat the lining indoors with anything. Maybe so, but not in every climate and room it will retain its original appearance for a long time. If the level of ventilation is insufficient, the wood may turn blue; if it is exposed to the sun, it becomes dark gray.
Blue discoloration can only be combated with biological means - chlorine or active oxygen, and then definitely impregnated with protective compounds, and maybe even painted. It’s a little easier with grayed wood: by removing the top layer by sanding you will again get a beautiful color, but without UV protection it won’t last long either. That’s why they decide to paint the lining inside the house or cottage.
One more point: not everyone likes wood in the interior. It's just that sometimes people get tired of looking at her. I just want a smooth, colored surface. This also happens, and often. In this case, look for opaque paint. Select characteristic effects as desired.
Opaque paints give an opaque film
The inside of the lining is painted with opaque paints also because wood in its natural color is not compatible with all styles. But sometimes you want to have a high-tech interior, for example, in a wooden house. In this case, paint with metal particles or mother-of-pearl (for example, Lignovit Platin) is suitable.
All compositions for protecting wood can be fairly roughly divided into six main groups:
- Protective compounds. Available for exterior and interior use. Compositions for external use additionally include ultraviolet protection, which prevents or slows down the process of photoaging of wood - discoloration to gray. So if you need impregnation for the lining on the balcony, and it faces south or east, you need a composition for external work. Only Please note that some of them turn the surface pink or green - this is the result of a chemical reaction. Read the description carefully, because the resulting color can only be painted over with opaque paints or a very dark tint.
Protective impregnations - Tinting compounds or stains. They do not paint over the texture of the wood, but give it some kind of shade. At the same time, a film is not created on the surface, the wood does not lose its properties - it remains vapor-permeable. Tinting compositions contain pigment and can be lightly or heavily pigmented. If you want to have a surface with a pronounced wood structure, take a slightly pigmented composition. You may need a lot of layers, but you can control the degree of “shading” of the wood.
The result of stains of different colors - Lucky. Today, water-based varnishes or aqualacs are more popular for lining walls or ceilings. They can be matte, semi-matte or glossy. Many people have the opportunity to add color and change the color at the same time. Unlike traditional varnishes, water-based varnishes do not close pores - the film on the surface remains vapor-permeable, but protects against dirt absorption. Many manufacturers add UV filters and bactericidal components. Such paints and varnishes are good for balconies or in unheated rooms with periodic visits - in dachas and bathhouses.
The varnish can be glossy, matte or semi-matte, or it can give color - pigmented - Paints. This group includes compositions that create a dense film on the surface, through which the structure of the wood is not visible. The group is extensive, with different properties and price ranges - from traditional oil enamel to latex and acrylate enamel.
- Wood oils. Some are transparent and some have pigment. Unlike varnishes, they do not create a dense film on the surface, but are absorbed into the fibers. Good compounds act similarly to a varnish coating, protecting against abrasion and the absorption of dirt. Only oils do not have a bright glossy shine - a matte or slightly shiny surface, like silk. This is a great way to preserve wood. Using specific application techniques, pigmented wood oils can highlight the texture (see below).
Brushing with wood oils - Wax-based compositions. There are three types of wax: solid, liquid and water. Before use, solid wax is heated to a liquid state; liquid and water (wax glaze) are ready for use. Wax protection is traditional and very effective, and new technologies make the process much easier. The disadvantage of wax is that it is quite difficult to apply evenly, but it fits well on a pre-primed surface.
This division is arbitrary: there are many mixed compounds that can be classified into at least two groups. So there are impregnations that can be tinted, and there are paints with protective properties. The difference is in the effectiveness of the protection. Impregnations primarily protect the wood, and imparting color is a secondary task. With paints it's the other way around. Their main task is to create a beautiful coating, and protection is a concomitant effect. If you immediately need good protection and high-quality coverage, take impregnation without tinting, and after drying, apply paint.
Another example of a mixed composition is oils with wax. These compositions combine the properties of both oils and wax, due to which the wood retains its appearance for a longer time.
The question of which group to give preference is up to everyone to decide for themselves. Different tools solve different problems, and it is important to choose the right properties that you need first.
Paints and varnishes for eurolining
After pre-protecting the paneling and installing it on the wall, many people want to change the color, add shine to the wood, or otherwise change the appearance of the room. The main choice always remains between high-quality varnish or expensive paint. How to cover wooden lining in a residential building? It all depends on the type of tree, climate and the ultimate goal of the owner. The simplest option is to coat it with colorless varnish, but any issue has its pitfalls.
Varnishes: purpose, use, feasibility
High-quality lining, as a finishing coating, is often coated with an even layer of liquid varnish. The texture of the wood becomes shiny in the light. The slightest chips and splinters are covered with smooth varnish. At the same time, the composition also performs a protective function - it repels moisture and absorbs some of the sun's rays.
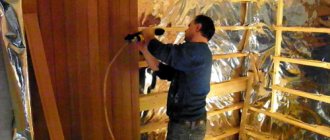
Liquid varnishes are applied to already installed lining using aerosols, a compressor with a special nozzle, or a hand sprayer. When carrying out work, the room is isolated from drafts and direct sunlight, which will dry the walls unevenly. All operations are performed by one or two workers wearing protective clothing (respiratory protection is required). The coating dries in 1-2 days and lasts for several years.
Advantages:
- Choosing a shade for wood (from dark to transparent);
- Low cost of coverage (for wholesale purchases)
- Easy to apply using spray or brush;
- Easy to care for (can be washed with water or soap solutions);
- Durability (3-5 years).
Flaws:
- Coating cracks (low-quality varnish often bursts);
- Instability to high temperatures;
- Unpleasant odor in the first few weeks after application.
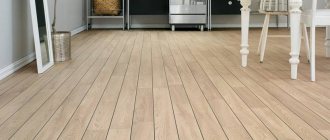
Liquid colorless varnishes are ideal for lining with a beautiful wood texture (pine, alder, birch). Allows you to preserve color and highlight it with shine.
How to properly paint the inside of the lining: technology
To paint lining in “dry” rooms inside the house, you can use any type of paint. Here you simply decide on the requirements for the decorative appearance of the surface. If the lining is dry, it can not be impregnated with protective compounds, or you can choose paint/varnish/wax with appropriate additives. You can paint it only on one side, leaving the back side untreated.
Paint each panel of the lining separately
If the lining will be used in damp or unheated rooms, on a balcony, it must first be thoroughly impregnated with protective compounds on all sides, maybe twice. Only after the impregnation has dried can it be painted, varnished, or, in general, given decorative properties. Another point: when installing the lining on a wall or ceiling, it has to be cut into pieces. Places of cuts in damp rooms must also be coated with the composition. It is not necessary to wait until it dries, but it is necessary to process it.
There is one very important nuance that many amateur decorators overlook. If you want to get a professional-level painting of the lining, you need to process each board separately: sand, paint, dry, and only then assemble the surface from the already painted lining. That is, mount already fully processed boards on the wall or ceiling. Only with this approach will the surface of the lining have the same color from any point.
It’s difficult to paint the entire surface of a clapboard wall well
If you paint an already assembled surface, unpainted areas remain in the grooves and recesses, making it difficult to sand large areas. You definitely won't get a perfectly flat surface. The quality of finishing in this option is not above average. It is permissible to paint a finished surface if you are renewing the paint job. This must be done at different intervals, depending on the operating conditions and the properties of the paintwork material.
Correctly, the painting technology looks like this.
- The lining is checked and sorted. All bent, bent or cracked boards are rejected. They can be used to test color, select color, number of layers, practice technique and painting sequence.
- Boards that have been sorted are sanded until completely smooth. It is most effective to work with a sanding machine, but you can also use a block with sandpaper attached to the surface. Sandpaper grit - 250-280. When grinding, circular movements pass through the face, tenon and groove. The back part of the lining can be left without treatment.
It is more convenient to work with a grinding machine - Apply the composition with a roller or brush. Each type of coating has its own points and features - they are written on the can or in the accompanying instructions. In general, the rules are simple: take a little paint and apply it in single strokes along the entire length of the lining. Then rub thoroughly and shade until a uniform color is obtained.
- Having achieved uniform coloring, leave to dry.
- After drying, sand again if necessary. This step is often necessary when working with opaque paints and varnishes. The first layer of paintwork raises the pile of the wood, which is why it becomes rough in places. This pile is removed by repeated sanding.
- The second layer of paintwork is applied. Drying.
There can be many layers: it depends on the hiding power of the paint and on what effect you want to get. But in any case, one rule remains: there should be little composition on the brush. The exception is impregnation or primer. They are applied with a well-moistened brush, but only those without pigment. When applying pigmented protective compositions, the rules for paints apply - the minimum required amount of the composition is well shaded.
Sometimes, even with careful rubbing of the paint, stains are clearly visible. This is not a bad paint, but the properties of wood: in some places the pores absorb better, in others worse. In order to achieve an even color in this case, the surface is first primed. You can use any wood primer or colorless matte varnish (can be water-based). After drying, the surface is sanded (yep, again) and then the required number of layers of paint are applied. Only in this case, after the first layer of paintwork, grinding is rarely required, and if necessary, then in some places, more often on a tenon or groove.
Watch the video to see how to evenly apply glaze, oil or wax. If furniture quality painting is required, there are even more layers: first a stain is applied, then two layers of primer. After drying, the surface is sanded until the surface is completely matte, first with grain 280, then 320, after removing the dust, a finishing layer is applied - varnish. An example of such work is in the video.
Useful tips for painting lining
Some subtleties of the workflow will help make the painting better. When processing wooden panels, the following points are taken into account:
- reduce the cost of painting . Tinted varnish or oil-wax is more expensive, but the effect of its use will be greater.
- Pre-impregnation of the lining should be done on all sides , this will significantly enhance the protective effect.
- When working with oil paint, you should take into account its tendency to change color (fading). To prevent color changes from becoming noticeable over time and spoiling the interior, you should choose darker, more saturated shades .
- It is better not to paint on a hot day , as the coating will dry too quickly and apply unevenly (spots of varying saturation may remain).
- In order for the coating to be uniform in color be stirred periodically during operation .
The coating is applied along the fibers of the lining Source nauka-i-religia.ru
- To ensure that the color of the walls is uniform , you can add the color of the finishing material (paint) to the primer.
- When choosing a paint composition, total costs are taken into account : not only its cost, but also the recommended number of layers, as well as paint consumption per 1 m².
Painting wood while maintaining texture
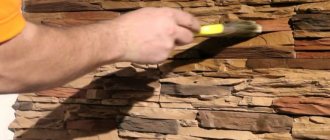
A pronounced wood pattern can be achieved using glaze, pigmented oil or wax. These compounds apply quite tightly, almost painting over the structure of the wood fibers. Any of the compositions described above can be applied with a brush or roller.
When applying paintwork materials, take very little, first applying them in fragments along the entire length of the lining. Then, using a brush or roller, the applied strokes are shaded over the entire surface. After leaving them to soak for 5-10 minutes, to reveal the texture, take a soft, lint-free cloth and remove most of the oil. As a result, the pattern appears much brighter than in its original state: a larger amount of pigmented product is retained in the grooves, and almost none remains on the protruding parts. The result is a pronounced texture. This technique is also called brushing or texturing the lining. In interiors, wood processed in this way looks very decorative: both on the walls and on the ceiling.
The process can be observed in the video. Three samples were painted: two with the same oil with pigment, one with colorless. 5 minutes after painting, one of the pigmented blanks is wiped to reveal the design. To preserve the wood after the pigment has dried (24 hours or more, read on the packaging), the lining is coated with two layers of colorless oil (glaze, wax). In areas of intensive use, you can also coat it with matte varnish.
Technology for applying protective and decorative coatings
At the finishing stage, a novice builder has to master new technologies. You need to nail the lining correctly, know how and with what to treat it, and perform decorative finishing. Coating the material with the selected means is carried out in stages. Before processing, prepare the lining.
- First, it should be cleaned of contaminants with a solution. To do this, dilute baking soda in warm water. Wash the lining with this solution. If there is an old layer of paint, for better adhesion it is advisable to completely remove the previous layer to remove cracks and peeling.
- Inspect the cleaned lining: remove mold, mildew, and treat darkened spots with bleach. Finally, the panels should be wiped with a clean rag to completely remove dirt and paint residues. If there are damaged panels, they must be replaced.
- At the next stage, we grind the surface. The operation is performed using pumice or fine-grained sandpaper. To ensure that there are no unsanded areas left, divide the entire wall into small sections and process them sequentially. Sanding should be done evenly, being careful not to rub in one place and not to apply much force.
- The final stage of preparing the lining for application of products is priming. Apply a layer of primer to the wall using a brush or spray gun. The seams between the panels must be treated especially carefully. One layer is enough. Sometimes a painting compound is used as a primer.
The paint is applied with a brush, mainly from above, so that there are no drips.
The paint itself is applied with a spray gun or a brush. To paint, prepare two brushes: a narrow one and a medium one – use the narrow one to paint hard-to-reach places. In order for the coating to serve for a long time and be durable, you need to apply 2-3 thin layers. The painting procedure is as follows:
- mix the paint and pour it into a small container;
- dip the brush in paint up to half the bristles;
- Before applying, press the brush to the surface and smoothly move it along the panel;
- then apply the paint in the same way over the entire surface, without touching the painted areas;
- We paint corners and openings with a narrow brush.
You should start applying paint from the top to avoid drips. To eliminate shade differences, apply one coat at a time. If you need to take a break, you should leave your work out of sight. Apply the next layer after the previous one has completely dried. Make the final layer of minimum thickness and apply it with light, even movements from top to bottom.
The varnish is applied in the same way. If the product is tinted, it should be thoroughly mixed before application and stirred periodically during use. We add less coloring pigment to each subsequent layer, in this case the surface after painting will acquire a deeper and more attractive shine.
How to paint lining like bleached oak
Often it is necessary to paint the wood white, but so that the veins are visible. They also say to create the effect of bleached oak. There are several ways:
- Use tinting with the appropriate name, which is also called stain. Different manufacturers have these. They usually have the names "frost", "bleached oak" or something like that. Application feature: do not pour too much composition. If you overfill it, the surface will begin to peel off over time. To achieve the desired degree of coloring, apply several very thin layers. After each, give it time to dry thoroughly.
Whitewashed lining looks great both on the walls and on the ceiling - Oil with wax with a similar name. The application technique depends on your desire: one or two layers for an almost opaque coating, or one layer followed by rubbing with a rag for a pronounced texture.
- Pigmented polyurethane primer called “white” or “bleached”. To obtain a translucent coating, the composition is diluted with a large amount of thinner. Its amount can be 80-100% of the volume (determined by samples). The disadvantage, like all polyurethane paints and varnishes, is that they turn yellow over time.
- Pigment acrylic primer, also diluted by 80-100%. The color remains white for a long time, but this primer costs more than polyurethane.
It’s difficult to say which composition to choose - you need to try. It is advisable to paint the lining with several compositions and compare the results. The effect when using different products is slightly different, but it also greatly depends on the wood. The reviews are also very different - some whitened with tinting, others with oil. Soils are rarely used for these purposes, but mainly because not everyone knows their properties.
Why does wood need treatment?
Wood has unique properties. If there is excess moisture in the air, it will easily absorb it and retain it until the humidity drops. Then she will give back the water. This is a big plus of the material, so a comfortable microclimate is maintained in the room. However, this is also a significant drawback. In conditions of high humidity, the tree that has absorbed water will not be able to release it and will begin to deteriorate.
Molds quickly destroy its structure. Low humidity is also not recommended for the material. It dries out and begins to warp. In addition, it is highly flammable and burns quickly. The rough surface traps dust and dirt. It is quite difficult to wash it off. Thus, without additional processing, the lining quickly loses its attractive appearance and performance characteristics.
Instagram robinwood_ufa
Instagram rima_yun
Secrets of decorative wood staining: techniques and tricks
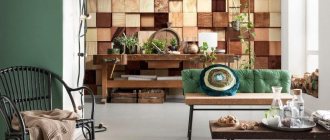
City dwellers want to preserve the natural color of wood as much as possible. For those for whom wood in the house is a boring everyday thing, paint the interior lining in some unusual color. Modern paintwork materials allow you to achieve different effects. For example, textured or brushed lining, but in two colors. This technique is often used in loft style interiors.
Brushed lining in two colors is an excellent choice for decorating walls
The trick is to apply two layers of different colors. The first layer is a dark color, the second is a light or brighter color. After playing with colors and the order of their application, you can create your own version. Watch the video - how to get lining brushed in two colors.
Painting in two colors may not be the same. You can make the recesses a darker color, and only slightly tint the face (front part) or do everything exactly the opposite. The result is a striped wall made of clapboard - the effect of a slatted wall.
Rating 2021: TOP 3 paints for lining
| Photo | Name | Rating | Price | |
| #1 | Acrylate latex paint “Harmony” | ⭐ 4.2 / 5 4 - votes | More details | |
| #2 | Water-based paint TEX washable Universal | ⭐ 4.5 / 5 | More details | |
| #3 | “BELINKA WASHABLE” paint for interior walls | ⭐ 4.7 / 5 5 — votes | More details |
What would you choose or recommend?
Take the survey
Acrylate latex paint “Harmony”
Paint “Tikkurila Harmony”
Pros
- High resistance to cleaning
- Gives the surface a velvety effect
Minuses
- Not suitable for doors and furniture
- Takes a long time to dry
Prices for paint "Tikkurila Harmony"
Tikkurila Harmony paint
Water-based paint TEX washable Universal
Washable paint "TEX"
Pros
- Great for wet areas
- Drying time only 1.5 hours
Minuses
- Not recommended for surfaces subject to frequent contamination
Prices for Tex Universal paint
Tex Universal paint
“BELINKA WASHABLE” paint for interior walls
Belinka Washable
Pros
- Designed for surfaces subject to heavy wear
- Environmentally friendly
- Without smell
Minuses
- No
Prices for paint BELINKA VD WASHABLE B1
Paint BELINKA VD WASHABLE B1
How to paint lining inside a house: ideas
Painting techniques and methods are great, but how to fit lining into a modern interior? Just. There are many interesting options. The designers' latest finds are a clapboard wall in a room with smooth walls. It looks creative and interesting. And most often such a wall is made using the brushing technique.
One of the options for using lining in the bedroom interior
An interesting effect is achieved by combining fittings of different thicknesses - in the photo, thin ones are inserted between wide boards. Moreover, they are painted in different shades of the same color. The combination turns out interesting and fresh.
Lining is also used to create interiors in a modern style.
Lining is not necessarily just a flat board with small grooves on one side, which is also called eurolining. There are different profiles, including those with waves and troughs. From them you can assemble interesting walls, the relief of which is emphasized by painting.
You can assemble interesting reliefs from linings of different profiles. To make it look more interesting, highlight the reliefs or whiten them
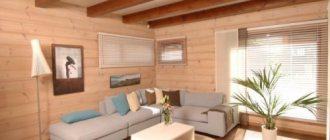
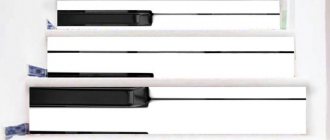
As usual, in the interior, a lot depends on the light. Several non-standardly designed lamps - long translucent strips behind which lamps are hidden, installed in the middle of the ceiling - and the interior is completely transformed. This design can be used to decorate rooms for young people, creative living rooms, etc.
Very interesting solution with lighting
You can play not only with light, but also with color: in the lighting zone, paint the lining in a lighter color, thus emphasizing this zone.
Play of light and color reflected in the mirror
If you have good drawing skills, you can paint the lining. Just don’t forget to then cover the entire painting with colorless oil or varnish to preserve it longer. This technique can be used when decorating a children's room.
Painting on lining
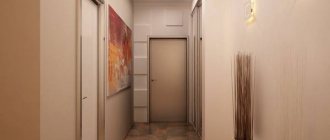
Rigidly defined lining panels look great in the interior of an office, living room, or hallway. In the same vein, you can decorate the wall in the dining area in the kitchen. Only its quality and coloring must be perfect.
The honey shade of the lining is repeated on the ceiling
Treatment for a rustic-style interior can be deliberately imperfect. These are rooms with a masculine character.
The rustic style will appeal to men. In this case, painting the lining using the brushing technique is the norm. Moreover, the colors are chosen dark
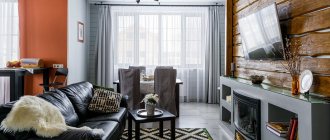
As if in contrast - light walls. The lining is whitewashed and the beams are painted dark. Despite the traditional materials used for centuries, the look of such a room is modern and stylish.
An excellent combination is light walls with the effect of bleached oak and dark massive beams. It's practically a win-win option.
Variation on the same theme
Lining is also used in the decoration of bathrooms. Impregnation here needs to be given maximum attention, but if the ventilation in the bathroom is at the level and the impregnation is protected from moisture, then there should be no problems. And the interior, you see, is very interesting - warm wood tones combined with bright marble are a great move.
Lining in the bathroom
Lining is also used for finishing balconies. You just need to fill it horizontally - this way you can expand the small space. And light colors look better in such a small area, maybe with a dark edging.
Whitewashed paneling on the balcony
Ceiling - lining, painted with light stain
Common questions and answers
- Q: Is there a way to remove dents on used paneling? A: Woodworkers use a tricky method (only for low-density wood). Near the site of damage, several gentle blows are made with the edge of the hammer. You need to spray them with water from a spray bottle and wait a few hours. The moisture will nourish the wood and smooth out the fibers. After sanding, the irregularities will not be visible. If physical damage is a major concern for the finishes in your home, then you may want to consider coating the wood with an anti-impact protectant.
- Everything depends on the climate. If the house is not heated in winter, then special attention should be paid to protection from moisture. Lining made from soft wood is generally not suitable for such purposes, so 3-5 layers of protection are needed, including good protection from moisture and fungus.
- These are quite vulnerable materials, but at the same time they are very cheap. Plastic lining is available in any colors, with any pattern, it can be washed with household chemicals or just water. MDF panels cannot be washed or processed, otherwise there is a risk of compromising the integrity of the board. The only layer of protection is an antiseptic, which is applied to the slabs at the factory.
- A high-quality clear varnish will be quite sufficient.
- Yes, but this way it will last several years less.
Types and features of lining
Nowadays, lining is often used for interior work. But decorating the space is done with different types of materials. They are:
- Quarter paneling. Each element is equipped with protrusions on the sides, which allows them to be overlapped.
- Simple. It is characterized by the presence of tongue-and-groove fastenings.
- With tongue and groove. The material is intended for mounting on walls and ceilings. It looks like a regular tongue and groove board, only smaller in size. The material is intended primarily for office premises.
- Eurolining. It resembles an edged board. On each side the fragments are processed with high quality. The tongue-and-groove system is used for connection. In the production of such lining, coniferous wood is used. Fungus or mold does not grow on this material, since there is a sample on the back of it that provides air removal.
- "American". This type of lining is characterized by an irregular rectangular shape. There is a groove in the widest part of the fragment, thanks to which you can achieve the effect of laying the parts overlapping.
- “Finka.” All elements have an oval shape.
- Block house. With its help, you can create an imitation of a rounded log from inside the room. To fasten the lining, sheathing is required. The material improves the heat and sound insulation of rooms.
You can use lining in a bathhouse, sauna, living rooms, and in the country. But if you are already tired of the natural color, then you can choose different paint options for decorating the surface. There are also substances that help protect wood and increase its service life.
A few final words
Vegetable oil will help remove paint from your hands. Just soak a piece of cloth in it and rub the dirty area. Keep it on without rinsing for five minutes. After the required period, you will need to wash your hands using regular washing powder.
If paint gets on the glass surface, a paste made from chalk and concentrated soda will help get rid of it. The composition is applied to the stained area and left for a while, after which the problem will be solved.
Rules for choosing coverage
The stain preserves the structure of the wood.
In dry rooms of the house, any type of paint is used, and the compositions are chosen in accordance with the requirements of decorativeness. If the lining is dried, it can not be treated with protective agents, but only paints can be used. This finish is coated with the composition on one side, while the other is left untouched. When choosing a color, take into account that light colors make the room larger, while dark colors make it smaller.
Color recommendations:
- Natural wood is suitable for the living room, so they use varnishes, wax impregnations, and low-pigmentation products to get walls with a honey-golden hue.
- The kitchen space requires calm shades of a warm direction, for example, peach, muted yellow, light orange, pale pink; oil and acrylic paints with a high degree of protection are used.
- For the office, cold and restrained tones are used, stains, varnishes, and wax impregnations are used.
- The children's room is decorated depending on the age and gender of the child, using water-based compositions classified as environmentally friendly materials.
The bedroom also does not need bright, provocative colors. The room is painted with a light shade, using delicate light green, beige, gray-blue tones.