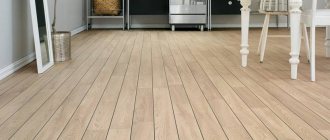
Wooden flooring is considered the most popular type of flooring. It is durable, biologically pure, reliable material.
But over time, deformations occur with wood: cracks, gaps, mold, and other defects appear. The article describes in detail how to prepare a surface for repair, how to prepare a special solution from sawdust and glue, features of application and drying, and other issues.
Basic ways to make a surface smooth
Wooden floors are leveled in several ways:
- Screed. If the floor is not rotten, then there is no need to touch it. It is enough to make a leveling screed under it. To do this, you need to raise the floor to a certain height. Then all accumulated debris is cleaned out and the base is primed. Concrete screed is good for wood if its layer is poured with a small thickness. Ideally, the height of the screed is within 5 cm.
- Cycling. It is used to free a wooden floor from the old coating completely or by removing the top layer of wood, which darkens and deteriorates over time. Cycling is carried out with small differences in heights at the base (no more than 10 mm). They are passed over the surface with a special machine.
How can you level a wood surface with a mixture of glue and sawdust?
An economical and universal surface leveling method suitable for all wooden floors.
Of course, it will not be possible to get rid of severe defects in the form of mold or rotten bars. A major change of the entire structure is required. But it is possible to patch up minor irregularities and obstacles. To level wooden floors with sawdust, they need to be mixed with PVA glue. The work will also require strips, a spatula and a level. The guides are installed so that they are level. Mount at a short distance from the wall.
Coating preparation
The surface must be well prepared before leveling.
- To do this, all irregularities, gaps, and cracks are cleaned with special tools, and the surface is sanded with sandpaper to make it even and smooth.
- Then all construction debris along with dust and dirt is swept away.
- A layer of primer is applied to the cleaned surface. If necessary, priming is carried out several times. It is important that the surface is well saturated with the composition and acquires protective properties against mold and moisture penetration.
- Allow the surface to dry thoroughly. The primer should be completely absorbed so that no trace of wet rubbing remains. Now the surface is prepared for filling with sawdust.
During preparatory work, it is necessary to maintain a certain microclimate in the room. It is better to close windows and doors to avoid drafts. If there is severe frost outside, warm the room to a comfortable temperature. It is advisable to carry out work in the summer, when there is no humidity and fumes.
Installation of beacons
For the prepared floor, you need to calculate the required layer of sawdust.
- To do this, measurements are taken along the perimeter of the room with a special water or laser level.
- The zero level of the floor is identified, along which notches are made on the walls along the entire perimeter.
- Then the notches are connected so that it is clear what boundary for the height of the future backfill layer must be observed.
- Beacons are placed in the selected places, which should be located 10–15 cm from each other, and they should not be tightly attached to the wall so that it is possible to work as a rule even during alignment.
- Beacons must be secured so that they do not slip away from the chosen course when aligned. To do this, they are attached to self-tapping screws.
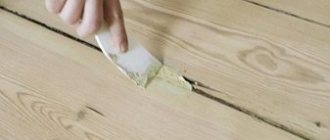
How to get rid of cracks using slats
The use of slats allows you to quickly get rid of any gaps. The slats have excellent elasticity and can be shaped to fit any gap. Here's a step-by-step process for sealing cracks using slats:
- Drive dowels into the cracks and process them with a milling machine.
- Find a suitable rail. Pine slats are best suited as they are the easiest to give to the desired shape and size.
- Then you need to treat the cracks and slats with glue. It is best to do this using sealant containers.
- We insert the slats into the cracks and carefully press every centimeter so that the slats are glued well.
- Then we treat the remaining space with PVA glue mixed with sawdust.
- Sanding the floor. For sanding you should use a grinder or sandpaper. It should be noted that when grinding, be sure to have a respirator and goggles to protect against fine dust.
- At the end, you can varnish or paint the floor.
At this point, the process of installing the slats is completed.
Let's see how to use plumbing tow to treat cracks.
Drying time
After leveling, you need to leave the surface to dry for several hours, preferably a day or two. It all depends on the climatic conditions and creating a favorable atmosphere indoors. In order for the sawdust to set well, you must not open the windows and doors for 24 hours after pouring.
It is important to ensure the optimal drying temperature of the surface. Drafts and humidity in the room must be avoided. It is best to turn on the heater for a short time in case of high humidity, and in case of drought, open one thing - doors or windows.
A completely rough finish will be ready for finishing work after 3 days. After this period of time, the main work on laying the finishing base begins.
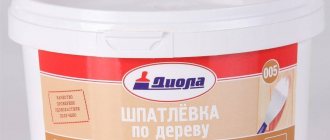
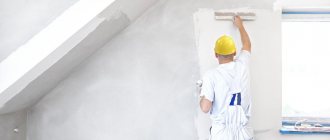
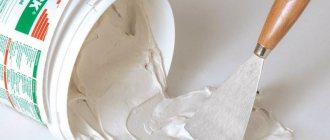
Procedure for working with homemade putties
Working with mixtures that you made yourself is not difficult. The main thing is to follow the order of actions, then you can say with confidence that everything will work out as planned.
- All necessary ingredients are prepared. It is best to use simple formulations, then you can be sure that the mixture will turn out as it should. If you have no experience in cooking, then it is better to practice a little - prepare a small amount to understand the procedure.
- As with all finishing work, the surface is prepared. Working with wood requires great care. All damaged areas are cleaned, rotten fragments and protruding nails are removed.
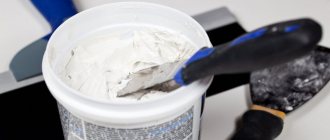
- The mixture is prepared with your own hands in advance. If sawdust is added, it takes time for it to swell.
- After preparation, the putty should be used within one to two hours. Then she loses all her qualities.
- The applied solution dries. The time for complete drying depends on the type of putty prepared.
- After this, you can begin sanding the surface. During the initial work, the walls are prepared for further processing.
- You can cover the tree with protective materials.
The remaining mixture is disposed of. It is not possible to store it. It is advisable to do this with a small margin.
Many people still wonder: how to make a mixture that will meet all the necessary qualities for woodworking? There's nothing complicated about it. Do-it-yourself putty will be an ideal solution for working on a wooden surface. The main thing is to prepare the solution correctly and apply it on time. Any purchased materials often do not live up to the expectations placed on them. Homemade mixtures are another matter. It all depends on the person himself; if he shows patience and does everything efficiently, then he will enjoy his work for many years.
Useful tips
Experts advise adhering to the following recommendations:
- The surface must be well prepared. The most important thing is that there is no dust or construction debris on it. Of course, the glue sticks all the parts together, but excess debris will interfere with rigidity and cause the final coating to crack over time.
- When applying layers of sawdust-adhesive layer, it is important to observe the following conditions: the coating must be applied layer by layer. This composition shrinks, so after applying a 1 cm layer, wait for it to dry completely and only then begin to apply the next layer.
- The leveling solution can be prepared using wood glue. It is boiled until completely dissolved in water in a ratio of 2:15. Then sifted sawdust and cement are added there - 5 parts to two parts of wood glue.
Leveling the base is easy. To do this, you need to mix them with glue and let the mass swell. Layering is easy to apply. After several days of drying, you can begin the main lining of the final coating.
Over time, the surface of any wooden floor will inevitably crack, sag and become uneven.
You can hide such defects using various floor coverings, such as laminate or linoleum.
You can hide such defects using various floor coverings , such as laminate or linoleum. Before laying any finishing materials, you should properly and efficiently treat the surface and make it as smooth as possible.
There are several ways to make the floor surface smooth. To choose the right method, you should evaluate the condition of the wooden surface.
Types of wood putties
Most often, homemade putties are made for treating wooden surfaces.
Several types of putties are used for wooden surfaces. Their positive and negative qualities are shown in the table.
| Type of putty | Advantages | Flaws |
| Polymer (latex) | They dry very quickly, latex putties are easy to work with, they are environmentally friendly, non-toxic, suitable for sealing the deepest defects of a wooden surface | High price |
| Oily. Another name is adhesive | The main advantage is strength, which allows it to be used for flooring. | They take a long time to dry, are not suitable for many types of wood, and are not resistant to moisture. |
| Plaster | Plasticity, strength, excellent adhesive characteristics, affordable cost | No resistance to moisture |
| Acrylic | Excellent for filling large surface defects. There are many colors. Resistant to humidity and temperature changes. Dries quickly (within 4-5 hours). Suitable for any wood-based coatings, including fiberboard, laminate, parquet, etc. | High cost, regular coating renewal required |
| Nitro putties | Resistant to humidity and aggressive chemical environments. No odor and easy to apply to surfaces | Long drying time (at least 24 hours) |
Choosing a method
- Checking wood for susceptibility to rot and insects. For this purpose, it is necessary to inspect the floorboards from the reverse side, as well as assess the condition of the joists. If there are places of rotting, chips and cracks, and there are also traces of insect activity, then it is necessary to replace the old floorboards in whole or in part.
- Determining the degree of deviation of the floor from the horizontal. This check is carried out using a laser or mounting level (as when installing a frame from a profile, described here).
Mechanical scraping of a wooden floor
Mechanical scraping requires a scraping machine, with which you can quickly and efficiently make the floor surface as smooth as possible.
Sanding is one of the simplest and most common ways to level a wooden floor. The laboriousness of the process pays off with the high quality of the result. Most often, sanding is performed for painting (read about puttying walls for painting in this article) or varnishing. The manual scraping method is impractical due to its high labor intensity and significant time consumption. Mechanical scraping requires a scraping machine, with which you can quickly and efficiently make the floor surface as smooth as possible. With minimal skills, to scrape a room of 20 square meters. meters takes no more than one day.
Stages of mechanical scraping:
- Cleaning the room of furniture and interior items. Stationary items should be covered to avoid excessive dust.
- Preparing the floor surface. Remove all nails and tacks that could damage the scraper. Thoroughly clean the floor of debris.
- Checking the functionality of the scraping machine and preparing special clothing, a respirator, headphones, and thick gloves.
- Direct floor scraping. Work should begin from the corner of the room. The first layer is removed by moving the snake.
- Elimination of all cracks, chips and holes using putty. The color of the putty must be selected as close as possible to the color of the wooden surface.
- Processing all hard-to-reach areas of the floor using manual sanding. After the putty has dried, it is necessary to carry out a secondary sanding.
Leveling the floor with PVA glue and putty
It is based on the use of a mixture of soaked sawdust and PVA glue, which, after hardening, forms a fairly durable surface, vaguely reminiscent of a chipboard board.
This innovative and unusual way of leveling a wooden floor is very budget-friendly , and has recently been gaining momentum in popularity. It is based on the use of a mixture of soaked sawdust and PVA glue, which, after hardening, forms a fairly durable surface, vaguely reminiscent of a chipboard board. The process is quite lengthy. To level a surface of 20 square meters. meters may take about 8 hours.
Stages of leveling with adhesive mixture:
- Removing furniture and cleaning the floor.
- Carrying out level markings and applying slats.
- Filling the space between the slats and the floor with the prepared adhesive mixture. A thick leveling layer is performed in several steps. Each subsequent layer is poured after the previous one has completely dried.
- Checking the resulting coating using a level. All defects and errors must be eliminated using putty.
- Complete drying depends on the thickness and takes at least a day. Additional strength can be added using a sheet of chipboard or plywood.
Insulation under heating structures
Heating elements can be installed on any type of floor, but in order for them to work properly, there must be a layer of insulation and a screed underneath them that creates reliable support.
Solutions based on sawdust solve both problems at once - the binder in the solution creates a strong screed, and sawdust reduces heat loss.
Tape heaters are placed directly under the covering (laminate, parquet, etc.).
However, to install a heating cable or water pipe, it is necessary to either pour another screed with maximum thermal conductivity, or make channels from wooden blocks of suitable thickness into which the heating element is placed.
Both methods are easy to implement on an insulating screed made from a mixture of sawdust and cement.
Leveling with self-leveling mixture
The walls should be covered with insulating material.
This method is quite simple, and self-leveling mixtures produced specifically for wooden floors make the whole process as easy as possible. The thickness of a perfectly flat surface will be from 0.5 to 2 cm.
Surface preparation consists of securing all movable boards and removing protruding parts of fasteners. Then you need to sand the surface to remove any remaining paint or varnish. Noticeable cracks and gaps are leveled using a thick self-leveling mixture. The walls should be covered with insulating material, and a wooden plank should be installed in the doorway at the height of the upcoming pouring. Duration of work in a room of 20 sq. meters with a layer of 3 mm. does not exceed 8 hours, and after 6 hours you can already move on the filled surface.
Leveling steps:
- Prime the surface with a waterproof primer, which will reduce hygroscopicity and improve bonding.
- Laying a special reinforced mesh on the primed surface with an overlap of at least five centimeters. To secure it, you must use a construction stapler.
- Mix the mixture in accordance with the instructions supplied by the manufacturer. For mixing, use a construction mixer or a drill with a special attachment. The finished mixture should be allowed to brew for 20 minutes, and then mixed thoroughly again.
- Filling the reinforced floor structure with the mixture and removing formed bubbles with a spiked rubber roller.
Leveling with plywood
A very popular and widespread alignment method. Demanded for laying various types of flooring. Plywood sheets of class 4 and higher are used. The sheet thickness should not be less than 1.2 cm. The optimal log thickness is 70 mm. A good option is the 2nd grade of solid conifer: spruce, fir or pine. Humidity level - no more than 18-20%. With a competent approach and some skills, a floor area of 20 square meters. meters can be leveled in one day .
Leveling steps:
- Installation of self-tapping screws as guide beacons (there is a good article about fasteners for profiles and gypsum board sheets here). The screws are screwed in over the entire surface using a screwdriver. All corners are equipped with beacons so that the resulting square is formed, the sides of which depend on the size of the plywood sheets.
- Horizontal alignment of beacons using a level.
- Laying logs from plywood strips in increments of 30 cm and fastening them with glue or self-tapping screws.
- Horizontal alignment of the joists and checking the strength of the overall structure of the grid of joists with sides of 30 cm.
- Installation of plywood sheets. It is considered ideal that the joints of the plywood sheets coincide with the joists. The plywood is fastened using self-tapping screws with countersunk heads.
Installation of plywood sheets. It is considered ideal that the joints of the plywood sheets coincide with the joists. The plywood is fastened using self-tapping screws with countersunk heads.
Cost of materials and work in 2015
Most often, construction and repair companies offer floor leveling services using the self-leveling method . The cost of leveling with a self-leveling floor up to 20 mm is 270 rubles. per sq. m. Leveling with a self-leveling floor from 20 mm to 50 mm will cost 310 rubles. per sq. m., leveling with a self-leveling floor using a leveling compound costs 350 rubles. sq. m. If you need to prime the floor with a universal composition, then such work is estimated at 75 rubles. per sq. m.
If the self-leveling floor option is chosen, then the consumption of high-quality German mixture Uzin NC 175 with a layer thickness of 3 mm. equal to 4 kg per 1 sq. meter; 6 mm – 8 kg; 9 mm – 12 kg. Accordingly, a standard package of 25 kg is enough for 6, 3 or 2 square meters. meter of wooden floor base. A paper bag of this mixture weighs 25 kg. costs around 3 thousand rubles.
The cost of professional work on leveling a wooden floor using plywood costs between 140 and 160 rubles. per sq. m. A sheet of waterproof plywood FSF 12 mm format 2500 x 1250 costs 1300 rubles. It’s easy to calculate the required amount yourself.
The price range for floor sanding is very wide and depends on the equipment chosen. The price for scraping a wooden floor starts from 119 rubles. per sq. m. For example, scraping work using German technology will cost the customer 500 rubles. per sq. m. Warranty on work - at least 2 years. The price of independent scraping work depends entirely on the cost of the tool used. Renting a sanding machine costs 1000 rubles per day. It is not advisable to buy such a tool for one-time use .
Water-based parquet putty
A more advanced method of sealing cracks in parquet is the use of two-component water-based varnishes.
You can prepare putty for parquet with your own hands by mixing the varnish component with the hardener component, adding fine sawdust to this putty mixture. For example, Wicanders W2000 already contains a hardener. All that remains is to add sawdust and achieve a thick mass.
- Putties are classified depending on their purpose:
- Starting (leveling);
- Finishers;
- Universal;
- Decorative;
- For the tree.
- You can also divide putties according to their composition:
- Acrylic (water-based);
- Alkaid (based on nitrosolvents);
- Latex (polymer-based);
- Oil-based (cannot be combined with nitro-based varnish, requires coating with special parquet oil).
We advise you to purchase putty in paste or powder form from a specialized store, where a knowledgeable consultant will be able to suggest the best option for leveling your floor.
If you do not want to seal the cracks and make the parquet yourself, then our specialists can help you.
KinLong.ru presents the best fittings for glass shower enclosures. High quality and very low prices!