Having appeared just over a century ago, wallpaper has changed dramatically, thereby changing the technology of pasting. At the same time, all the metamorphoses have occurred mainly over the last 20-30 years - if someone knows only the old methods and techniques of working with paper trellises, in modern realities they will not be able to properly hang wallpaper, since newspapers will no longer help here. New types of trellises require a different approach when preparing walls for their subsequent wallpapering. Why has technology changed so much and how to prepare walls for wallpaper?
Reasons for changing wall gluing technology
The need for preparatory work when covering walls with trellises is due to three factors:
- The use for construction of new types of wall materials (foam concrete, gas silicate, etc.) that do not hold trellises on their surface without prior preparation;
- Pasting in some cases a smooth surface on which the glue does not hold the wallpaper well;
- Production of heavy or very thin types of wallpaper. In the first case, problems arise when creating conditions for strong adhesion between the wall surface and the wallpaper; in the second, all the defects of the surface being pasted immediately catch the eye, since modern trellises do not hide them, but stick out.
In this regard, in the process of preparing walls the following tasks must be solved:
- Creating good adhesion between wallpaper glue and wall material. There are two problems here: the porosity of many building materials and the smooth surface of concrete, glass, tiles, etc. In the first case, approximately 50% of the wallpaper area is in contact with the wall, which leads to constant peeling of the wallpaper and unraveling of the seams. During the preparatory work, the pores are stopped, and a continuous film of primer is created on the surface of the wall material, ensuring ideal adhesion between the wall and the adhesive applied to the trellises. In the second case, it is necessary to create good adhesion of the wallpaper to the wall - the problem can be solved by applying special primers.
- Aligning walls with wallpaper. Modern wallpaper, both thin and dense, does not hide even minor unevenness of the walls. This is especially noticeable in daylight. Therefore, eliminating wall defects is one of the most important tasks during the preparatory work.
- Fighting mold and mildew. This seemingly minor task actually helps solve the eternal problem of plaster - the appearance of microorganisms in cracks and crevices in damp rooms and on walls - cold and moisture coming from the street create ideal conditions for the growth and reproduction of mold and various types of fungi.
The variety of tasks to be solved when preparing walls for wallpapering breaks the step-by-step instructions for the complete technological process into independent blocks: preparing walls, repairing them and leveling them.
Preparation for old wall coverings
The very first stage in carrying out preparatory work for wallpapering is dismantling the old covering. If you do not dismantle the old wallpaper, further measures to prepare the surface will not make sense.
The old wallpaper needs to be softened. If the previous wallpaper was paper, it should be wetted with a soap solution and wallpaper glue added. On vinyl or non-woven wallpaper, you need to make cuts in order to get to the paper base, which should soften the soap solution. After the wallpaper has softened, it should be removed with a metal spatula. If they are difficult to remove, you should moisten them again with soapy water.
If the wall was painted with enamel or oil paint, it should be cleaned with coarse sandpaper. Water-based paint is removed in the same way as paper wallpaper using a spatula.
If the previous wall finishing was plaster, you need to ensure its integrity by tapping for the presence of voids. Empty spaces are removed and plastered; if there are many such spaces, it is better to remove the entire layer and plaster the surface again.
Removing old wallpaper
Obviously, before you start gluing, the old wallpaper must be removed, and there are several reasons for this.
- First of all, old wallpaper doesn’t hold up well even a few years after hanging. And if you apply glue to them, they will become soft and simply peel off even under slight weight.
- Over the years of use, bacteria and dirt accumulate under the wallpaper.
- New wallpaper will take a long time to dry if you paste it over old wallpaper.
- Adhesion decreases, and hence the service life of the material.
- When the wallpaper pasted over the old ones dries, unevenness will inevitably appear that will not look attractive.
How to remove old wallpaper
Also note that there are several methods for removing old wallpaper. Let's get to know them.
- Mechanical . If the wallpaper is already peeling off or does not stick well, you can pry it off from above with a spatula and then simply pull it down.
- Water . Applicable in most cases. Scratches are made at different points on the covering, after which a rag soaked in warm/hot water is used to wet the wallpaper. After 15 minutes, the surface is cleaned with a knife or spatula.
- Chemical . There are special products that are safe for health, but allow you to easily remove wallpaper from the walls. The disadvantage of this method is the need for additional costs.
- Steaming . The walls are slightly moistened and then treated with streams of steam. This will make it easy to remove the wallpaper.
Tools for work
Note! Wallpaper should be slightly wetted, otherwise the walls underneath may be damaged. You should work in small sections - this way, when you get to the middle, the coating will already be dry.
KLEO wallpaper remover
If all these methods are ineffective, you can resort to heavy artillery - we’re talking about a grinder or an electric drill with an attachment. The next stage after cleaning is puttying the walls to level them.
Video - How to prepare walls for wallpapering
Master Class. Removing hard-to-remove wallpaper
Step 1. First, find out which wallpaper you need to remove. Simple paper ones can be removed using one of the methods described above, but vinyl ones will require the use of a special enzyme-based remover.
Consider the type of wallpaper you need to remove
Step 2. Cover the floor with protective fabric or film and secure it with adhesive tape. Then place a stepladder.
Place protective cloth all over your floor
Step 3: Remove the sockets. Or, alternatively, only their upper parts.
Remove the socket
Step 4. Turn off the electricity, because the work will use a lot of water. Try to do everything during the day - this way you will achieve the best results.
Turn off the power to the room
Step 5: Put on rubber gloves and special protective clothing.
Wear protective clothing and rubber gloves
Step 6. Find the edge of the wallpaper and pull it using a putty knife. If there are no problems, then there is no need to use special tools.
Look for the edges of the wallpaper to start cleaning
Step 7. Pierce the wallpaper with a special tool. Treat the entire surface with it so that the glue loosens and water penetrates freely.
Use a special tool to pierce the wallpaper
Step 8. Prepare a special solution using fabric softener and hot water (1:1). Pour the finished product into a spray bottle. Try to treat small areas, and the amount of hot water should be minimal. For best results, use store-bought enzyme gel.
Make a solution of one part hot water and one part fabric softener
Step 9. Start working on a small area until the solution dries. Wallpaper can be removed within 15 minutes after applying the solution.
Work on a small area immediately to prevent the solution from starting to dry out.
Step 10. Let the solution sit on the wallpaper for 5-10 minutes to absorb a little.
Let the solution sit on the paper for 5-10 minutes
Step 11. Move from bottom to top, prying up the edge of the wallpaper with a tool.
Pull from bottom to top, using a paper scraper to pry up the edges.
Step 12: For painted wallpaper, you will need a special wallpaper remover, which can be rented or purchased.
Buy or rent a wallpaper remover
Step 13. Steam a small area and clean with a scraper. Continue until the paper is completely removed.
Steam a small section of the wall
Step 14. If this does not help, you can use a special cleaning gel. Let it sit on the wallpaper for 15-20 minutes, then start cleaning. Next, you need to immediately clean the wall. Remove stubborn glue using a special gel.
If the wallpaper cannot be cleaned, choose a cleaning gel
Master Class. How to Remove Elmer's Glue.
Step 1. These instructions will be useful for those who, when gluing, did without traditional wallpaper glue. White school glue is sometimes used instead.
Removing Elmer's Glue
Step 2. Take a bucket, pour hot water into it, put on protective gloves. It is important that the water is always hot, and therefore it may have to be changed during the process.
Fill the bucket with hot water
Step 3. Dip a towel in water, wring it out a little, then place it on the glue - the water should penetrate into it and into the paper.
Soak the towel in hot water
Step 4: Before the water cools, remove the glue. You can use a sponge for this.
Remove the glue before the water cools down
Step 5: Wash the sponge and repeat the cycle until the Elmer's glue is completely removed. It is possible that the wall will be damaged in some places, which will require the use of putty.
Rinse the sponge
Note! After removing the wallpaper, the walls must be thoroughly washed. You can use a special solution of hot water and dishwashing detergent for this.
Preparing walls with oil paint
If you have to make repairs in an old house or apartment, inherited from your great-grandmother, then you need to know how to prepare the walls for wallpapering if there is oil paint on the surfaces. It was this finishing material that was used 50-60 years ago for renovations, so you can still find a “miracle of design thought” to this day. What to do? Firstly, you can use a hair dryer - it heats the surface (the paint begins to bubble and rise above the wall), then the unwanted material is removed with a spatula. But keep in mind that heated paint releases toxic substances into the air, so you should keep the windows open while working.
Secondly, you can remove the paint from the walls with a sander, but in this case you need to close all the doors and plug the cracks so that dust does not get into neighboring rooms. You can only work in a special mask, because it is very difficult to breathe while sanding walls.
Thirdly, there are special solutions on sale for removing paint from walls - they are a little expensive, but they quickly get rid of the unwanted coating.
Sometimes none of the above methods for removing paint from walls “works” and in this case you need to either prime/putty the wall or make notches on the surface.
Removing paint
Most likely, it will take a lot of time and effort to remove the old paint. This can be done using the following methods:
- mechanical;
- chemical;
- thermal.
Removing paint using power tools
Let's look at each method in more detail. So, manual (mechanical) removal is considered the cheapest. For work, use a chisel with a hammer or an ax. You can use an ax to make notches on the walls, then sprinkle with water. After it is absorbed, all that remains is to knock off the paint at any convenient angle. As for mechanical removal using special tools , it involves the use of an angle grinder or an electric drill with a special attachment. The work will be much easier than in the first method, but there will be more dust.
The mechanical method of removing paint is the most budget-friendly
There will be no difficulties with the chemical method The only disadvantages include the additional costs of purchasing the product. The point is this: wearing protective clothing, you need to apply the product to the walls, wait three to six hours, and then, when the paint has softened, remove it with a wire brush. At the end the walls need to be washed several times.
Paint remover
And the last method - thermal - involves treating the paint with hot air. The task is troublesome, because, first of all, you will need a gas lamp or a hair dryer, and when burned, the paint releases substances harmful to the body. Finally, the paint does not always fade after this treatment.
Removing paint with a hair dryer
Removing stains
Have you removed the old wallpaper, got rid of the paint, but found some stains on the surface of the wall? You definitely need to get rid of them! Otherwise, there is a risk that they will appear on the new wallpaper in exact accordance with the picture seen.
If the stains are mold/fungus, then you need to saturate the walls with several layers of a special primer. Ideally, check the quality of insulation on the outside of the walls, correct defects, or insulate the walls outside/inside.
Sometimes rust stains are clearly visible on cleaned walls - this is how rust appears from the metal frame of cast surfaces. There is only one way out - at the place where the stains appear, the entire layer of plaster is removed, the surface is treated with an anti-corrosion agent, then the plaster is applied again.
Filling deep holes in walls
After carrying out initial work on the walls, especially if you knocked off old plaster, deep holes could form in the corners and on the surface, the depth of which can reach the point that you can easily stick your hand into them.
And before leveling the walls with plaster, deep holes need to be sealed, and in a special way. Here, either foaming with polyurethane foam or cementing using DSP or repair composition is suitable. The work itself is not that difficult. However, you need to remember that in addition to cementing, you also need to properly impregnate the walls:
- the place where the hole is to be filled must first be primed;
- wait 1.5-2 hours;
- re-prime;
- wait again for 1.5-2 hours;
- moisten the area where the holes are sealed with water (0.5 hours);
- foam or cement holes (1-3 hours);
- wait at least 24 hours to continue working on the wall (24 hours).
In total, we take at least: 1.5 days.
If you decide to completely seal a deep hole with a DSP with reinforced mesh, then you need to wait even longer: about 4 days, but this case is rather an exception from those that I talk about in the article.
First cleaning of the premises from garbage
You may ask, why do you need to clean the room if work is in full swing, and there is still so much to do? The answers here are very simple. Firstly, there are pieces of old wallpaper lying all over the floor along with pieces of cement and construction dust, and walking through all this mess becomes very uncomfortable. Secondly, and this is the most important thing, next we have to prime the wall. And this is best done when the room itself is clean enough. We allocate about 0.25 days for cleaning.
Stages of preparing walls for taping
How to prepare walls for wallpapering? Work on preparing walls for gluing consists of several sequential technological processes.
- The preparatory stage that completes construction and installation work in a new building. There must be: the work of laying the floor screed has been completed; electrical wiring completed; door (window) frame installed; Built-in furniture is installed.
- Old wallpaper and paint are removed from the walls, nails and screws are removed.
- The quality of old plaster is checked by tapping it with a hammer. When dull sounds appear, the wall is cleared of the plaster layer.
- Chips and peeling are repaired, microcracks are repaired.
- The walls are washed if necessary (oil stains, soot, dirt are washed off).
- A primer is applied to create good adhesion between the wall and the plaster layer.
- Beacons are displayed.
- The walls are plastered with cement-sand mortar.
- The applied plaster layer is primed and putty is applied.
- The final stage of preparation is priming the surface for taping with trellises.
Preparation stages
Preparation is a complex of interrelated activities, each of which plays a specific role. All procedures are carried out in strict sequence.
So, before wallpapering you need to:
- If there is an old decorative layer, remove it completely and clean the surface. Assess the general condition of the walls.
- If work is carried out on an old base, then the existing peelings are removed, after which the areas are primed.
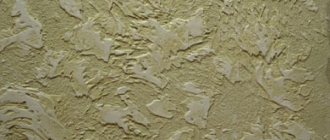
- The surface is covered with plaster to correct significant unevenness. For minor imperfections, puttying is performed.
- One or two layers of primer are applied.
The main stages of wall preparation: 1 - cleaning of old finishes;
2 - base primer; 3 - leveling the surface Preparation for pasting is a fairly simple task, but each stage has its own subtleties and features.
Removing an old layer
If the work is carried out in a habitable house or apartment, then preparation begins with the sequential removal of the previously applied decorative layer. The facing material most often is paint or wallpaper. Removing each coating has its own characteristics.
Removing paintwork
It should be understood that any paint needs to be completely removed, even simple whitewash is washed off entirely.
Procedure:
- Using a spatula, remove all peeling areas. This is quite easy to do: the tool is installed at a slight angle and the entire surface is processed with sharp movements.
Removing peeling layers of paint using a spatula - The remaining places are removed in various ways; the most effective is the use of a special composition. It is applied to the paintwork and left for some time, the paint literally swells. You can also use a hair dryer. Using a hair dryer to remove old paint
- There is often advice on using a grinding machine. This method is justified only when carrying out a full range of finishing works on large areas.
Cleaning the surface with a grinding machine
On a note! This is a rather labor-intensive process, so you need to be patient.
Removing old wallpaper
How to prepare walls for wallpapering if there is a paper layer? Removing such old coating is much easier. To work, you will need a spatula and a spray bottle with warm water.
Removing old wallpaper
The dismantling process occurs as follows:
- Initially, you need to pry off the layer in some places; if there are voids, the material will be removed in layers.
- The remaining areas are sprayed with water until completely wet.
- Next, use a simple spatula to remove paper residues with sharp movements from bottom to top or diagonally.
This operating principle is suitable for all types of wallpaper, including liquid wallpaper.
Materials and tools
To carry out the preparatory work, the finisher, regardless of whether he is a beginner or an experienced builder, must have a variety of tools and devices. Their set is dictated by the type of covering to be removed: trellises, paint or plaster; wall type:
- brick;
- concrete;
- wooden;
- plasterboard, etc.
The owner of a house or apartment who carries out repairs on his own needs tools and materials for a specific situation, and therefore there is no need to provide a general list of everything that will be needed during the repair.
To easily navigate the necessary materials and tools, a list of them will be given before the description of each type of work . The only thing you should always have at hand is a stepladder or portable platform (horses). Therefore, there will be no further mention of this device.
Wall cleaning
Preparing walls for wallpapering with your own hands begins with cleaning the walls of old wallpaper, paint or plaster. At the same time, each type of technological operation has its own correct techniques and methods. Let's look at them in more detail.
Wallpaper
How to remove old wallpaper? To do this you need:
1. Clear the walls of furniture - take it into the next room or move it to the center of the room and cover it with polyethylene film.
2. Turn off the electricity in the room being repaired, remove sockets and switches.
Sockets and switches are removed.
3. Collect the necessary tools and equipment:
- paint roller (can be used), sponge or rags;
- set of spatulas;
- knife (kitchen or construction);
- bucket for hot water;
- "wallpaper tiger";
- metal brush;
- iron;
- a piece of fabric (old T-shirt, towel);
- garbage bags;
- individual protection means.
4. Buy more if you don’t have a home:
- laundry soap - a quarter of a piece ground into shavings (in a bucket of warm water) will speed up the process of removing wallpaper;
- fabric softener - one cap of the product will give an effect similar to ¼ bar of soap;
- table vinegar (9%) - 5 tbsp. spoons in a bucket of hot water will help you quickly and easily clean the walls of old trellises;
- MK wallpaper glue - diluted to the consistency of kefir (5 times more water than indicated on the package) quickly softens wallpaper, indispensable when removing wallpaper from drywall;
- special compositions - can be bought in liquid or dry form, allow you to remove all types and types of wallpaper from the walls, regardless of the type of glue with which they were glued (see photo).
Wallpaper removers.
The methods for removing trellises are influenced, first of all, by the type of glue and the type of wallpaper: paper, non-woven or vinyl. For example, warm or hot water is always used for modified starch (MS) glue, but some methods are used for paper wallpaper, and others for non-woven and vinyl. If you know the little secrets, the work won't take long.
How to quickly remove old wallpaper from a wall glued with MK glue? For trellises that have been hanging on the wall for more than 8 years, the procedure is very simple. Sections of wallpaper that are lagging behind the wall are cut with a knife. A narrow spatula is inserted into the resulting cracks.
The wallpaper sheet pulls towards itself very slowly - if it moves quickly, the paper will tear due to age. The remaining trellises on the wall are scraped off with a knife or spatula blade. The process can be accelerated if such areas of the wall are moistened with heated water and given time (about 20 minutes) for the paper and glue to soften.
How to remove paper wallpaper from walls when they have been in use for a short period of time? If the trellises have been hanging for less than 4 years, they are moistened with warm water. A roller or sponge is suitable for these purposes.
Usually work is carried out not on the entire wall, but on several canvases. After soaking 4-5 wallpaper sheets, they are “forgotten” for 20 minutes. This is enough for the glue (due to the starch it quickly becomes liquid) and the paper to become saturated with water. After that, the wallpaper is removed with a spatula and a knife.
However, this procedure is completely unsuitable for vinyl trellises - the top layer of wallpaper does not allow moisture to pass through. Then how to quickly remove vinyl wallpaper from a wall ? There are two ways here.
- Use a knife to pick up the vinyl layer and tear it off the paper base. Next, proceed in the same way as with paper wallpaper - warm water, a spatula and a knife.
- Use a knife to make cuts on the trellises (you can use a “wallpaper tiger”) and moisten them. Penetrating under the vinyl film, the water wets the glue and paper, after which the wallpaper easily comes off.
Important: experts recommend in all cases, after removing the wallpaper, rinse the walls, and more than once, with clean heated water. In practice this is practically not done. There were no significant differences in the service life of the wallpaper.
There are some peculiarities when removing paper wallpaper from drywall . Here the soaking process is completely eliminated - water will not only soften the glue and trellises, but also damage the plaster. In this case, liquid wallpaper glue will help.
It is diluted with a large amount of water (4-5 times more than indicated in the instructions) and spread on the trellises. Wetting the paper web and the glue with which the trellises were glued, such a composition is not able to completely saturate the gypsum board cardboard with water. You can remove the sheets with a spatula and knife after 20-30 minutes. Such methods are not suitable for PVA, MC and CMC glue.
How to quickly remove wallpaper from walls glued with modern high-quality types of glue and PVA glue? PVA glue has the most problems. It must be removed in two stages: first the wallpaper, then the glue itself.
Trellis permeable to water are treated with a hot soapy solution. To do this, a piece of laundry soap is crushed, diluted in 4 liters of water, brought to a boil and immediately applied with a roller to the wall. After 15-20 minutes, the trellises can be removed without problems.
They do not process the entire wall, but a part. After removing the wet wallpaper, the remaining adhesive is scraped off with a spatula or a metal brush, and the wall is washed. Then the solution is heated and work continues in the same order.
For water-repellent wallpaper, make a solution with fabric softener. For single-layer trellises, 0.3 liters of conditioner per bucket of water is enough; for double-layer trellises, pour twice as much detergent into the water.
The instructions are simple:
- approximately 2 m2 of wallpaper is wetted;
- after 10 minutes the next 2 m2 of wall are wetted;
- after 20 minutes, the wallpaper is removed in the place where the primary soaking was carried out;
- the remaining glue is scraped off with a wire brush;
- the next area (2 m2) is soaked, etc.
MC and CMC glue is destroyed either by steaming or when treated with special removers.
Professional builders use a steam generator or steam cleaner, but not every home has one. An iron and a linen towel (any natural fabric without synthetic additives) will come to the rescue.
The technology is as follows:
- the fabric is lowered into the water, then twisted not very much;
- the iron warms up to maximum temperature - an extension cord is needed here to connect to electricity from another room;
- the towel is applied to the wallpaper, and, pressing firmly, it is ironed - 5-6 times;
- The trellises are scraped off from the steamed area with a spatula.
This operation is repeated until the wallpaper is completely removed from the walls. The work is not fast, it takes a lot of time. But in practice it is the best option.
Special washes sold in the form of powder or jelly can speed up the work. Their manufacturers claim that the products are completely safe for the health of people living in the apartment. But, still, it is better to work with gloves.
The solution is prepared in accordance with the recommendation on the packaging. Apply to the wall with a roller. On waterproof trellises, it is necessary to apply perforations with a knife or “wallpaper tiger”. The removers need 2-3 hours to dissolve the adhesive mass, after which the wallpaper will come off the wall on its own.
Perforation (cutting holes) of wallpaper using a “wallpaper tiger”.
Liquid and photo wallpapers can be removed using any of the above methods; glass wallpaper can only be removed using removers. When removing glass wallpaper, there is a little secret: you need to remove one sheet at a time and be sure to pull it from top to bottom.
Dye
It is impossible to carry out plastering work on a painted wall to level its surface or apply simple putty - neither cement nor gypsum has adhesion to paint. Therefore it needs to be removed.
Old paint.
Attention: painting the wall is not an obstacle to wallpapering. In many cases, it is possible to glue trellises directly onto the paint layer (see the work “Is it possible to glue wallpaper onto paint”).
To clean the paint layer from the wall you must have:
- personal protective equipment;
- blowtorch;
- grinder;
- axe;
- various attachments for a hammer drill or grinder;
- putty knife;
- chisel;
- knife;
- paint remover;
- brush.
Using the tools listed above, paint can be removed:
- using chemistry - special solutions (washes);
- heating the surface of the walls - thermal method;
- mechanically - the paint layer is removed with power tools.
The chemical method is based on the ability of special chemical mixtures, for example, “Prestige” gel, “Antikras” remover, etc., to dissolve all types of paints. Wherein:
- the drugs are quite expensive;
- remove only one layer - if you paint multiple times, you will have to dissolve each layer separately;
- a pungent odor lingers in the room for a long time;
- Remnants of flushes should absolutely not be flushed down the toilet - special disposal is required;
- the worker must be dressed in a chemical protection suit;
- upon completion of work, mandatory water procedures.
Conclusion: the method is effective, but has a whole bunch of negative side effects, which is why it is better to abandon it.
The conclusion drawn applies to purchased washes. You can prepare them yourself and not have these problems. Several recipes:
- 0.25 liters of ammonia (10%) is poured into 1 liter of cold water, 2 kg of construction chalk is added and mixed thoroughly. The resulting mixture is evenly applied to the paint and after 2 hours they begin to remove it (the composition does not destroy the paint layer, but disrupts its adhesion to the wall surface - it is removed in layers);
- Mix 1.2 kg of quicklime and 0.4 kg of soda ash until thick sour cream forms. Apply to the wall and let it soak through the paint. After half a day, the paint layer can be removed;
- Apply a thin layer of liquid glass to the wall. After drying, the silicate film is removed, and the paint is removed along with it.
The thermal method is based on the ability of paint, under the influence of high temperatures, to transform into a semi-amorphous state - when it is no longer solid, but not yet liquid. This layer of paint can be easily removed with a spatula.
You can heat it with a hair dryer, a blowtorch, a simple iron through a newspaper, or even better - food foil. The method has been known for hundreds of years, has been tested and has never failed. The only thing is that you need to be careful when using heat near electrical wiring, switches, sockets and other plastic items - they can ignite or melt.
Heated spot.
There is only one downside to this method: when oil paint is heated, caustic substances are released into the air.
The mechanical method of removing paint from the base was born at the same time. The method is labor-intensive, but not harmful to health, does not pose a fire hazard, and allows the use of any available hand-held percussion tools (trowel, axe, chisel, hammer) or power tools with various attachments. Therefore, it can be used to remove paint in the kitchen, nursery and bathroom.
How to remove paint from walls manually? Using a spatula, the paint is removed in places where there are cracks in the paint layer or swelling. Tightly adherent paint can be removed either with a chisel, hammer or axe.
The process can be mechanized and using power tools (drill, hammer drill) with special attachments.
Removing paint with a grinder.
Stages of work completion
You should first find out what and how to treat the walls before wallpapering. The step-by-step preparation technology consists not only in the correct selection of the necessary materials, but also in studying all the subtleties. Incorrect repairs can be avoided by carefully reading this material. It is important to take into account all stages of preparation and not skip any of the existing ones.
Why are walls prepared for wallpapering? This is necessary in order to avoid the appearance of fungus and kill existing ones, to ensure good adhesion to the surface. The wall to be pasted must be thoroughly cleaned, it should be leveled as much as possible - then the coating will last longer.
The procedure for preparing walls for wallpaper is as follows:
- Removing old surface finishes - Any wall finishes should be removed.
- Primary priming. The surface is treated with the composition after removing all the finishing coating. This is done to disinfect the walls and prevent moisture from being absorbed into them.
- Sealing cracks and defects. If there are any cracks or holes, they must be repaired. Prepare the gypsum mixture, and then plaster the surface, then putty.
- Alignment. To do this you will need sandpaper or a special abrasive mesh.
- Re-treating the walls before wallpapering with a primer mixture. It is carried out with the aim of good adhesion of the wallpaper to the walls, while providing antiseptic and disinfecting effects.
The stages of preparing walls for wallpapering cannot be interchanged. The sequence of work order is very important, because the final result of the work depends on it.
Preparation of materials and tools
Before answering the question of how to properly prepare walls, you need to purchase materials and tools. You will need:
- starting putty or gypsum plaster (levels the surface, applied as a base layer);
- finishing putty (applied to the starting putty or directly to drywall, making the walls perfectly smooth);
- primer (make sure to apply it to the previously prepared space).
It is better to use a universal primer, with deep penetration into the surface. Then the preparation of walls for wallpapering will be of the highest quality.
Each purchased material has instructions for preparation and use on its packaging. Please read it before performing any priming work. To prepare the surface for wallpaper, you need to have special tools on hand that will get the job done quickly and efficiently. These materials and tools will simplify the preparation of walls for wallpapering, saving effort and time:
- film (cover the floor);
- stationery knife;
- construction tape (to avoid contamination);
- bucket (mix the mixture);
- roller and brush (coat the surface with primer);
- a pair of spatulas of different sizes (leveling tool);
- drill with a mixer attachment (stir the putty).
Removing old wallpaper from walls
To hang new wallpaper in a room, the old ones must be removed. Without this, it will not be possible to prepare concrete walls for gluing. There are a number of reasons why it is strongly recommended to remove previously pasted wallpaper:
- After a few years, the old wallpaper no longer holds up well. They will become soft and will simply peel off under a slight weight if glue is applied to them for gluing new wallpaper.
- Wallpaper will take a long time to dry if new wallpaper is applied to it.
- After the glued wallpaper dries over the old wallpaper, unevenness appears and the appearance is unsightly.
- The level of adhesion between materials becomes less, which reduces service life.
- Dirt and germs accumulate under the wallpaper over years of service.
When removing old wallpaper, several technologies are used - the initial stages of wall preparation:
- Manual method. It is used when the wallpaper does not stick well or has come off. Use a spatula to pry from the top and then pull down to clean the coating.
- Water method. It is used most often. You just need to make scratches in different places of the wallpaper for good water penetration. Next, take hot or warm water (soak a rag and wet the wallpaper). Wait 15 minutes and clean the surface with a spatula or knife.
- Chemical method. Chemical products are sold on the construction market that can be used to easily dismantle wallpaper without harming the wall, and they do not affect health. There is only one “but” in this method: it requires additional costs.
- Steaming. Lightly moisten the wallpaper and blow it with a stream of steam, and then easily remove it.
Wet the wall lightly so as not to damage the surface under the wallpaper. Work in small areas. By the time you reach the middle, the wallpaper will already be dry.
If none of the methods is suitable, you will have to try cleaning with a grinder or drill with an attachment. Only after this will it be possible to putty the surface to level it.
On video: preparing walls before wallpapering.
Removing paint
What to do about the problem of painted walls? Removing paint is a very difficult job that takes time. But if the walls are painted, remodelers use three methods to remove the paint:
- mechanical (manual or using electric tools);
- chemical (use chemicals);
- thermal (using high temperature).
Mechanical (manual) is the cheapest method and is not very dusty. In its implementation, an ax or chisel with a hammer is used. It’s easy to beat the walls with an ax to create cuts, and then spray with water. When it is absorbed, carefully knock off the paint at a convenient angle.
Mechanical (electric tools) - the method involves the use of an angle grinder or drill with special attachments. This is much easier than the manual method, but be prepared for a lot of dust.
The chemical method is quite simple. It has only one drawback - you need to spend money to buy the product. In case of application, it is better to wear special clothing for protection, then coat the wall with paint, wait 3-6 hours (depending on the quality of the paint). The paint is softened and brushed off with a wire brush. After this, the wall is washed several times.
The thermal method is burning paint with hot air, but this technology is very troublesome. Firstly, you need a special tool (a hair dryer or a gas lamp), and secondly, burning paint provokes the release of toxic substances that are harmful to health. Thirdly, all the paint is not always burned out.
Primer of walls
How are walls treated before wallpapering? A primer is the product that needs to be used to cover any surface, be it made of drywall, putty or plastered with plaster. Apply the primer mixture to avoid cracks on the surface. It improves the adhesion of the surface to the material, removes unnecessary moisture from it, removes debris and small particles.
How to treat a wall before wallpapering? There are different types of primers:
- acrylic;
- alkyd;
- mineral;
- deep penetration;
- with coloring powders.
How should you treat the walls before wallpapering? This is a personal decision for everyone, but the mixture must be selected taking into account the properties of the surfaces. You can choose the right one with the help of a salesperson in a store or by reading the description on the product.
There is currently a huge selection of primer compositions on the construction market. There are a few basic solutions that are especially highlighted by experts:
- Universal acrylic solution. It is often used due to its ability to be deeply absorbed into the wall, lack of odor, dry in 6 hours and can be used on any wall.
- Contact composition. The most famous solution, used even by beginners. Its properties are exactly the same as those of the acrylic mixture, but in addition it also contains small quartz grains of sand. They increase the penetration of the mixture deep into the surface and at the same time help to level out its minor imperfections.
- Griftal composition. It is used only in places of high humidity, so it is not very well known. Dries within 24 hours after application.
The primer solution is applied to all walls. Use a roller for this, and a brush in the corners. If after priming the wall absorbs everything and becomes dry, you need to apply the primer again.
Leveling the surface
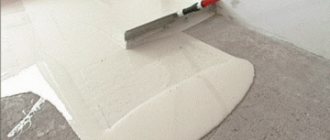
After the walls have dried from the primer, the surface must be leveled (plastered with plaster). Is it necessary to plaster the coating? No, if the walls are dry and smooth, the old plaster does not crumble, and there is not much money in the budget. If the walls are uneven, have many defects and flaws, then they must be plastered for wallpapering. How to level the walls? Using any high-quality gypsum mixture.
All cracks and holes must be filled with the mixture, a layer of maximum 1 cm applied, and the surface leveled with a spatula. Leave the walls until the material is completely dry, then sand with sandpaper or a special mesh.
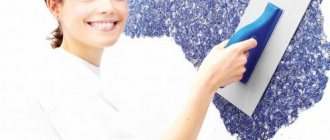
Let's start puttingty. We spread the putty and use a spatula to level all the surfaces that will be covered with wallpaper. When the procedure is completed, wait for it to dry. The putty surface is sanded until completely smooth. The final stage is re-priming. It must be done before wallpapering, when the walls are already puttied.
How to repair cracks
After removing the plaster and old finish, the walls are carefully inspected for chips, cracks, damaged masonry joints, etc. Identified defects require elimination, especially cracks.
A crack in the wall is a common occurrence.
Cracks in the wall are the scourge of new residents in panel houses. Living-in apartments suffer from this to a much lesser extent - even in old “Khrushchev” apartments you rarely see them. There is a simple explanation - cracks appear mainly due to shrinkage of the building. They must be sealed in any case.
You can repair the crack yourself. For this you will need:
- set of spatulas;
- brush;
- sponge;
- primer;
- sandpaper;
- putty;
- fiberglass mesh (in some cases).
Attention: before starting work to repair a crack, you must make sure that its growth has stopped. Otherwise, all the work will be in vain - you will have to redo it after a certain time.
We will describe the whole process step by step:
- plaster 2-3 cm wide along the crack;
- use a spatula to widen the gap; if necessary, you can use other tools (chisel, hatchet, chisel);
- the edges of the wall near the gap are cleaned with sandpaper;
- Dirt and dust are removed from the recess and around it (this can be done with a vacuum cleaner or brush);
- the crack itself and its edges are primed (it is most convenient to perform this operation with a sponge);
- the gap is sealed with any putty (you can also use acrylic paint sealant);
- after the repair mixture has dried in the wall gap, a serpyanka (a strip of fiberglass) is applied to the recess and covered with gypsum putty or the same repair compound that was used to seal the crack;
- Using a wide spatula, level the mixture into a thin layer;
- the dried solution is sanded manually or with a grinder (sandpaper with a grain of 100-150).
Expanding the crack with a spatula followed by cleaning.
For information: the polymer putty is rubbed into the crack with a narrow spatula, the acrylic sealant is squeezed out from the tube with a pneumatic gun.
Sealing the seam with acrylic sealant.
Chips and irregularities are initially moistened with “cement laitance” or primer, then sealed with a special solution developed for these purposes.
Potholes in the masonry mortar are deepened by 2.0-2.5 cm, followed by priming and sealing with cement-sand mortar. The cement mixture can be replaced with a very effective polymer-based repair composition. But it all depends on the price of the material - cement-sand mortar is much cheaper.
Before finishing the walls, they must be leveled. Plaster or drywall will come to the rescue. The material “Which is better - plaster or drywall?” will tell you what exactly to choose. Let's consider both options.
Using serpyanka to strengthen the wall.
Preparing the wall surface for wallpaper
Practice has shown that preparing concrete walls for wallpapering when carrying out repair and finishing work in a residential area is a more labor-intensive and time-consuming procedure than pasting itself. And this is natural; concrete and brick walls often have quite significant unevenness and cracks. In such cases, even using thick and expensive wallpaper, it is impossible to hide these defects.
Such imperfections can be removed by leveling and sealing the surface, or by using plasterboard covering the walls. After completing such work, the wall should be smooth, even and dry; the subsequent quality of the finish will largely depend on this. Therefore, preliminary repairs and preparation of walls in an apartment for wallpaper are very important for finishing work.
In old housing, before starting work, you need to remove the old wallpaper. To facilitate this procedure, it is advisable to pre-wet them. In those places where they hold quite tightly, you need to thoroughly clean the roughness with sandpaper; in places where there is swelling, additional processing is also required. Film and roll wallpaper such as foam film must be removed completely.
To prevent old stains from appearing, it is advisable to seal them with aluminum foil or seal them with nitro paint (nitro varnish). It must be remembered that even the smallest grains of sand or pits can be visible on some wallpaper, so leveling the surface must be done with special care. Preparation should be carried out taking into account the type of wallpaper used.
Leveling by plastering
The most common option for leveling walls is to plaster them with a mortar of cement and sand. In order for the solution to adhere well, the surface under the plaster needs to be primed.
How to prime walls
They begin to plaster the walls after applying a primer to them. This operation allows you to:
- saturate the wall material with moisture, which will not allow it to take water from the plaster mortar;
- create a film with strong adhesion to the wall (the primer penetrates up to 1 cm deep into the material), which in turn provides good adhesion to the plaster;
- increase the strength of the surface of the wall material - the absorbed primer protects the wall from chipping, the formation of small cracks, etc.;
- bind dust particles that actively counteract any connecting processes.
The primer must be selected according to the wall material and type of plaster. For example, a primer for concrete and gypsum plaster is not suitable for cement-sand plaster mortar.
The repaired wall is primed with a paint roller or brush in 2 layers. In this case, the next layer must be applied after the first has dried, although there are recommendations to apply the second layer after the first after 10 hours. It is impossible to unequivocally evaluate such advice - there are no studies on this issue.
Removing dust from the crack using a brush, followed by impregnation with primer.
Plastering a wall
The next stage of preparatory work is the installation of beacons. The operation is described in detail in the work “How to install beacons on a wall for plaster?” Let us briefly recall the entire technological process.
- In the upper corners of the wall, at a distance of 10-15 cm from the adjacent wall and 20 cm from the ceiling, holes for dowels are drilled with a hammer drill or drill and screws are screwed into them - 2-3 cm of hardware are left above the surface.
- A plumb line is hung on the head of each self-tapping screw, and a hole is drilled for the second hardware at a height of 20 cm from the floor. After this, the heads of the hardware are brought into one plane (you need to screw in or unscrew one of the screws with a screwdriver).
- The wall surface is being hung. To do this, a fishing line or twine is stretched between the screws horizontally and diagonally.
- Using a construction square along a stretched fishing line, measurements are taken of the distance from the surface of the wall to the plane formed by the tensioned fishing lines.
- Add 3 cm to the point of the wall most curved towards the room and form a new plane - the plane of the plaster.
- Beacon guides are installed from the PS profile.
The process of plastering with cement-sand mortar is described step by step in the material “Plastering walls on lighthouses with your own hands.” The stages consist of:
- from spray;
- soil;
- covers.
They are performed in strict sequence after the previous layer has dried.
Spraying is done to create good adhesion of the plaster solution to the wall. Apply up to 5 mm thick. The solution must be prepared with a high content of binder (cement, gypsum, lime) and be similar in consistency to liquid sour cream.
If a decision has been made not to prime the surface of the walls, then they are moistened with water so that the wall material does not take away some of the moisture from the solution and thereby disturb the chemical process of formation of cement (gypsum, lime) stone.
Professionals advise starting work from the bottom left corner and going up between the beacon profiles. Having finished the first row, move on to the second, etc.
The second layer, builders call it “primer”, is applied after the spray has completely dried - this is the plaster layer of mortar that levels the wall. Its consistency should resemble bread dough. Thickness - about 2 cm. Work is carried out in the same order as spraying.
With the third layer, the wall surface is leveled to an almost ideal state. Some specialists are able to perform this part of the operation at such a high level that finishing (finishing) finishing - putty - is not required.
When moving to an adjacent wall, you need to remember the angles. They are never even and straight. Therefore, when laying out the plane of the plaster, it is possible and necessary to level the angle. How to do the job correctly, you can see in the article “How to align the corners of walls in an apartment?”
Leveling with plasterboard
How to level walls for wallpaper using “dry plaster,” by which builders mean plasterboard sheets, can be read in the materials “How to level walls with plasterboard with your own hands?” and “How to level walls with plasterboard without a frame?”
The fastest, easiest and cheapest way to level walls using gypsum plasterboard is to use glue. But this option is only available for small, up to 3-4 cm, height differences on the wall surface. If the curvature is greater, it is imperative to install a sheathing.
If the wall is uneven up to 4 mm, glue is applied to the wall surface and the first sheet of drywall is pressed firmly against it. Subsequent sheets are applied to the wall surface, but are not pressed into the glue. Using a level and a rubber hammer, the gypsum board is brought into the same plane with the already glued sheets (they are tacked to the wall).
If the unevenness is significant, strips of plasterboard come to the rescue, which are glued to the wall, and only then drywall is attached to them. Surprisingly, there are often cases when apartment owners who do the work themselves use a lot of glue instead of strips. The result is the same - when the glue dries, it shrinks strongly and either comes off the gypsum board, or pulls the sheet along with it, causing it to burst.
How to glue - instructions
Once you have prepared the concrete base, you can begin the gluing process. Wallpaper is glued to a concrete wall, as well as to other surfaces:
- prepare the glue, how to do it correctly can be read in the instructions, which are on each pack;
- the strips are cut according to the height of the room, leaving a small margin at the top and bottom;
- if necessary, then select a drawing;
- glue is applied to the wallpaper and to the wall, and if they are non-woven, then the walls do not need to be smeared;
- the strip is folded in half, with glue inside;
- make a vertical line on the wall and glue a strip along it;
- the work is started from the window, bubbles and folds are removed using a plastic spatula or roller;
- the next strip is glued end-to-end with the previous one;
- When gluing openings in a concrete wall, the wallpaper is glued overlapping, then the excess is cut off in the opening with a blade.
Primer before wallpaper
Modern wallpapers are made from a variety of materials. It is very difficult to select an adhesive for the combination of wall material and the back side of the trellis. This will require more than a hundred types of adhesive mass.
Manufacturers of wallpaper and glue found a simple way out of this situation: they developed special primers that serve as an intermediate link between wallpaper glue and the material from which the wall is made.
Therefore, you need to choose a primer for wallpaper based on the surface of the wall (it is already adapted to different types of glue). Apply a rough coat of primer with a roller, and in hard-to-reach places with a brush. The second, finishing layer is applied after the first has dried.
For reinforced concrete, the first layer is applied with a diluted primer - it is necessary to saturate it with moisture as much as possible. Re-prime after the already applied primer has completely dried.
Priming walls for wallpaper is discussed in detail in the material “How and what is the best way to prime walls before wallpapering?”
The nuances of preparing a wall for different types of wallpaper
Wallpaper can be heavy or light, dense or translucent. This makes some adjustments to the process of preparing walls for taping trellises.
Liquid wallpaper
Liquid wallpaper easily tolerates various uneven surfaces of the walls, but bright spots shine through well and look gray on a dark surface. Therefore, the walls under them do not need to be puttied, but they must be painted with white water-based paint, if they are not light-colored.
Non-woven wallpaper
Lightweight non-woven wallpaper can be glued over old paper trellises and over paint, which simplifies the entire process of preparing walls. The only thing that needs to be controlled is how well the previous finish adheres to the walls, and whether bright colors (of old wallpaper or painted walls) are visible through the wallpaper. If in one of the cases the condition is not met, then a full cycle of preparing the walls for wallpapering lies ahead.
Photo wallpaper
The ability of photo wallpaper to emphasize the slightest convexity of the walls while simultaneously distorting the pattern requires mandatory puttying of the surface, followed by sanding by hand or using a sander.
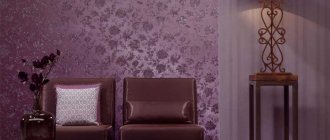
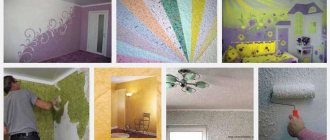
Wallpapers and their types
On the building materials market we are offered a fairly large selection of such products. Non-woven and vinyl wallpapers are currently in greatest demand. This is explained by their beauty, practicality (they can be washed or easily and simply removed a stain of dirt), durability and, most importantly, a fairly attractive price.
Despite a number of disadvantages (simplicity of texture, short service life, etc.), paper wallpaper is still in demand due to its low cost. More expensive ones that have a number of advantages include: textile, velor and glass wallpaper, silk-screen printing. Preparing walls for wallpapering with liquid wallpaper has become a novelty on the renovation market.
Such products will help hide small defects (irregularities, scratches, etc.) on the surface of the walls.