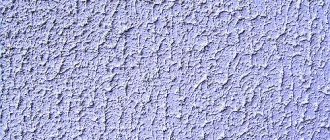
Sometimes when painting a car, walls, or any other surface, a shagreen effect occurs, which is visually manifested in the formation of the so-called orange peel. In some cases, it is forced and is achieved specifically for decorative purposes. But more often it occurs for negative reasons.
The mechanism of formation is such that the particles of the paint and varnish material do not form a single, flat, smooth surface during painting. What it is is clear, but why shagreen appears when painting, how to achieve this effect or get rid of it is described below.
Causes
The main reasons for the formation of unforced shagreen:
- weak or insufficient quality of paint coating (enamel, varnish, primer);
- malfunctions or incorrect configuration of painting equipment (paint gun);
- presence of defects on the treated surface;
- lack of proper conditions for performing work;
- painting at too far or close distance from the surface.
If the paint and varnish product is of poor quality, it may have a heterogeneous structure with various impurities, and during exit from the spraying device it may quickly curl up. Such dried particles form unevenness on the surface, and in large quantities they create the shagreen effect.
The problem of incompatibility of paintwork materials with each other is acute. When painting and preparing the base, it is better to use materials on the same base, ideally from the same manufacturer.
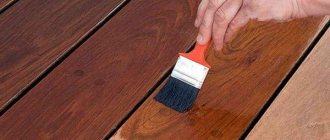
Manual application technology
Before application, the surface must be cleaned and primed. This step will improve adhesion to the finishing mixture. After this, they begin to apply decorative plaster.
- Prepare a solution from dry powder taking into account the proportions indicated on the package. If you use a ready-made solution, you can add 200-250 ml of water per 25 liters of plaster to make it more liquid.
- If necessary, a color – a coloring composition – is added to the base (white) acrylic mixture.
- The mixture is evenly applied to the prepared surface using a plaster trowel. The layer thickness should not exceed 3 mm.
- Level the wet mixture with a fur or foam roller with large cells, passing each area at least 3 times.
After this, it is left to dry at a temperature of +5 degrees. Optimal humidity is no more than 80%.
Advice! It is better to plaster together. One person applies and levels the plaster, the second master rolls it with a roller and creates a decorative relief. This approach will speed up work and improve the quality of finishing.
Plastering with a roller
There is a simpler technology for manual application using a roller. The process consists of the following steps:
- preparation and priming;
- pouring a small amount of the mixture into a convenient tray;
- application and distribution with a textured, cellular roller. They work like when painting a wall; the roller is dipped into the plaster and rolled over the wall several times.
consumption rate : from 1 to 1.5 kg per 1m2.
Drying time : a layer of 2-3 mm dries completely and becomes ready for further work within a day.
How to create shagreen with a roller is shown in the video below.
How to prevent shagreen
Many people try to paint without shagreen, since a regular smooth surface always looks attractive. If for walls, heating radiators, surfaces with visible joints, the shagreen effect is acceptable and even a priority, then when painting a car this is unacceptable.
Shagreen is almost always present, the only question is its visibility with the naked eye.
To avoid this effect, you should use only high-quality paints and varnishes, a serviceable, correctly configured painting tool. When purchasing paint, primer, varnish, in a store, you can ask the seller for a certificate of conformity for the product to ensure that paint and varnish materials are produced in accordance with GOST. This will confirm the quality of the product at the level of the manufacturer and the companies that control its quality.
If you are not confident in carrying out high-quality work without defects after painting, you can do it on a so-called sampler. Take a small area of the surface and paint it. If no problems arise, continue painting.
Roughness can be prevented if the following requirements are met.
- Carry out painting under the correct temperature conditions (+18-24°C), this will allow the paint and varnish material to preserve its properties and consistency, which is important for proper spraying through the spray gun.
- Correctly set up and operate the spray gun - with constant pressure and the correct distance from the surface to be painted.
- The temperature of the metal and the environment inside the box must match; paint on metal that is too cold or too hot will not adhere properly.
- It is better to carry out work inside a special spray booth; all conditions for tightness and temperature will be met.
- The quality of coloring will largely depend on the thickness of the dye, so it must be properly diluted with a solvent. It is better to find out the correct proportions and possible dilution method in the instructions for use for paintwork materials.
Useful video
Hello, dear readers. I deliberately didn't want to touch on the topic of painting because I don't think I paint cool enough. Yes, perhaps better than most painters in our city, but still not ideal.
But recently they started asking me to release material on this topic. I thought for a long time and came to the conclusion that, in the end, I could give you good advice on this matter. So meet me - my thoughts on painting the ceiling with your own hands! Why the ceiling? Yes, simply because it is the most difficult.
Naturally, no one will film me while I work, so I cannot post direct photos of the process here. But they won't really help. I can only post the results of my work on the painting front, so that you don’t think that I’m so bad)
As I already said, the most difficult thing to paint is the ceiling, because everything is visible on it, even the smallest jambs. Also because, as a rule, it is not small, plus the hand gets more tired - you have to swing it for quite a long time. And not only the arm, also the neck and back. The main mistakes that beginners and even seasoned painters make when working with ceilings:
- Using cheap paint that dries extremely quickly. When the painter “rolls away” the first square and moves to the second, the edges of the first are already dry! And these are inevitable stains on the surface when fresh paint comes across dried paint.
- Using bad tools. Choosing the wrong roller can result in lint coming out of it, which will remain looking at you from the ceiling forever. In addition, too short a pile absorbs little paint, which is why you have to dip it into the bath more often. And this increases the time spent, which, again, threatens the paint on the surface drying out and stains. A bad brush will also produce bristles.
- Smoke breaks (breaks, in the sense) during work. Here you can guess for yourself what will happen.
- Improper surface preparation. This may be unsanded or too rough putty, the ceiling may be poorly primed or not primed at all. In this case, you will at least get stains. And at the very least, the paint will just fall off if the ceiling was dusty.
The true “Uncle Vasya”, or, as it often happens now, “Uncle Rovshan”, can find many more ways to ruin the ceiling; I described only the most common ones.
Now let's figure out how to avoid all this?
How to remove shagreen
If after painting shagreen does form, you can try to remove it.
Roughness is removed by polishing the surface. You need to prepare sandpaper of different grain sizes (or a sander), polishing pastes, and a bucket of warm, clean water (preferably distilled).
Start by rubbing with sandpaper of P1200-P1500 grit, maintaining a constant level of pressure when pressing. In this case, the metal is doused with water. Instead of sandpaper, you can clean it with a grinding machine, this will speed up the process.
Next, polish with finer grit sandpaper P2000-P2500. The final step is polishing with special pastes. Ideally, three pastes are used; the 3M brand (75 or 75) works well.
Trizact abrasive wheels have a good polishing effect.
If after painting the car it was not possible to remove the shagreen, you will have to remove the paint and re-paint it.
Painting walls with water-based or decorative paint
Today the market offers the widest selection of paints and wallpapers.
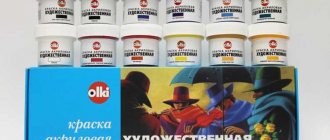
To decorate apartments and houses, water-based paint is also used, which has a wide range of colors, dries quickly, is easy to apply, and is suitable for updating and repainting.
- environmental friendliness;
- fire resistance;
- resistance to detergents;
- ease of application.
- shelf life – 24 months;
- susceptible to mold and bacteria;
- Not suitable for all surfaces.
A textured suspension outperforms a water-based suspension. With its help, it is possible to create diverse interior solutions that will decorate a house or apartment for a long time. Water-based paint is more suitable for temporary room design.
When is shagreen needed?
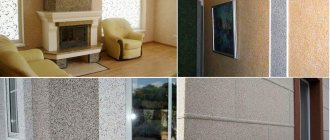
For a long time, the effect has been applied to walls and various surfaces with coating defects in order to hide them. This is simpler and ultimately looks aesthetically pleasing than painting uneven walls, on which a smooth coating does not look very attractive due to very prominent irregularities. Shagreen is effectively applied to various joints and welds. Conventional painting will only add color to such places, when the roughness of a part will hide the visible joints and add decor. In addition, it can be applied in just 1 layer.
The created surface is tactilely very pleasant.
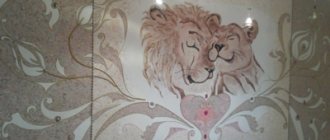
There are special shagreen paints with a varied color palette. They not only give a decorative color, but also perform a protective function. Prevents exposure to moisture, mechanical and other environmental factors.
The most popular material is polymer powder paint. It is applied to any surface, plastered, puttied walls, metal structures indoors (cabinets, radiators, safes, etc.).
Shagreen helps to hide visual defects in structures and turn them into a decorative element.
Advantages of the material
“Shagreen” is a fairly advantageous finishing coating option that gives a wonderful finishing effect for interior surfaces and building facades. Here you will not limit yourself to functionality, durability and strength of the material. Among the many benefits:
- Attractive appearance of the coating.
- Fade resistant property.
- Frost resistance.
- Economical. The consumption of Shagreen plaster is within 2.5 kg/m² for interior decoration and 3.8 kg/m² for decorating building facades.
- Light color property.
- Possibility of leveling walls with bulges and depressions up to 2 mm.
- Putty and further sanding are not required as additional processing.
- Convenient packaging.
- Reasonable price.
Now, being familiar with the technology of applying Shagreen plaster, its advantages and features, you can evaluate this type of material, relegating others to the background in choosing options for finishing materials for interior design in your home.
Types of coloring compositions
Any paint and varnish material is classified according to the main component included in its composition. So, shagreen powder paints are as follows.
- Polyester. Excellent for outdoor use, where the surface is directly exposed to weather factors (rain, snow, UV rays from the sun, wind, temperature changes).
- Epoxy. Used for surfaces that will be affected by acid-base compounds.
- Combined (polyester-epoxy). Excellent for indoor work.
Polyester-epoxy compositions on the paint and varnish market have proven themselves well with the so-called “antique” effect, when the color of the base layer of paint differs from the color of the shagreen itself. Visually, this allows you to achieve a very non-standard solution. For example, there might be white shagreen on a black base, or pink rough on a slightly pink base.
The size of the roughness can be large or small. The choice depends only on personal preferences and financial capabilities. Consumption will be higher for coarse-grained coatings.
Varieties
The division of shagreen into types is possible based on size. They range from small to large. The former reach only a few millimeters, while the latter can be several centimeters. Depending on the type, the method of how to remove shagreen on varnish will be determined. The smaller it is, the easier the process will be.
Depending on the type, the method of how to remove shagreen on varnish will be determined.
Dressing methods
During dressing, various types of leather (as well as fur) are obtained, which can be divided into three parts: raw leather, rawhide and tanned leather.
Fresh (steamed) skin is flexible due to the fact that its collagen fibers are not glued together. Dried skin becomes hard or brittle because these fibers stick together into a solid mass and lose their mobility. Thus, to prepare leather, it is necessary to introduce into its dermis a substance that would separate the fibers from each other. When tanning, such substances are tanning agents that are capable of creating chemical bonds between fibers, but at the same time preventing them from becoming soggy and sticking together. Other processing methods may use some kind of fat: it will also prevent the fibers from sticking to each other (rawhide).
Despite the differences in processing methods for obtaining different types of final products, there are common required steps. The first universal operation is fleshing, in which the skin is deprived of the remains of meat, fat and subcutaneous fat. Then, if required, dehairing or liming is carried out, removing hair and epidermis. The resulting product is called golyom. At this stage, you can stop and get the so-called raw leather or go further along the path of rawhide or tanned leather. There are now a large number of species of the latter. Accordingly, there are also many recipes for dressing.
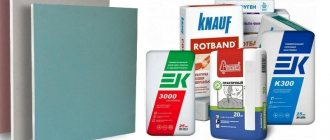
Surface preparation
For painting, I recommend using Sheetrock exclusively. As a last resort Vetonit. The surface is covered with at least two layers of putty, after which it must be sanded with an abrasive mesh with a grit >180. And it is polished not just in daylight, but with a spotlight, a light bulb on a cord, or, at worst, with a powerful flashlight. You should be able to see the smallest details of the surface. In addition, you need to get a brush with soft bristles to periodically brush off dust from the ceiling. It often happens that without doing this, people miss a significant defect - dust simply gets clogged into the hollow and makes it invisible. But when applying paint, everything will be noticeable, but then nothing can be corrected.