ps They helped us a lot, so advertising is free))
Published on October 28, 2018 by Stroitel
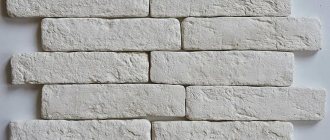
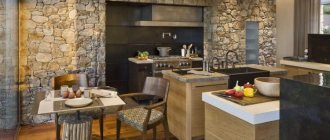
Gypsum brick for interior decoration has become one of the most popular ways to decorate room surfaces. It has replaced options that are considered more traditional: wallpapering, painting. The fact is that this decorative material includes an excellent aesthetic component, as well as the availability of a product that you can make yourself.
Advantages and disadvantages
Decorative gypsum bricks have many advantages, which are as follows:
- Creating a good indoor microclimate. Possessing hygroscopicity, the material is able to take away some of the moisture from the air, which it releases when there is a lack of it.
- Fire resistance. Gypsum is not subject to combustion, which means it is not a source of flame propagation.
- Additional thermal and sound protection of the object. The product creates a coating that retains heat inside the room and also prevents the penetration of noise pollution.
- Light weight. The design does not exert significant load on the surface. Therefore, such bricks are excellent for finishing partitions.
- Large selection of colors and relief. This makes it possible to show a full flight of fantasy and design imagination.
- Easy to install. To work you will need a minimum set of tools and skills.
- Possibility of self-production. This significantly reduces the overall costs of finishing activities.
One of the main advantages of gypsum brick is its ease of installation
. Of course, there are some disadvantages. The negative points include low resistance to mechanical damage. That is, it is quite easy to damage the material. But with some skill, it is possible to restore the coating.
For what purposes is the material used?
Today, a wide variety of products are available for retail sale. Their main difference is in their external qualities.
List of varieties of decorative slabs:
- Glossy . Varnish is applied to the surface, resulting in a glossy finish.
- Matte. Treatment is carried out with specialized impregnations that increase the protection properties of the material.
- Embossed. An individual drawing is selected.
- Concave and convex . The choice depends on the client's wishes.
The main distinguishing features of brick: texture, shape, color and relief . There is a wide range of colors available. You can paint the product if necessary.
Note. The building material can be used indoors.
Where can the material be used?
Currently, there are various types of products on the market. They differ in their external properties. There are the following types of decorative tiles:
- Glossy. It is obtained by applying a layer of varnish.
- Matte. The treatment is carried out with special impregnations that increase the protective properties of the material.
- Embossed. The drawing is completely individual.
- Convex and concave.
Gypsum brick can vary in color, relief, texture and shape
The number of existing shades is very large. If necessary, additional painting of the product can be carried out.
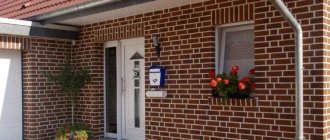
The material is suitable for use in various rooms, but exclusively inside a house or apartment. It is also necessary to take into account that its use is unacceptable in the following places:
- in the bathroom or shower;
- next to the kitchen sink and gas stove;
- for facing fireplaces.
The coating looks quite impressive when combined with other types of finishing products.
Gypsum brick can only be used for finishing dry rooms
Self-production
Decorative bricks are made by hand without the use of special technologies and units. For such a process you will need a simple set of components:
- Gypsum mixed until liquid.
- A hardener that reduces the setting time of the solution and also increases its performance properties.
- A color that is added directly to the mixture.
- Form - can be plastic or silicone.
On a note! It is the form that is quite expensive, so many people try to make it from improvised means. The process takes two to three weeks. For this, a brick is used, which will act as a sample. It is placed in a manufactured wooden frame of the required size. All parts are coated with lubricant. The structure is filled with liquid silicone. It turns out to be a household version, which is not much different from the store version.
Mold for making gypsum bricks
But how to make decorative brick at home? The event consists of following certain steps:
- The necessary tools are being prepared. To work, you will need a container (construction bucket), a drill with a mixer attachment. Pre-prepared molds and lubricant for them. It is the last ingredient that helps to remove the product with minimal difficulty. You can purchase a special substance or use simple Vaseline or soap solution.
- You should mix enough mixture to fill all the molds. It should be borne in mind that excess will quickly harden and become unusable.
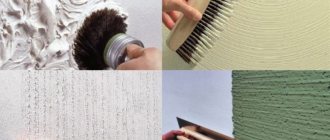
- The solution is mixed as it is done during normal work. The dry mixture is poured into a pre-prepared container with water. Everything is thoroughly mixed. You need to get the consistency of sour cream. It is important to consider that the presence of lumps and dry sediment is unacceptable. Additionally, a hardener is added.
The solution for making gypsum bricks must be of uniform consistency, without lumps
On a note! In the absence of a hardener, many craftsmen who make such bricks themselves recommend using citric acid.
- For an additional effect, PVA is introduced - fifty grams of glue are used per kg of dry mixture. Fiber is added to reinforce the material. Its amount does not exceed 1-2 grams.
- When the solution is ready, pour in the prepared color, the thoroughness of stirring it depends on what effect is desired. For example, to obtain a homogeneous surface, intensive mixing is carried out. And to create stains, the pigment is poured into the resulting substance, but without proper stirring.
- The mold is greased. The composition is poured in one layer, without creating unnecessary gaps. Everything is left for a while.
- After 30-40 minutes, remove the resulting products. This must be done carefully. If plastic molds are used for decorative bricks, they are lightly tapped with a mallet. Silicone products are simply bent a little.
When removing the finished brick from the mold, be careful not to damage it.
Advice! To show your design imagination, you can paint after finishing the surface. This will allow you to get completely customized coverage. The compositions are chosen to be water-based.
If required, the material is coated with special impregnations. To create a glossy effect, apply several layers of varnish. The resulting material has all the properties of purchased material and is excellent for installation indoors.
When choosing a material for interior wall decoration in a residential area, you have to take into account the aesthetics of the materials, cost, environmental friendliness, and how much usable space will have to be sacrificed. In this regard, do-it-yourself brick plaster is the best option.
Advantages of this solution:
- coverage will not require large financial and time costs;
- the plaster contains no harmful materials, and it can be considered absolutely environmentally friendly;
- the layer of decorative coating is quite thin, therefore, there is no need to fear that the space of the room will decrease;
- imitation brickwork can be applied with your own hands, which eliminates the need to search for specialists who may turn out to be amateurs in finishing work.
If you decide that this option is suitable, read the detailed instructions, then the work will not be particularly difficult.
What you need to make decorative bricks at home
Alabaster is a material that is widely used in putty mixtures. Its main advantage is that it dries quickly. If you make an imitation of brick from plaster, then such a finish will emphasize the interior design and at the same time make it stand out from the general background. In order to make decorative brick you will need:
- Container for mixing the solution;
- Containers for water and bulk gypsum;
- Drill or screwdriver with whisk;
- Form purchased in a store;
- Wide spatula.
Preparing the wall for decoration.
A do-it-yourself imitation brick wall made of plaster will look good only if the walls are not beveled, i.e. the angles between them and the floor are 90 degrees. Otherwise, leveling is performed using cement, beacons and facade construction mesh. Remove the old coating, which does not adhere firmly, and seal cracks, unevenness and other defects with a solution. After drying, the cemented wall is coated with a deeply penetrating primer.
If the wall is initially quite flat, there is no need to cement it. Just seal the defects with the plaster mixture and wait until it dries, and then treat it with a primer solution and add glue. Apply the primer with a foam roller and paint the seams with a brush.
"Important! Decorative finishing with plaster materials in new buildings, including do-it-yourself brick plaster, should be carried out no earlier than 12 months after the completion of the project.”
If you do not take this nuance into account, you will have to deal with the appearance of cracks: in the first few months, the walls may shrink.
What will you need?
Before starting work, prepare materials and equipment:
- basin (bath) - apply plaster mortar;
- a roll of tape;
- several spatulas (wide and narrow);
- rule or laser level;
- cord - set up beacons.
It is convenient to mix the solution with a drill equipped with a special attachment. The last option is manually. It is advisable to spread oilcloth on the floor: even though you are extremely careful, you will not be able to avoid dirt.
You will also need gypsum plaster, a brush, a paint roller, paint (or pigment) and a small stick. Of course, real brickwork cannot look perfect if the seams are not drawn with a special device - jointing. Applying decorative plaster under stone or brick is a simpler process, and the seams can be easily “drawn” with a broken pencil (empty fountain pen, thick knitting needle).
Important step: applying plaster.
So, you have completed the preliminary preparation of the wall (cemented, plastered defects), primed it and waited for the base to dry. Now proceed to adjusting the working mixture. The simplest and most common option involves adding dye to the plaster solution. There is another way, but it will be discussed at the end. Now let's focus on the first one. Dilute the dry mixture according to the instructions, then add the coloring pigment and mix everything well.
Without experience in this kind of work, you should not mix a whole basin of mixture. The thickness is like viscous sour cream, so that the composition gradually slides off the spatula, but does not drip or fall off in pieces. The composition is good, if there are no lumps. For the first time, it is enough to cover 1 square meter of wall. If you hesitate, the solution will dry out and you will have to throw it away.
The mixture is scooped up with a spatula and thrown onto the surface, then leveled upward. If you want a brick wall made with your own hands from plaster to look as unnatural as possible, do not try to smooth the surface too much. Brick is rarely perfectly smooth; more often it is rough and has irregularities.
Creating a brickwork pattern.
Pay attention to the dimensions of a real brick - this should be the distance between the seams in the “masonry”. If you forget to take this point into account, brick plaster applied with your own hands will look unnatural. It is not at all necessary to focus on the parameters of the cheapest, standard brick. After all, wall material is produced both elongated and almost square.
Don’t forget that now there are textured, embossed, non-standard and specially chipped bricks. Hand-applied plaster can look so original! True, it is better to experiment, already having experience. A beginner should try to make an imitation of masonry using ordinary, rectangular bricks.
Do you want the lines to be perfectly straight? Use a ruler. Do you prefer slight curvatures? Draw by hand. The main thing is to have time to apply the lines before the plaster hardens. When you paint an imitation of masonry, excess mixture will begin to form. Remove unnecessary items with a dry cloth. If you do not have time to dry, you can damage the edges of the “bricks”. So you need to process each section in turn. After this, the surface is left alone, allowing it to completely dry and harden. It is important not to touch the coating - there is a risk of smearing the pattern, but if you want to get an interesting textured surface, brush over the “bricks” with a hard, dry brush.
Finishing processing.
When the decorative coating becomes durable, you can make it look chic with sandpaper, but this is not necessary, it depends on your preferences. The final stage is the removal of everything unnecessary, i.e., remnants of plaster that disrupt the design. Further processing depends on which mixture was used - colored (dyed) or regular, without adding pigment.
It is clear that decorative brick plaster should not have a white-gray color, so an unsightly colorless wall needs to be painted. You can mix several different dyes to achieve maximum resemblance to natural brick, or limit yourself to a ready-made suitable color if you find what you need on sale. Brick can have different shades, so you have some freedom of choice.
A successful design technique: apply dye of one color as the first layer, and after a couple of minutes - another. It would also be a good idea to paint individual “bricks” in a bright shade. After all, real masonry often amazes with its variety and variegation, so a do-it-yourself brick wall made of plaster has the right to be not monochromatic. Creative people can experiment with colors, because now it is not uncommon to find products in a variety of colors, from bright yellow to black. Guests will not guess that the “masonry” is not real!
Consider the surrounding environment, lighting, color of the floor, ceiling and doors, as the overall impression of the interior will be created by the combination of all shades. Neighborhood with furniture of the wrong color or, say, with a floor covering of the “wrong” material can ruin the whole impression.
Matrix manufacturing
In the process of casting finished elements, the most difficult and crucial moment is the manufacture of the matrix. In the narrow sense, a matrix for making silicone or polyurethane molds is a platform on which templates are laid out and filled with material for making molds.
There are no special requirements for the size of the matrix; it all depends on what type of tile will be cast. Most often, 20 mm thick chipboard is used as the main base material; in addition to the slab, you can take multi-layer plywood. Well, for the production of molds on an industrial scale, you can also use metal sheets with a thickness of 6-8 mm.
In a budget option, it is enough to have a chipboard measuring 60x60 cm. The main thing is that the surface on which the casting will be carried out is as even and smooth as possible, and that the sheet itself is rigid and durable.
On the front side of the matrix, the internal field is marked for master models and places where the sides will be installed. For the sides, wooden planks of the same thickness are usually used; simply screw them to the base with self-tapping screws.
Advice: in order for the form to be durable and last a long time, it is recommended to take the height of the sides 10-12 mm higher than the highest point of the master models.
After marking the sides, they are cut and adjusted to each other so that there are no gaps in the corners. The sides are screwed using 4-5 screws on each side. It is recommended to additionally seal the joint with the chipboard with construction silicone before fixing the sides. After drying, excess glue is removed.
Imitation of brickwork using tape.
This method of applying plaster to imitate a brick wall is interesting because you can do the job yourself. It is necessary to eliminate significant defects on the wall in advance, but it is not necessary to level it to a perfectly smooth state, the main thing is that there are no significant differences.
“Tip: You can use colored putty instead of plaster.”
You need to prepare in advance a roll of construction tape of the same width as is usually found between adjacent bricks. The further order of work will be as follows:
- On the surface where the decorative plaster will be located, vertical and horizontal lines are drawn at the seams. It must be taken into account that the vertical lines in each next row must be shifted by half a brick in relation to the previous one;
- the drawn stripes are painted along the entire length with paint the color of cement mortar or close to it;
- After the paint has completely dried, apply horizontal strips of tape, and then vertical ones. If you stick the tape in a different order, it will be difficult to remove later;
- a layer of plaster or putty is applied to the prepared base;
- without waiting for drying, the surface is smoothed, and the degree of smoothness that the plaster for brickwork will have is chosen at will, depending on what you like best - a relief or a perfectly leveled surface;
- When the plaster hardens a little, remove the strips of tape. It is enough to pull the edges of the horizontally pasted strip, and the vertical pieces will easily come off, since they are on top of the horizontal ones;
- When the composition is completely dry, apply your favorite decorative finish.
“Tip: a DIY brick wall made from plaster will look as realistic as possible if you paint it with a lighter color than the brick: it will darken when dry.”
Decorative Portland cement brick
To work you will need:
• cardboard; • white Portland cement; • sand; • foam balls (they are sold in any furniture store); • cement-based sealant; • reinforcing mesh.
Styrofoam balls
1. The first step is to make a mold for bricks
. It can be made of ordinary cardboard. A reinforcing mesh of suitable size is placed on its bottom and walls.
2. To make a solution
sand, foam balls and water are mixed in water in a ratio of 1:1:2. Next, Portland cement is poured so that the solution acquires the consistency of very thick sour cream. To increase viscosity, it must stand for 20 minutes.
3. The mass is placed by hand (it is better to wear rubber gloves) into a cardboard box, leveled and left for a day to harden.
4. To make the products smooth, they are coated with a more liquid solution consisting of water, sand and Portland cement (3: 1: 1).
5. Bricks should be painted with acrylic paint diluted with water. First, you should tint them with a darker solution, and then cover them with a transparent layer of lighter paint.
Portland cement bricks can be any color
6. The last step is to seal the paint with liquid sealant.
How much will decorative plaster for brick cost?
Considering that the wall can be treated with ordinary putty or cement plaster, the costs for it make up the bulk of the costs. Add here the cost of the rule, level, coloring pigment, as well as other materials and accessories if you plan to buy them.
First, let's calculate the consumption of plaster. Typically, manufacturers indicate that it is 8.5 kg of dry mixture per 1 square meter. m when plastered with a layer of 10 mm. Since decorative plaster for red brick is not applied in such a large layer, but approximately 2 times less, the estimated consumption is accordingly halved. It turns out 4.25 kg per 1 sq. m. The resulting value must be multiplied by the number of square meters.
It is possible to buy gypsum plaster at a price ranging from 250 to 500 rubles. per package weighing 30 kg. It is easy to calculate the final consumption taking into account the area of the wall.
"Important! Buying plaster that is too cheap risks the fact that it will be of poor quality. The best option is to order the required number of packages at a price of 350-400 rubles.”
When making calculations, do not forget to round the resulting data up: in practice, the consumption is often higher. Keep in mind that the “bricks” may not work out the first time, you may not have time to use some part of the mixture and it will dry out, and other nuances may appear. In any case, it’s better to have some left over than not enough.
To consider another decoration option, check out concrete-look plaster.
Now you understand how to create beautiful masonry at home in a day, for the production of which you don’t have to spend a single brick!
Decorative finishing in the interior of a house or apartment is an excellent option to emphasize the subtleties of design work, highlight significant elements in the apartment, and improve the interior by choosing the right tone of the tiles. Gypsum tiles are made with your own hands if they are used in every room of the house, it requires a lot of consumption, which will be expensive when purchased. The production of this material will not be difficult, since there is no need to use high temperatures and special tools, as is the case with tiles. Gypsum tiles in the interior
Return to contents
Properties of gypsum tiles
Gypsum tiles have positive properties:
- The tiles are made from gypsum, which is a relatively cheap material.
- Gypsum is non-toxic and does not affect human and animal health.
- When making tiles with your own hands, you save money.
- When you make your own gypsum tiles, you can paint them yourself in the desired color, as well as give them the desired shape.
- Tiles can be made at home in various sizes, widths and thicknesses. It all depends on the future location.
- When making tiles at home, a polymer is added to its composition, which serves as a water-repellent ingredient. This is an important factor when there is high humidity in the house, for example, tiles on plasterboard in the bathroom or on a balcony finished with plasterboard. Gypsum tiles can be made at home
Return to contents
The benefits of making tiles yourself
Gypsum tiles can be used to finish:
- Slopes. After installing the windows, during repair work, the slopes on plasterboard windows are decorated with gypsum tiles.
- Fireplace. A plasterboard fireplace is covered with gypsum tiles to add naturalness and originality.Use of gypsum tiles
- A flight of plasterboard stairs is lined with gypsum tiles to create the interior of the house.
- Doorways are decorated with gypsum tiles.
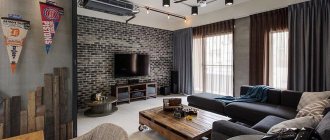
- Walls in a room, in a living room, in a hall. Laying gypsum tiles under the brick, highlighting significant places, for example, the wall on which the TV is installed.
- Columns and niches made of plasterboard. Finishing occurs to accent the background of the overall interior.
Benefits of making tiles yourself:
- to make tiles you will not need a lot of space, as well as drywall tools;
- it is possible to produce tiles without using a vibrating table;
- The manufacturing technique is easy. It will be understood by a person making tiles for the first time;
- painting the tiles is done independently;
- All materials for tiles do not have a high cost, which makes the manufacturing process enjoyable.
Return to contents
Making decorative bricks for interior decoration with your own hands
- Preparation for making decorative bricks Materials and tools
- How to properly prepare a special mixture for sculpting decorative bricks
Quite high demands are placed on modern building and finishing materials these days. Trying to make their home more comfortable and original, people purchase environmentally friendly and safe materials. Decorative bricks, which can often be found in construction stores, are very popular. But prices can be quite high.
Scheme for making decorative bricks.
If you want to decorate the interior of a room with decorative bricks, but you don’t want to shell out large sums for it, then you can make it yourself. The finishing material can be given an original shape.
Tools and materials for the production of gypsum tiles
To produce gypsum tiles with your own hands, you will need a room in which there will be an optimal air temperature (+15, +20 degrees), as well as minimal humidity (dry room). To produce tiles at home you need:
- Form. It can be silicone or polyurethane.
- Ingredients for gypsum mixture.
- Perfectly flat table. This should be done using a building level.
- Plastic container for mixing ingredients. Tools and materials for making gypsum tiles
- Special paint of the desired tile color.
- Acrylic based varnish, matt.
- Brush. It can be a small construction one for painting the entire surface of the tile. Art brush size 3 or 4 for fine sketching.
- An ordinary spatula.
Materials you should purchase are G10 gypsum and slaked lime or citric acid.
Return to contents
The process of installing gypsum tiles
Just like manufacturing, installation of the slabs is simple. You just need to take care of all the necessary tools and materials in advance. What are they? Here is the list:
- set of spatulas: serrated and simple;
- building level and pencil;
- grinder or hand saw;
- drill with mixer attachment;
- miter box;
- bones;
- construction gun;
- foam sponges;
- trowel;
- sandpaper;
- gypsum or ceiling glue. Even liquid nails are allowed;
- dye for seams;
- primer mixture;
- water-based varnish;
- grout for seams.
Stage 1 – marking for gypsum tiles
To simplify the task, the first step is to mark the wall. To begin with, the starting points, vertical and horizontal, are found. This is necessary to ensure that the finished finish is smooth and neat. Since laying the tiles begins from the corner, the markings are tied to it. When working, use a regular or laser level.
Stage 2 – laying gypsum tiles
It begins with preparing the adhesive composition. To do this, use a mixing attachment for a drill. The consistency of the glue should resemble sour cream. The surface on which the gypsum tiles will be applied is treated with a primer in advance in order to have time to dry before gluing. This is necessary for better adhesion to the surface.
Next, the adhesive composition is applied to the wall. Residues are removed with a notched spatula. It evens out the surface. All that remains is to attach the gypsum tile to the surface, pressing it tightly. As you can see in this photo, the adhesive can be applied to the tiles, and not to the base.
If we are talking about brick-type masonry, then seams must be formed. To maintain the distance between individual elements, available material with the same thickness is used. No seams are needed for stone cladding.
Stage 3 – cutting gypsum tiles
Since gypsum is quite soft, it is not necessary to cut it with a grinder. You can also use a hacksaw. External corners will need to be joined correctly. To prevent the overall appearance from deteriorating, individual elements are cut at an angle of 45 degrees. For this purpose you will need a miter box. And to bring the cut elements to perfection, sandpaper is used.
If you need to trim an arch or column, then figure cutting will be required. You need to mark the products and cut them with a grinder. After which the installation continues.
Stage 4 – grouting
The putty between the tiles is a grout mixture or gypsum glue. The composition is applied with a pistol into the space between the tiles. As an option, use a narrow spatula, as shown in the photo.
That's all, all that remains is to wait for the mixtures to dry and complete the final notes. The surface is cleaned and varnished. Now you know how to make gypsum tiles with your own hands and decorate them. And to make things easier for you, we have prepared a visual video on how to decorate walls with decorative gypsum stone.
Form
Molds for gypsum tiles are sold on the construction market. You can also make it yourself, then it will be original. There are molds made of silicone or polyurethane on the market. Their cost varies from 990 rubles to 7 thousand rubles. It all depends on the size, material, textured pattern. Mold for making gypsum tilesTo produce gypsum tiles, the mold must be dry and clean. To prevent plaster from remaining on it after work, before pouring the mixture, the mold is lubricated with a solution of soap or shampoo.
Return to contents
Types of forms
Typically, reusable molds made of plastic materials are used to cast decorative stone. True, this does not prevent the use of rigid matrices made of plastic or wood. Or short-lived rigid forms made of plaster.
Each type of material has its own advantages and disadvantages. Silicone molds allow you to make from 100 to 300 castings. This is quite enough to recoup production. Polyurethane matrices have a longer service life; from 800 to 1000 castings can be formed. At the same time, polyurethane can also be used to work with a vibrating table.
Wooden molds are the simplest, but the quantity of finished products will be small, and the quality will be low. Gypsum is used for specific castings; they must have the correct geometric shapes so that after the concrete hardens they can be easily separated from the mold.
Making molds from polyurethane
The prepared master models are covered with two layers of grease. To do this, you can use Vaseline or a special release agent. The polyurethane mass is stirred and a hardener is added. When the mass reaches the consistency of liquid sour cream, it is carefully poured into the middle of the matrix and distributed evenly throughout the entire volume.
Important! Filling must be done on a horizontal surface. To do this, the matrix is leveled before pouring.
After pouring, use a wide spatula to level the fill. To speed up drying, it is recommended to slightly heat the surface with a hair dryer. After the polyurethane has dried, first remove the sides from the base, and only then remove the resulting casting.
Making a mold from silicone
Although silicone molds are inferior in strength to polyurethane ones, they allow you to get the same clear prints. The manufacturing technology is similar to polyurethane casting - the matrix is treated with a release solution. It is recommended to do this twice with an interval of 5-7 minutes. After this, a solution for filling is prepared. The jelly-like mass is evenly distributed over the surface and left to dry.
The finished template is removed after the silicone has completely hardened. To do this, carefully remove the sides and, after trimming the edges of the form, it is removed from the matrix without effort.
Matrix made of wood
The wood matrix is made from a material that has a pronounced fiber structure. In principle, in order to obtain a casting with a characteristic “wild” natural arrangement of the wood structure, it is best to use old boards. Before hammering out the matrix, the side facing inward is treated with sandpaper. This is necessary in order to remove roughness from the fibers. The sides are fastened with self-tapping screws. From the inside, the cracks are treated with silicone, and after drying, with a grease lubricant.
Application of plastic
When using plastic, industrial equipment is usually required. The fact is that plastic molds are made by injection molding plastic. In this case, the temperature of the plastic can reach 300 degrees. At home, it is unsafe to reach such a temperature for 1-2 kg of molten mass of plastic. True, there is an option to simply glue a mold from strips of plastic or dissolve the plastic in acetone and, while it is soft, fill the matrix with this mass.
Plaster molds
Gypsum is a very strong, yet fragile material in its structure. It is rational to make molds from plaster for one product. This will make it easier to cast and remove the finished model from the mold. In this case, in case of failure, only the form for one element will crack, and not for several.
The work has the same sequence as for other materials. Only the casting is done for one model, and the pouring solution is done very quickly. Gypsum sets and hardens very quickly.
Step-by-step instructions for tile production
There is some consistency in making tiles with your own hands. It should be followed.
- Pouring the mixture.
- Drying the tiles.
- Painting in the desired color.
Watch the video for instructions on how to make gypsum tiles yourself.
Fill
Initially, the mixture is prepared. For this:
- take 6 portions of gypsum;
- you need to add 1 portion of slaked lime or citric acid;
- For 1 part of gypsum, 0.7 water is required.
If the color of the tile was chosen in advance, then paint is immediately added to the solution. But, if the color is supposed to be the same, but the tone is different, then it is better to paint it after making the tiles. All components of the solution should be mixed into a single consistency. You can use a construction mixer for this. But using the mixer should be at low speed so that there is no air in the mixture. The solution should be like sour cream. Pouring the mixture into the mold After mixing, carefully and slowly pour the mixture into the mold. Leveling is done using a spatula. If you mix the solution and then prepare the mold, the mixture will set. It cannot be diluted with water.
Drying
The form should be on a flat surface. After pouring, it is not recommended to expose the mold. You can tap it a little with a spatula to release the bubbles. If a vibrating table is used, then this should not be done.
The gypsum solution will thicken in 15-20 minutes. But, it will take 12 hours for complete hardening, provided that the room is warm and dry.
After the time has passed, the slab should be removed from the mold. This must be done carefully, because gypsum is a strong but fragile material. The tile is left to dry further. Drying gypsum tiles In order to speed up the process, you can use a heater. But contact with sunlight should be excluded.
Tile painting
After drying, gypsum tiles are white, even like bricks, unless dye has been added to the solution. For coloring you will need a water-soluble dye. There are several types of tile painting:
- Adding dye to the solution.
- Painting the form. Before pouring the solution, the form is painted with a brush. Then the tiles have an uneven color tone, but with highlighting bright stripes at the borders of the textured pattern. Painting gypsum tiles
- After the gypsum tiles have dried, use a brush or spray to paint the surface of the tiles and apply varnish on top.
Return to contents
Decorative tiles from DSP for interior and exterior decoration
This method was shared in a comment by a member of our portal with the nickname Albeduin.
AlbeduinFORUMHOUSE Member
A method of making decorative stones without pouring each into molds, such tiles can be made in the simplest way. The cost of consumables per 1 m² is in the range of 15-30 rubles.
DIY decorative brick.
The price was relevant three years ago, even taking into account the rise in price, it has not fundamentally increased, especially considering that not only raw materials become more expensive over time, but also a square of finished tiles today costs a lot.
Solution
The mortar is prepared from sand, cement, water and acrylic primer (concentrate) - it is the primer that provides the mortar with uniformity and elasticity, and the finished tile with increased strength. The ratio of cement and sand is 1/3, primer is about 100 ml per bucket (half a glass, added after mixing the CSP). The solution is made quite liquid, but holds its shape and does not float thanks to the primer.
Equipment
The process of making tiles consists of several stages and does not require expensive equipment or special materials, but you will have to make a couple of special devices yourself.
Frame – base and sides made of plywood, 6-8 mm thick, ends made of wooden blocks. To ensure high adhesion of the tile to future substrates, the back side is also made textured, with characteristic roughness, by laying a backing under the laminate on the plywood. The dimensions of the frame are arbitrary and are tied only to the result - for what purpose and what size the tile is needed.
Press - assembled from wood and plastic, designed for cutting the total mass in a mold into tiles. The frame is made of wooden slats, on which a plastic cutting part protruding to the thickness of the tile is fixed. Topicstarter suggests using school rulers as knives, but there are a lot of variations.
Albeduin has simplified the task as much as possible for everyone interested, providing a description of the work procedure with graphics.
Making tiles
The form is placed on a table, workbench or any other flat surface and filled with mortar - it must be laid out from one edge and leveled using a rule or spatula, finishing to the end. To give relief to the front tile surface, after leveling the mortar, they pass over it with a trowel “tack-free”, after which they are again leveled along the edges of the frame. The result is voids and grooves, but with a smooth edge.
After about 15-20 minutes, when the solution begins to harden, the tiles themselves are formed with a press; they do not need to be cut through, a seam of half the thickness is sufficient. The frozen tile will easily break into segments, and less effort will be required during molding. After molding, use a spatula to cut the mortar around the perimeter of the frame - to avoid problems with removing the blanks. The pieces are left in the frame for three days; if a large volume is needed, several frames are made and stacked on top of each other when drying.
After three days, they begin to remove the semi-finished products - remove the frame and pull the workpiece towards you by the backing until the edge of the base coincides with the seam, and carefully break it off. Albeduin advises breaking off four tiles in fragments, this will simplify painting, and then breaking into segments. The tiles are stacked and left for another four days to dry.
The tiles are painted with tinting pastes, but they are added not to the paint, but to the acrylic primer. There are no exact proportions, since there are many manufacturers and different concentrations. The approximate ratio is one-eighth of a tube per liter of primer, but pay attention to the recommendations for use; do not exceed the maximum proportion. To obtain a shade close to ceramic brick, three colors are used - yellow, red and black. The paste of each color is mixed separately and applied to the tiles with a brush one at a time.
The yellow color comes first, this will be the base, it will be completely absorbed into the surface. After it dries, red is applied, since the tile has already absorbed the yellow primer, the permeability has deteriorated, and the red will partially spread into the voids. The black color is diluted thinner, and it will practically not be absorbed and will collect in the voids, giving a light tint.
This layer-by-layer coloring not only gives a more natural color, but also protects the tile from external influences, and it can be used both indoors and on the facade.
If you wish, you can “play” with any shades, adjusting them to the interior.
Broken-shaped tiles are obtained by cutting segments not with a crusher, but with the edge of a spatula; otherwise, the technology is no different. You can grout the seams with the same mortar from which the tiles are made - DSP with primer. You should not use ready-made grouting compounds, as they are designed for a smooth surface, but they will get tightly packed into the relief of homemade tiles and ruin the whole look. When grouting with a solution, after drying, an indelible coating also forms, but it is easily removed - after the joint has dried, go over it with a brush dipped in primer.
Corner Tiles
Corner tiles are also made using this production technology; it is more complicated, but also quite doable at home. Depending on the desired angle, the frame is assembled not rectangular, but triangular. For those who know how to work with wood and have an electric jigsaw, assembling a form from plywood and timber will not be difficult. Especially with a visual aid from Albeduin.
But not only the shape is different, there are also nuances in the manufacturing process.
The substrate is not only placed separately in each cell, but is also positioned so that the grooves on its surface run horizontally. This is done to hold the solution on an inclined base.
The solution is made thicker than for flat tiles and with a double dose of primer, since it should be more elastic, not rise beyond the rule and not fall out of the cells. With a thick mortar, you won’t be able to get the texture with slaps; the relief is pressed arbitrarily with the tip of a trowel or spatula.
Removal - as in the first option, the blanks are pulled out of the mold after three days, carefully prying them off together with the substrate, but for drying they are not stacked, but placed on an edge and the substrate is torn off. If it does not come off (due to an increase in the amount of primer in the solution), leave it for another couple of days.
Division - break the tiles into segments when they lie on the edge, with a pulling movement (you cannot pull) by the short side (up). To simplify breaking, even during the molding process, through notches are made along the ribs, and not just trimming along the perimeter of a large segment.
The durability of such façade tiles is best evidenced by the fact that they have been doing well on the basement of Topixarter’s own house for seven years now. And on the wall in the unheated utility room, nothing happened to it for several years.
Clearing the form
After the completed procedures, when the tiles are completely ready, you should clean the work area yourself and clean the mold. To do this, you can use a dry cloth or sponge. Carefully wipe all corners and place the mold in a dry, dark place. It is not allowed for the uniform to be in sub-zero temperatures or in the sun.
If there are white traces left in the form after the tiles, then you can pour concrete into it and leave it to harden. When the concrete pebble is removed, all the white residue is left behind. The process of removing finished gypsum tiles from the mold. Following the sequence, you can make individual gypsum tiles, which will subsequently decorate the interior of the house and create the desired atmosphere. Creating tiles is a simple process. Making a mold yourself sometimes saves money, because silicone with additives for the mold costs significantly less than the mold itself. Installing gypsum tiles on the wall will be quick and simple. The final work will delight not only the owners of the house, but also the guests. But, if there is a desire to produce a certain decorative stone, then the form is purchased on the market.
Return to contents
LiveInternetLiveInternet
Quote from Russian-Handmade message
Read in full In your quotation book or community!
DIY bricks for decorating a fireplace. Master Class
Dear masters and craftswomen! I hasten to show you a wonderful master class from Valentina Garkusha on designing and decorating a fireplace using putty bricks - alabaster, which are very reminiscent of the texture of stone. A great idea if you don’t have enough money for natural stone, which is not that cheap) Many thanks to the author for the master class!
Let me take a break from the topic of decorating the fireplace and want to turn your attention to my favorite topic - relaxation and travel) If you want to spend your holidays abroad this year, I suggest you opt for the warmest country in Western Europe - Spain. A very beautiful country, warm climate, gentle sea, a huge number of attractions, Russian-speaking tourists, European comfort with high quality service - you can find out about all this by reading reviews from tourists on the pages of the website of the travel company SilverTour. Here you can book air or bus tours to Spain from Kyiv. Read all the order details and tour costs on the company’s website.
Bricks can be painted in any color your heart desires. This is exactly what we needed.
To create bricks you need alabaster, foil, a plasterboard block or any block, a measuring container, a container for diluting the solution, and a stirring stick. We dilute the solution in a 1:1 ratio. For one brick I took 4 spoons of alabaster and 4 water.
We take a piece of drywall (mine is 3.7 cm by 18.5 cm, but you can make it in any size), a piece of foil (I have food foil folded 4 times and well wrinkled)
We wrap our die in foil, giving it a shape.
We take out the die and align the edges of our improvised form.
We dilute the solution and pour it into the mold.
Shake the mold with the solution a little to release air bubbles.
After 15 minutes, the brick can be removed from the mold. Due to the fact that our foil is crumpled, we get this texture, and all the stones turn out different. You can make several molds at once. You can use this form several times in a row; if the foil breaks somewhere, you can always correct it.
Here I have 5 stones cast at the same time. When the pebbles dry completely, they ring and turn white.
I painted the dried stones with water-based emulsion and brown pigment on top.
Perhaps my idea will be useful to someone. By the way, if you don’t paint the pebbles, but cover them with diluted PVA glue, you will get shiny and interesting colored (maybe ivory, I’m not sure) pebbles. These stones can be easily cut with a hacksaw
They lined the fireplace with homemade bricks. I wanted to cover it with natural stone, but it was a bit expensive.
This cute little angel guards our hearth. The wings were originally terribly brown, so they had to be repainted.
Fruits are fake, purchased. Here you can see that the baguette is not yet dry.
Source stranamasterov.ru/node/690207
Russian-Handmade