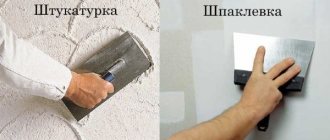
What is thermal insulation plaster
When talking about plastering walls, the question that comes to mind is the labor intensity of the work and the need to attract specialists with experience and qualifications, but the classic application of sand-cement mixture to the walls does not solve the problem of wall insulation. With thermal insulation or “warm” plaster, there will be one less problem during construction.
When insulating, warm plaster is used for the facade and interior work. It is highly energy efficient, but remains an inexpensive construction raw material.
Why do you need to insulate walls from the inside before plastering and painting?
External wall insulation is a building standard today, but it may not be enough - and then the temperature in the apartment or house remains uncomfortable. There are also situations when it is simply not allowed to insulate a room from the outside - for example, if one of the walls opens into an elevator shaft, or if the building has the status of an architectural monument and façade work on it is limited.
In such cases, internal wall insulation will help create a favorable microclimate in your home. If you approach this issue responsibly, you can not only improve living conditions, but also use the resources of the heating system more efficiently.
When installing internal insulation before plastering, you should first find out what the wall is made of (concrete, brick, with insulation integrated inside (layered masonry) or heat-insulating backfill (well masonry), with heat-insulating filler (for single-layer concrete wall panels), etc.). d. The required thickness of internal insulation depends on the design of the wall; the second factor that directly affects this parameter is the selected thermal insulation material.
The correct material for internal wall insulation must meet the following requirements:
• low thermal conductivity – to minimize heat loss; • high moisture resistance and low vapor permeability - thanks to this, condensed moisture does not accumulate in the insulation, reducing the risk of mold and mildew damaging the walls, which can pose a danger to allergy sufferers; • strength, durability, ability to maintain shape and volume; • environmental friendliness and safety for human and animal health; • good fire safety characteristics.
All these properties are possessed by modern polymer insulation based on polyisocyanurate foam - PIR-plates PIRRO.
The most obvious “side effect” of insulating walls from the inside is a reduction in the usable area of the room. To reduce it to a minimum, it is recommended to use Pirro Wall products with a fiberglass lining, specially adapted for applying plaster mixtures, including decorative coatings, directly to the insulation.
Insulating walls from the inside with warm plaster is one of the many ways to reduce heat loss at home. In addition to its main purpose, warm plaster for walls can sometimes be their final finishing. You will learn how to properly perform such insulation by reading this article.
Material composition
For the manufacture of traditional plaster compositions, cement, sand, water, and, if necessary, mineral additives are used to add strength or frost resistance to the final product.
Thermal insulating plaster has the properties of both insulation and cement mixture.
This effect is achieved by applying a special recipe to the production of the material. The most common substances that are used to dilute the material to increase its energy-efficient properties of steel:
- expanded vermiculite;
- sawdust;
- granulated expanded clay crumbs;
- crushed pumice;
- granulated polystyrene foam.
Manufacturers and prices
The technology for producing the material appeared not so long ago, but there is already competition among manufacturers. Nowadays, the most famous heat-insulating plaster is of three brands: “Mishka” or “Varmix”, “Umka” and “Knauf”. Below is a description of each of them.
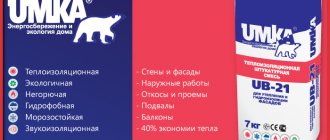
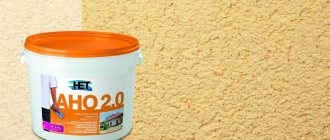
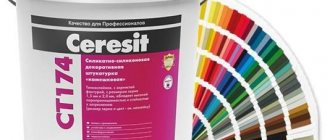
- Thermal insulation mixture "Umka". Popular material in recent years. It has gained fame as a product suitable for interior finishing work. The basis of “Umka” is granulated silicon balls. It has vapor barrier properties, does not absorb moisture, absorbs sound waves, and is an excellent thermal insulator. Silicon balls are odorless and harmless to human health. In addition to increased thermal insulation properties, due to granulated ceramic balls, the plaster composition acquires increased strength with a lighter specific gravity. Applying such a mixture to wall surfaces will not require additional treatment with primer compounds or installation of reinforcing mesh. In construction markets, “Umka” is sold at a price of 100 rubles per 1 kg.
- Warm plaster “Mishka” or “Varmix”. Some people confuse these two materials, but they have the same manufacturer, who has rebranded the brand. Like the previous insulation, “Mishka” in its raw form is a dry mixture, which is diluted in the required proportions with water before application to the surface. The finished composition has high adhesion properties to any surface, which eliminates the need to treat walls with primers. This is an excellent sound and vapor barrier material. “Mishka” has the positive properties of a competitor and is used as a heat-insulating plaster for exterior use. The price in the store per kilogram of “Mishka” starts from 120 rubles per kilogram.
- Thermal insulating composition "Knauf". Manufacturers took care of the versatility of the final product. Knauf can be applied to any type of surface. Even floor slabs are insulated and plastered with the mixture. Due to the fact that the plaster composition is applied both manually and using machine mechanisms, a person has the opportunity to save time when performing work.
Polystyrene foam insulation
This insulating material, popular for many years, has been used as insulation for facades under plaster for many years. Over the years, manufacturers have significantly improved its quality by adding substances known as fire retardants to the composition of polystyrene foam.
Thanks to such components, polystyrene foam lost its ability to burn, but this only reduced the list of its negative qualities. Among them are the following:
- the insulation has low vapor permeability, which provokes the appearance of moisture on the surface of the walls;
- dissolves upon contact with bitumen paints and solvents;
- there is a high toxicity of the vapors released when the material melts;
- It is not permitted to use it in the construction of social facilities.
However, it is unlikely that the material would have been used for such a long time if it did not also have positive qualities. This:
- the high density of some types of expanded polystyrene, used as facade insulation under plaster, creates additional protection for the facade, protecting it from mechanical damage;
- does not rot and does not interact with acids and alkalis;
- does not support combustion;
- lower cost than other types of insulation.
The presence of some disadvantages does not prevent polystyrene foam from being one of the materials actively used for wall insulation.
Types of warm plaster
Technically, the material has the properties it needs due to the addition of insulating materials to the base. There are three types of mixtures based on composition.
- Vermiculite based plaster. This additive is produced by heat treatment of vermiculite rock. Expanded vermiculite has antiseptic properties, protecting wall coverings from the formation of harmful fungal growths. This lightweight mineral filler is added to ready-made dry mixtures, making it possible to use for facade work and interior decoration.
- A plaster mixture containing expanded polystyrene foam granules. The polystyrene foam content makes the plaster an excellent thermal insulator. In addition to this insulating material, the composition includes cement, lime, special additives and fillers. It is suitable for use as a warm plaster for external and internal construction work.
- Another type of this heat-insulating mixture is called “sawdust” , since in addition to cement, sawdust, clay, and paper are added to it. Due to the content of additional components, heat-insulating plaster for interior work is used for thermal insulation. Such warm plaster when performing external work on the outside of the wall is not resistant to constant exposure to moisture. However, it is also suitable for interior work. When insulating walls with this composition, keep in mind that during the period of hardening of the solution it is necessary to ensure constant ventilation of the room. “Sawdust” solution is applied to brick and wooden walls. Hardening time is about two weeks. If you do not ventilate the room, the surface of the finish will become covered with mold or mildew.
Choosing material for home insulation
Having decided to insulate the facade, you should first of all decide what the thermal insulation of your house will be, because not only the warmth of your home, but also the selection of other components of the insulation system depends on the choice of insulation. The following materials are mainly used as insulation:
- Cotton wool (mineral or stone) is a combination of silicate rock melts and metallurgical slag with their mixtures. This material is presented in rolls and slabs. The main difference is the density and size, as well as sound insulation performance.
- Glass wool is similar to mineral wool, with the only difference that the raw materials used to produce it are the same as for the production of ordinary glass.
- Polystyrene foam is the result of processing waste petroleum products. It consists of many bubbles and is the cheapest option for facade insulation. Being an excellent thermal insulator, polystyrene foam is characterized by weak fire resistance, increased fragility, and, when burned, also high toxicity. Available in slabs that make it easy to implement even the most complex architectural solutions.
- Extruded polystyrene foam is made from polystyrene by extrusion. A distinctive feature is the ability not to absorb moisture. However, the use of this material requires good ventilation.
- Basalt slabs are an excellent option for sound and thermal insulation, with a high degree of density, fire resistance and resistance to deformation.
Plaster systems used for insulating facades are multilayer in structure and, from a technological point of view, involve the application of 3 main layers to the surface of the house wall:
- Thermal insulation is insulation in its pure form, attached to the base using either an adhesive composition or using traditional dowels. For insulation, a material with a low thermal conductivity coefficient is used.
- A reinforcing layer, the essence of which is to provide the protective function of thermal insulation. Here an adhesive solution, reinforcing fiberglass mesh or primer are used, applied to the previous layer.
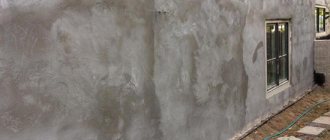
- Decorative finishing - direct plastering.
Cement heat-insulating plaster Knauf Grünband
Warm plaster Knauf Grünband deserves special attention. The Knauf product line itself is well known, but among them there are the most popular ones. Fractional components are no more than 1.5 mm in diameter. Application is carried out in two ways: manually and using electrical equipment.
This mixture is also used in addition to performing the main functionality. It helps solve other problems, such as:
- Application of waterproofing coating to the walls of facades, basements, sanitary rooms and other rooms with high humidity.
- Strengthening the surface of facades. The high characteristics of the Knauf Grünband mixture in the field of resistance to physical stress make it possible to protect walls from the effects of external conditions associated with the natural shrinkage processes of the soil under the building. As a result, cracks do not form on the surface.
- Decorative tasks. The structure makes it possible, through simple manipulations, to transform the plaster layer into a finishing decorative element for wall decoration. As a result, no additional painting work will be required, except for the final painting of the surface.
Knauf Grünband is sold in retail outlets in 25 kilogram containers. One bag, when applied to a wall 1.5 cm thick, is enough to treat a surface area of 1-1.4 square meters. m.
Specifications
All necessary parameters are usually indicated on the packaging. Specifications vary depending on the type of material, but approximate values can be derived.
Typically, the consumption of thin plaster with a layer thickness of 1 mm is from 1.6 to 2 kg. This indicator is directly affected by the composition of the mixture. Most plasters are stored under normal humidity conditions from 6 months to a year. The dry mixture is packaged in paper bags of 25-50 kg. Flexural and compressive strength is measured after 28 days from application. Typically, for thin plasters, the compressive strength is from 15 MPa, the bending strength is from 4 MPa, and the adhesion strength to the base is from 0.5 MPa. The solution can be used for up to 60 minutes after preparation. Pigments may be added to some mixtures for coloring.
Work progress
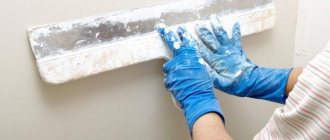
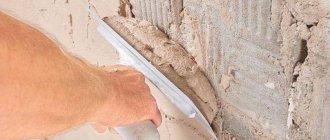
Insulating plaster is applied to the wall surfaces using traditional technology. Before starting work, the surface is cleaned of dust and flaking elements. Some types of warm plasters do not require treatment with primer compounds, but for higher adhesion, applying a primer will not be superfluous.
The solution is mixed in construction containers with a volume of at least 50 liters.
It is written on the packaging how much liquid will need to be added to the mixture according to the technology. Some plaster compositions harden in a short time, so you should carefully study the instructions from the manufacturer to avoid discarding the material.
In order to save time, the work is entrusted to experienced teams who have already completed more than one project using this technology.
Plaster, suitable as insulation for the facade, is applied in the same way as that used indoors. When working with it, it is important to pay attention to the frost resistance properties of the material and its adhesion at sub-zero temperatures. In the process of plastering the facade with warm plaster with your own hands in winter, there is a risk that the solution will not adhere to the frozen surface of the wall. In the future, the layer will move away from the wall, and the material will have to be thrown away.
The material is applied to the walls in several layers. Each layer is not made thicker than 20 mm, and it can be applied no earlier than 4 hours after the previous one. To carry out the work, experienced specialists use construction spatulas of two sizes: wide and small. The quality of work is checked using two-meter rules with a level. This should be done 3 weeks after completion of work. The deviation of the plane from the level should usually not exceed 1-3 mm.
Plastering the facade, main stages of work
Plastering on facade insulation technology consists of the stages of preparing the base, fastening the slabs, lining with reinforcing mesh and layer-by-layer application of plaster mixtures.
Preparatory work
Depending on the choice of materials, the optimal temperatures for insulating and plastering the facade are in the range from +15 to +30 degrees. It should be remembered that the outer part of the wall begins at a level of 60-70 above the ground; additional waterproofing is applied to the base part using bitumen compounds. The surface is thoroughly cleaned of decorative coatings, washed with water under pressure and dried. Oil or other contaminants are removed with solvents. Conduct a study of voids and differences. Deviations of more than one centimeter are noted with a two-meter ruler.
Residues of enamel and paint coatings are checked for compatibility with the adhesive composition or removed by sandblasting, chemical treatment or annealing. Restore cracks, voids and differences using a screed, after drying, prime. Window and door openings are framed with L-shaped profiles.
Restore cracks, voids and differences using a screed, after drying, prime.
Installation of insulation
The adhesive composition is applied to the slabs using beacons of 8-10 pieces. or stripes, retreating 3 centimeters from the edge, it should cover at least 70%. The stripes along the edges are applied with a dotted line so that there are no air pockets left under the thermal insulation.
They start by gluing the bottom plates from the base level, in horizontal rows. At the same time, bandage the joints as when laying bricks. At least 20 cm are retreated from the joint of the slabs of the previous row. In places where they adjoin structural elements (window openings, columns), open joints of 1.5 centimeters are left, which are filled with waterproof mastic.
During installation, the slabs are pressed with a wooden float. It is important not to allow irregularities larger than 3 mm, because they will be impossible to hide. The dowels are fastened in the middle of the slab and at the joints after a day, when the glue has dried. Wide gaps are filled with strips of insulation.
They start by gluing the bottom plates from the base level, in horizontal rows.
Wall reinforcement
The mesh for plastering the facade over the insulation is first attached to the corners, using plastic fasteners on the insulation or on the plaster with a thickness of at least 2 mm. A perforated corner profile is mounted on the corners.
The mesh for plastering the facade over the insulation is first attached to the corners, using plastic fasteners on the insulation or on the plaster with a thickness of at least 2 mm.
Base plaster layer
After three days, apply the base layer. The method is no different from plastering indoors, with the installation of beacons and maintaining the thickness of the layer. To protect the edges of the corners, corners made of aluminum or galvanized steel are attached to glue. The junctions with structural elements are protected with a perforated profile. The process is carried out strictly according to the beacon map with planned technological breaks.
To protect the edges of the corners, corners made of aluminum or galvanized steel are attached to glue.
How to apply a leveling layer
When plastering walls over insulation, the main layer is applied in this way: the solution is poured between the beacons and distributed from side to side in the direction from bottom to top. The excess is cut off.
The solution is poured between the beacons and distributed from side to side in the direction from bottom to top.
Grinding and expansion joints
Puttying is done in a spiral from a large circle to the center. Thus, a tubercle is obtained in the center which is leveled by the reverse action. The seams are filled with grout and sanded.
For the plinth, the same procedure for plastering the facade with insulation is performed, but after reinforcement, bitumen waterproofing compounds are needed. Additionally protected with asbestos-cement slabs or other materials over which a canopy is formed. The upper edge of the insulation on the pediment should also be covered with tiles or a metal canopy. The gaps are filled with waterproof mastic.
If weather conditions do not correspond to those specified by the manufacturer, scaffolding is built around the house and completely covered with a film that protects from wind and light rain.
The seams are filled with grout and sanded.
A plaster facade with insulation will make your home more comfortable inside and more beautiful outside. An experienced plasterer can easily cope with the task; a person who is far from finishing work will have to learn how to work with power tools and apply the compounds smoothly.
Preparatory stage
Applying plaster to insulate the facade will require more preparation before starting work than indoors. Work at height requires strict adherence to safety measures, the use of only certified equipment and building structures to ensure work safety. Before starting work, elements protruding from the body of the capital structure are removed from the surface of the external walls. After completion of general construction work, masons do not remove pieces of dressing reinforcement. They are cut to avoid future injury.
The choice of mineral wool and the technology of insulating facades with mineral wool for plaster
Energy and heat saving depends on the quality of the building façade. Highly efficient developments coupled with durable modern building materials will help achieve real reliability and functionality of facade structures. The technology of facade insulation with mineral wool incorporates several fundamental advantages:
- Weather resistance;
- Advantageous thermal and sound insulation;
- Non-flammability;
- Resistance to deformation;
- Light weight;
- Hydrophobicity;
- Long-term operation;
- Air permeability;
- Environmentally friendly.
- Which mineral wool to choose
- Installation technology
- Required Tools
- Materials for work
- Features of preparatory work
- Securing the starting profile
- Application of adhesive solution
- Fastening insulation with dowels
- Formation of slopes and corner areas
- Reinforcement of mineral slabs
- Application of decorative plaster
- Cost per square meter of work
Work on the reinforcing layer
When the planning and preparation stage is over, the time comes when warm facade plaster is applied. In modern realities, this stage often begins with disappointment, as it turns out that the differences on the walls being treated are too great. Although solutions have great strength characteristics, sometimes this is not enough to avoid using reinforcing mesh as a load-bearing base.
The reinforcing layer is technologically designed to withstand loads from its own weight. Manufacturers provide data that their products do not require the provision of reinforcing mesh. In this matter, it is worth additionally monitoring the problem and obtaining expert advice, after which a final decision should be made as to whether the base should be reinforced under the plaster layer.
Features of plaster technology for insulation
The advantages of this technology are that it allows you to make the room warm without reducing the internal space. This thermal insulation reduces heating and air conditioning costs, creating a comfortable indoor climate. The method is quite simple and you can do this work on your own, of course, with strict adherence to the rules. Materials used for thermal insulation are affordable, lightweight and do not require additional reinforcement of structures. Facade plasters with insulation can give the exterior an attractive appearance and increase service life. If necessary, they can be easily dismantled. The procedure is difficult to apply only in the restoration of architectural monuments, where the possibilities are limited by the historical appearance of the building.
The method is also called “wet facade”, this involves applying layers of wet compounds and drying each layer. The layer-by-layer structure consists of insulation, reinforcing mesh and plaster with a finishing coating.
A necessary technical requirement is that the materials must be combined with each other; for this purpose, mixtures with a single base composition are used.
The advantages of this technology are that it allows you to make the room warm without reducing the internal space.
Advantages and disadvantages of warm plasters
Warm plaster is not ideal for interior construction work. Like any product, it has its pros and cons. Below is a description of the positive and negative features for the general group of thermal insulating plaster mixtures.
Positive traits:
- no deformation changes over time, wear resistance;
- high strength;
- absence of components harmful to health in raw materials;
- resistance to low temperatures;
- high adhesion properties;
- Possibility of application to any type of surface;
- in most cases does not require a reinforcing layer.
Mixture consumption
Plastering walls with the help of hired personnel may be accompanied by unjustified material costs. Control of the production of the mixture by builders is ensured by calculations based on data from manufacturers of thermal insulation material.
Consumption ranges from 10 to 18 kg per square meter. meter. The consumption of warm plaster for external work will reach up to 25 kg per square meter. meter, so a thicker layer must be applied to the external walls.
The numbers may differ from one manufacturer to another, but not to a significant extent. Consumption will become higher if the wall surface has too many unevennesses, as well as due to overspending by builders on defects. These points are worth paying attention to.
How to make warm plaster with your own hands
When it is not possible to purchase a ready-made mixture, you should try making it yourself. You can make warm plaster with your own hands in a simple way. It is important to note that for its manufacture it is not enough to simply add granules of insulating raw materials to the cement-sand mixture. A special plasticizer is used.
To make the composition you will need ordinary water, cement, thermal insulation filler (vermiculite) and a plasticizer. PVA glue is used as a plasticizer. The ingredients are mixed in the following proportion: to one part cement, four parts filler. 50 grams of PVA glue per bucket of cement is enough. Add water to the required consistency.
Plastering the surface of the walls with a composition made by yourself takes place in three stages:
- The plasticizer is diluted in water.
- Filler is added to the cement. The finished mixture is mixed until smooth.
- The dry composition is diluted with liquid, and the resulting solution is allowed to stand for 15 minutes.
After completing the preparatory work, the product is ready for use.
Reviews
When using insulating plaster for exterior work, you kill several birds with one stone. This includes applying a leveling layer, installing thermal insulation, and even decorative finishing. If desired, this can be done in one step. You can’t do without mineral wool or polystyrene foam at a construction site, but you can use warm plaster and save time and money. And applying the composition is easier than carrying out thermal insulation work, followed by installation of a ventilated facade.
Manufacturers of warm plaster for interior work talk about the good properties of the mixtures in terms of sound insulation, however, in order to block the “airborne noise” the insulation material must have a fibrous structure and be blown, with a thickness of 5 cm or more, which in fact is not provided. Consequently, their properties are not so good in this direction.
Applying plaster on mineral wool
The technology for finishing a facade insulated with mineral wool involves the use of two layers - reinforcement and plaster. The first layer is a durable fiberglass mesh. This material must have maximum alkali resistance. Thanks to this reinforcement, the coating will gain maximum strength. Also, the fiberglass mesh will provide excellent adhesion between all layers.
A small layer of a special primer should be applied on top of the reinforcing fabric. It is often sold together with plaster. You can also purchase it separately.
Important! It is not recommended to use other types of primer, as they will not provide the necessary adhesion.
Once the primer has dried well, you can begin applying the finishing coat. To do this, use a wide spatula. The layer thickness must be at least 3 mm. If you do not adhere to this indicator, the facade will soon become unusable.
For those who decide to plaster mineral wool with acrylic mixtures, the work must be carried out as quickly as possible. This will allow you to get the same shade in all areas.
When plastering, it is important to pay special attention to the corners of the building, windows and doorways. An additional layer of mesh should be installed in these areas. It should also be remembered that plastering of any type of mineral wool should be carried out at a temperature not lower than +5 0 C.
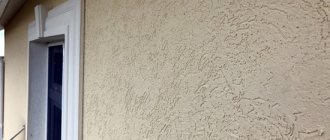
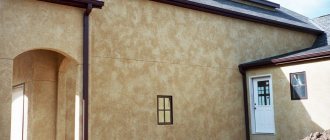
Giving the façade a “bark beetle” texture
If you decide to give the surface an unusual texture, you can use a mixture with the addition of mineral fractions. These are small pebbles, the size of which ranges from 2 to 3 mm. In the process of rubbing such putty, small furrows will appear on the surface, randomly located.
As for creating a “fur coat,” you can use a roller or trowel to carry out the work. In the second case, the tool will need to be pressed tightly to the surface and torn off sharply.