What is thermal insulation plaster
When talking about plastering walls, the question that comes to mind is the labor intensity of the work and the need to attract specialists with experience and qualifications, but the classic application of sand-cement mixture to the walls does not solve the problem of wall insulation. With thermal insulation or “warm” plaster, there will be one less problem during construction.
When insulating, warm plaster is used for the facade and interior work. It is highly energy efficient, but remains an inexpensive construction raw material.
Composition characteristics
Mixtures in cement mortar are used for external and internal work.
Thermal insulating plaster reduces heat loss due to its special composition. It includes porous filler, binder and special additives. Fine-fraction components make up from 45 to 70% of the mixture volume. Most often used:
- expanded perlite;
- granulated expanded clay;
- pumice crumbs;
- expanded polystyrene granules;
- foam glass spheres.
The binder is cement, gypsum or lime. Gypsum-based mixtures are used for interior work, while cement compositions are universal. To improve the characteristics of the solution, add to it:
- antiseptic;
- water repellents;
- plasticizers;
- air-releasing additives.
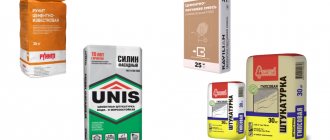
The insulation is sold in the form of a dry mixture, packaged in bags of 12-25 kg.
Material composition
For the manufacture of traditional plaster compositions, cement, sand, water, and, if necessary, mineral additives are used to add strength or frost resistance to the final product.
Thermal insulating plaster has the properties of both insulation and cement mixture.
This effect is achieved by applying a special recipe to the production of the material. The most common substances that are used to dilute the material to increase its energy-efficient properties of steel:
- expanded vermiculite;
- sawdust;
- granulated expanded clay crumbs;
- crushed pumice;
- granulated polystyrene foam.
Manufacturers and prices
The technology for producing the material appeared not so long ago, but there is already competition among manufacturers. Nowadays, the most famous heat-insulating plaster is of three brands: “Mishka” or “Varmix”, “Umka” and “Knauf”. Below is a description of each of them.
- Thermal insulation mixture "Umka". Popular material in recent years. It has gained fame as a product suitable for interior finishing work. The basis of “Umka” is granulated silicon balls. It has vapor barrier properties, does not absorb moisture, absorbs sound waves, and is an excellent thermal insulator. Silicon balls are odorless and harmless to human health. In addition to increased thermal insulation properties, due to granulated ceramic balls, the plaster composition acquires increased strength with a lighter specific gravity. Applying such a mixture to wall surfaces will not require additional treatment with primer compounds or installation of reinforcing mesh. In construction markets, “Umka” is sold at a price of 100 rubles per 1 kg.
- Warm plaster “Mishka” or “Varmix”. Some people confuse these two materials, but they have the same manufacturer, who has rebranded the brand. Like the previous insulation, “Mishka” in its raw form is a dry mixture, which is diluted in the required proportions with water before application to the surface. The finished composition has high adhesion properties to any surface, which eliminates the need to treat walls with primers. This is an excellent sound and vapor barrier material. “Mishka” has the positive properties of a competitor and is used as a heat-insulating plaster for exterior use. The price in the store per kilogram of “Mishka” starts from 120 rubles per kilogram.
- Thermal insulating composition "Knauf". Manufacturers took care of the versatility of the final product. Knauf can be applied to any type of surface. Even floor slabs are insulated and plastered with the mixture. Due to the fact that the plaster composition is applied both manually and using machine mechanisms, a person has the opportunity to save time when performing work.
Types of warm plaster
Technically, the material has the properties it needs due to the addition of insulating materials to the base. There are three types of mixtures based on composition.
- Vermiculite based plaster. This additive is produced by heat treatment of vermiculite rock. Expanded vermiculite has antiseptic properties, protecting wall coverings from the formation of harmful fungal growths. This lightweight mineral filler is added to ready-made dry mixtures, making it possible to use for facade work and interior decoration.
- A plaster mixture containing expanded polystyrene foam granules. The polystyrene foam content makes the plaster an excellent thermal insulator. In addition to this insulating material, the composition includes cement, lime, special additives and fillers. It is suitable for use as a warm plaster for external and internal construction work.
- Another type of this heat-insulating mixture is called “sawdust” , since in addition to cement, sawdust, clay, and paper are added to it. Due to the content of additional components, heat-insulating plaster for interior work is used for thermal insulation. Such warm plaster when performing external work on the outside of the wall is not resistant to constant exposure to moisture. However, it is also suitable for interior work. When insulating walls with this composition, keep in mind that during the period of hardening of the solution it is necessary to ensure constant ventilation of the room. “Sawdust” solution is applied to brick and wooden walls. Hardening time is about two weeks. If you do not ventilate the room, the surface of the finish will become covered with mold or mildew.
Types of heat-insulating mixtures for plastering
Thermal insulation compositions are classified by the type of binder: gypsum, cement, etc., as well as by the type of insulating filler.
Straw based
The material used for a long time is insulating plaster made of clay with straw grain. Straw in clay coating acts as reinforcement and creates voids.
As a result, the plaster coating can be thicker without delamination or cracking. It is applied as a rough layer on the wall over shingles by hand. The coating is breathable, absorbing excess moisture from the air and returning it when the room is dry. Before application, the walls are moistened or sprayed with clay mash. The main disadvantage is the long drying time. The main advantage is a favorable microclimate and low cost.
Sawdust based plaster
Sawdust has long been used for home insulation. They covered the rubble and ceilings. They were added to clay and lime mixtures for coating walls. Sawdust retains heat better than wooden beams, since the thermal conductivity coefficient of sawdust is 0.06 - 0.07 W/(m2•°C), and wood - 0.18. In terms of heat retention, sawdust is much closer to polystyrene foam.
Compositions with sawdust can have a different mineral base - clay, gypsum (Armenian plaster: 3 parts of gypsum, 1 part of sawdust), cement and lime. The main application is indoors. Before mixing the composition, sawdust is sifted through a sieve with a cell diameter of 5 mm.
Polystyrene as filler
A type of polystyrene foam - expanded polystyrene - is used for various purposes, for example, as a filler for anti-stress toys, upholstered furniture, and sleeping pillows. The material is ultra-light (up to 98% air), does not absorb water, and is not food for microorganisms. It is used in cement screeds for floor insulation (1:4:4 - cement/polystyrene granules/sand), and also as a heat-insulating leveling layer (1:3) laid under the screed.
Plaster mixtures with polystyrene are used for work on facades and indoors. They are produced on the basis of cement or cement with lime. Although they do not burn, they can release toxic substances when ignited.
Plaster mixture with the addition of foam glass
Small glass balls (up to 2 mm), which contain air bubbles that are not afraid of water, are perfect for use as a filler for warm plasters for facades. Such compositions are easy to install, retain heat well, and do not get wet.
Mixtures based on perlite, vermiculite and expanded clay
When volcanic lava frozen on the ground comes into contact with water, obsidian hydroxide is formed - porous round granules similar to pearls. Due to this, the hydroxide received the name pearlite. The granules have high porosity, which reaches 40%, and are capable of absorbing water 4 times more than their own weight (hygroscopicity is a disadvantage of such mixtures). For plaster composition (external and internal use), expanded perlite is more often used.
The mineral group of hydromicas contains vermiculite, consisting of small exfoliated scales of brown-golden color. When heated, vermiculite swells and fills with air. Used in lightweight concrete compositions and warm plaster mixtures. Has antiseptic properties. Perlite and vermiculite absorb odors and water well, so they need finishing plastering.
Expanded clay granules (crumbs) are produced by firing some low-melting types of clay. During firing, light, low heat-conducting granules of different sizes are formed. For warm facade plaster, granules up to 5 mm in diameter are used.
Cement heat-insulating plaster Knauf Grünband
Warm plaster Knauf Grünband deserves special attention. The Knauf product line itself is well known, but among them there are the most popular ones. Fractional components are no more than 1.5 mm in diameter. Application is carried out in two ways: manually and using electrical equipment.
This mixture is also used in addition to performing the main functionality. It helps solve other problems, such as:
- Application of waterproofing coating to the walls of facades, basements, sanitary rooms and other rooms with high humidity.
- Strengthening the surface of facades. The high characteristics of the Knauf Grünband mixture in the field of resistance to physical stress make it possible to protect walls from the effects of external conditions associated with the natural shrinkage processes of the soil under the building. As a result, cracks do not form on the surface.
- Decorative tasks. The structure makes it possible, through simple manipulations, to transform the plaster layer into a finishing decorative element for wall decoration. As a result, no additional painting work will be required, except for the final painting of the surface.
Knauf Grünband is sold in retail outlets in 25 kilogram containers. One bag, when applied to a wall 1.5 cm thick, is enough to treat a surface area of 1-1.4 square meters. m.
Brief overview of factory-produced plasters
Knauf Grűnband. The plasters of this brand are considered the highest quality and most popular on the modern market. This material is produced on the basis of cement, and the filler is polystyrene foam with a fraction of about 1.5 mm. In addition, the composition contains additional components that increase the performance characteristics of the finished coatings. After drying, the plaster is not afraid of water and has a structural coating. The thermal conductivity of the mixture is 0.55 W/m°C. The minimum layer thickness is 10 mm, the maximum is 30 mm. The material can be applied manually or using a machine. Supplied in 25 kg bags, the average consumption is 12 kg per square meter with a layer of 10 mm.
Knauf Grűnband - warm plaster with polystyrene foam filler
AuBenputzPerlit FS-402. Lightweight plaster based on Portland cement, to which perlite is added. The mixture was developed specifically for finishing cellular concrete surfaces, but it can be used to treat any surfaces, including old plaster. Insulated surfaces do not have the highest thermal conductivity coefficient - 0.16 W/m°C. The filler fraction does not exceed 0.6 mm, resulting in the formation of a textured coating that requires further decoration. The maximum layer is 50 mm, and the consumption is 10 kg per square meter with a layer of 10 mm.
AuBenputzPerlit FS-402 - thermal insulation composition with perlite filler
Unis Teplon. Quite a popular material that is intended exclusively for internal surfaces. It is made from gypsum and perlite. The maximum layer without the use of reinforcing mesh is 50 mm, with mesh – 70 mm. After drying, a coating is obtained that does not need to be subjected to further finishing. The mixture comes in two versions: gray and white. It can be used to prepare the base for wallpaper or paint. Thermal conductivity of plaster is 0.23 W/m°C. The material is packaged in bags of 5, 15 and 25 kg, consumption is 8 kg per square meter.
Unis Teplon - plaster with a gypsum base and perlite filler
De Luxe Teplolux. Warm plaster based on cement with the addition of foam glass with a fraction of 3 mm. After drying, the surface requires further finishing. The recommended layer is 40 mm, it will dry in 28 days. The mixtures are packaged in 12 kg bags, consumption is approximately 5 kg per square meter.
De Luxe Teplolux - warm plaster with foam glass filler
Paladium Palaplaster-207. The main advantage of this material is its high level of sound absorption. It is made of cement and foam glass. Typically, plaster is used to create rough surfaces for wallpapering or painting. The solution dries quite quickly: 2-3 days. Consumption is only 4 kg per square meter, and it is supplied in 12 kg bags.
Paladium Palaplaster-207 - thermal insulation mixture with foam glass filler
Umka UB-21 TM. This material was specially designed for cold winter conditions - it can withstand 35 freeze/thaw cycles. It is produced on the basis of cement and lime, to which foam glass granules are added. After drying, the plaster requires further finishing. The uniqueness of the material lies in the fact that if a reinforcing mesh is used, the layer of material can reach up to 100 mm. The plaster is supplied in 7 kg bags, and the consumption is 3.5 kg per square meter.
Umka UB-21 TM - plaster with foam glass filler
ThermoUm. Can be used for interior and exterior work. The material dries for at least 28 days, after which you can begin finishing it. After drying, the coating gains the ability to absorb moisture accumulated near the wall itself and release it into the air, which ensures a long service life of the surfaces. The mixtures are supplied in 7 kg bags, and the consumption is only 3 kg per square meter.
ThermoUm is a warm plaster that has a long service life
On a note! You should not make a conclusion about purchasing a certain type of plaster based only on consumption or cost indicators. The lower the consumption, the more expensive each kilogram of dry mixture will be, so it is better to make a full calculation in advance and decide on the budget.
Work progress
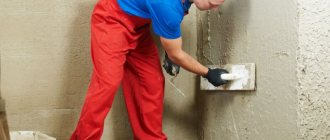
Insulating plaster is applied to the wall surfaces using traditional technology. Before starting work, the surface is cleaned of dust and flaking elements. Some types of warm plasters do not require treatment with primer compounds, but for higher adhesion, applying a primer will not be superfluous.
The solution is mixed in construction containers with a volume of at least 50 liters.
It is written on the packaging how much liquid will need to be added to the mixture according to the technology. Some plaster compositions harden in a short time, so you should carefully study the instructions from the manufacturer to avoid discarding the material.
In order to save time, the work is entrusted to experienced teams who have already completed more than one project using this technology.
Plaster, suitable as insulation for the facade, is applied in the same way as that used indoors. When working with it, it is important to pay attention to the frost resistance properties of the material and its adhesion at sub-zero temperatures. In the process of plastering the facade with warm plaster with your own hands in winter, there is a risk that the solution will not adhere to the frozen surface of the wall. In the future, the layer will move away from the wall, and the material will have to be thrown away.
The material is applied to the walls in several layers. Each layer is not made thicker than 20 mm, and it can be applied no earlier than 4 hours after the previous one. To carry out the work, experienced specialists use construction spatulas of two sizes: wide and small. The quality of work is checked using two-meter rules with a level. This should be done 3 weeks after completion of work. The deviation of the plane from the level should usually not exceed 1-3 mm.
Stages of plastering a facade with your own hands
Plastering of the facade is carried out in stages. Favorable temperature conditions for work are from +15 to +30 ºС. In cool weather, scaffolding is constructed and covered with windproof film.
It is allowed to carry out plastering work at temperatures from +15 to +30 ºС
Preparatory work
First, the house is checked for cracks, and if any are found, a restoration screed is made. The outer part of the wall begins at a distance of 60-70 cm from the ground. The base is treated with waterproofing bitumen material. Old walls are cleaned of dyes and other decorative layers mechanically, by firing or chemical sandblasting.
Before starting work, the surface is cleaned of old coating
New ones are checked with a two-meter even strip for the presence of protrusions and irregularities. The excess is cut off with a spatula and smoothed with a grater. Using washing equipment, the wall is washed and dried. Then prime with a wide brush, penetrating deeply into every crevice. Cracks, chips and other defects are repaired with starting putty, and then the surface is leveled with the same mixture. After drying, sand with a coarse grater and prime the entire wall.
Installation of insulation
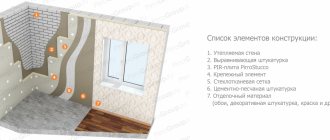
Before installing the slabs, a special profile is installed that will ensure their horizontal position. Insulation is glued to the prepared surface in rows horizontally. The glue is applied dotted at 8-10 dots for one slab or continuously applied in the middle with a grooved spatula, 3 cm away from the edge of the slab. The stripes along the contours are applied in a dotted line so that there is no air cushion left inside.
Insulation boards are glued in rows horizontally
Gluing begins from the base, the second and subsequent rows are laid, observing the ligation of the slabs, as when laying bricks. The second layer of insulation is glued at a distance of at least 20 cm from the seam of the first row. The distance between the tile seams should not exceed 6 mm, and differences in plane should not exceed 3 mm.
In places where window openings, columns, and corners adjoin, unclosed joints of 1.5 cm are left, which are subsequently filled with waterproof mastic.
Press down the insulation with a wooden trowel. A day after the glue has dried, fasteners with dowels with an umbrella-shaped cap are used in the center and at the joints. Wide cracks are filled with mastic.
Facade reinforcement
The reinforcement is made with a special mesh of glass fibers. Installation of the reinforcing mesh begins with cutting. The calculation is made in such a way that the segments overlap each other by 10 cm (overlapping). Start installation from the corners, moving towards the center. The slopes of all openings are leveled with perforated aluminum corners.
To strengthen the base, the façade is reinforced
The mesh is applied to the insulation using glue. It is completely immersed in the composition. After the first layer has dried, applying a second one will not hurt, since the mesh will be more firmly glued to the insulation.
Base plaster layer
The initial plaster layer is applied 3 days after gluing the reinforcing mesh. The technology for plastering walls outside and inside is no different. Aluminum beacons are also glued on, and perforated profiles are installed at the corners.
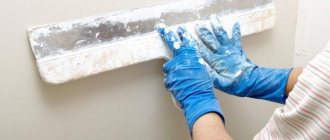
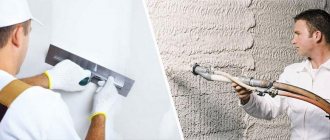
The plaster is applied using a trowel and spread along the guides using a rule. For the construction of large buildings, a plastering station is used, where the solution is supplied through pipes and hoses, spraying the mixture mechanically onto the walls.
Plastering technology
After applying the plaster to the surface, rubbing begins. Movements with a spatula are made using different technologies:
- horizontally;
- vertically;
- cross;
- all around.
Trajectory of the spatula
Base layers are applied 2-3 times depending on their thickness, which in general should not exceed 5-6 mm. Then the plane is primed with a wide brush.
Leveling layer
After removing the beacons, depressions remain. They are first primed and then plastered, starting from the bottom with horizontal movements to the right and left. The seams are sealed so that the plane appears as one whole. A finishing layer of plaster is applied on top, either for painting, or a mixture is taken with pigment.
The final layer of plaster makes the surface ideal for subsequent finishing.
Grinding and expansion joints
After the plaster has dried, it is sanded with a construction polyurethane float.
To reduce the load on the structure, the surface is cut with a special construction disk into longitudinal and transverse seams in places of possible deformation. The depth of the seam should reach the main wall. That is, all layers are cut through: plaster, reinforced mesh and insulation. This type of seam is called an expansion seam. It is needed to prevent cracks from occurring in the structure during shrinkage, earthquakes or other natural phenomena.
After applying the last layer of plaster, the coating is sanded with a construction trowel.
Subsequently, the seams are filled with mastic or other insulating material. Cuts at the corners are made at a distance of 15 cm from the edge. The distance between the seams depends on the structure of the soil and the material from which the house is built. This data can be found in the construction manual. The shortest distance is 15 meters.
Preparatory stage
Applying plaster to insulate the facade will require more preparation before starting work than indoors. Work at height requires strict adherence to safety measures, the use of only certified equipment and building structures to ensure work safety. Before starting work, elements protruding from the body of the capital structure are removed from the surface of the external walls. After completion of general construction work, masons do not remove pieces of dressing reinforcement. They are cut to avoid future injury.
Work on the reinforcing layer
When the planning and preparation stage is over, the time comes when warm facade plaster is applied. In modern realities, this stage often begins with disappointment, as it turns out that the differences on the walls being treated are too great. Although solutions have great strength characteristics, sometimes this is not enough to avoid using reinforcing mesh as a load-bearing base.
The reinforcing layer is technologically designed to withstand loads from its own weight. Manufacturers provide data that their products do not require the provision of reinforcing mesh. In this matter, it is worth additionally monitoring the problem and obtaining expert advice, after which a final decision should be made as to whether the base should be reinforced under the plaster layer.
Advantages and disadvantages of warm plasters
Warm plaster is not ideal for interior construction work. Like any product, it has its pros and cons. Below is a description of the positive and negative features for the general group of thermal insulating plaster mixtures.
Positive traits:
- no deformation changes over time, wear resistance;
- high strength;
- absence of components harmful to health in raw materials;
- resistance to low temperatures;
- high adhesion properties;
- Possibility of application to any type of surface;
- in most cases does not require a reinforcing layer.
Application technology
The solution is made as it is used, so that it does not harden in the air, it is applied with a spatula.
You can perform plastering at home yourself. The insulation technology consists of several stages:
- Preparing the base. The surface of the walls is cleaned and primed.
- A solution is prepared from the plaster mixture. The composition must be used within two hours, then it will thicken.
- To create an even layer, it is recommended to install beacons using a building level.
- The mixture is applied manually (with a trowel, spatula) or applied by machine.
- The surface is leveled according to the rule, guided by the beacons.
- After the solution has partially set, the beacons are removed. The cracks are sealed with the same composition.
- To thoroughly level the surface, apply a mixture of liquid consistency. After drying, it is processed with a grater.
Warm plaster is left as a finishing coating or lined with artificial stone or ceramic tiles. Insulation helps make a home energy efficient and reduce heating costs.
Mixture consumption
Plastering walls with the help of hired personnel may be accompanied by unjustified material costs. Control of the production of the mixture by builders is ensured by calculations based on data from manufacturers of thermal insulation material.
Consumption ranges from 10 to 18 kg per square meter. meter. The consumption of warm plaster for external work will reach up to 25 kg per square meter. meter, so a thicker layer must be applied to the external walls.
The numbers may differ from one manufacturer to another, but not to a significant extent. Consumption will become higher if the wall surface has too many unevennesses, as well as due to overspending by builders on defects. These points are worth paying attention to.
Calculation of plaster consumption
When purchasing a dry building mixture, you can easily find its consumption on the packaging, because the manufacturer always indicates this figure in kg/sq. m. If you decide to make the solution yourself, you will have to take into account the average consumption rates depending on the size of the layer:
- with a plaster thickness of 2.5 cm, 10-14 kg of mass is consumed per 1 square meter. m;
- with a layer thickness of 5 cm, about 18-25 kg per 1 square meter is spent. m.
Typically, an improvement in heat and sound insulation is observed already when a plaster layer 0.5 cm thick is made. Of course, this is not enough for effective insulation, so this indicator should also be selected more accurately.
Layer thickness calculation
Most manufacturers advise applying a layer of mortar with insulating properties of sufficient thickness - 2.5-5 cm. This will allow the plaster to fully realize its heat-insulating abilities and create an additional protective layer.
The choice of size of the layer should also depend on the thickness of the walls themselves. For example, to really reduce heat loss in a house with walls 50 cm thick, it is necessary to apply a plaster layer of 8-10 cm. For regions with extreme climates, individual calculations are required, as well as for non-standard base materials.
How to make warm plaster with your own hands
When it is not possible to purchase a ready-made mixture, you should try making it yourself. You can make warm plaster with your own hands in a simple way. It is important to note that for its manufacture it is not enough to simply add granules of insulating raw materials to the cement-sand mixture. A special plasticizer is used.
To make the composition you will need ordinary water, cement, thermal insulation filler (vermiculite) and a plasticizer. PVA glue is used as a plasticizer. The ingredients are mixed in the following proportion: to one part cement, four parts filler. 50 grams of PVA glue per bucket of cement is enough. Add water to the required consistency.
Plastering the surface of the walls with a composition made by yourself takes place in three stages:
- The plasticizer is diluted in water.
- Filler is added to the cement. The finished mixture is mixed until smooth.
- The dry composition is diluted with liquid, and the resulting solution is allowed to stand for 15 minutes.
After completing the preparatory work, the product is ready for use.
How to check the quality of work
To get the job done efficiently, follow these tips:
| At the preparatory stage of work, the main wall is checked for dirt, unevenness and decorative applications. | |
| Dry plaster is not diluted “by eye”, but according to the proportions indicated on the packaging. | |
| The insulation is fixed evenly using a level. | |
| The dowel caps must fit snugly against the insulation boards. | |
| The reinforcing mesh is embedded under the base layer of plaster so that the ends fit tightly to the insulation and do not stick out. | |
| A canopy is installed above the facade, since water flowing down the wall will eventually erode the structure and penetrate into microcracks. | |
| At the end of the work, check how smooth the wall is (are there any drops, bumps or holes). | |
| Inspect the corners of door and window openings for cracks and chips. | |
| They walk around the perimeter of the house and carefully inspect the walls for defects. |
If no defects are found, then the work was done efficiently and you can be proud of yourself. After all, living in an insulated house is more comfortable. Now you don’t have to worry about frost in winter or heat in summer.
Have you plastered the façade using insulation yourself? Share your life hacks in the comments.
Reviews
When using insulating plaster for exterior work, you kill several birds with one stone. This includes applying a leveling layer, installing thermal insulation, and even decorative finishing. If desired, this can be done in one step. You can’t do without mineral wool or polystyrene foam at a construction site, but you can use warm plaster and save time and money. And applying the composition is easier than carrying out thermal insulation work, followed by installation of a ventilated facade.
Manufacturers of warm plaster for interior work talk about the good properties of the mixtures in terms of sound insulation, however, in order to block the “airborne noise” the insulation material must have a fibrous structure and be blown, with a thickness of 5 cm or more, which in fact is not provided. Consequently, their properties are not so good in this direction.
Let's sum it up
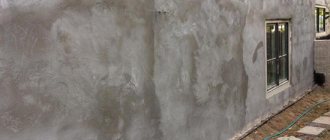
Warm plaster is used as a leveling building material, similar to its conventional counterparts. The mixtures are also used for treating facades and walls indoors with any humidity. A characteristic feature of this plaster is its heat-insulating property, along with which the coating does not allow noise to pass through.
The affordable cost of warm plaster and a wide range of applications have a clear advantage over analogues. In addition, you can prepare warm plaster with your own hands .
We recommend:
- Sheathing for siding: installation of a frame for siding,…
- Hydrophobization of the facade: technology of work
- Restoration of bathtubs with liquid acrylic: technology…
- Panels made from natural materials: amazing ideas for…
- Wall slats: decorative wooden buffels in…
- DIY wicker furniture: technology…
Related posts:
- How to decorate an empty wall in a room
- Bright room: choice of colors and furniture, photos of interior examples
- Apartment interiors in a modern style: beautiful renovation design, real photos
- Stretch ceilings: photo for the hall, two-level options in the interior of the room
- Design of a small apartment: interior solutions and ideas for modern renovations with photos
- How to lay roofing felt?
- Bed built into a closet, pros and cons, types and their characteristics
- Wicker furniture simple master classes
