Articles
All photos from the article
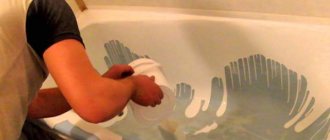
The final touch of any renovation is the installation of decorative elements such as baseboards, borders, moldings, etc. At this stage, inexperienced craftsmen usually have a question about how to fix the skirting boards, especially if they are made of plastic. An excellent solution is to use so-called liquid nails, the only thing is that in this case it is necessary to strictly follow the installation technology.
Fastening skirting boards with liquid nails
To help in this matter, next we will look at how to glue the baseboard to the floor with liquid nails yourself.
Plastic strips
Plastic skirting boards are used more often than wooden ones; they are a common decorative item for residential premises.
Plastic strips perform various functions, such as hiding wires and cables. The following types are available for sale:
- universal strips suitable for linoleum, laminate, wood or tiles;
- for carpet (shape in the form of the letter “L”, squeeze the material so that it does not curl);
Plastic skirting boards are available in various hardnesses. Planks made from polyvinyl chloride have low strength and are brittle. Hollow PVC is of lower quality.
Devices made from semi-solid polyvinyl chloride are more plastic and are sold in roll tapes. When gluing certain skirting boards, you must adhere to the same technology. It is slightly different from attaching wooden planks.
Before applying the glue, it is necessary to accurately measure the length by placing the strips on the floor and marking them.
It is carried out taking into account the fastening decorative elements (joints), which must be immediately attached to the planks. The same is done with the corners, attaching them to the baseboards.
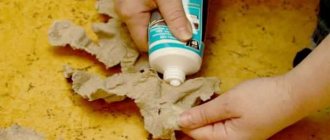
It is recommended to glue plastic material to the floor as follows:
- Apply liquid nails in drops to narrow and thin sections of the plinth, maintaining a distance of 10 centimeters;
- if the bar is short, a four-centimeter distance is enough; if there are any protruding parts or transitions, then the gap between the drops should be a couple of centimeters;
- if it is wide and thick, it needs to be covered with glue, forming waves;
- completely coat corners and joints with glue, as they easily fall off if touched;
- if the strip is formed of two parts and a latch, liquid nails are applied only to the main one.
The cleanliness of the floor and walls in the area being pasted is of great importance, since dirt reduces adhesion.
Gluing begins from the corner and continues until the room is covered with skirting boards along the entire perimeter. At the end of the work, wipe the glued products with a wet rag to remove glue stains.
Installation of plastic plinth
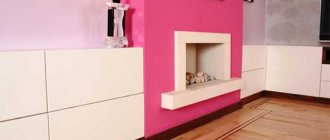
Plastic skirting boards are not as bad as they seem. They don’t always look “very cheap”. These are no longer those terrible shiny products made of thin-walled, stupefying-smelling plastic. The appearance of modern products is very close to MDF. Of course, you can’t confuse it with wood, but the price is several times lower. There are plastic skirting boards with soft edges. They allow you to cover small gaps without much effort. There are models with a cable channel closed with a lid of the same color. You can install fasteners into the channel, and then lay the cables. Convenient, reliable and economical.
How to fasten PVC skirting boards with self-tapping screws or dowels
What can be annoying are the plastic corners and connectors - they look like an amateur. But normal plastic can be cut down with a good saw and joined perfectly. Especially if you have a miter saw. But a miter box will also work. Just buy a special blade for a hacksaw - for plastic. If you can’t find something like this in nearby stores, use a metal blade. If you want your joints to look flawless, make sure they match perfectly using fine-grit sandpaper. And, by the way, if the plinth consists of several parts, you assemble it and then saw it all together. This is the only way all the parts will be the same.
One more point for easier connection on the outer corners. They often “move away” when drilling. We take double-sided tape and fix them to the wall in the desired position. During the installation of skirting boards, the sections can also be “grabbed” to each other using adhesive tape, but this is regular tape.
Plastic plinth with cable duct and mounting on a guide
How to fasten a plinth made of PVC or another type of plastic if it does not have a cable channel (groove) into which the fasteners are installed? You can use glue, but there are mounting systems for a guide.
All of the above is also true for plastic skirting boards. The only difference is that before applying the glue, it is better to degrease the plastic using a suitable solvent (white spirit, for example).
Tools
The surfaces to be joined must be cleaned and dry (especially important for plastic). The surface of the walls at the joints is treated with a primer. The master will need sandpaper and a primer with a roller.
Necessary tools also include:
- a hacksaw (for cutting the required length of plastic sheets) or a grinder;
- tape measure (at least 3 m);
- miter box (carpentry device for cutting and sawing planks at an angle);
- rubber hammer;
- silicone spatula with blade (4 cm wide);
- joining angles for internal and external connections;
- construction gun for cylinders for squeezing out the adhesive base on the surface;
- a clean old rag that can be used to quickly wipe the stain before it dries.
The baseboard itself must be painted or varnished in advance and then allowed to dry. This will prevent the walls and floor from getting dirty. Self-adhesive skirting boards require no tools. Using a hacksaw for metal will prevent ragged edges.
Trimming without miter box
If you don’t have a miter box, you can make the corner joints of wooden baseboards yourself. All segments must be laid out around the perimeter of the room. At corner joints you need to mark the surface of the walls with a marker. The result will be four points in each of the corners.
- Alternately, the left and right parts must be attached to the wall, marking their joints on the wall with points 1 and 2. Then, alternately, draw a line perpendicular to the wall from the points. As a result, point 3 appears on the fillet.
- Lines are marked on the floor along the bottom edges. Point 4 is the intersection of these lines.
- It remains to connect point 3 to point 4 diagonally.
- The corner is cut with a hacksaw. In this case, the other side of the cut (which will be glued to the wall) should go along the edge. As a rule, the angular cut is 45 degrees.
What to attach to
When the plane is selected, the question arises: what to attach the floor plinth to?
The fastest and easiest way to install skirting boards is with liquid nails. It is enough to treat the back side of the plinth with adhesive and press the plank tightly against the wall or floor. But, firstly, this method of fastening is not suitable for skirting boards made of fragile materials, such as MDF, and secondly, this is a “forever” installation method; the profile cannot be removed and used if something goes wrong, or in the future repair.
All subsequent methods of installing skirting boards require drilling. Let us immediately note that the optimal gap between fasteners is 300-500 mm. The dowel-nail should penetrate 30 mm into the floor or wall, but if the surfaces are uneven, then it is better to choose a 3.5 * 40 self-tapping screw, with a No. 6 dowel attached to it.
If the plinth is not provided with a special fastening strip or recesses for the clip, then the length of the screw should be equal to the length of the dowel plus the thickness of the plinth.
Inexpensive models made of MDF and wood, as well as some plastic skirting boards, are fastened with self-tapping screws or nails, which are driven directly over the decorative layer, penetrating the entire body of the profile. To ensure that the installation is carried out accurately, after drilling the base, hammer in the dowels, attach the plinth to the place of fixation, and transfer the drilling points to the plinth. Then, strictly according to the markings, drill through the strip with a thin drill, then take a drill of a larger diameter and make a countersink - a recess for the head of a screw or nail. Place the profile in place and attach it. You can hide the fasteners with special stickers and a wax pencil, if the baseboard already has a decorative coating, wood and MDF are puttied with a special compound for painting, and then painted.
Watch the video on how to nail plastic skirting boards; the video will help you understand the main stages of installing a profile with a cable channel.
Hidden installation methods
Modern models of skirting boards have recesses for clips (usually profiles made of wood and MDF), plastic and metal profiles have a special load-bearing element that is fixed to the base, after which the upper decorative strip is fixed to it.
Installing the clip is very simple: first, holes are drilled around the perimeter of the room and a plastic dowel is inserted into them. Then a clip is applied and secured with a self-tapping screw. When all the clips are installed, a veneer or wooden baseboard is applied and, with a simple press, fixed into place. If necessary, the profile can be easily removed and reattached.
Installation of floor plinths with clips
The starting base for the plastic and metal profile is attached in a similar way. Before attaching the plastic plinth, the load-bearing surface is marked for dowels. When all the holes in the wall or floor are drilled and the plastic dowels are installed, the plank is applied to the installation site, and the drilling points are transferred to it. Then holes are made according to the markings, and the base is attached to the load-bearing surface, after which the decorative part of the plinth is snapped into place.
How to install a floor plinth that has a fixing strip in its design
Do not tighten the screw a couple of turns with the drill so that the starting bar does not crack from excessive force. It is better to secure the base tightly manually with a screwdriver.
Polyurethane, duropolymer and ceramic skirting boards are attached to the base using special glue or polyurethane foam. If the walls are smooth, before attaching the plinth to the floor, you can paste wallpaper, but if the surface has visible defects, then first it is leveled, and only then the plinth is installed. Next, watch the secrets of the masters, how to install skirting boards correctly, video tips will help you stick the profile in an unusual way, quickly and very carefully.
How much does it cost to install MDF skirting boards?
Wooden skirting boards - installation prices
| Services | Cost of work | |
| Height 5 cm | Height 6-7 cm | |
| Installation of wooden plinth (solid wood, veneer, MDF) | Price: 180 RUR/linear meter. | 230 rub/linear meter |
| Installation of europlinths with clips | Price: 450 rub/linear meter. Order | |
| Varnishing the baseboard | Price: 50 rub/linear meter Order | |
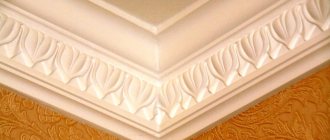
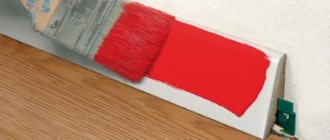
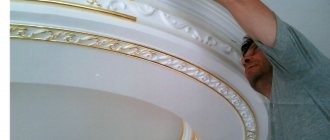
How to glue ceiling plinth with liquid nails
Fillet or ceiling plinths are designed to hide defects obtained during the repair process and give the interior an appropriate designer look.
You can choose any option you like of these decorative elements, which are made from:
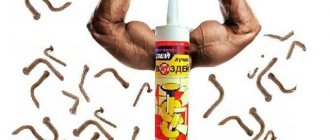
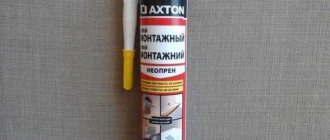
Various adhesives are used to stick it on. But the most suitable for any baseboard element are liquid nails. This adhesive composition does not harm the ceiling elements; it has a good attractive force to hold the cornice. There are two types of liquid nails:
- acrylic - used in rooms not subject to humidity, environmentally friendly;
- neopropylene - the composition contains organic solvents, which is why there is a pungent odor. They are used in well-ventilated areas, they are not afraid of moisture and cold, and they secure any load.
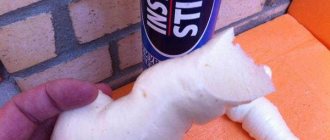
The advantage is that when using liquid nails to stick the baseboard, you can do it quickly, without wasting time on fixing the molding.
Where is it better to mount it - to the floor or to the wall?
The presence of two perpendicular planes determines two options for fixing the floor plinth. The natural preference will be the simplest and easiest method. The easiest way is to attach this finishing element to a surface that will accommodate fasteners with less labor:
- In houses made of timber with concrete floors and cement screed, it is recommended to prefer fastening the plinth to the wall;
- In houses made of foam concrete and brick with a wooden floor, it is wiser to “drive” dowels or nails into it.
In order to attach the plinth to the floor with a concrete screed, to the walls made of foam concrete, you will first have to drill holes for plastic dowels with a hammer drill. The spacing of the points for installing fasteners determines the type and degree of unevenness of the base and the geometric parameters of the slats. The most common distance between the fixation points of both the baseboard itself and the strips or clips for mounting plastic slats is a minimum of 30 and a maximum of 40 cm.
The choice of mounting plane depends on the technical characteristics of the base
Attention. On walls that are finished or only leveled with plaster, on partitions constructed using plasterboard, on structures lined with soft finishing stone, on chipboard boards, the plinth will not hold firmly. In such cases, it is recommended to choose the floor as the basis for fixation.
If for some reason attaching the plinth to plasterboard or to a chipboard panel is the only possible option, for fixing you need to purchase special self-tapping screws designed to work in this material, or finishing nails with zinc coating.
It is generally advisable to place the attachment points on the metal elements of the frame if it was used as a structural support.
Gluing process
Before gluing, it is necessary to correctly select liquid nails of suitable quality.
This type of nails is the most universal, but if necessary, they can be replaced with glue 88. They can also be used to fasten most coatings; its distinctive feature is its resistance to moisture.
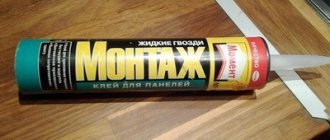
The best brands of nails are “Titan”, “Anti”, “Dragon”, Moment Montazh, “Master Klein” in a cylinder, “Krass”. A good brand is “Profi Master”, produced in jars from one to three kilograms.
To attach to the flooring and wall, the following equipment is required:
- saw - hacksaw;
- yardstick;
- a special gun for a bottle of nails;
- hammer;
- spatula;
- rubber knife.
To simplify the process of screwing fillets into the corners of the room, it is recommended to buy a miter box, but you can do without it.
It is replaced with a homemade template and markings are applied on it. Fillets are also produced that are glued without tools; they are much easier and faster to attach.
Is it possible to change the baseboard without ruining the wallpaper? It's certainly doable. However, if there is an idea to change the wallpaper, then you should wait until gluing.
Otherwise, it will need to be peeled off, which can harm it (mainly made of wood). For pre-treatment, it is necessary to completely remove dirt and dust from floors and walls, and clean the joint where the material will be attached.
Next, measurements are taken and marks are placed in accordance with the footage of the wall. It is very important to take into account all protruding parts and corners to avoid problems during gluing.
Peculiarities
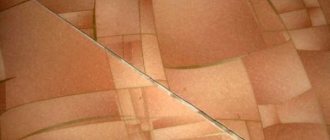
Installation using adhesive is very quick. It is used if all surfaces of the room are almost perfectly level, otherwise the profile will look unsightly and will gradually begin to peel off.
Liquid nails (neoprene or acrylic), special mixtures made on the basis of polyurethane, acrylic putty (allows you to remove small irregularities), and a universal polymer adhesive composition are suitable for the job. Glues “Moment”, “88”, “Dragon”, “Titan” are often used.
Working with liquid nails made on the basis of neoprene components requires effective ventilation of the room. The unpleasant smell in the room after installing the panels will disappear after a few days.
Advantages and disadvantages of gluing skirting boards
The baseboard is needed to hide the unsightly gap between the wall and the floor material. It is this that gives the room a finished look after renovation. The choice of installation method for floor skirting depends on many factors. Among them are the degree of evenness of the walls and the type of material of the planks.
The easiest way to install wood and plastic products is with liquid nails - quick-setting glue. This type of gasket is universal and can be used even by beginners.
The advantages of the method are:
- eliminating the risk of mechanical damage to the wall, floor, and the appearance of dents, which is very often observed when drilling;
- reliable fixation of the element in a strictly designated place;
- high installation speed;
- the possibility of using liquid nails even with high humidity in the room;
- economical composition - low price, low consumption;
- seam elasticity, no crumbling, complete waterproofness;
- Suitable for any materials - from wood, natural stone to artificial.
This installation technology also has disadvantages. Gluing will not work if the wall surface is uneven. The appearance of the baseboards will be unaesthetic - they will become wavy, quickly move away, and water will begin to get into the holes when washing the floor. Even the best quality adhesives will not help avoid such troubles.
Of course, you can additionally use nails, but the appearance of the room will suffer. It is better to level the walls immediately, especially if a wooden plinth will be attached. In addition, the planks can be plastic or MDF, and the latter’s properties and fastening technologies do not differ from those of wood.
Wood planks
Wooden skirting boards are currently used much less frequently than plastic ones.
It would be a good idea to purchase a plank made of a material identical to the floor covering; for example, a wooden one is ideally combined with parquet of the same type of wood. If necessary, they can be glued to linoleum, laminate or plank flooring. Having purchased nails and accessories, you need to properly shorten the baseboard. This can be done with a hacksaw directly after finishing the measurements of the walls of the room.
The planks are cut in the form of strips of a specific length. Corner elements should be cut to form an angle of forty-five degrees.
First, shorten the first plinth, then attach it to the next one. Helping to hold the bar with your hand, saw off a piece so that a gap does not form at the joint.
Then we begin to attach the products:
- We take the first plank, turn it in our direction, with the part applied to the wall and floor;
- cover with drops of nails, making indentations of three to five centimeters between them. We perform such actions for narrow slats;
- wide ones are covered with nails continuously in the form of waves so that the adhesion is stronger;
- when the manual contains information about allowing some time for the adhesive to dry, this is not always necessary; generally, a product treated with liquid nails can immediately come into contact with the wall and floor;
- the beginning of pasting should be carried out from some corner, it is recommended from the largest wall;
- attach to the wall very carefully, it is better to be as precise as possible, mainly in height, so that no adhesive stains remain on the wall covering;
- press down on the baseboard, holding it for some time (specified in the instructions) to speed up adhesion;
- after ten to fifteen minutes the plinth will stick well, the glue will dry;
- then do the same actions with other parts along the entire length of the walls of the room.
Sometimes the outer part gets dirty with nails. Frozen nails, once dry, are difficult to erase, and therefore it is recommended to immediately remove drops of glue with a wet cloth. You can also clean off traces with a rubber spatula or any hard spatula.
At the end of the work, liquid nails are applied using a spatula into the cracks between the joints.