What are liquid nails
Previously, craftsmen used a cement mixture or materials based on them to lay ceramic tiles. The result turned out to be durable; the cladding could last for decades. But the number of advantages of this option ended there. Among the disadvantages were a huge amount of construction dust during installation, the presence of a peculiar aroma and heavy soiling of the room. Cladding the floors and walls became a very labor-intensive process. With the advent of special tile adhesive, this process has become significantly simplified. With it, it became possible to glue ceramics to various materials, but without the negative consequences of repairs. But still, before work, careful preparation of the foundations was necessary.
Therefore, special tile adhesives have been replaced by a newer product - liquid tile nails. This product can be called universal, since it allows you to work with various materials and substrates; it can even glue ceramics and natural stone. It allows you to cover the surface as quickly as possible, simply, without dirt and dust. After hardening, this glue becomes denser and stronger, providing good adhesion for a long period, like ordinary nails.
Which composition to choose?
If you decide to use liquid nails for tiles, then choose the appropriate option:
| View | Surface |
| Composition with an aqueous solvent that dries quickly | Ceramic |
| High humidity resistant adhesive | Bathroom |
| Heavy Duty | Heavy tiles |
| With organic solvent | Concrete, brick |
When purchasing a specific liquid composition, pay attention to such things as:
- binding the adhesive base to the surface;
- How is the location of the glue application located (vertically, horizontally);
- where the work is carried out (internal or external);
- How long does it take for the adhesive base to harden?
If you follow simple rules correctly, ceramic parts will adhere perfectly to such an adhesive base.
Types and characteristics
After hardening, liquid nails acquire high strength and resistance to deformation. When applied, they are able to penetrate into various crevices, which ensures good adhesion. Liquid nails are divided into two types:
- Neoprene - contains an organic solvent.
- Acrylic - water-based.
When choosing, be careful, because the differences in composition and characteristics are significant. The first one has a pungent and unpleasant odor and contains harmful substances, but the glue is more resistant to moisture (bathroom option) and dries faster.
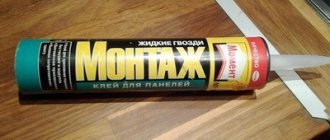
Types of Liquid Nails
The second type is environmentally friendly, but not resistant to moisture and is intended for gluing materials with high roughness. And one more feature - it can withstand temperatures only up to 40 degrees.
Types of glue
Liquid nails are sold in two varieties depending on the composition and properties:
- Acrylic. The base is acrylic in the form of a water emulsion. They are non-toxic, completely safe for humans, and can be used even indoors because they are odorless.
- Neoprene. It is based on polymer components and organic solvents that are harmful to health. When using, do not forget about personal protective equipment and thorough ventilation of the room.
The degree of adhesion of neoprene adhesives is much higher than that of acrylic adhesives. Solvent-based liquid nails quickly set on substrates, are durable, and are capable of gluing even smooth, glossy materials. Neoprene adhesives are more suitable for working with tiles in the bathroom, since they are the most resistant to humidity and do not deteriorate due to temperature changes.
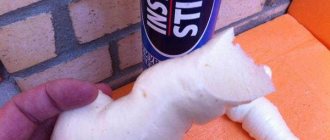
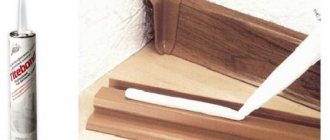
Construction adhesive Neoprene in a white factory bottle
Requirements for tile adhesive
Before tile adhesive became widespread, the method of laying on cement or concrete was used. This imposed certain restrictions on the work with such a solution, and also influenced further dismantling.
But glue has a number of advantages that cement cannot boast of:
- Glue is a more durable (for tiles) material.
- It is much easier to dilute the glue to the desired condition than to prepare a concrete mixture - there is a risk of pouring it a little and getting something that is not what you need.
- When working with concrete mixtures, the material consumption is much greater, and the price of the components is approximately the same. It turns out that laying on concrete is much more expensive.
- There are only 2 concrete mixtures on which tiles can be laid. But tile adhesive is presented on the market in a very wide range.
Tile adhesive has certain characteristics, based on which it must be selected. This:
- Adhesive properties.
- Plastic.
- Setting speed.
Advantages and disadvantages
The adhesive composition of liquid nails has both positive and negative qualities.
It’s worth starting with the cons - these are:
- Strong unpleasant odor.
- Not suitable for application at low air temperatures.
- It can only be applied in rooms where there is good ventilation, since the composition is toxic.
The list of advantages included many more characteristics of the glue:
- Allows you to glue tiles to walls of any degree of porosity.
- Liquid glue has a special composition that quickly hardens within 10-40 minutes.
- It is used for sealing seams and joints in rooms with high humidity, so it is suitable for the bathroom, kitchen, and swimming pool.
- The high strength of the substance guarantees the durability of ceramic or other material finishes.
- Provides ease of use, which is a huge plus for inexperienced craftsmen.
Technology for installing tiles on gypsum boards
In this part of the process of laying tiles on drywall there are practically no differences from the usual work algorithm. Many people know how to lay tile cladding correctly. The prepared solution must be applied to the base with a notched trowel. This will create grooves of equal depth and distribute the glue evenly under the ceramic. The quality of adhesion of the cladding to the base depends on this.
After lubricating the wall with the solution, you should perform the following steps:
- Press the cladding fragment firmly to the surface. To increase the strength of the connection when laying tiles on drywall with your own hands, you need to lightly tap each element with a rubber mallet. The same technique is useful when aligning adjacent fragments.
- To glue the tiles evenly, you need to insert plastic crosses between the fragments.
- After laying ceramic tiles on drywall is completed, the coating must be dried for the period specified by the manufacturer for the specific brand of adhesive. Remove the support bar and lay the very bottom row (made of cut ceramics).
- Remove crosses. Treat the laid layer of tiles with a grouting compound. Jointing can be done with a rubber spatula, rubbing the mixture into the gaps between the masonry elements.
- After the grout has dried, coat the facing seams with water-repellent varnish. This is true if tiles are glued to drywall in a bathroom, swimming pool, sauna or other room with a constantly high level of humidity.
Laying tiles on drywall must be carried out in compliance with a technological break. To do this, every 4-5 rows you need to stop working for about 1 hour. During this time, structural stresses arising in the base are relieved. After this, you can lay the next few levels.
If a home craftsman knows how to lay tiles on drywall, he can easily do without the services of repair companies. This significantly saves time and money spent on repairs.
In fact, there are no special secrets in how to glue tiles to drywall. The main difficulties lie in properly preparing the base for finishing. But the process itself occurs in the same way as under normal conditions.
How to properly prepare the surface?
After constructing the frame, many people wonder whether it is necessary to putty or whether the surface needs to be primed. All joints of sheets and places of fixation must be puttied. The surface must be smooth, without cracks, depressions or holes. This forms the solidity of the structure and gives it stability. It is necessary to choose a special putty for drywall. Preparing drywall for tiles does not take much time, since all materials dry quickly.
Then a primer is applied that is compatible with the gypsum board and the selected adhesive. This procedure is necessary to achieve better adhesion. The entire surface of the wall must be covered with primer. It is applied with a roller or wide brush in several layers.
To glue tiles to drywall, prepare the adhesive mixture according to the instructions on the package. For better adhesion, the solution must be applied to the surface of drywall and tiles. Since the tiles are laid on a flat wall, the thickness of the adhesive may be the minimum specified by the manufacturer. The maximum layer of solution is 5 mm.
Costs for purchasing materials
Considering the costs of the upcoming renovation, you need to keep in mind: they consist of three components: the cost of tiles, glue and moisture-resistant drywall. Having determined the price of materials, it is not difficult to plan your budget in advance.
You can buy Ceresit CM 17 glue for 1,250 rubles. for 25 kg. Consumption varies from 1.8 to 4.7 kg/m2, which means that the cost of glue will be 90-235 rubles. per m2.
You can order moisture-resistant plasterboard for tiles in the bathroom for 345 rubles. per sheet measuring 2.5 x 1.2 m. This is how much Knauf products cost.
It’s easy to calculate: per sq.
m of drywall will have to pay 115 rubles. Bathroom tiles produced by a well-known brand cost from 214 to 1300 rubles per piece. or 152-929 per square meter. data-matched-content-ui-type=”image_stacked” data-matched-content-rows-num=”2″ data-matched-content-columns-num=”3″ data-ad-format=”autorelaxed”>
White or gray tile adhesive – which is better?
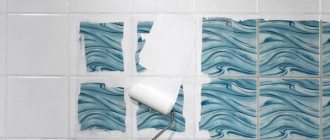
As a standard, both white and gray tile adhesive are made from medium and high grades of cement. In terms of strength, hygroscopicity and other characteristics, adhesive masses can be the same. The question then arises: what is the difference between white and gray tile adhesive? The thing is that materials such as slate decorative stone, artificial or natural marble and some types of glass, when facing, can take on the dark color of gray glue and, accordingly, the material loses its attractive qualities. In addition to the above-mentioned facing materials, wall mosaics are also laid on white tile adhesive.
Mosaics are laid only with white tile adhesive.
Selection Basics
This market segment is packed to capacity, so there is a choice. Different brands differ in technical characteristics, indications for use (and contraindications). Choose brands of liquid nails intended for use in rooms with high humidity (this should be written on the label). Among all the diversity, we have chosen four of the most worthy representatives.
| Name | Volume, ml | Type | Peculiarities |
| Titan WB (WB) - 50 | 310 | Acrylic | A specially designed brand for ceramic tiles. Time for complete setting is 2 days. |
| Solvent Free | 163 and 296 | Resistant to low temperatures. Correction time – 30 minutes. | |
| Teb Surround | 310 | The cheapest of those presented. Ecologically pure. Large tiles cannot be glued to it. | |
| Heavy Duty | 300 | Neoprene | Super durable, absolutely moisture resistant. Resistant to negative temperatures. Toxic, be sure to use a respirator when working. |
The last option is the most durable analogue. It allows you to glue large tiles, but is also much more expensive than others. To decorate an entire bathtub with it, you will need an impressive amount. If you have the means, don’t hesitate and take it – it’s the most durable and reliable analogue.
Consumption
By carefully reading the instructions, you can find out about the required composition consumption.
However, when purchasing liquid nails there are a number of factors to consider:
- How smooth is the working surface of the room? During the leveling process, you can determine the required amount of glue. With increasing deviations from the norm, the amount of costs will increase;
- Tiled features. If covering a large area, more mixture will be required. Gluing a small smooth product will require a small expenditure of funds;
- Experience, installation speed.
Glue selection
When tiling a bathroom, you should choose an adhesive that can easily withstand high humidity. It is also important to consider the size of the tiles being attached: for porcelain tiles and large elements, it is worth buying liquid nails with enhanced adhesion. If you have to stick elements on concrete or brick, it is better to purchase neoprene-type liquid nails; for drywall, you can use acrylic compounds.
Also, when purchasing, you need to pay attention to the following indicators:
- drying speed;
- suitability for indoor or outdoor use;
- temperature regime;
- fire safety;
- smell.
How to choose the right one
The choice of composition is carried out depending on the type of work and the characteristics of the finishing materials used.
Please pay attention to:
- composition (without chalk - more durable, without acetone and toluene - non-toxic);
- appointment;
- consumption;
- speed of drying;
- moisture resistance.
You should not purchase products from an unknown manufacturer. It is necessary to carefully study all the data about the product and listen to the recommendations of the shopping center consultant.
Ready-made (dispersion) tile adhesive
Ready-made tile adhesives are very popular in Europe. Ready-made tile adhesive is a dispersion of water-based polymers. Such glues harden due to the evaporation of water from the mixture. Ready-made tile adhesive is a dispersion paste that has a number of advantages over cement-based tile adhesives. Firstly, it is impossible to prepare ready-made tile adhesive incorrectly. It is already ready for use! And, secondly, the finished glue can be used on objects with no access to water.
Dispersion tile adhesives are usually white in color and can be used on any stable mineral substrate, as well as on deformable ones such as drywall. And due to the absence of sand in the composition, such adhesives can be applied in a very thin layer, which is often required when laying mosaics. One of the disadvantages of ready-made adhesives is the fear of frost, which means such adhesives can only be used indoors.
Also, not all ready-made adhesives can be used in damp rooms, for example, in the bathroom. For wet rooms, ready-made adhesives “Litoacryl Plus” or “Drauf + Sitzt Wasserdicht” are suitable. Ready-made adhesives are very elastic, so dispersion tile adhesive can be used to glue any cladding - glass mosaic, porcelain tiles, natural stone (impervious to prolonged contact with moisture), earthenware and porcelain tiles, and others.
Since there is no need to prepare ready-made tile adhesives, the room will remain clean. This is very important if the work is carried out in a room where people live at the time. In general, ready-made adhesives are the optimal solution for domestic construction. The principle of applying ready-made tile adhesives is no different from working with cement adhesives. You will also need a notched trowel, and the thickness of the layer will depend on the format of the tile.
The marking of ready-made adhesives is the same as for cement ones with one difference - instead of the letter “C”, ready-made adhesives are marked with the letter “D”, which means “Dispersion”. For example, D2TE adhesive is a dispersion reinforced tile adhesive with increased open time and no tile slipping.
How to glue
Before starting facing work, it is necessary to prepare the surface, clean it of remnants of previous finishing, dirt and other substances or grease. Then apply a layer of primer depending on the wall material. After the primer has dried, you can glue the tiles using liquid nails. But first you need to take into account the instructions indicated on the packaging and the recommendations of the manufacturer.
It is important! Some types of glue can be toxic, so you need to follow safety rules and wear a respirator.
You also need to pay attention to the other data indicated on the packaging, especially during the period of complete hardening.
Advice! To ensure economical glue consumption and ease of application, you can purchase a special construction gun that holds a can of liquid nails.
To glue tiles to liquid nails, you must follow these basic steps:
- Apply adhesive to the facing material.
2.Then lean the tile against the wall.
3. Hold in this position for several minutes.
4. If large tiles are used, you will need a rubber hammer for uniform, high-quality fixation.
5. After laying the facing tiles has been completed, you need to give the glue time to dry completely.
6. The procedure for grouting the joints of the first row should be postponed until the very end of installation.
It will be useful for craftsmen to base their work on the general rules for finishing walls, floors and ceilings using liquid nails.
Among them are the following important points:
- When working, only dry and clean materials should be used, and this applies not only to the base, but also to the tile itself.
- To ensure reliable adhesion, you need optimal and strong pressure on each element for two to three minutes.
- It is necessary to ensure an even distribution of pressure over the entire surface of the material.
- For most types of liquid nails, there is a standard period of complete drying after 24 hours. Liquid nails completely harden after a week.
- It is also necessary to grout the joints a week after the glued cladding has completely dried.
- It is not recommended to use liquid nails for laying ceramic tiles on the floor.
It is important! In order to create an even seam during the laying of ceramic tiles, you need to use special construction crosses. It is not recommended to remove them immediately after installation; you need to wait 3 hours. After this you can delete them. Only after the liquid nails have completely cured can the joints be processed and filled.
Bathroom tiles
For each type of surface, a specific adhesive structure is used. In the bathroom, it is better to use neoprene liquid nails for ceramic tiles. Glue with a water-based base does not withstand high room humidity.
Liquid glue will cope perfectly with temperature fluctuations in the bathroom. The main thing when using a liquid adhesive base is that the surface on which the composition is applied is dry and grease-free.
Installation with nails is carried out as follows:
- the mixture does not need to be pre-prepared, it is simply applied to the surface;
- prepare the surface (clean, degrease, eliminate unevenness);
- apply the composition to the ceramics;
- if the tiles are laid in a row, then use markings (plastic stops);
- After applying the glue, press the ceramic elements against the wall.
Gluing tiles to liquid nails is not at all difficult. The work process does not require any special skills - everything can be done independently.
Tiled elements glued in this way hold tightly and are almost impossible to tear off.
Decide which liquid nails to use to glue ceramic tiles in the bathroom based on your preferences.
Seam processing
If the tiles are laid in a room with high humidity, standard joint grout will not be enough. Water will penetrate through it, which over time will lead to damage and warping of even moisture-resistant drywall. Therefore, a special varnish or sealant for bathtubs is applied on top of it.
USEFUL INFORMATION: Installation of partitions from gypsum plasterboard: step-by-step instructions, price per m2
The whole process is shown in detail in the following video. If, after reading the article and watching the video, it turns out that certain points are not described in sufficient detail, ask questions in the comments. An experienced master finisher will answer you.
Service life: how to extend
Every person who has started a renovation wants to know in advance how long the finished cladding can last. And, of course, he hopes for as long a period as possible. Liquid nails are exactly the fastening material that can provide high-quality, reliable, strong and durable results. But it’s not enough to just find high-quality glue or liquid nails; you also need to follow the basic rules for its use and application.
You can also be guided in your work by the following basic rules that can increase the service life of the adhesive:
- If errors occur in laying tiles, errors must be corrected immediately before the glue hardens.
- In the room where repairs are taking place, it is necessary to maintain a suitable air temperature. Each manufacturer of liquid nails usually indicates the optimal temperature on the packaging. It is under these conditions that the glue will connect the facing materials with the base as efficiently as possible.
- It is not recommended to overheat cans of liquid nails. Otherwise, the substance in the bottle may dry out.
- It is necessary to ensure that liquid nails are stored in a place with low humidity and protected from water. Therefore, you should not leave it outdoors. The glue may simply deteriorate.
How long will it last?
When choosing an adhesive, you want to know how long the tile will last and whether it will fall off after a short time. Is it possible to glue tiles with liquid nails so as not to have to return to repairs for several years? To make the glue last longer, follow these rules:
- do not wait for the glue to completely harden if you need to improve the quality;
- It is advisable to perform work at normal temperatures. This way the glue adheres better to the ceramic surface;
- If the glue overheats in the can, it will lose consistency (dry out).
Store the package of liquid nails in a dry place. Do not leave spray cans outdoors and avoid contact with water. Otherwise, not only the packaging will suffer, but also the contents themselves.
Which tile adhesive is suitable for finishing plasterboard with tiles?
Much depends on the room. In the bathroom and similar rooms, which are characterized by high humidity, tiles on drywall are laid with epoxy or cement elastic thin-layer adhesive. If we are talking about laying facing material in a relatively dry room, then, in addition to the above, you can also use compositions based on synthetic resins. In some cases, tiles on drywall can be laid with gypsum adhesive designed for gluing drywall to load-bearing walls.
Attention!
Even when using moisture-resistant drywall and tile adhesive, in the bathroom, before tiling, a fiberglass mesh is mounted on the surface and a layer of moisture-resistant putty or tile adhesive with low hygroscopicity is applied.
What is “universal tile adhesive” and is it suitable for the bathroom?
The term “universal tile adhesive” usually means an adhesive composition of average quality. That is, universal tile adhesive is not a composition with such a set of characteristics as moisture resistance, resistance to temperature changes, vibration and aggressive environments. This is a standard adhesive mixture for tiling normal surfaces under normal conditions. When choosing and purchasing adhesive, you should never immediately make a purchasing decision based on the label on the package “universal tile adhesive.” You should more intelligently find out the specific properties of a particular adhesive composition.
Important Tips
- If you doubt whether it is possible to lay tiles on drywall in a new home, do not experiment, but seek advice from an experienced builder. He will dispel doubts or, on the contrary, recommend waiting for the house to shrink. This precaution will save you money and time.
- Laying tiles on drywall that does not have moisture-resistant properties is not allowed. Gypsum fiber sheet (GVL) is best suited for damp rooms.
- How to lay tiles on regular drywall (GKLV): attach it not to the wall, but to guide strips located at a distance of 40 centimeters from one another. Depending on the thickness of the sheet, the distance may be reduced. The backing prevents the drywall from swelling when it gets wet.
- Some craftsmen use polypropylene plaster mesh instead of planks. It reliably protects drywall from deformation. The mesh is installed using PVA glue and metal staples.
- Drywall is coated with a primer in two layers: apply the first layer, wait for 45 minutes until it dries, then apply the second layer.
- An option to make the wall more durable is to install gypsum plasterboard using a two-layer method. Twice as much material is consumed, but nothing threatens the reliability and durability of the wall.
Important! Beginning home craftsmen ask: is it possible to glue tiles onto drywall if it is too thin? Answer: it is possible, but it is recommended to install the sheets in two layers.
Fastening MDF panels
Using liquid nails, you can glue MDF panels to the wall. To begin with, they carry out preparatory work: leveling the walls with putty and a spatula, removing contaminants.
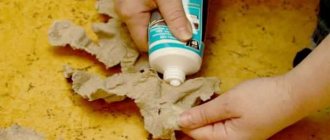
Working with MDF panels and liquid nails
Only then do the following steps:
- Using a tape measure, measure the height of the wall on which the MDF panels will be attached;
- Using a felt-tip pen and a square, mark the areas that will have to be cut;
- Apply glue in dotted lines at a distance of 10 cm;
- The MDF panel is tightly applied to the wall, and then torn off so that the glue is weathered for 5 minutes, and the MDF panel subsequently does not peel off from the wall;
- The MDF panel is attached to the wall and fits tightly to it by tapping.
Installation of MDF panels is simple if you use high-quality materials and step by step carry out all stages of repair work.
About the selection of materials for installing tiles on gypsum boards
Drywall is a very convenient material for leveling surfaces. It does not require labor-intensive and messy processes associated with putty or screed. Very often, gypsum boards are used to finish floors and walls in hallways, bathrooms and kitchens. These are the same rooms where you will later need to glue the tiles to the drywall. In this regard, apartment owners often have questions about whether it is possible to lay tiles on drywall, and how to do it correctly. There are several mandatory rules:
- Much of the success in the installation and subsequent operation of ceramic cladding depends on the choice of materials. GKL manufacturers sell several varieties of these products. Among them there is also drywall with special impregnation of water-repellent substances. Such sheets are marked GVLV and have green cardboard surfaces. This type of material is most often chosen for finishing a bathroom. But in the hallway and kitchen they usually prefer gypsum plasterboards that do not have hydrophobic properties. One of the rules for choosing drywall for tiling involves using exclusively GVLV as a base.
- The next nuance is the increased load on the partition or floor made of gypsum plasterboard. Tiles are quite heavy material. According to European standards, to install tiles, the plasterboard base must be two-layer, and the pitch of the frame profiles cannot exceed 40 cm. This will provide the necessary rigidity to the wall on which it is planned to install the tiles.
- Another important component is the adhesive composition. When choosing it, you need to focus on the purpose of the mixture. It should be suitable for working with both tiles and plasterboard. Cement-based adhesives, special dry mixtures or “liquid nails” are suitable.
- A lot depends on the ceramics itself. Your choice should be made on tiles whose sides do not exceed 33 cm. This is the maximum allowable size so that the load can be distributed evenly over the surfaces being connected.
If you follow these simple but necessary rules, the answer to the question of whether it is possible to glue tiles to drywall will be positive. Ceramic tiles on drywall can be installed no less reliably than on a concrete partition or floor screed.
Useful tips
- Store liquid nails in a cool place and make sure the packaging is completely sealed before use. Otherwise, the glue could already lose its properties.
- Do not apply liquid nails in a thick layer. This will not improve adhesion, rather the opposite: the composition will not be able to dry evenly, and the quality of adhesion will deteriorate.
- Do not glue wet surfaces: water will interfere with bonding.
- To prevent excess glue from staining everything around, protect nearby surfaces with masking tape.
How to remove liquid nails
Sometimes, as a result of careless tile laying, liquid nails may accidentally end up on other surfaces. Therefore, you need to know how to properly remove liquid nails.
If the composition is still in a soft consistency and has not yet hardened, then it can be easily removed from the surface. Can be wiped off with a sponge or cloth. But you need to act immediately before the hardening process begins.
If you notice the remains of liquid nails on the surface after they have had time to dry, then you can use one of these suggested options:
- Carefully, using a trowel, scrape off any remaining dried adhesive from the base.
- Use acetone for cleaning if a small amount of the substance remains on the surface.
- You can use a hair dryer and heat the composition to +50°C. After softening, try to wipe it off with a cloth.
Note! To remove liquid nails from skin, you can use Vaseline or oil. Then wash the body area thoroughly with soap and water. It will help eliminate any leftovers.
How to remove dried glue
During operation, glue particles may get onto the front side of the tile. To remove them, you can use one of the following methods:
- fresh glue is wiped off with a wet sponge;
- dried glue can be removed with a special cleaner, which is sold in construction stores;
- you can wait until the liquid glue dries slightly and then scrape it off with a spatula;
- You can heat the stained area to 60 degrees, and when the glue softens, remove it with a cloth.
It is better to first try to clean the tiles using gentle methods, and only if they do not help, resort to more aggressive methods. Do not forget that even micro-scratches from a spatula become clogged with dust over time and spoil the appearance of the cladding.
Gypsum stone - recommendations for gluing
As with the above repair work, it is important to properly prepare the work surface - correct unevenness, remove dirt, treat the wall and gypsum stone with an acrylic primer.
After this, an adhesive mass is applied to the stone. Decorative gypsum tiles are lightweight and can be glued with anything, including liquid nails. Apply glue to the entire surface using a comb spatula. By pressing the gypsum stone against the wall, make sure that it does not wobble. You need to lay it out one by one, taking into account the size. After complete drying, the decorative gypsum stone is painted.
Is it possible to glue tiles with liquid nails?
Due to their wide range of applications, liquid nails are considered universal. This glue can bond any surface, both porous and smooth.
Manufacturers are constantly experimenting with formulations. The range on the market is updated with a clear focus on application: for glass and plastic, for gypsum tiles and artificial stone, for wood or metal.
Over time, experts began laying tiles with liquid nails, taking into account the many positive aspects of this method.
Kiramiku
Ceramic tiles adhere perfectly to such adhesive, but the price of the product can become an unaffordable luxury when processing large areas. More often, the composition is used for partial repairs, which involve gluing several segments of ready-made cladding.
An important point is the treatment of the bonded surfaces. If complete installation is carried out, the walls or ceiling are cleaned of dust and grease and primed. If you need to return some elements to their original place, remove the remaining mortar or glue from both surfaces, clean them thoroughly and only then glue the tiles onto nails, press firmly and hold for several seconds.
If any remaining product extends beyond the seams, you must immediately wipe them off with a dry cloth. Once it sets, it will be quite difficult to remove the glue.