Rules for working with plastic
To ensure that the creation process delivers only pleasant sensations, follow these rules:
- It is advisable to wear gloves when working with clay.
- Upon completion of use, plastics, hands, tables and other objects that were used must be thoroughly washed.
- It is not recommended to use plastic or polymer boards.
- All additional tools for working with plastic cannot be used for other purposes (boards, knives and other tools should not be used for cooking).
- When working, take into account all the rules and advice from the manufacturer regarding the storage, hardening or baking of clay.
Metallic paints
Metallic or iridescent acrylic paints (or inks) are used for polymer clay in the same way as regular acrylic paints. But with their help you can create interesting effects, such as “aging” the surface or “crackle” and use it in the “Mokume gane” technique.
If you want to create a crackle effect, you should test the paint first because some paints do not crack when stretched, but rather stretch.
Metallic inks can be used in much the same way as acrylic paints.
Using paints to work with clay
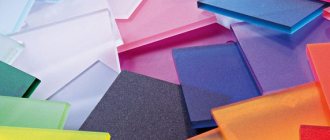
Despite the fact that there is polymer clay in the desired color, and you can do without additional coloring compounds, it is the paint that allows you to make the product brighter and improve the quality and appearance of the product. Several types of dyes can be used for coloring:
- acrylic;
- oil;
- ink;
- aerosol;
- crayons and pencils;
- powder.
The amount of paint used depends on the desired color. In order to give the product a delicate and pastel color, it is necessary to use a minimum amount of material, and in order for the color to be bright and saturated, the amount of material can be safely increased.
After adding the coloring material, the clay must be kneaded thoroughly, otherwise the product will end up with uneven, colorful stripes; such variations are also used in jewelry and products.
When using several color options, paint must be selected from the same type and manufacturer in order to avoid combining different densities, colors and different characteristics. Manufacturers provide tables that help achieve the desired color by combining and mixing available paints.
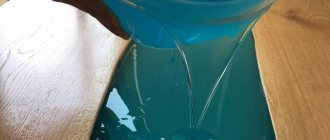
Special ink for plastics
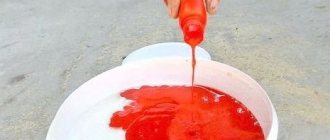
Coloring polymer clay with ink is not a common practice. And not all liquid dyes are suitable for this.
Suitable inks include a special alcohol ink called Alcohol ink, used by artists and craftsmen. How do they look?
They are a concentrated alcohol-based dye. Their main property is that the ink becomes waterproof after drying, which, by the way, is perfect for polymer clay.
This bottle dye has a wide color range, including both bright intense colors and muted shades such as beige, brown, gray. Therefore, it can be used for various types of plastic.
But the great thing about this ink is that it is best suited for translucent polymers. When it is painted with any materials that contain pigment particles, the translucency is lost.
However, this does not happen when using alcohol dye, since it does not have pigments. And transparency is maintained even with strong ink intensity, with the exception of shades that are too dark.
Therefore, everything is fine with the use of alcohol inks, except for one thing that is worth knowing. If you overdo it with adding dye to the clay, the products may become sticky or areas with light spots will appear on them.
Characteristics of coloring compositions
Paint products are distinguished by their light resistance, which the paint labeling will help you understand. The lightfastness of paints is indicated by asterisks. The most suitable dyes are those with two or three stars.
For the base of the product, markings with a black square or a half-filled square are suitable - such colorful materials can get rid of the transparency of polymer clay. The white square indicates transparency, which will give the product the properties of cold porcelain. A crossed out white icon indicates that the colorant is translucent.
The difference between polymer clay and cold porcelain
Many people mistakenly believe that these are the same material. But in fact, there are significant differences between polymer clay and cold porcelain.
Polymer clay has a softer texture. Products made from it can polymerize in an oven at high temperatures or dry on their own - it depends on the type of material. It is not recommended to sculpt thin products from clay, as it is fragile. Ready-made accessories retain their appearance for a long time and do not absorb moisture.
Cold porcelain is more suitable for professional work. It can be rolled out very thin. This is a more durable material for sculpting flower arrangements; the finished petals will look lifelike. Porcelain dries on its own at room temperature.
Cold porcelain is afraid of moisture, so products made from it must be coated with a double layer of varnish.
Preparatory stage
Before working with polymer clay, you need to prepare all the tools you will need to paint the material:
- palette for paints;
- brushes;
- container with water;
- napkins or paper;
- sponge.
Before applying coloring materials, a primer must be applied to the clay. Priming the surface will allow you to achieve a more uniform and high-quality color when applying paint.
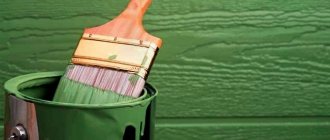
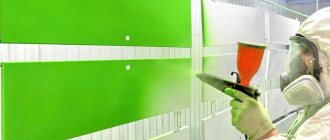
Aerosol paints for plastics
Some types of plastic crafts require uniform coloring. This is especially true for making dolls from polymer clay.
Spray paints, also called aerosols, provide such coloring and a smooth color transition.
These dyes have distinctive features from other materials. And they are as follows:
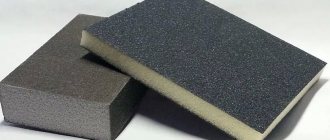
- Before applying spray paint, the surface of the plastic craft must be sanded and primed;
- The aerosol can be applied either outdoors or in a special well-ventilated room;
- The temperature outside or indoors should not be below +10 and above + 20 degrees Celsius. If the regime is violated, the paint will not adhere well and will stick;
- You can work with paint only with gloves and a respirator;
- Before using the aerosol, it must be shaken well;
- You need to spray the composition at a distance of 25-30 cm from the craft with even up and down movements;
- Apply no more than three coats of paint, leaving at least an hour of drying time between each coat.
In addition, when using aerosols for ceramics, it is worth remembering that they all come in different compositions. The label will always say what they are used for.
So, for example, if the composition contains acrylic or nitrocellulose, then these sprays are well suited for plastic. But car enamels will ruin the product, since their composition is not compatible with polymer clay.
Therefore, overall it is a complex dye. And it is not recommended for beginners to use it, despite the wide palette of colors.
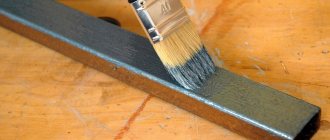
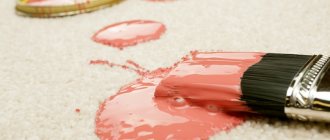
Acrylic paints
Painting with acrylic products has the widest application. As a material for painting, it is necessary to use high-quality artistic acrylic paints. It is better to take them for working with clay that does not require baking. However, if such material is available, several staining experiments can be carried out.
It is important to take into account the peculiarity of acrylic paint - darkening after drying. When you first experience working with plastic and paints, you need to practice using dyes on paper, paying attention to the color and the time spent on drying.
The main disadvantage of acrylic painting is that it dries quickly. However, there are options and work opportunities to help avoid this:
- The first option is a drying retardant. Additional tools for the job can be purchased along with the paints.
- Using a small amount of pigment on the palette to save drying material.
- To prepare more color, it is recommended to use jars that can be closed for the next use.
How to give the material shape, texture and color?
It is better to color polymer clay before molding products. To do this, you need to roll out the mass and sprinkle it with pigment, then knead thoroughly until a uniform shade is achieved. Suitable coloring agents include food coloring, cocoa, ground coffee and makeup paints.
You can paint the finished product, but the coating will wear off over time. To protect the color, it is recommended to coat such products with 1 or 2 layers of varnish.
To get an interesting effect, you can knead a piece of clay not completely so that the areas differ in shade saturation, or mix two different colors in the same way.
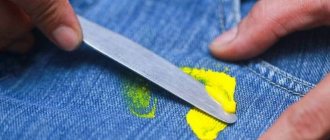
If you need to make holes in the products, you should not delay this process until the clay dries. Drilling into a cured object may result in a rough or sharp edge. It is best to let the clay become slightly crusty, mark the contours of the hole with a toothpick and, using rotational movements, alternately on both sides, drill a hole. How to do this quickly and accurately can be clearly seen in the video.
If the clay needs to be given a rough surface, then the salt technique can be used. To do this, roll the dried accessory in fine kitchen salt and place it in water. You can remove it when the sprinkles have completely dissolved.
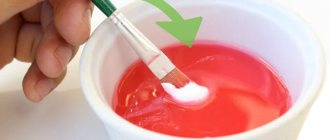
Oil paints for polymer clay
Oil paints are great for working with any type of polymer material. When choosing a paint, you need to pay attention to reviews of this product, the paint base (oil) and test results. To experiment, you can apply a small amount of paint to baked clay and leave the material to dry. A positive result will be the absence of stickiness of the paint a month after application.
Oil painting options allow you to create amazing details and jewelry elements:
- A small amount of material is used to make products in bed and delicate tones;
- Using a sponge or cloth, you can create the appearance of an antique surface. To do this, you need to apply paint to the product and remove most of the material using a cloth;
- The paint will help create an imitation of precious stones in the product;
- To create a “marbled” product, a colorful substance is mixed with clay before baking the decoration.
The main disadvantage of using oil-based dyes is the drying time. The complete period can take up to six months, depending on the size of the product and the amount of material used.
How to paint polymer clay products?
Polymer plastic is used for sculpting small sculptures, products and decorations. With the help of self-made sculptures you can add uniqueness and exclusivity to any interior.
Ceramic products help to complement and dilute the interior with elegant figures or decorations in any color scheme, emphasizing the individuality of the room or space. And to create unique polymer clay products that would perfectly suit your style or fit into the interior, you need to know how to use paint to add an attractive look, because the plastic itself is white.
Clay for interior decorations made at home is divided into two categories:
- the first option hardens by air drying;
- the second option is a material that needs to be exposed to high temperatures; it is baked.
However, any type of work requires accuracy and caution in the manufacture of the product.
Powder, crayons and pencils
You can create a metallic effect and additional colored elements that highlight the product using powder or crayons for coloring polymer clay.
Pearlescent powder gives details the effect of radiance and shine. Powder dye can be mixed with acrylic or oil paint base. The big advantage of using powder is its quantity, and you need to use very little material to get the job done.
Crayons and pencils are also used in small quantities. However, they require additional work. To use them, you first need to grind the coloring materials to a powder state. Pencils are used to create additional drawings and decoration elements.
How to make polymer clay at home - recipe No. 2
It is perfect for children, because it contains baby oil.
Take:
- 20 g baby oil;
- 200 g PVA;
- 200 g potato starch;
- 10 g hand cream or Vaseline.
Manufacturing instructions:
- Take a suitable bowl and add starch here first. Now add the liquid ingredients and stir.
- Set up a water bath. To do this, pour water into a suitable pan and place the container with the newly created mass on top. Place this structure on the fire so that the water in the lower pan gradually boils. And you will constantly stir the contents of the top one.
- If lumps begin to form, then remove the structure from the heat and stir the polymer clay until it becomes homogeneous. And if there are no lumps, then wait until the mass thickens and remove it from the heat.
- Then cool it and place it in a plastic bag. Leave the polymer clay in this state for half a day.
- Then you can start creating from it. And if you are not creating crafts for now, then store this mass in the refrigerator in a tightly closed bag or in a plastic container.
Aerosols for coloring clay
Aerosols as dyes allow you to paint clay in a variety of colors with smooth and neat transitions. Before using the aerosol, the clay is polished and coated with an acrylic base.
The main disadvantage of this coloring option is the price of aerosols. Therefore, this method of painting a product is used only by professional firms and specialists.
Working with polymer clay requires extensive preparation and time. To do this, you can study video tutorials and understand the basic rules and features of clay products.
The effort and time spent will reward the “sculptor” with exclusive jewelry, original accessories and unique interior details.
Ink
Due to the popularity of rubber stamps, there are several types of pigments and inks available today. Some are transparent, some are translucent, others have a metallic effect or iridescent color. Depending on the manufacturer, inks have different properties, and you need to know these characteristics when using them with polymer clay. Several ways to use plastic with ink and rubber stamps:
• Creating texture on unbaked plastic.
• Drawing on plastic using the ink itself.
• Toning liquid polymer clay.
• Tinting of translucent plastic.
• Toning layers of polymer clay using the Mokume Gane technique.
• Applying ink to layers of polymer clay using the Mokume Gane technique.
• Tinting shaving foam and applying it to unbaked beads to create an unusual texture.
• Apply drops of ink onto the shaving foam that covers the plastic to create a “marbled” surface.
Polymer clay made from starch and PVA
To make it you need to take:
- 200 gram glass of PVA glue (white);
- a 200-gram glass of corn starch (without changing the quality of the finished product, you can replace it with corn flour);
- a tablespoon (17 grams) of liquid Vaseline;
- 2 tablespoons (40 grams) lemon or lime juice;
- a tablespoon of rich hand cream without silicone (Nivea or perfect for children).
You also need to prepare a fireproof ceramic or glass mixing bowl, a plastic spoon or spatula and a silicone mat on which the final mass and polyethylene will be kneaded.
- Pour all the glue, Vaseline into a bowl and carefully add the starch. Combine everything well with a plastic spoon.
- Add lemon juice and stir everything thoroughly again.
- Place the bowl of mixture in the microwave at maximum power for 60 seconds. After half the time has passed, take out the mixture, but do not mix it.
- Take a silicone mat and coat it thoroughly with cream.
- Use a spoon to remove the dry crust from the mixture, which should be discarded. Place the remaining plastic and soft mass on the prepared substrate.
- Knead the prepared mixture with your hands. It must be stirred vigorously for at least 5 minutes. Its consistency should acquire density and elasticity.
- When the desired consistency is reached, roll it into a thick sausage and place it on a towel or thick cloth. This is necessary so that excess moisture is absorbed.
- Once cooled, wrap it in plastic wrap and place in a container with an airtight lid. You can work with the masses. It must be stored in a cool, dry place.
To obtain colored plastic, you can add dry food or oil dyes to it. It is better to do this after the complete mixing process. Store each color in a separate container or bag.
How to protect yourself from harmful substances
The basis of plastic is polyvinyl chloride, this material itself is not dangerous, but if the recommended temperature of 110 to 130 ° C is exceeded during baking, carcinogenic substances will begin to be released in large quantities. Among them is a slow-acting neurotropic poison - vinyl chloride, and in addition to it - gaseous hydrochloric acid and hydrogen chloride. The plasticizers that make up polymer clay are also harmful to humans when they evaporate. Therefore, when working with baked clay, you need to be very careful and not use a kitchen oven for baking, as well as other tools and surfaces prepared for eating and preparing food. It’s best to set up a workshop on the balcony or in the garage, and if the plastic burns, it’s easy to close the door to the apartment and open the windows.
Polymer clay from soda and starch
1 part baking soda;
- 1 part cold filtered water;
- 1 part corn starch (if replaced with potato starch, the color will be gray).
This mass is perfect for beginners. It is easy to prepare and convenient to sculpt.
- Mix the ingredients in a thick-walled saucepan.
- Cook the mixture over medium heat, stirring continuously until it thickens.
- Place the finished mixture from the pan onto a silicone mat and cover with a slightly moistened towel. Wait until it cools down a little.
- Knead the mass vigorously until it becomes sufficiently elastic and suitable for modeling.