Patterns on the walls in the apartment - photos, design ideas
A little lower we will present to your attention a large number of stencils for wall decor. Now we’ll show you what such wall decoration might look like. Watch and be inspired!
Patterns on the walls in the apartment - photos, design ideas:
Volumetric heart for the hallway Original kitchen
Bright bird
Flowers Laconic ornament Fairy-tale characters Tree
Large dandelions Cute sheep - ideal decor for a nursery Another idea for a nursery
Stencils for Wall Decor - how to make it yourself
Today's selection contains stencils and wall decor ideas. Textured painting is a very modern way to transform your home. The monotony of the coating is depressing, but the multidimensional layers are very creative. The whole question is how to apply them. Let's talk about this today!
By the way, it is not at all necessary to buy some fancy rollers and stamps. You can screw fabric onto a simple paint roller and get an original texture.
Handy stencils for wall decor
However, even without a roller, you can create a very interesting structure on your walls.
Use a large sponge or washcloth as a stencil for wall decor.
You can use rollers with bubble wrap, some kind of mesh or twine.
An old dust fan will help create a light, airy pattern on the wall.
Painting through tulle or mesh will make your walls look very impressive.
Tulle as a stencil for wall decor
By the way, you can create vertical stripes in fresh paint using brushes or brushes. The depth of the stripes can be changed by pressing the brush. The pattern will depend on the thickness of the pile and its rigidity.
You can make both vertical and horizontal stripes. Or you can combine them.
When painting walls, ordinary plastic film will help give a very interesting texture.
Related article: How to make potholders without a sewing machine using the patchwork technique: master class
Film as a stencil for wall decor
Using thin transparent paper you can decorate the walls like this.
Additionally, you can apply a patina over the paper.
In addition to abstract backgrounds, you can also experiment with normal stencils for wall decor.
Stencil for wall decor - scales
You can cut out stencils from thick cardboard or floral wrapping film.
Stencils for cardboard wall decoration
Stencil for wall decor - polka dots
Stencil for wall decor - monograms
You can even use some items from the kitchen as stencils.
By the way, the functional idea of a reusable stencil is made from canvas stretched on a stretcher. You can cut both simple and complex patterns.
Below I offer several examples of cutting stencils. You can print it and then transfer it to film.
Stencils for wall decor
Stencil with astronomical pattern
Stencil for wall decor - ornament
Stencil for decorating columns
Ornament for wall decor
Stencil for wall decor - quadrangular ornament
Stencils for wall decor - diamond pentagons
If you use several colors when painting through a stencil, you can get spectacular transitions along the walls.
Multicolor stencils for wall decor
In the end, I propose another original idea - a mountain landscape on the wall. Gradient with a transition from dark to almost transparent.
Stencil for wall decor with a landscape
To decorate walls using two-color painting, you can use ready-made stencils. You can print the stencils below by scaling them. If you know how to draw, then you can redraw the stencil onto very large format paper and then you will be able to decorate a large area of the wall.
Nowadays you can also print large format stencils in print shops. In terms of money it will be quite affordable. By the way, you can also order a slot, so that you can simply peel off the excess, leaving what you need. I explained it chaotically, but I think it’s clear...
Related article: 97 cross stitch patterns for towels
Below you see stencils for “Africa” wall decor. There are two of them, they differ in the width and size of the elephant. And also a stencil for the walls “Giraffes”.
How to make stencils
You can use stencils by cutting them out of paper with a craft knife, attaching them to the wall with tape and stamping them with a sponge and acrylic paint.
It is much more interesting to create your own stencils than to download ready-made ones. You can't show individuality that way. But, of course, among friends, if no one has seen them before, even common templates will be as original.
Video - how to make a single-layer stencil from a photo
Another option is that you can order a vinyl stencil from any company involved in outdoor advertising - they have special plotters and they will cut out a stencil from self-adhesive vinyl film for you. You can decorate the wall with a vinyl sticker or, again, use it as a stencil, stamping it with acrylic paint and a foam sponge. In short, there are a lot of options for applying a picture to the wall.
Video - DIY stencil for wall decor
Pavel Perederiy talks more clearly; watch his master class and your knowledge will increase significantly.
By the way, on my website you can also look at corner stencils or butterfly stencils.
increases
Stencil for wall decor “Africa”
increases
Stencil for wall decor “Savannah”
Stencil for wall decor “Giraffes”
increases
Stencil for wall decor “Tree of Love and Kindness”
Stencil for wall decor “Bob Marley”
Stencils for wall decor “Butterflies”
useful links
Good material on the technique of drawing using stencils is given on the page
ibud.ua/ru/statya/dekorirovanie-sten-trafaretami-100893
It tells about the types of stencils, the choice of location, and the rules for working with stencils. Recommendations are also given for those who want to make a stencil themselves.
Related article: How to get rid of paint smell after painting in an apartment
If you have a creative streak, then most likely you will not be satisfied with the availability of ready-made stencils. Moreover, most often they are offered to buy on special websites. There are some vague crafts in the public domain. So, there is a special guide for those who want to learn how to cut stencils. Address
naxolst.ru/trafaret/kak-sdelat-trafaret-svoimi-rukami-prodolzhenie.html
Come in and see how it's all done.
Many people probably tried to find free stencils and most often ended up on sites that sell them. So, we have found stencils that you can download just like that, without paying. Website address
getpattern.ru
Searching the site gives you a choice of the best stencils according to rating. The most downloaded by other users, as well as the most recently added. You can find something for every taste and different themes.
Well, one more guide on the technique of applying stencils to the wall. And also according to the method of cutting and preparing the stencil.
ideas-for-house.ru/kak-sdelat-trafaret-dlya-sten-2/
In this case, film is used as the base, not cardboard or paper. That is, such a stencil will serve for quite a long time.
DIY geometric patterns on the wall - ideas, photos
Only a few people choose geometric patterns for decorating walls, as they consider such a design to be too complex and too bright. But if you try to make a similar finish with your own hands, you will be surprised to realize that making geometric designs is very easy.
How to make such an original drawing on the wall:
- We level the wall - seal all the cracks and holes. This must be done, otherwise these minor defects will spoil the final appearance of the wall.
- We prime the wall and wait until it dries. Next, we take the painter and begin to create the outlines of the figures.
- After this you can start painting. To make the pattern beautiful, combine at least 2 colors. The wall will look even more beautiful if the pattern is applied in 3 colors or shades.
- Let the decorative material dry and you can carefully remove the tape. If, after removing the auxiliary tape, any imperfections are found, take a thin brush and carefully paint on everything.
Do-it-yourself geometric patterns on the wall - ideas, photos:
Delicate room design
Discreet minimalism Discreet minimalism Bright decoration of the room
Imitation of mountain peaks Do-it-yourself geometric patterns on the wall - ideas, photos Complex room design
Combination of yellow and white Interesting combination of shapes and colors Cozy room design
How to work with stencils
You can apply the design not only to painted walls, but also to wallpaper, plastic, glass, etc. That is, stencils for walls for painting can be used not only to decorate walls, but also to decorate furniture facades, for example. Only highly textured surfaces are not suitable. You cannot apply paint to them properly. All others are suitable. Moreover, acrylic paint is compatible with almost all. They can be in a jar or aerosol. The advantages of acrylic are known to everyone: the paint adheres well to both smooth and porous surfaces, dries quickly, does not fade for a long time, and has almost no odor. That is why stencils for painting walls are usually painted with acrylic paints.
Stencil painting on the walls can be of any theme
What to work with
If an anti-stencil is used, then paint is applied only from a can. You cannot achieve this effect with other tools (except perhaps a spray gun). When spraying paint, the can is located 25-35 cm from the surface to be painted. It is better to select the distance by doing a “pen test” on a piece of old wallpaper. This way you can accurately select the duration of paint dispensing, movement, and distance. And one more thing: when working with a spray can, it is necessary to additionally protect the areas adjacent to the stencil so that careless movement does not end up painting an unnecessary part of the wall.
You need to work with paint in spray cans carefully - its quantity is difficult to control
When working with all other templates, you can use:
- a piece of foam rubber;
- a brush with short and thick bristles;
- roller with sponge.
Stencil paint can be applied with a brush, roller or sponge
In any case, we take paint in limited quantities. If there is a lot of it, it will flow under the stencil and ruin the whole job. Therefore, after dipping the brush/foam rubber/roller into the paint, we squeeze it out well. The amount of paint can be checked by running it over an unnecessary sheet of paper/piece of wallpaper several times.
What and how to fix it
To prevent stencils for painting walls from moving, they must be fixed to the wall. There is a special glue for this. It is applied in a thin layer to the back of the stencil, after which it is attached to the wall. After completing the work, removing it is not a problem. Moreover, it does not damage the surface.
Another option is double-sided masking tape. Note! Masking tape is a must. Unusual. If you use a regular one, it will damage the wall - most likely, a piece of paint will remain on the tape. Or vice versa, part of the sticky composition will end up on the wall. Which is no better. But masking tape acts approximately like the glue described above: it holds well and does not leave marks after peeling off.
The stencil must be fastened securely, but in such a way that it does not damage the wall when peeled off.
Scotch tape is easier to buy and cheaper, so most people use it. We cut it into small pieces, remove the protective film on one side and glue it to the stencil. You need pieces in the corners - that's for sure, but they may also be needed in the middle of the long side of the sheet or somewhere else. It is important that the stencil holds well and there is no possibility of moving it.
The procedure for transferring a picture to the wall
You need to work with a stencil for painting walls like this:
- Preparing the surface.
It should be dry and clean. Ideally, the walls have been recently painted. If this is not the case, clean them thoroughly. There should be no grease or any other stains. If you have to wash the wall, you need to dry it well. If you need to remove dust, you can do it with a vacuum cleaner and a long-bristled brush. Then take a slightly damp cloth and collect the remains. Leave to dry. Further work can be done only after the walls are dry. Vertical or horizontal drawing - it doesn’t matter. It is important that it “fits” into the interior - We apply a stencil to the wall, mark control points by which we will check the position of the stencil.
- Remove the protective film from the tape, align the control points, and glue it.
- Take a sponge/brush/roller, dip it in paint, wring it out, and paint over the details.
- Leave for a few minutes for the paint to dry. Carefully remove the stencil from the wall and clean off the paint.
Then, if necessary, we repeat the procedure. Next time you need to check whether the paint left over from the previous time has dried. Can only be used after complete drying. Dried several times, the paint forms a thick crust. This may cause it to flow between the stencil and the wall, or the shape of the design will change. Therefore, after several uses, remove the paint.
Features of working with a volumetric stencil
To create a three-dimensional image, you can use textured paint, putty, decorative plaster, liquid wallpaper and other similar compositions. You can find special formulations in stores, but they are very expensive. In this part, the choice is yours; all the compositions listed above are suitable.
All of the materials listed above have a paste-like consistency. There is no point in applying them with a brush or roller. You need a small spatula, preferably a flexible plastic one. If you don't have it, you can use a piece of any plastic. Even an old plastic card will do.
Working with a volumetric stencil
We take a certain amount of the composition on a spatula, fill the cavities with it, immediately removing the excess with the same card. At this stage, you need to make sure that there are no air cavities left and that the surface filled with plaster/putty is smooth. If you've ever worked with plaster, you won't have any problems. Everything is exactly the same.
After the composition has set, but before it dries completely, remove the stencil. In this case, the edges of the picture turn out torn and uneven. Don't be upset, this is normal. Don't do anything, just wait for it to dry completely. Now we take sandpaper with medium or fine grain (depending on the composition that was used) and sand all the nerves. In general, that's all. Then, if you want, you can color the resulting ornament, but that’s another story.
Decorative patterns on the walls - stencils for printing
If you want to save time and effort, then decorate your walls using stencils. All you have to do in this case is to stick the stencil on the wall using masking tape, and then use paint to paint the “picture”. Decorative material can be applied with a piece of washcloth, a sponge, or brushes of different sizes.
Decorative patterns on the walls - stencils for printing:
Stencil for decorating corners in a room Plant theme will decorate any interior
Intricate pattern on the wall Imitation tiles in oriental style
Original pattern for room decor
Patterns for creating airy interior design Patterns for creating airy interior design A selection of patterns for decor
A selection of patterns for decoration A selection of patterns for decoration
Making your own stencil
Having decided on the design, we will select the material for the stencil and begin making it.
For disposable, small templates, you can use simple office paper, cardboard or other dense material. For example, plastic film, foil, parchment. If your budget allows, it is better to choose a self-adhesive film (it is strong enough and can withstand moisture).
Follow these steps:
Draw or transfer the design you like onto the prepared base. In some cases, you can simply print it on a printer. In others it is better to use tracing paper. If it is transparent film or parchment (secure the layout to it with a needle or tape so that it does not move), carefully trace the image using a marker. A base that is not very dense (for example, plain paper) can be made more solid by sticking tape over the entire surface.
Place the workpiece on any surface that you are not afraid of cutting
Using a utility knife (if more convenient, use scissors), carefully cut out the inner areas of the outline so that the main design is hollow, but at the same time all the details of the image are well held.
For complex or repetitive illustrations, make a reusable template. Choose very thick cardboard, acetate film or thin plastic sheets will do.
Do the same as in the previous case, taking into account some nuances:
- When making large or complex drawings, you should break them into parts that will be combined during the process of transferring to the wall. Otherwise it will be very difficult to hold them in place when painting.
- You can attach the dimensional pattern to the base using masking tape, adhesive tape, or even glue it (at several points).
- The cut out contours can be strengthened by covering them with tape. Pressing the middle of the tape to the cut border, fold its edges along the borders (one edge of the tape inward, the other outward). You will achieve a tight fit of the material to the surface, the cuts will be smoother.
Simple patterns on the wall - stencils for printing
If you don’t like complex tasks, then decorate the walls in the room with simple, laconic stencils. With their help you can create interesting and memorable stories.
Simple patterns on the wall - stencils for printing:
A selection of stencils for room decor A selection of stencils for room decor A selection of stencils for room decor Light feathers - they can be made very bright
Butterflies
Cute owl Cute owl
Feminine silhouette for bold design Laconic cats Airy dandelion
Features of wall decor with stencils
Stencils for wall decoration have a number of advantages. Main useful characteristics:
- Relatively low cost in the store, the ability to make it yourself.
- Versatile, can be used several times.
- Large selection of drawings. Fantasy has no boundaries.
Stencils for painting walls are designed to transform space and update the interior. With their help, you can highlight an area, hide defects, and create an interesting accent.
You should not immediately apply a complex ornament. Despite the apparent simplicity of the process, certain skills and experience are required. Experts recommend that beginning craftsmen practice on other surfaces, controlling the application technique and taking into account the characteristics of the coloring composition. It is necessary to minimize the flow of paint over the edges of the layout.
Stencils for painting walls are designed to transform space and update the interior.
Main types of wall templates:
- Color preferences: plain (one color) and combined (several shades).
- Size: small and large.
- Quantity of use: single and multiple, reuse possible.
- Shape: thin and voluminous, due to a layer of putty.
- Contents: flexible (self-adhesive) and hard, made of dense material.
The “Anti-stencil” option is aimed at painting the surrounding area of the layout, and not its interior. Halo effect.
You don’t have to buy stencils on the wall for cutting in a store; you can make it yourself. To do this, you will need plastic film, self-adhesive paper, cardboard, etc.
You don’t have to buy stencils on the wall for cutting in a store; you can make it yourself.
Beautiful patterns on the wall - stencils for printing
Beautiful patterns on the wall - stencils:
Ready-made composition for room decor Ready-made composition for room decor Ready-made composition for room decor Ready-made composition for room decor Ready-made composition for room decor Ready-made composition for room decor Ready-made composition for room decor Ready-made composition for room decor Ready-made composition for room decor Ready-made composition for room decor Ready-made composition for room decor Ready-made composition for room decor Ready-made composition for room decor
Patterns on the wall in the kitchen - stencils
The kitchen is a place where the whole family gathers every day, and therefore this room should be as cozy and beautiful as possible. It is best to choose thematic decor for the kitchen - on a culinary theme.
Patterns on the wall in the kitchen - stencils:
Invigorating coffee - what would you do without it?
Hot tea Patterns on the wall in the kitchen - stencils Patterns on the wall in the kitchen - stencils Patterns on the wall in the kitchen - stencils
Which paint to choose and how to apply it
You can draw on concrete, wooden, plastered, plasterboard walls, as well as on wallpaper for painting. Wallpaper absorbs paint better, so it will take more paint than on a painted surface. Depending on the type of surface, the appropriate paints are selected:
Acrylic paints for walls
- Water-based acrylic - for wood, cardboard, wallpaper, concrete.
- Latex - concrete, gypsum concrete, plaster.
Construction stores sell paints mainly in standard packaging - 1-3 kg, so it is better to look in art stores/on specialized websites.
A plot that unites all rooms into one composition
Painting is done in any convenient way:
- Hand brush with short bristles.
- Roller.
- Sponge.
- Airtograph.
Aerosol paints are more “sloppy”
Unlike aerosol paints, which have a wide jet, airbrushes are much more convenient to use, but they also cost money. You don’t have to think about how to create halftones, and you don’t have to cover a large area of the wall from splashing.
Working with an airbrush is convenient and neat
How to draw
The golden rule for stenciling is that the tool should be semi-dry. Having dipped the brush (roller/sponge) into the paint, you need to squeeze it out - roll it over a sheet of paper so that it is semi-dry.
The paint is driven in with a cloth
The paint is rolled out with a roller, but with a brush/sponge they are painted with tapping movements, as if driving in the paint, no up and down movements. Hold the brush perpendicular to the wall. To saturate the color, the driving procedure is repeated.
The paint is driven in with a brush perpendicular to the wall
Patterns on the wall in the bedroom - stencils
Patterns on the wall in the bedroom - stencils:
Cute pattern for bedroom decor
Moon and stars - gentle and beautiful A selection of stencils for bedroom decor Angel is suitable for both an adult’s bedroom and a nursery
Night fairy
Patterns on the wall in the hallway - stencils
The hallway may have brighter and more dynamic wall decor, because this is the room your guests see when they enter your home. And, perhaps, the hallway is exactly the place where you can use the brightest colors and shades. Since you won't be spending a lot of time in this room, bright colors won't have a negative effect on you.
Patterns on the wall in the hallway - stencils:
An elegant shoe is very appropriate in the hallway Lightness and simplicity
Floral motifs Floral motifs
Floral motifs
Preparing the wall surface
As before any decorative finishing, before applying a stencil to the wall with your own hands, you need to clean it of dust and dirt . This is done in a standard way. Then comes the turn of specific preparation.
To ensure that the drawing is even, it is recommended to mark the places where the stencil is attached . A helping hand will be needed here if there is no construction level among the tools. It is especially important to make accurate markings when the design chosen is complex and consists of several small motifs.
Painting tape will help fix the drawing on the wall . For a stronger adhesion, it is convenient to use a spray with an adhesive effect; it leaves no residue and can be used several times. Aerosol adhesive can be used on different types of surfaces. Does not leave stains or marks.
When starting to work with material that is unfamiliar to you, you must first practice using old wallpaper or paper. At the same time, make sure that the colors of the wall and the drawing are chosen correctly; it is not too late to change them at the preparatory stage.
Application: how to avoid drips
For excellent results, it is better to choose drawings without too small details. The simplest tool seems to be a brush, but there are a number of features to consider. You will have to hold the brush vertically and apply the paint in a minimal layer , otherwise you will not be able to avoid bleeding under the drawing.
Therefore, you will need to apply several layers . A sponge is also a good option; you should place a sheet of paper next to it, on which excess paint will be removed.
- It is necessary to remove paint accumulations in the corners of the drawing in a timely manner.
- It is better to use a roller only if the drawings are large enough.
- If the borders of the drawing look unclear, a regular paint brush will come in handy. It can be used to mark the edges after the stencil is removed.
- To make the volumetric stencil easier to paint, it should first be coated with a primer.
to use acrylic paints . They are safe to use indoors, dry very quickly, are easy to tint, and can be applied well with various types of tools, be it a roller or a brush. Their cost is also low. Acrylic putty is also available for sale, which is suitable for making three-dimensional drawings in the baroque or fantasy style.
When applying paint, do not rush - unsuccessful strokes cannot be erased. If there is an error, the entire area will have to be redone. Be sure to first protect the parts of the wall that you don't want paint to get on. If a spray is used, you need to cover the entire space on the side of the design with film.
Although decorating rooms using stencils has a number of nuances, you shouldn’t be afraid: your efforts will pay off with interest! After all, the end result will be a designer space , and the financial costs will not be too high. The efforts made will create a special aura in the house, which will have a beneficial effect on all family members.
Patterns on the wall in the hall - stencils
Patterns on the wall in the hall - stencils:
Another variation of a beautiful female silhouette A selection of stencils for wall design
Patterns on the wall in the hall - stencils Flowers are always beautiful Laconic
Patterns on the wall in the nursery - stencils
Make the nursery as beautiful and original as possible, do not be afraid to combine many colors and shades in the decoration of the walls, this will help make the world around your baby as colorful as possible, and the children really like it. The only thing is, do not use acidic shades - they will have a stimulating effect on the baby’s nervous system, and she will be capricious a lot.
Patterns on the wall in the nursery - stencils:
Cheerful family of kittens Universal decor
Universal decor
Cheerful decor for children's room Universal decor Universal decor Universal decor
Universal decor
Universal decor Universal decor
Walls
0 votes
+
Vote for!
—
Vote against!
Decorating your home is one of the ways to give the room an individual style and unique image. There are many ways to achieve this, but wall decor using stencils is becoming increasingly popular due to their availability and ease of use. Such an ornament highlights one zone without overloading the entire space. A skillfully selected pattern will emphasize the style of the room, make an accent where necessary, and create a special mood. The article will talk about how to make a stencil for wall decor with your own hands and how to work with it correctly.
The stencil design is universal. It can be applied not only to walls, but also safely used for the floor, fireplace or windows. Everything is limited solely by the imagination of the owner of the premises.
Types of stencils
Plain. The most common type, one tone of paint is taken and applied to the wall. Simple, fast, beautiful.
Multicolor. Creating a real drawing, with many shades. This type requires a certain skill and patience, since you need to make a lot of stencils and paint the surface, placing one on top of the other. The important thing here is not to get confused by them.
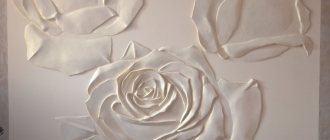
Volumetric stencils for wall decor. The stencil is applied using putty, 1-3 mm thick. Despite the ease of application, it looks very beautiful and unusual, creating the impression of a velvety surface.
Anti-stencil or reverse stencil. It is called so because the surface is painted not inside the stencil, but outside it, creating a backlit effect. Ideal for muted bedroom colors.
Stencil selection
Of course, the stencil should be chosen based on the general style of the room in which the ornament is created. Since there is no arguing about tastes, advising the choice of one or another stencil is a thankless task. However, it is worth giving a few general recommendations.
- Accuracy to a large number of details. A beautiful drawing on the wall can turn into something like graffiti if you get too carried away with decorating the room. Laconicism is a trend that is always in fashion.
- One room - one type of ornament. Butterflies do not go well with geometric patterns, and damask patterns lose their charm when surrounded by trees and flowers.
- No excessively small details. Firstly, they are difficult to paint, and secondly, from a distance they can look sloppy, just like paint stains.
- The more jumpers and lines there are in the stencil, the more beautiful and clear the picture will be after application.
Samples of stencils for wall decor
Choosing a location for the stencil
As is the case with the choice of the type of pattern or ornament itself, it is impossible to give clear recommendations that a stencil will be appropriate in one corner and inappropriate in another. Only a sense of beauty will tell you where it is best to place the pattern.
To begin with, you can make small stencils for wall decoration and decorate the places next to the switches with ornaments. Typically, patterns around mirrors, above the table or near the bedside tables fit well into the design of the room.
How to make a stencil with your own hands
The market is replete with a huge number of ready-made stencils for wall decoration, for every taste and budget. Almost every hardware store, especially large retail chains of building materials, offer a wide range of ornaments and designs. But a drawing created by yourself will be even more valuable.
To make your own stencil you will need the following tools:
- original drawing;
- stencil material (film, plastic, cardboard);
- stationery knife;
- marker, pencil;
- scotch;
- glass (or other) surface on which it is convenient to cut a stencil.
First of all, you need to decide on the pattern according to which the stencil will be made. Those who have artistic abilities can design and draw it themselves. Those who are not lucky enough to have a talent for drawing, having figured out what style they would like to decorate the walls or ceiling in, can search for a suitable image on the Internet and print it on a printer. If the drawing is large, divide it into parts, and then fasten the parts together with tape.
The next step is choosing the material for the stencil. It can be simple paper or cardboard, self-adhesive film or thin plastic, depending on the type and size of the ornament. To simplify the task, you can contact any advertising agency, where they will help you create a stencil based on the image and print it.
To transfer the ornament to the material, you need to use carbon paper, or, if transparent plastic is used for the stencil, simply trace it along the contour with a marker. To prevent the design from “moving away”, it is attached to the stencil with tape or paper clips.
When the drawing is transferred, in some cases it is necessary to finalize it by drawing the lines and jumpers along which it is cut. If the stencil is depicted on paper or cardboard, then it is better to cover it with tape on both sides or laminate it so that the paint does not absorb and the jumpers do not curl. This will extend the life of the stencil.
It is important to cut the stencils in such a way that there are no cuts or burrs, otherwise the final design will look untidy. Another subtlety - all small parts must be attached to larger ones, otherwise they will disappear when cutting out. Only the areas that will be painted are cut out. To do this, use a stationery knife or blade, and place glass (or any other hard material that you don’t mind cutting) under the stencil, then the cut lines will be clearer and smoother.
Working with a stencil
Required tools:
- stencil;
- stencil glue;
- brush, roller or sponge for applying paint;
- acrylic or spray paint.
First of all, you need to prepare the surface on which the stencil will be applied. Clean it from dust and dirt, if you can wash it, if not, wipe it with a clean dry cloth or vacuum it.
The second step is applying markings. If possible, it is better to use a level, with it you will be confident that the drawing will not be skewed or crookedly applied. The extreme points for the stencil are marked with a pencil in order to attach it evenly in the future.
It is recommended to practice first before seriously applying a drawing to the wall. This can be done on a piece of wallpaper or large Whatman paper. A preliminary sample will allow you to practice the application technique and choose the color of the ornament. It is advisable to make several options in different shades, and try on how each of them will look in the future, attaching the resulting pattern to the wall.
Also, ready-made reusable stencils for wall decor are available for sale. They are made of polymer film, which is easy to clean and does not tear, allowing you to train on paper the required number of times.
Aerosol glue
In order to fix the stencil on the wall, it is best to use a special aerosol glue. It leaves absolutely no marks, and when using it, you don’t have to worry about the wallpaper or paint coming off the wall along with the stencil. The glue is sprayed in an even layer onto the stencil, which is then carefully pressed against the surface, especially in areas of thin bridges.
What is important to know about working with glue:
- on different surfaces it holds the stencil differently; the smoother the surface, the better the adhesive properties of the glue;
- after removing the stencil, the glue does not remain on the wall;
- glue is applied to the stencil and provides maximum adhesion to it;
- after washing the stencil, the glue can retain its adhesive properties, so if you plan to reuse it, you don’t have to completely wash off the glue;
- the larger and heavier the stencil, the more difficult it is to hold it only with glue; in such cases, you may need “safety net” in the form of masking tape;
- it does not prevent paint from flowing under the stencil.
Coloring
Coloring is a fuss-free activity.
It is recommended to use acrylic paint for stencils; it dries quickly and is suitable for all types of surfaces. The paint is applied using a brush, sponge or roller. It is important that when working with a stencil, there should be a minimum amount of paint to eliminate the possibility of leakage.
When working with a brush, it is held directly perpendicular to the wall, the paint is applied using the padding method, to prevent lint or paint from getting behind the stencil.
If coloring is done with a sponge, then it is better to make the first prints on another sheet of paper, this will remove excess paint.
When working with a roller, you need to ensure that the paint is distributed evenly, especially in the corners and small parts of the stencil. It is more convenient for them to work with large stencils.
To spray spray paint, the can should be held at a distance of approximately 30 cm from the wall. The surface may need to be additionally protected from accidental paint spilling outside the stencil.
The saturation of the drawing with color occurs gradually, in several passes. If its boundaries are not clear enough, they are drawn with a thin brush after removing the stencil.
Creating a three-dimensional drawing
To apply a three-dimensional pattern, you will need a special acrylic putty. It is applied using a spatula, carefully layer by layer until it reaches the desired thickness. A volumetric pattern is usually achieved with a thickness of 1-3 mm. A couple of minutes after application, when the putty has already set but has not completely hardened, the stencil must be carefully removed so as not to damage the ornament. If the layer is not very even, it’s okay; after the putty has completely dried, it can be easily leveled using fine sandpaper. Then the drawing can be painted or tinted.
When the job is completed, the stencil should be washed and dried, if possible, for reuse.
Mistakes you can avoid
The most common mistakes that happen when working with a stencil are:
- stencil offset;
- paint leakage.
To avoid such troubles, you need to securely fasten the stencil; aerosol glue is an ideal assistant here. And also take a minimum amount of paint. Accuracy and patience will undoubtedly help achieve the perfect result.
Practice shows that those who have studied the stencil manufacturing technology and carefully read the instructions for use and coloring are always satisfied with the result.
Stencils for wall decor photo
Stencils for decorating kitchen walls
Ornamental patterns on the wall - stencils
A correctly chosen ornament can greatly change the perception of a room. For example, it may look larger than it actually is. And all because such decor, due to its “volume,” adds visual “depth” to the walls.
Ornamental patterns on the wall - stencils:
This pattern is suitable for large rooms
Ornament of different sizes Floral motifs
Heart A selection of hearts of different shapes Ornamental patterns on the wall - stencils Kazakh ornament Oriental motifs
Smooth lines
What you need to know about the stencil
A stencil is a sheet of plastic with slots that form a specific pattern. The large cutouts are connected by bridges that hold the pieces together. A professional cliche has a mark for precise alignment of sheets when repeating the design (dot, cut out the edge of the sheet). You can simply trace the corners of the sheet with a simple pencil.
Marks help to achieve a perfectly straight pattern line
What questions may arise about the stencil:
- What material is it made of?
- How to attach a sheet to the wall?
- What and how to draw?
- Is it possible to make stencils for walls with your own hands?
A humorous inscription will cheer you up
Which stencil to choose
A classification will help solve this issue, depending on which the appropriate option is selected. Based on the density of the material, templates are divided into types:
- Standard;
- Textured or voluminous;
- Adhesive.
Method 1
The standard type is made of Mylar (hard material), reusable. It will not fade from paint, but may tear if the paint is vigorously peeled off.
Volumetric ornament
For storage, hard stencils are powdered with talcum powder and spread between hard sheets, such as plywood.
General diagram-instructions for working with a three-dimensional stencil.
| 1. Fix the volumetric stencil on the wall. | |
| 2. Fill the cut fragments with putty. | |
| 3. Remove the stencil , gradually bending it back. |
Method 3
Adhesive (oracal in common parlance) is a soft vinyl/PVC film with an adhesive base for one-time use. Convenient for drawing on complex surfaces.
It’s worth considering if adhesive stencils for wall decoration are positioned by sellers as reusable. This is basically impossible - the material is soft, deforms during removal at the end of the work and cannot be reused.
Advantages and disadvantages of rigid stencil:
- Durable, reusable.
- Easy to use - attach, fix, paint over.
- But they do not adhere tightly to an uneven surface, so the edges may become smeared and will have to be painted on with a brush.
Advantages and disadvantages of adhesive template:
- Adheres tightly to difficult surfaces.
- But it’s disposable, because it can stretch when removed.
- By removing the film, you can grab month-old plaster/paint.
- When stored for a long time, they dry out and crack.
- Whimsical at work.
General diagram-instructions for working with Oracle.
| 1. Glue the stencil on the wall. | |
| 2. Separate the backing , lower it down, while simultaneously gluing the stencil film to the wall. | |
| 3. Roll the stencil from bottom to top . When rolling out the roll, the backing is separated and the film is glued to the wall. | |
| The elements of the pattern are only pryed with the tip of a knife and removed | 4. Remove fragments of the drawing . In this case, you can use a stationery knife. |
| 5. Paint over the drawing. | |
| 6. Remove the film , holding it parallel to the wall. |
Depending on the style and, probably, originality, cliches can be divided into the following types:
- Regular/standard - patterns are openwork “holes”, which are painted over with the main color.
- Inverse - the stencil is the opposite, here it is not the design that is cut out, but the background. The background slots are painted over with a dark color, and the figures will remain the same color as the wall.
Terminator using an inverse stencil
You can make beautiful stencils for decoration yourself from the most affordable materials:
- X-ray film.
- Cardboard. The surface is sealed with ordinary tape / drying oil .
- A piece of vinyl wallpaper coated with paint.
- Folder Covers.
You can draw your imagination in a graphics editor (Corel Draw) and have plotter trimming done at any advertising agency (price approximately 70 rubles/m2). A stationery knife is convenient for cutting yourself. Thick material is placed under the template so as not to scratch the table.
Sometimes simple lines say a lot
How to attach a stencil to a wall
Just as a sheet of paper is attached motionless to the easel, so the template should be motionless on the wall.
Fixation is done in two ways:
- Aerosol glue (Marabu Fix-it, Idea, KCR01, Cadence).
- Masking tape.
Often, stencils glued to walls are duplicated with masking tape, because large sheets “gain weight” due to the adhering paint.
Double locking makes working easier
Rules for using glue:
- Apply glue not to the wall, but to the underside of the stencil;
- Observe the setting time of the glue according to the instructions;
- Do not use on rough/textured walls;
- The wall must be clean from dust;
- To ensure a tight fit, the stencils can be rolled onto the wall with a roller through paper;
- Wash off the glue with warm water or a special remover.
There is something in common between the graceful lines of wall decor and herbs
What are the benefits of masking tape?:
- Unlike usual, it does not leave sticky residue;
- Easy to remove by hand.
Brick wall - large-scale pattern: stencils
Brick wall - large-scale pattern:
Stencil - forest motif Majestic forest Brick wall - large-scale pattern
Stencil selection
Brick wall - large-scale pattern:
Pattern on a white wall - animal stencils
Pattern on a white wall - animal stencils:
Wolf cub in his habitat
Pattern on the wall
Geometric cat pattern Geometric pattern Pair of wolves
Simple and original
A selection of silhouettes for wall decor A selection of silhouettes for wall decor Decor with strong energy Horses
Patterns on the wall - flowers: stencils
Patterns on the wall - flowers:
Flower arrangement Flower arrangement
Rose Tulips
Flower arrangement Flower arrangement Flower arrangement Flower arrangement
Flower arrangement Flower arrangement
Garland patterns on the wall - stencils
Garland patterns on the wall - stencils:
Beautiful garland Beautiful garland
Beautiful garland Beautiful garland
Video: DIY wall decor - 13 ideas! Lifehacks for painting walls
Read other articles on our website that will help make your home more beautiful and comfortable:
- How and with what to update old interior and entrance doors with your own hands?
- DIY kitchen decor from scrap materials: ideas, tips
- Decorative fireplace: what role does it serve, what can be quickly made from?
- How to make a decorative stone from gypsum: instructions
- How to beautifully and modernly decorate a window in a house, apartment, or country house: 100 ideas
- DIY decor made of concrete, Turkish putty and plaster: loft in the interior
How to make a stencil
Perhaps you couldn’t find a stencil with a suitable design in the store, what should you do? Making it yourself is quite a feasible task.
The idea can be found on the Internet , or even the drawing itself. There are entire portals dedicated to this topic. When you go to a stencil store, you can start searching in the required category, and there you can evaluate how this or that option will look immediately in the interior, without resorting to a complex modeling process.
Once the design is selected, you need to decide what material will serve as the basis for the stencil. Plastic, of course, is more durable, but for the first time it is easier to use cardboard or even plain paper, tracing paper, or baking parchment.
In the process of transferring the picture, it is necessary to securely fix the base and the picture itself. An affordable and easy way is to use carbon paper. Transparent tracing paper can be applied to the drawing, then simply trace the contours.
Regular lamination will help extend the life of a stencil made by yourself. It can be done in any photo salon. Or another option, simpler. The picture is covered with wide tape on both sides, then you need to carefully make slits in the right places. To do this you will need a stationery knife; for small parts it is more convenient to use nail scissors.
It is at this stage that accuracy is very important. Irregularities and burrs along the edges of the drawing will make the result of the work sloppy; it is better to avoid them. For convenience, work should be carried out on a flat, hard base that is not afraid of scratches. A special rug for needlework or a piece of plexiglass will do.
A reusable stencil requires the use of more durable materials, but there is also an opportunity to save money. Ordinary cardboard, if treated with acrylic varnish, will last much longer and will not be damaged by contact with moisture.
Making stencils with an adhesive layer
When applying a design to pre-painted surfaces, instead of a professional stencil, you can use a design cut out on regular self-adhesive film. Each roll has a reverse side with markings on which it is easy to transfer the desired design.
Cutting out will take some time (a small drawing takes about half an hour), but the result is worth it! After all, you will get a stencil that is easy to clean and can be used many times . Only after finishing the work should the protective layer be returned to its place so that the glue does not dry out.
