To properly plaster a brick wall, you need to stock up on tools and materials before starting work. What construction tools and materials will be required:
- falcon;
- trowel;
- rule;
- mixer;
- container for mixing the solution;
- brush with metal bristles;
- plumb line;
- level;
- roulette;
- guiding beacons.
Also, for plastering the wall you will need building mixtures:
- primer;
- plaster.
Plaster or facing brick?
The type of facade finishing must be chosen at the stage of laying the foundation.
After all, facing bricks significantly increase the load, so its weight will need to be taken into account. In addition, such a brick will require separate support, as well as connection with load-bearing walls, and it is better to do this simultaneously with the construction of the walls. Digging up the foundation later and topping up the foundation is not the best solution.
Of course, brick cladding lasts a very long time; it will not need to be updated during the entire life of the building. However, partial replacement of the facade when choosing a low-quality facing brick is unrealistic - in this case it will have to be completely removed and replaced with a new one.
Please also note that according to building codes, brick finishing is allowed only in low-rise construction. It is not used for high-rise buildings. Old houses are lined with it if the walls need to be given additional rigidity. In this case, it is necessary to top up the foundation or completely replace it.
There are also disadvantages when finishing with plaster. It will have to periodically cover up cracks and renew the paint. Although shrinkage cracks can appear not only in plaster, but also in brick.
Finishing with plaster will cost less. It does not require reinforcement of the foundation and support, and the cost of the cement-sand mortar is much lower. Further repairs of plastered walls are simple - both small and large defects are easily corrected. In addition, plastering is not a complicated process that beginners can do.
Primers
100% Acrylic Primer - Seal Grip® Blocker
The second layer can be applied to them within an hour, which will save valuable time and speed up work.
Seal Grip® 17-921 primer is used on putty, plaster, brickwork, wood surfaces, wallpaper, plastic, aluminum, galvanized metal, etc.
The primer can be tinted in more than 1000 shades
- 100% acrylic latex primer
- Unsurpassed hiding power
- Excellent at blocking water stains, ink, tannins, rust, etc.
- Moisture-resistant, quick-drying primer
- Excellent adhesion to the surface (sticking)
- Almost odorless
- Alkali resistant
- For external and internal work
- Can work at surface temperatures of +2ºC and above
Detailed Description of SealGrip Primers:
100% Acrylic primer for exterior and interior use Perma-Crete®
- 100% acrylic latex primer
- Can be applied to fresh plaster or other cement surface (after 7 days or when surface alkali is less than 13)
- Excellent at blocking water stains, ink, tannins, rust, etc.
- Moisture-resistant, quick-drying primer
- Excellent adhesion to the surface (sticking)
- Almost odorless
- Alkali resistant
- For external and internal work
- Can work at surface temperatures of +2ºC and above
- Apply by roller or spray
- Good vapor permeability (breathes)
Detailed Description of Perma - Crete Primers:
Speed hide® Acrylic Interior Primers
Opaque White Primer (thick, sour cream consistency)
Speed hide primers are professional acrylic latex thick primers in white color. Primers are intended for interior walls, ceilings, plaster, putty and drywall.
The primer can be tinted in more than 1000 shades
- Smooth, uniform coating
- Form a white substrate (developer)
- Fills micropores well
- Levels uneven surface porosity
- Binding up dust residues
- Almost odorless
- Apply by roller or spray
Detailed Description of Speed hide Primers:
How to choose a primer: As you know, primers can be either liquid transparent or thick white. Such primers differ primarily in price.
Liquid deep penetration primers are inexpensive primers whose main purpose is to strengthen the top layer of the surface and bind dust. Some liquid primers contain alkali-damping components.
The advantages of liquid primers: a) low price b) penetrate 25% deeper into the surface compared to thick primers.
Disadvantages of liquid primers: a) transparency b) after applying a primer of this type, non-uniform glossiness may form in places where the deep primer is applied in two layers (this happens very often, since it is very difficult to apply the deep primer evenly, without overlapping). As a result, uneven glossiness will be visible even after applying the paint. c) I do not prevent the penetration of stains from the surface.
Thick white primers are primers of a different price and quality category (compared to deep primers), the main purpose of which is to strengthen the top layer of the surface, bind dust and create a flawless surface for further painting. Some thick primers contain alkali dampening components and special additives against mold and mildew.
The advantages of thick white primers: a) form a white substrate b) fill micropores well c) even out heterogeneous surface porosity d) prevent stains from penetrating the surface
Disadvantages of thick primers: a) 25% lower penetrating ability compared to deep primers. We can draw conclusions: it is preferable to use a deep penetration primer on porous surfaces or for the purpose of economy. Thick white primers can be used on any surface.
In cases where it is necessary to achieve the highest quality painting result on a very porous or problematic surface, it is possible to use two primers - a deep primer on the first layer, and a thick white primer on the second layer. For example, a plastered facade, the basement of buildings or buildings with missing foundation waterproofing (built more than 50 years ago, architectural monuments, fences).
Our company is ready to offer a range of high-quality primers, with the help of which a lot of previously encountered problems with painting will be solved:
1) Transparent deep penetration primer resistant to alkalis Speed hide 6-808
2) White primer with deep penetration, particularly resistant to alkalis and salts migrating over the surface Perma-Crete 4-809
3) Thick white primers that block stains, alkalis, soot, tannins and capillary moisture Perma-Crete 4-603, Seal Grip 17-921.
4) Thick white primers for interior work Speed hide 6-4, Speed hide 6-2
Primer consumption for plaster
Plaster is the most popular material for surface finishing. In order for the plaster to adhere properly, all surfaces should be treated with a primer before applying it. If this is not done, then after a while the plaster will simply fall off.
On average, the primer consumption for plaster is 180–200 ml. per one square meter.
It should be noted that some adjustments are allowed in costs, since each manufacturer indicates its own different standards.
The given standards are approximate. Therefore, before starting work, you should read the manufacturer’s recommendations; they are usually indicated on the packaging.
The primer mixture can be applied by roller, brush or spray. When applying the mixture, you must adhere to safety rules. You should wear gloves on your hands to protect your skin. The primer should be applied in a proportional, even layer.
Read also: how to make a decorative panel with your own hands.
Grouting ceramic tiles in the bathroom with your own hands: find out how to do it better with us.
How to ensure quality priming
In order for the tiles or wallpaper to hold firmly, and the paint and plaster not to crack for a long time, you need not only to select the necessary priming solution, but also to apply it to the wall in compliance with all technologies.
Before you start priming, the base must be prepared:
- Thoroughly clean off dirt, old paint, and lime using a brush or spatula.
- Seal all large cracks with putty or cement mortar.
- If there is efflorescence, fungus or mold, then before applying the primer it is necessary to treat the problem areas of the surface with specialized mixtures.
- After this, rinse the brick base with clean water and dry thoroughly (usually it takes about a week for complete drying). Applying soil mixtures to important surfaces of walls is allowed only if they have a mineral base.
Having cleaned and properly prepared the brick area, you can begin priming work. They can be carried out using the following devices:
- Brush. Ineffective and time-consuming when applying compounds over large areas. It is advisable to use a brush as an auxiliary tool for impregnating hard-to-reach areas.
- Roller. It allows you to quickly and efficiently process a large surface; it can be used to apply both conventional priming solutions and deep penetration ones.
- Spray gun. Evenly and quickly distributes the soil mixture over a large area.
Both deep penetration and regular primers are applied in a thin layer to the brick base and left for 2-3 hours to dry. If necessary, the procedure is repeated several times, achieving the necessary properties of the wall before applying the decorative finish.
By selecting a primer mixture in accordance with the base and finishing materials, as well as in full compliance with priming technology, you can ensure high-quality long-term repairs.
Common manufacturers
The building materials market is saturated with primers of various types. If 2-3 decades ago it was difficult to find a suitable composition, now times have changed. In Russia, a number of enterprises are engaged in this.
- “Prospectors” - serial production is established on fifteen high-tech lines of the main workshops located in the Moscow region and four in other constituent entities of the Russian Federation: Ulyanovsk, Belgorod regions, Krasnodar Territory and the Republic of Buryatia.
- One of the oldest manufacturers of building materials in the world. In Russia, the production of primer for Ceresit gas block is established at five enterprises: in Kolomna, Chelyabinsk region, Stavropol Territory, Ulyanovsk and Novosibirsk.
- One of the largest manufacturers of primers for gas silicate in Russia by the number of branches (6). has a central office in Volgograd, and factories are distributed across several constituent entities of the Russian Federation: Volgograd, Voskresensk, Moscow region, Chelyabinsk, Orenburg, Republic of Tatarstan.
- does not have such a number of productive workshops. The high quality of soils for aerated concrete and other building compounds makes it popular. It has only 1 plant, located in Staraya Kupavna near Moscow.
Prospectors
The company, founded in 1992, specialized in ready-made putty and gradually expanded its product catalog. The main direction of development of the enterprise was the production of dry mixtures. Today it represents one of the main manufacturers of dry construction mixtures in Russia.
| Name | Deep penetration soil | Primer for porous and highly absorbent surfaces | Con |
| Volume, l (kg) | 1 5 10 | 6 15 | 5 10 |
| Compound | Water. Styrene-acrylic dispersion. Targeted supplements. Antiseptic. | Aqueous dispersion of acrylic copolymer. Filler. Blue dye. Functional additives. Water. | Water. Styrene-acrylic dispersion. Targeted supplements. Antiseptic. |
| Application | External. Internal. | External. Internal. | External. Internal. |
| Applicability to aerated concrete | Maybe | Eat | Eat |
| Consumption, l (kg)/1m² | 100-200 | 0,3-0,4 | 100-200 |
| Storage, surface, work temperature, °C | From +5 to +30 | From +5 to +30 | From +5 to +30 |
| Drying time, hour | 1 | 4-6 | 1 |
offers only 3 primer options for aerated concrete. The use of one of them is questionable, since the manufacturer itself calls its use “possible.”
Ceresit
Ceresit primers are manufactured by the Henkel concern, which specializes in three areas: “Cleaning products”, “Cosmetics and personal care products”, “Adhesives and technologies”. There are 2 positions in the product line applicable for aerated concrete.
| Name | Deep penetration soil, ST 17 | ST 17 Concentrate |
| Volume, l (kg) | 5 10 | 1 10 |
| Compound | Water dispersion. Acrylic polymers. | Water dispersion. Acrylic polymers. |
| Application | External. Internal. | External. Internal. |
| Applicability to aerated concrete | Eat | Eat |
| Consumption, l (kg)/1m² | 300-400 | 0,3-0,4 |
| Storage, surface, work temperature, °C | From +5 to +35 | From +5 to +35 |
| Drying time, hour | 4 | 4-6 |
The Ceresit CT 17 primer for cellular concrete has a light yellow tint, the CT 17 concentrate is transparent.
Volma-Plast
The company was founded in 1943. The main direction: the extraction of natural gypsum stone from its own deposits and the production of construction and finishing materials on a gypsum and cement basis. There are 3 positions in the line of primers applicable to aerated concrete blocks.
| Name | Primer Volma Plast styrene-acrylate | Primer Volma Universal | Primer Volma Interior |
| Volume, l (kg) | 5 10 | 5 10 15 | 5 5 10 |
| Compound | Styrene-acrylate dispersion. Water. | Styrene-acrylate dispersion. Water. | Styrene-acrylate dispersion. Water. |
| Application | External. Internal. | External. Internal. | Internal. |
| Applicability to aerated concrete | Eat | Eat | Eat |
| Consumption, l (kg)/1m² | 50-100 | 100-150 | 150-200 |
| Storage, surface, work temperature, °C | From +5 to +30 | From +5 to +30 | From +5 to +30 |
| Drying time, hour | 1 | Up to 2.5 | Up to 2.5 |
Please note that the Volma Interior primer can be used on aerated concrete walls, but is intended for subsequent painting, wallpapering or putty. According to the manufacturer's technical instructions, it is applicable only for interior work.
Deep penetration primers “Volma Plast” and “Volma Universal” are used when working with aerated blocks followed by plastering.
Russian manufacturer of materials for construction and repair. We have been on the paint and varnish market for over twenty years.
| Name | Primer Aerated concrete contact 1 (discontinued) | Primer Gas concrete contact 2 |
| Volume, l (kg) | 23 | 23 |
| Compound | n/a | n/a |
| Application | External. Internal. | External. Internal. |
| Applicability to aerated concrete | Eat | Maybe |
| Consumption, l (kg)/1m² | 250 | 250 |
| Storage, surface, work temperature, °C | +10 to +35 | +10 to +35 |
| Drying time, hour | 8 | 3 |
With an impressive range of primers from, only two of them are applicable to aerated concrete blocks.
When making primers for aerated concrete blocks, the manufacturer adds polymer components to their composition, which have a beneficial effect on the surface being treated. After application, the smallest particles penetrate into the cells of aerated concrete, holding them together.
Walls are not primed in one layer. Deep penetration emulsions from proven brands are capable of saturating the block 5-8 cm deep. It is best to apply 2-3 layers, depending on the manufacturer's recommendations. You can find them on the label of the container with soil.
Do not exclude priming of aerated concrete walls from the list of required works. Only in this case will you build a good, warm and reliable house.
What does priming the base do?
The quality of construction and finishing work depends on the correctly selected primer, depending on the condition of the brick wall and subsequent decorative design. Wall primer provides:
- Adhesion (sticking) of finishing material to the base.
- Strength (when using deep penetration strengthening mixtures), which is very important when strengthening old or crumbling walls.
- Water resistance – additional protection of bricks from precipitation or in rooms with high humidity.
- Protection. Primers with antiseptic additives reliably prevent the development of fungi and mold.
- Economical. After using primer mixtures, the subsequent consumption of paint or tile adhesive is greatly reduced.
- Quality finish. On a primed brick wall, the paint will lie smoothly, the plaster will not crack, and tile adhesive, with moderate consumption, will ensure reliable adhesion of the decorative tiles to the base.
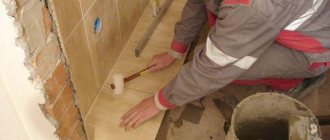
Tools and equipment
To perform plastering work, you need to stock up on the following tools:
- a trowel and a plaster trowel for applying the mortar;
- falcon for feeding the mixture;
- a rule and a trowel to level the solution;
- trowel for grouting plaster;
- container for mixing the solution;
- a construction mixer or drill for mixing the components.
- with a wide brush or roller for applying primer;
- level, plumb line and level for marking and control.
Figure 2. Tools used for plastering.
It is important to keep tools clean and wash them after completing each stage of work.
Primer Features
Primers are usually sold as ready-to-use surface preparations or as powders that still need to be prepared. In this case, it is possible to purchase mixtures for different surfaces: wood, metal, plaster, brick and drywall. The composition usually includes:
- film-forming polymers;
- pigments;
- drying accelerators;
- other materials to improve adhesion, heat resistance and hiding power.
To ensure that the result does not let you down, carefully study the conditions in which the work will take place. To choose the right paint, you need to know everything: from the quality of the applied plaster to the average temperature in the room. Regardless of the composition, the primer has the following characteristics:
- Strengthens the wall. Which necessitated the use for weak surfaces. In this case, you can choose a deep primer, which will be absorbed into the wall to a greater depth to increase its strength.
- Improves adhesion to materials. The primer removes unevenness and reduces the absorbency of the walls, which subsequently saves plaster, paint and wallpaper.
- Increases moisture resistance. The primer will allow you to forget about fungus, mold and rust.
Paint choice: outside and inside
There are many requirements for paint for painting bricks. The same paint is not suitable for working on an external wall and indoor brickwork.
USEFUL INFORMATION: Is it necessary to prime drywall before wallpapering: what to treat with
Outdoor wall paint
If you are going to decorate an external wall, for example, on an open balcony, you will need façade paint. But not just any composition is suitable for outdoor work; it must necessarily have the following properties:
- high light fastness;
- alkali resistance – the cement mortar that holds the masonry can negatively affect the applied coating;
- waterproof - protects against precipitation, prevents unwanted moisture absorption;
- high adhesion – adhesion to the surface being painted;
- vapor permeability - a brick wall must “breathe”, providing a microclimate inside the room;
- durability;
- resistance to damage.
Acrylic latex, silicate and silicone paints have the necessary characteristics.
- Acrylic latex paint creates an excellent waterproof coating, prevents the appearance of efflorescence - white salt stains, and has excellent elasticity and hiding power. Its disadvantage is low vapor permeability.
- Silicate paint has excellent vapor permeability, which compensates for its low water resistance due to the rapid evaporation of water and resistance to microorganisms. Among its disadvantages include low elasticity and the inability to bridge small cracks.
- Silicone paint does not allow water to pass into the walls, while allowing air to circulate through the coating, protecting the wall from contamination. Thanks to its increased elasticity, it covers two-millimeter cracks. A unique property of silicone paint is the ability to apply it to a brick wall within two days after the wall is erected. With all its advantages, this paint is not available to everyone due to its high cost.
Paint for a brick wall in a room
There is an opinion that indoors you can successfully use facade paint that is well suited for the porous surface of brick. But many formulations may be unsafe due to the volatile substances released. To paint a wall in a room, you need to choose a water-based and adhesive-based material.
Alkyd paint will create a semi-gloss effect, acrylic will give a matte surface. If the area to be painted is small, you can choose oil paint, which will give the brick a soft shine.
For rooms with high humidity - bathroom or kitchen - special moisture-resistant materials are suitable. For a brick fireplace, you need to choose a heat-resistant composition.
How to apply concrete contact
In order for the primer to perform its functions, you must adhere to the rules for its application.
There are always instructions for use on the packaging. You must read it carefully and adhere to these rules. The properties and methods of applying primers of different types from different manufacturers may differ, for example, some types of concrete contact can only be applied with a brush, while others are designed specifically for application by roller. These nuances must be taken into account.
Preparatory work
Before applying the primer, it is necessary to remove debris and excess dust; if there is old paint or plaster that does not adhere well, it must be knocked down and cleaned with metal brushes; Wash dirty surfaces with soapy water or soda solution and dry thoroughly.
When storing the material, sand settles to the bottom, so before work it is necessary to thoroughly stir the primer so that the sand is distributed evenly.
It is the sand that is part of the concrete contact that makes it possible to give the surfaces a roughness that ensures adhesion.
Applying primer
There are two main ways to apply primer:
- with a brush or roller;
- spray gun.
Applying concrete contact with a brush or roller is a rather slow and labor-intensive process.
It is necessary to apply it so that the sand is distributed evenly over the surface of the base.
It is much more productive to apply the primer with a spray gun. In this case, the air flow beats the residual dust and distributes the sand evenly over the surface.
In addition, the spray gun allows you to significantly save time.
Sometimes it is recommended to apply concrete contact using a roller, which is certainly faster and more convenient than applying it with a brush.
To do this, the primer will have to be diluted with water, but adding water will weaken the adhesive composition. As a result, the sand will not adhere well, which is noticeable even when applying the primer: the sand crumbles directly onto your hands. In addition, the fleecy surface of the roller absorbs large amounts of sand. The primed surface acquires an uneven, bald, crumbling texture.
There are types of concrete contact that are designed specifically to be applied with a roller. Such primers have a more liquid consistency, which allows you to use material more economically, while they provide surfaces with increased adhesion.
Concrete contact is applied to the base in one or two layers. After drying, a durable film appears on the surface of the base, resembling sandpaper to the touch. It is this structure that allows you to reliably hold finishing materials.
After working with the primer, the instrument must be immediately thoroughly washed with water, since the composition dries quickly, and after that it can only be washed off with a solvent.
Features of applying concrete contact for outdoor work
Concrete contact can be used at ambient temperatures from +5 to +25°C. When performing finishing work in the cold season, you need to use special frost-resistant types of primer intended for outdoor work.
Preparing a brick wall for painting
How to paint a brick wall
Painting brick walls
Painting brick walls is not that simple. This is where you need to choose the right dye and then apply it efficiently.
All work is completely done with your own hands, but only by following the required technology. Below are instructions on how to do it correctly.
Completing of the work
Before you start purchasing materials and doing the work, you should watch the video in this article and photos. After all, you first need to understand what the end result should be. After all, there is a significant difference in this matter: painting a brick wall on the balcony and painting the facade is a completely different option. There are two different approaches here.
Tools and materials
Before painting a brick wall, you need to take care of preparing the required working tools and materials.
Depending on the condition of the wall surface that will be painted, a number of tools may be required:
- Sponge;
- Cement. The M300 is perfect for this job;
- Protective glasses;
- Sandpaper. It must be taken in different grain sizes. If you have to process a large surface, then it is better to purchase a grinding machine;
- Special paint for brick walls;
- Scraper;
- Spray gun (see Selecting a spray gun for painting);
- Latex gloves.
By its structure, brick is a rather rough material, and when processing brick walls, tools quickly become unusable. To reduce tool wear costs, use high-quality and durable brush rollers and brushes.
Help in choosing paint
Brickwork has a rough surface in its structure; the heterogeneity in the masonry is explained by the presence of cement joints between the bricks. Painting such a surface is very difficult, for this reason a special paint for facades was developed.
- When choosing and purchasing facade paint, you should choose not ordinary paint for facades, but paint for painting brickwork (see Brick paint: how to choose and use). There are separately developed paints for painting both old and new brick walls, and having different features in their content.
- A large number of specialized paints designed for painting brick surfaces. Such paints have improved elasticity, the ability to penetrate deep into the surface being painted, and they also level and hide formed cracks.
- The optimal solution when painting external masonry is the use of elastomeric paint. Using this paint, you can protect the wall being treated from humidity and the effects of seasonal temperature changes. Plus, this paint can easily repair cracks in the masonry. When working with paint, you should prepare yourself for the fact that you will have to invest a lot of effort. Elastomeric paint has a thicker formula than ordinary facade paint, especially since the layer must be three times thicker when applied. The cost of paint is quite high.
- For regular interior painting, the choice of paints is significantly wide. Indoor walls can be painted with paints based on a variety of base substances. If the paint is chosen to paint a bathroom (see How and how to paint bathroom walls) or a toilet, you should choose a paint that is resistant to an alkaline environment and has water-repellent qualities. When painting heated surfaces, heat-resistant paint should be used.
- In addition to facade paint, when painting brickwork you can also use latex or acrylate paint. The above-mentioned coloring agents are resistant to sunlight and retain their original appearance for a long time. You can use transparent acrylic varnish by applying it in several layers, onto the masonry, which is made with the utmost care, the wall receives a unique shade, while maintaining its color.
- Although, the best solution can still be considered the use of natural latex paint. This paint occupies a leading place among similar paints. It has increased durability, has excellent water-repellent properties, and perfectly seals small cracks. Another advantage is the ease of application to the surface.
Attention: When choosing paint, you should choose a color that will match the features of the interior and be combined in the color scheme with other buildings and satisfy personal tastes.
Repair work
The processes carried out for painting brick surfaces contain three main points:
Attention: The durability, service life and quality of the painting done depend on how well the brickwork is prepared.
If the masonry preparation work is carried out unsatisfactorily, the surface to be painted will not be of high quality. Even the best paint will not hide defects, and pretty soon the attractive appearance will be lost.
Sealing cracks and removing plaque
If the wall is well prepared and cleaned, the quality of the painted surface will be unsurpassed. First, work must be done to prepare the wall using a brush with bristles made of fairly elastic metal wire.
Repairing cracks in masonry
- In the case where traces of the previous coating remain on the wall, it must be removed from the surface using a regular solvent. If traces of fungus, mold and lime stains are detected, this indicates that this surface is actively exposed to moisture, which can lead to premature destruction of the wall.
- Lime deposits and stains are destroyed with specially designed solutions. You need to work with them using personal protective equipment. First, use a metal wire brush to clean the affected areas. If salt appears on the surface of the wall, it is removed with the assistance of the same metal brush and water, then you should wait for some time and repeat the procedure if the salt appears again.
- Carefully examine the surface of the wall made of brick for the presence of irregularities and cracks. Minor chips and cracks on the wall surface are repaired using latex paint. which is produced specifically for brick walls. These paints are much more effective than alkyd paints and are better suited for painting brick walls. They are quite viscous and “breathe” easily.
- Large cracks and seams must be cleaned of crushed mortar, dust and dirt, and sealed with new mortar. Wash with a washcloth and a stiff brush, and use putty to level the surface. Allow the wall surface to dry completely completely for approximately fourteen days. If paint is applied to a wall that has not yet dried, then after a certain period of time traces of fungus and mold will appear on it.
Attention: If there are small cracks, they must be enlarged with a chisel and then sealed with mortar. The solution needs to penetrate into the crack.
Wall primer
There is an assumption that the wall surface should not be primed before painting. This is not an entirely true belief. Painting a brick wall on primer will last much longer.
Attention: The primer coating promotes better adhesion of the applied paint to the surface being painted and provides improved water-repellent ability. Paint consumption is reduced and the service life of the coating is increased. In addition to all this, the antiseptic additives contained in the primer create a barrier to the appearance of fungus and mold.
- When preparing a brick wall for the painting process, you should use a primer containing acrylic and latex. The primer should be applied in two or three layers, allowing the previous layer to dry.
- The thickness of the applied layer should not exceed two millimeters. In case of residual expression of greasy stains, another 2-3 layers of primer should be applied.
- For work it is better to use a spray bottle. Then the coverage will be uniform. It is better to purchase a primer with deep penetration.
Painting a brick wall
After finishing the surface preparation and drying it completely, it’s time to paint it:
- Using a roller with a two-centimeter pile or using a brush with hard bristles, you can apply paint to the wall indoors. It is more convenient to paint the outside of the wall with a spray gun.
Attention: Both inside and outside, paint application is recommended in two or three layers. Painting should begin from any corner of the upper part of the surface.
- The initial layer of paint serves as a primer, and subsequent layers are applied after the previous one has dried, this ensures the evenness of the layers and the absence of paint deformation.
- When starting to plan to paint a completely new wall, it is necessary to wait at least 12 months from the date of its construction. If this is not done, then defects may appear over time.
- Painting facade walls should be done in the summer, when the ambient air warms up to a temperature not exceeding 25 degrees. If you do not adhere to this rule, the paint will leave streaks and not lay down in an even layer.
- When painting the walls inside a living space, you should remove all the disturbing furniture or place it in the center of the room, covering it with film.
- If we take into account labor costs, then painting is much easier to work with than cladding or work related to plastering. Caring for such a wall also does not require special attention; washing the surface once or twice a year with a soap solution is enough.
- If the area is partially damaged, then you do not need to paint the entire wall; applying paint to the damaged surface is enough. After a certain period of time, the area that has undergone cosmetic renovation will merge in color with the rest of the wall.
We paint a brick wall slowly and according to technology. Only then will the coating last long. The coating is not expensive, but requires careful preparation for application.
Graduated from the Faculty of Architecture of the Penza State Institute of Architecture and Construction. For the last ten years, he has been a leading specialist in a large construction company in Penza, engaged in the construction of multi-storey residential buildings. Total work experience in the specialty is 18 years. Consults on design issues, selection of materials for interior and exterior decoration, and technology for finishing work.
Painting brick walls
The fashion for unplastered brick walls has returned and is used in interior design of all styles and trends. But brickwork cannot be left in its absolutely original form. To prevent the bricks and mortar that were used to build the walls from absorbing moisture and deteriorating over time, the surface must be treated.
For interior walls, you can use any acrylic, polymer, cement or silicate paint.
Painting a brick wall is the most optimal treatment method, which will not only protect the masonry, but also give it a more aesthetic appearance. Painting brick walls is also attractive because it is suitable for decorating not only facades, but also any non-residential and residential premises in an apartment. If fragments of walls with visible brickwork are used in a room, they can be coated with a special paint that “breathes”. In the kitchen and bathroom use moisture-resistant paint that repels grease stains, and in the hallway use regular acrylic paint. Painted brick will look appropriate in all rooms.
Materials and tools needed for work
Before painting a brick wall, you need to prepare all the necessary tools and materials. Depending on the condition and type of wall (new or old, interior or façade), you may need:
For each type of paint, you should select a suitable primer. For latex paint, a medium or deep penetration acrylic primer is suitable.
- a sponge or a stiff wire brush;
- wall cleaner;
- brushes with stiff bristles or roller;
- spray;
- sponge;
- scraper knife;
- sandpaper;
- paint for brickwork;
- putty or grout;
- cement;
- primer;
- rubber gloves and safety glasses.
The surface of a brick wall is quite rough, so the tools used to finish it wear out quickly. To reduce their consumption, use durable and hard brushes, brushes and rollers.
Choosing paint for brickwork
The paint is applied in overlapping strips of one to two meters. The borders will not stand out, and there are practically no drips. Remaining paint can be removed with a special sponge.
Brick is a facade material, so even for painting interior walls it is better to use facade (latex, acrylic or acrylate) paint for brickwork, designed specifically for non-uniform and porous surfaces. Paints intended for brickwork are characterized by increased elasticity and increased permeability into the surface material. Thanks to these properties, during the painting process, additional sealing and gluing of most cracks on the surface and its leveling occur.
When choosing paint, you need to check with the seller whether you are buying it for finishing new or old brickwork, since it differs in composition, service life and quality of painting. If you plan to paint a small area of the wall for hygienic or decorative purposes and there are no visible erosions on the wall, you can use regular acrylic paint or enamel.
In any case, you should not use ordinary oil paint, as it forms a dense, “non-breathable” crust, which leads to the destruction of the masonry.
Procedure for repair work
The work of painting brick walls consists of 3 main stages:
- preparing the wall surface for painting;
- primer;
- painting.
The quality and durability of the paint largely depends on the correct preparation of the brickwork for painting.
Without properly carried out preparatory work, all the defects that are inevitable on an unprepared wall will be noticeable, and even the best paint and varnish coating will quickly become unusable and will not be able to hide them.
Removing plaque and sealing cracks
The brick can simply be varnished in several layers.
High-quality painting of brick is only possible on a clean wall. Before washing the wall, its surface must be cleaned using a stiff wire brush and liquid detergent. If there are remnants of old paint or whitewash on a brick wall, treat it with a solvent. The presence of lime stains and mold on the wall indicates that in such places the wall will absorb water, which will accelerate its destruction.
Limescale deposits and mold are removed with special solutions designed for removing limescale discolorations, which must be handled with safety glasses and rubber gloves. First, the affected areas are cleaned with a solution using a wire brush, and then washed off with water. If there is efflorescence on the wall, they are also removed with water using a stiff brush and wait a while to make sure there is no need for re-treatment.
Carefully inspect the walls for protrusions and cracks. Small cracks can be easily repaired with latex paint produced specifically for brick walls. Such paints are better suited for brickwork than alkyd ones. They are quite viscous and breathable, which allows them to be used for sealing small cracks.
Free large cracks and cracked seams from dirt, dust and crumbled old mortar, then seal with cement mortar. Use a stiff brush or sponge to smooth the wall and leave for 2 weeks to dry completely. Then the wall needs to dry completely, which takes at least 7-10 days. If you start painting before it is completely dry, after a while fungi and mold may appear on the surface.
Primer before painting
If efflorescence occurs, treat the entire brick wall with a special impregnation to form a water-repellent layer.
There is an opinion that bricks can be painted without the need for a primer. This assumption is not entirely correct. The primer increases the adhesion of paint to the wall surface, makes the brickwork water-resistant, reduces paint consumption and guarantees the durability of the coating. In addition, thanks to the antiseptic additives it contains, the primer prevents the appearance of fungi and mold on the walls.
To prepare a brick wall for painting, use an acrylic or latex-based primer. The surface must be primed in 2-3 layers, allowing each layer to dry before applying the next. The thickness of each layer should not be more than 2 mm. If there are greasy stains on the wall, they need to be primed more thoroughly, adding 2-3 additional layers.
How to paint a brick wall
Be prepared for the fact that paint will not adhere smoothly to a brick wall.
After the surface is completely prepared and dry, you can proceed directly to painting it. The paint is applied indoors using a roller with a 2 cm pile or a stiff brush with thick bristles in stripes with an overlap of 1-2 mm. It is better to paint external walls using a spray gun. In both cases, you need to paint in 2-3 layers, starting from any upper corner of the wall. For the first layer, the paint is slightly diluted and applied as a primer. Each subsequent layer is applied after the previous one has completely dried to avoid deformation of the paint.
If you decide to paint a new wall, then before starting work you need to wait at least a year from the time of its construction . Otherwise, due to the fact that the wall has not undergone the necessary processes of shrinkage, weathering and leaching, defects will very quickly appear on the painted surface. It is better to paint façade walls in the summer when the air temperature is not higher than 25 °C. Otherwise, the paint will not lie flat and will leave streaks on the brick wall. If the work is carried out indoors, before it begins, it is advisable to remove the furniture or place it in the center of the room and cover it with oilcloth.
In terms of labor costs, painting is much simpler than plastering or cladding, and caring for painted brickwork will not be difficult. It is enough to wash the surface 1-2 times a year with a soapy water solution. If areas of the coating need to be restored, the entire wall does not have to be painted. It is enough to apply paint only to damaged areas. Over time, the updated fragment will merge with the entire surface of the brick wall into one whole and will be visually indistinguishable.
Painting a brick wall: step-by-step instructions
Painting a brick wall can be done in two cases: when there is a need to change the appearance and after time has passed to restore its former beauty. If you choose the right color, you can emphasize the architectural features of the building - this is true when it comes to the facade. However, quite often a brick wall becomes part of the interior; in this case, it is also necessary to carefully choose paint and follow the technology for carrying out the work.
Why paint a brick wall?
This type of finishing has a cosmetic effect and protects the wall from external influences. In order to achieve a good result, special attention must be paid to preparation. As a result, you can get a glossy or matte surface, which may have inclusions, which will expand the space if the composition is applied indoors. The matte surface is more resistant to mechanical stress and has increased abrasion resistance.
Paint selection
Paint for painting a brick wall can be organic silicon. It allows you to form a reliable layer that allows water vapor to pass through. The composition is resistant to mechanical damage, temperature changes and seasonal changes. However, you will have to pay a lot for such a mixture.
Latex products are also characterized by vapor permeability. It has high decorative qualities and is characterized by harmlessness. Latex compounds have one disadvantage, which is low wear resistance. If you will be painting a brick wall, it is recommended that you first consider photos of such work. As a result, you will be able to understand which composition is better to choose.
Among others, lime-based paints are available on the building materials market; they look quite attractive, allow steam and air to pass through, and are also environmentally friendly. However, they have a significant disadvantage, which is expressed in small detachments that spoil the overall picture. Painting can be done with the following types of paints:
Alternative solutions
For such work, water-based acrylic material can also be used. There are no harmful substances among its ingredients, and the coating is rich and has a high degree of wear resistance. Acrylic paint with the addition of silicone is quite common today. The surface ultimately acquires increased performance characteristics.
Along with the paint, it is recommended to purchase a primer, which is applied beforehand. With its help, you can remove dust from the surface, increase adhesion to materials and eliminate the occurrence of streaks. The primer allows for uniform coloring. As an additional protection for walls from moisture, you can use a water repellent. It increases the thermal insulation qualities of walls, forms a breathable and moisture-repellent film.
Recommendations for painting a brick wall
Painting a brick wall should not be done immediately after the masonry is completed. It is necessary to postpone work for a year or more. This time will be enough for the walls to dry. The paint will peel off if this recommendation is ignored. Work outside should be carried out in warm weather, when the temperature is equal to or less than +25 °C.
You should not start work if there is a strong wind outside the window, because air currents will attract dust particles to the surface of the facade, which will spoil its appearance. It will be possible to get rid of defects only by re-painting, which will entail additional costs of money and time.
For reference
Painting a brick wall in the interior requires clearing the room of furniture. If it is impossible to remove them from the rooms, then you need to move all the objects to the center of the room and cover them with old sheets or polyethylene. In this case, the trim and baseboards are dismantled, otherwise they need to be protected with masking tape. Floors must be covered with film or paper.
Preparation of tools and materials
Before you paint a brick wall, it is important to prepare some tools, including:
- brush with metal bristles;
- detergents;
- primer;
- scraper;
- grouting solution;
- painting tray;
- roller;
- dye;
- brush or spray gun;
- individual protection means.
Preparing for coloring
If you prepare the surface before painting, you will create the perfect base for the final coat. The brick wall should be cleaned with a brush. Painting a brick wall on a balcony is carried out according to the same principle, which involves removing the old coating. To do this, prepare bleach powder, which must be diluted in water. The ratio is as follows: 1 to 3.
Once the surface has been treated, it needs to be watered generously. The base should be cleaned of masonry mortar and loose brick particles. A wire brush and solution will allow you to treat the masonry to remove salt deposits. If this step is neglected, efflorescence will soon spoil the surface. They will affect the decorative qualities of the finish and cause the material to peel.
Preparing a brick wall for painting requires the application of an antiseptic composition. To do this, you need to use chlorine-containing products like “Whiteness”. They are applied to the wall, which must then be left for 20 minutes. Then the composition is removed from the surface using a stiff brush or scraper.
Additional preparation tips
The next stage of painting brick walls inside a building involves treating the surface with a soap solution. You should wait a certain time until it dries completely. If any moisture remains, this will cause peeling and swelling of the paint layer, which will develop cracks during use.
The masonry must be inspected for cracks and chips. If defects are noticed, they can be sealed using water-based silicone sealant, as well as sand-cement mortar. After the plaster has dried, any excess should be rubbed off with sandpaper. If there are greasy stains on the surface, they need to be covered with a primer.
The surface should be left until dry, this will take approximately 7 days. Then the masonry is coated with a primer in two layers; you can use one of the following tools for this:
If you use a primer based on acrylic or latex, this will increase the adhesive properties and provide the ability to create a reliable base, in addition, it will be possible to reduce paint consumption.
Work methodology
Once the brick wall has been cleaned before painting and the primer has dried, you can begin painting.
- All door and window openings are covered with thick cardboard before starting the process, this will eliminate the need to wash off drops of paint, which will certainly fly apart. All parts and surfaces that are not to be painted must be protected. This is especially important if you plan to use a spray bottle.
- For painting work, it is recommended to use a brush whose working surface has a width varying from 80 to 100 mm. This indicator is optimal for applying the composition in a horizontal direction. A roller with medium pile is also perfect. It will not leave streaks or smudges. If you want to speed up the work, you should use a spray gun; it will ensure even distribution of the composition.
- Painting a brick wall starts from the top corner. When using a roller or brush, it is necessary to ensure that even pressure is applied to the tool, this will avoid the formation of excessive application of the mixture or bald spots. The paint must be stirred regularly to prevent sediment from forming.
- As soon as the first layer has dried, you can begin the second. If information about the waiting period between layers is not indicated in the instructions for the paint, then you should wait 3 hours. Depending on how porous the brick is, two or three coats may be necessary. If desired, the seams should be painted over with darker or lighter shades. In the first option, it will be possible to emphasize the geometry of the brick.
- Preparing the ceiling for painting with your own hands
How to prepare for painting the ceiling The mesh tape glued to the joint, then you need to spread the starting... - Painting a brick wall in the interior Brickwork in the interior Brickwork has a special charm. She makes a reference to history, asks...
- How to properly prime walls before gluing wallpaper Priming walls for wallpaper: why and how it’s done The photo shows priming a plasterboard wall.…
- How to remove paint from a concrete wall How to remove paint from a wall After chemical treatment, oil paint loses its physical properties, softening...
Design solutions when painting a brick wall
When considering options for painting a brick wall, you can choose the most appropriate technology for yourself. For example, if you decide to apply this type of interior design to a hallway or other room that has insufficient lighting, then you can cover the wall with transparent varnish. In this case, the material will retain its color, and the gloss will make the room brighter. If there is no problem with lighting, then preference should be given to a matte finish; it will protect the surface from dust and remain invisible to the eye. Another option for decorating a brick wall involves different methods of jointing. They can be made oblique so that the shadow effect is more noticeable, or even - in this case it will be possible to achieve a high degree of decorativeness.
The loft style is quite popular today when decorating rooms. If you also decide to use it, then the brick wall can be given an antique effect. To do this, use any suitable tool with a sharp working surface and a hammer. Pieces should be broken off from the brick in different places, and then the wall should be painted using paint of different shades of red. At the last stage, the surface is covered with matte paint.
In order to smooth out aggressiveness, you can use curtains of bright or light shades. The same applies to bathrooms, where this style can be found most often today. It should not be used for small rooms, but for those located on the upper floors of private houses, it is perfect.
Conclusion
If the surface of the brickwork is brown or red, but this option does not suit you, just buy a jar of paint. It will be enough to choose the right technology for designing the base. There are many ways to design a surface, and you can achieve the effect you want - you just need to put in the effort.
6 Best Dog Breeds for Families with Young Children Many families decide to get a dog around the time they have their first child. But which dog breeds are best for families.
What is it like to be heir to the royal throne? 7 Surprising Facts Royal heirs are entitled to a range of benefits, but until recently these were also limited by ancient traditions formed over time.
How to tell your daughter or son that there will be another child in the family. Are you expecting another child? Congratulations! You might want to share this joy with your family and friends, but what about your older children? When
What is it like to be a virgin at 30? I wonder what it’s like for women who didn’t have sex until almost middle age.
11 Weird Signs That You're Good in Bed Do you also want to believe that you please your romantic partner in bed? At least you don't want to blush and apologize.
15 Cancer Symptoms Women Most Often Ignore Many signs of cancer are similar to symptoms of other diseases or conditions, which is why they are often ignored. Pay attention to your body. If you notice.
Technology of applying primer under plaster
Finishing the facade with relief plaster involves preliminary preparation of the walls. Which includes treating wall surfaces with a primer. To complete the work, you need to prepare rollers with short and long handles, several brushes of different sizes for hard-to-reach areas, a container for primer and the primer itself. The priming process has a mandatory order:
- apply the composition to easily accessible areas of the surface, previously cleaned of dirt and dust, using a roller with a long handle;
- the primer applied to the walls is distributed over the entire area with a roller on a short handle, moving up and down and left and right;
- Using a construction brush of a convenient size, areas that are difficult to reach with a roller are treated with a primer: joints, corners;
- After the first layer has dried, approximately 3-5 hours later, apply a second layer of primer. And on areas with a particularly loose and porous structure, three or more layers should be applied. This will enhance the properties of the soil and not miss the slightest area.
To speed up the process of priming the walls, you can use a spray bottle, first diluting it to the desired consistency. After the primer has completely dried, you can proceed to applying decorative plaster.
Note. While the primer layer is drying, it is necessary to ensure that the treated surfaces are free from dust and dirt.
Photo 5. Stages of applying plaster
Why do you need to prime?
The main function of primer mixtures is to strengthen the bond between layers of plaster and the wall it is applied to. In this way, the walls are prepared for plastering. But there are several more functions:
- The primer composition increases the strength of the outer layer of the plaster composition.
- When used, interlayer adhesion improves.
- The coating eliminates fungi and mold between layers of the plastered surface.
- The primer promotes waterproofing and protection against corrosion in preparation for plastering.