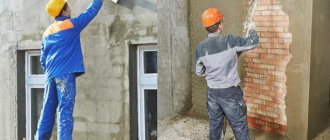
Laying a brick oven is a long process that requires special attention. But its construction does not end there. Craftsmen strongly recommend either plastering the stove if it is new, or putting in order the one that is in use. This will not only make it decorative, but will also significantly extend its service life.
It is quite possible to carry out plastering yourself. You can make the mixture for application yourself or buy it ready-made in the store.
In this article we will analyze all the important points of this stage of oven design.
Why plaster the stove?
The materials of the Russian stove include:
- clay;
- fireproof (fireclay) brick;
- iron (doors, grates, grates).
Each has its own heating temperature, expansion, and thermal conductivity.
Yes, it is indeed possible to leave the stove unfinished, but after a short time it will lose its neat appearance along the colored seams. If the masonry was done in haste, cracks will begin to appear.
Plastering is performed to strengthen the structure, protect it from drying out, and give it a beautiful appearance.
In addition, the procedure is relevant in the following cases:
- The oven is not laid out neatly. The mixture will help level the corners and sides.
- The old coating began to crack and fall off.
- To increase the strength of the walls, their thickness will increase.
- Heat capacity improvements. The bathhouse or house will remain warm longer.
- The seams were filled with a natural-based mixture, which is why insects settled there.
- The interior design of the room has been changed, so the furniture needs to be decorated in the appropriate style.
- Increases the level of fire safety. It prevents carbon monoxide and smoke from entering the house through cracks in the brickwork.
Using heat-resistant plaster is an excellent way to restore antique stoves, fireplace boxes, followed by laying ceramic tiles, marble and other decor on top.
Preparation for plastering
Before the plastering procedure, you should be patient, since preparing the surface of the stove can take a whole day.
It’s also better to stock up on the necessary tools in advance so that you don’t have to run to the hardware store in the midst of work. So, you will need:
- Spatulas of different sizes (a medium one is suitable for scooping up the solution, but a wide one is better for uniform application).
- Container for liquid plaster.
- Plaster hammer for delicate driving of plaster nails.
- Trowel (trowel) for leveling the mortar on the surface.
- Hammer-cam (used when working with tools such as chisels, trojans, gears).
- Scissors needed to cut fiberglass mesh. Or metal scissors, if the work will use a chain-link mesh.
- Grater and trowel for leveling the finished coating on stove walls.
- Smooth for sanding plastered walls.
- Chisel (you can use it to make notches on brickwork for better adhesion of materials).
- Assortment of primer brushes.
- A metal brush for sanding the stove and getting rid of the old coating.
- Building level, plumb line and rule - to control the evenness of application of materials.
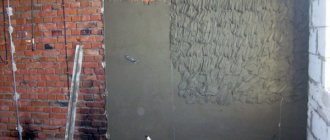
The first stage of work is to thoroughly clean the stove walls from dust, soot or remnants of the old coating. If the surface is not properly prepared, the adhesion of the materials will be poor and this finish will not last long. It doesn’t matter whether the stove is old or just built.
The next step is deepening the seams. The layer of binder mortar between the bricks should be hollowed out by 5-10 millimeters. But you shouldn’t go too deep, otherwise you’ll have to spend a lot more plaster. The resulting recesses must be cleaned of dust.
Once warming is complete, you can begin priming.
It is important to remember that only perfectly smooth masonry can be plastered. If there are significant flaws on the wall, then it should be leveled using a metal reinforcing mesh. It is secured with nails and then primed.
The primer should never be neglected. This pre-coating helps:
- Apply the plaster evenly.
- Reduce fixed asset consumption.
- Extend the service life of the finish.
The choice of material depends on the type of stove and the degree of its heating:
- Less than 100 degrees C – used for autonomous heating. In this case, ordinary finishing materials will do. If the technology is followed, they will last a long time and will not affect the efficiency of the furnace.
- Less than 300 degrees C - you need to take a heat-resistant primer that can retain its properties during prolonged heating.
- More than 300 degrees C - a primer is not needed at all, even a fireproof one, since it can only provoke peeling of the plaster.
To strengthen the coating or level the wall, special meshes are used. They are sheets of metal or fiberglass fibers with cells measuring 15-20 millimeters. Such a network, in addition to strengthening the plaster, increases the resistance of the finish to temperature changes and increases thermal conductivity properties. It is secured using special nails that are driven into the layers of mortar between the bricks.
Classification of plaster for stoves and fireplaces and requirements for it
During combustion, a significant temperature difference is formed outside and inside the product. It disappears only after it has completely cooled down.
To avoid cracks in the brickwork, purchased or homemade plaster must meet a number of conditions:
- Be resistant to high temperatures, be heat resistant.
- Have an elastic structure. This will simplify the application process. The mixture will not begin to crumble from drying out.
- All components in the composition must be environmentally friendly and, when heated, safe for health.
- Be fire-resistant, not exposed to flames, maintain working properties.
- Adhere well to the surface.
Regardless of whether it is purchased thermal plaster or made at home, it must meet the requirements.
Ready-made factory mixtures are sold in dry form, so you need to dilute them with water in the correct ratio.
Based on the composition of the mixture, they are classified into two types.
Simple
Simple plaster is called plaster, which contains only two components: clay and sand.
Before making the solution, sand is passed through a sieve, clay through a metal mesh with small cells. This way the raw materials are clean, powdery, without any debris.
Stove makers recommend choosing fatty clay, since this way the adhesion to the surface will be much better. With increased fat content, simply increase the proportion of sand in the mixture.
Before mixing the solution, the coarse clay must be filled with water and allowed to soak as much as possible for 2–3 hours. This will make the mixture plastic, and over time the coating will not begin to burst.
Complex
A complex composition involves the combination of three or more components at the same time. There are several mixture options:
- lime, clay, sand;
- asbestos, clay, sand;
- clay, cement, asbestos, sand;
- fiberglass, sand, gypsum, lime, clay.
The basis throughout is heat-resistant clay.
It is important to maintain the correct proportions of the mixture and mix to the desired consistency, otherwise the solution will become too hard and may crack.
The composition of the purchased putty includes fireproof kaolin clay. After being fired (at a temperature of 1500 degrees), it is crushed to powder.
How to plaster a stove to prevent cracks
The solution can be prepared independently in the following ways:
- the usual mixture consists of sand, water and clay;
- complex solution contains lime, gypsum, cement.
Complex mixtures are more often purchased at construction stores, since preparing them yourself can be too difficult.
To create a simple solution, clay, river sand in a ratio of 1/2, small fiberglass for strength and water are used. There is skinny and fatty clay. When using oily clay, you can add 2 more parts of sand.
The refractory plaster coating for the stove should not crack when the heating masonry shrinks and expands. Of the many options, clay solutions show the best results. Such a mixture will not crumble or become cracked when heated strongly.
Gypsum plaster without additional admixtures cannot be used for finishing stoves. This coating cracks when the base gets hot. When finishing stoves, gypsum serves only as an additional component. The material is mixed with clay and lime.
Asbestos fiber is often added to the mortar for strength and elasticity. This mixture lasts a long time on the wall and can withstand exposure to flame and moisture. Asbestos prevents cracks from occurring. Sometimes more affordable straw chaff is used instead.
Fireclay clay is added to thermal plaster. This component can be obtained after heat treatment of kaolin clay. Once the fired material turns into stone, it is crushed finely and then used.
Clay-sand
The mixture for plastering a brick oven is elastic and non-flammable. This waste-free material can be purchased at a hardware store or dug up yourself. However, when searching on your own, you should only look for pure breeds. It should be free of grass, roots and small stones.
A mixture of clay and sand has the following advantages:
- budget material can be purchased in any region;
- clay plaster is easy to restore;
- the material holds heat well;
- clay is environmentally friendly and does not contain toxins;
- the material does not corrode hands upon prolonged contact with skin;
- good vapor permeability helps preserve the stove walls in the summer, when heating is not required;
- the remaining solution can always be soaked and used;
- clay is conveniently applied to the base;
- When finishing, you don’t have to rush, since the solution takes a long time to dry.
Attention!
However, when finishing a stove with clay, you cannot apply a thin layer. Material thinner than 1 cm will crack and peel.
Clay-sand plaster is a good and inexpensive composition for a brick oven
Cement-clay-sand
A plaster mixture based on clay, sand and cement becomes very strong after drying. The solution is not so convenient to apply and dries faster, so it is mixed in small batches.
The mixture is also supplemented with glass and chalk. All components are mixed without liquid, then clay is added. At the very end, liquid glass is poured into the solution. This coating will be quite strong.
Lime-clay sand
Lime makes the solution plastic, strong, more sticky and resistant to biological attack.
Mixture proportions:
- clay – 1 hour;
- lime – 1 hour;
- water – 2 hours;
- asbestos – 0.2 hours.
To increase strength, you can add 1 part of cement.
Is it possible to plaster a stove with gypsum plaster?
Gypsum mixtures must contain heat-insulating components in order to be used for finishing stoves. It is recommended to add fiberglass. The material helps withstand heat and prevents fire. The strength of such plaster allows it to withstand strong mechanical loads.
Before finishing, the base is cleaned of protruding mortar residues and other dirt. Brick is always primed several times.
What not to plaster a stove
Plasterers do not recommend using the Rotband brand mixture, since it is made from gypsum, which spreads at temperatures above 100 degrees. The coating will fall off from the hot stove along with the facing material.
Pure gypsum plaster is not used for finishing stoves and fireplaces
Types of plaster
Let's look at the main types, advantages and disadvantages, and nuances of use.
Clay-sand
This is a good plaster composition for a brick oven. It's inexpensive. It is easy to prepare it yourself.
You can even dig up clay if the terrain allows it. But to knead it, you will have to clear it of debris and sift it thoroughly.
Among the advantages of using clay mortar:
- Low thermal conductivity, so the raw material retains heat for a long time.
- Environmentally friendly, safe for health.
- Low price.
- Vapor permeability.
- Long shelf life. Does not spoil even when diluted.
- Does not apply to quickly hardening raw materials.
- Plasticity of the material. It is convenient for them to carry out coating.
- The coating can be repaired.
- Does not burn even under high temperature.
- After application there is no waste left that must be disposed of.
The only negative is that it needs to be applied in a layer at least 1 cm thick, otherwise the solution will begin to fall off.
The ratio of the components is as follows: one part clay goes to two parts sand. 1:10 fluffed asbestos is added (at the discretion of the owners).
Cement-clay-sand
According to the classification, it belongs to the complex type. This mortar composition is often used for laying bathhouses, stoves in the house, and fireplaces. Forms a highly durable coating. But in comparison with clay-sand plaster, it sets worse. It hardens quickly, so mix it in small portions.
The optimal grade of cement is M150.
For preparation, take three parts of sand, one part each of cement and clay.
If the surface is tiled on top, then another part of liquid glass and chalk is added to the mixture - this increases strength and resistance to cracking.
Lime-clay sand
The addition of lime gives the solution plasticity, improves adhesion to the surface, and disinfects the mixture from insect larvae and bacteria.
To knead, it is recommended to take one part clay, one part lime to two parts water.
Gypsum based
Expert advice: gypsum plaster in its pure form is not used for finishing stoves and fireplaces. When heated, frozen plaster quickly cracks.
But as an auxiliary component, gypsum will increase the viscosity and density of the composition.
Such mixtures harden in a short time, so it is better to cook in small portions. From kneading to hardening it will take a maximum of 15–20 minutes.
There is a mixture on sale where gypsum replaces cement and is responsible for holding the composition together. It is also combined with lime to give strength to the plaster.
With added asbestos
The use of asbestos is similar to coating reinforcement - it increases strength and adhesion to the surface.
When mixing yourself, asbestos should be poured into the mixture in small portions. In addition to the crushed powder, fiber is added.
Asbestos is different:
- durability;
- moisture resistance;
- fire resistance.
This component protects the plaster from cracking.
An alternative to asbestos is chopped straw (much cheaper) and fiberglass mesh fibers.
Strengthen the mixture with salt
Experienced stove-makers have made it a rule to add kitchen salt to the solution. This increases the hygroscopicity of the clay, due to which the plaster does not dry out, remains plastic and does not crack.
In addition, insects are not interested in the salt solution, which will be a big plus if the stove is located in a private house or residential cottage.
How to make the solution yourself
To mix the components, use an electric drill with a mixer.
Use an electric drill with a mixer, or mix the mass by hand to prepare the plaster. Take clean water, without silt or fatty film on the surface. Rainwater is ideal, but this condition is not mandatory, so filtered liquid is used.
Lime is an excellent plasticizer. The good viscosity of the substance contributes to the greatest adhesion of the plaster to the base. There is no universal mortar that can be used to plaster a brick stove in any type of house and under different operating conditions. It is better to consult with an experienced stove maker before plastering a brick fireplace.
From clay
The clay is pre-soaked for 24-48 hours.
The advantages of the material compared to lime and Portland cement are its fat content. Most often, stove makers try to plaster a brick stove with clay, since the composition is strong, elastic and plastic, and resists a sharp rise in temperature.
Cooking process:
- the clay is pre-soaked in a container for 24 - 48 hours;
- knead the lumps, mix until a creamy consistency is obtained;
- strain before use;
- sand, slaked lime, asbestos fibers, liquid clay are poured into the container, water is added, and mixed.
A simple solution is stored under a lid made of cellophane or roofing felt. Complex mixtures are used during the day, and with gypsum - immediately after mixing.
From fireclay clay
Sand and water are added to fireclay clay.
Burnt kaolin (clay after heat treatment) partially loses its plasticity, but becomes heat-resistant.
Released material:
- with moisture absorption 2 – 10% (highly annealed);
- with absorption up to 25% oxen (low annealed).
Fireclay clay is poured into the trough, sand is placed on top, and water is poured in. Stir, cover and leave for 72 hours. After mixing again after the specified time, the solution is ready to plaster the outside of the stove.
Complex compositions with glue, fiberglass, asbestos do not need to be defended; they can be plastered immediately, after first saturating the wall with a primer.
With the addition of cement
Cement-clay-sand mixtures are used for plastering chimneys.
For the cement-clay-sand mixture, grade M 400 is used. Cement hardens 20 - 25 minutes after mixing with water, but the process will finally end after 4 hours. Prepare such a volume that can be worked out during this time.
Work process:
- a solution with the consistency of a thick dough is made from sand, oily clay, and filtered water;
- Asbestos and cement are introduced into the mass, water is added and quickly mixed.
The composition may contain only cement in the form of a binder component, or lime may be added to it. A mixture with added cement works well in damp areas. It is used for plastering chimneys in the attic area and outdoors.
Plastering the stove with your own hands: step-by-step instructions
This can be done quickly if you carefully prepare in advance and correctly calculate the consumption of materials, taking into account the area of the product.
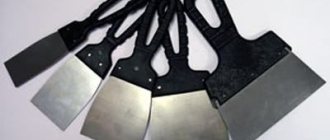
Required Tools
For plastering you will need:
- Master OK. For application, uniform distribution of the solution over the surface.
- Metal scissors. Needed for cutting reinforcing mesh.
- Spatulas of different sizes. Used for distributing and smoothing the mixture in corners and in narrow places.
- Grater, ironer. The first tool is taken for rough grouting. The second has the same shape, but the coating is not mesh, but rubber - for sanding before painting.
- Chisel. It will be needed to apply notches to the cement coating. Suitable if you have to cover a stove without reinforcement.
- Hammer, metal brush.
- Brushes for applying primer and paint.
- Construction mixer. Speeds up mixing of the solution.
- Plumb line, level, tape measure, pencil.
- Plastic film to cover the floor and wall corners from particles of the mixture and paint.
If the walls of the furnace are uneven, then you will have to install a beacon, and more than one. By plastering taking into account the beacons, it will be possible to achieve alignment of the walls and corners of the stove.
Surface preparation
Before the main work, the new and old stove should be prepared.
Finishing of a new product can only be done after the final hardening and shrinkage of the masonry mixture. Otherwise, the applied plaster will crack very quickly. In addition, it is important to heat the stove several times, even if this happens in the summer. The walls should warm up well and condensation should disappear. It is recommended to unstitch the seams to a depth of 0.5 cm and brush over the metal. It is worth making notches on the concrete surface (for better adhesion of the plaster to the walls).
If the stove is old, pieces of chipped mortar, plaster, whitewash or paint are removed. If necessary, the walls are cleaned entirely. Cracked bricks are replaced with new ones and re-laid. The remains of the loose solution are swept away with a broom.
In both types of furnaces, soot and soot are removed from the surface, and the ash is cleaned. Oil stains are removed with a degreaser.
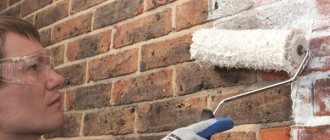
Next, use a brush to thoroughly prime the entire surface to be plastered.
Basic rules for preparing the mixture: composition, proportions
In rural conditions, stove makers do not buy ready-made compositions in the store, but prepare them themselves.
The most popular recipe is a clay-sand mortar with the addition of lime and asbestos:
- 2-3 days before use, the clay should be soaked in water. In this case, all floating debris is immediately removed and refilled with clean water.
- It is better to pass the settled clay through a sieve. Stir until smooth.
Even small lumps should not remain in the clay, otherwise this will be the first reason for the formation of cracks in the coating.
- The clay is combined with dry sifted river sand. You can use wet sand, but then you will need more water to mix the solution. The proportion is 1:2, where one part clay goes to two parts sand.
- When adding lime, it is soaked in water overnight.
- The asbestos will need to be fluffed up.
- For one part of clay there is a tenth of asbestos and lime.
To enhance the plasticity of the solution, add 200 g of kitchen salt to the bucket of plaster. This protects well from cracks and guarantees uniform drying of the treated surface.
Another factor that is worth taking into account is how you will have to heat the stove. If the fuel is coal or peat briquettes, which give off intense heat, then it is recommended to add fireclay powder to the mixture. This will increase the resistance of the coating to high thermal loads.
For a wood-burning stove there is no need for such an additive.
Reinforcement
Reinforcement is a necessary stage of construction aimed at increasing the strength of the plaster. Prevents peeling and falling off of finish.
It is customary to add to the mixture (optional):
- asbestos fiber;
- hemp;
- slag wool;
- small fiberglass;
- chaff
Before applying the solution, it is recommended to reinforce the product with metal mesh.
Reinforcement fasteners for stoves with curved walls, where the plaster layer is more than 1.5 cm, are required.
A steel mesh with a cell size of up to 20 mm is suitable for this.
Mounting to the wall is carried out in two ways:
- Nails that are driven into masonry joints at a slightly angled angle. The length of the nails is 10–11 cm. The vertical fixation step is every 2–3 brick rows, and horizontally every 15 cm. You don’t need to hammer it all the way in, but so that the head remains 5 mm on the surface.
- The wire that was laid during laying. Wire material – copper, stainless steel, annealed nichrome. It is tied tightly to the reinforcing mesh.
There is also an old-fashioned way of reinforcing with burlap or gauze. The burlap is dipped into a semi-liquid solution so that it is well saturated. You need to cover the walls on top of the mortar. It is important to smooth it thoroughly so that there are no bubbles or dents.
But this method is unacceptable if heating is carried out with coal.
Applying plaster
Performed in the following sequence:
- Heat the oven well.
- We prepare two types of solution. One has a liquid consistency, like sour cream, the other is viscous, denser. Mix the viscous solution right before plastering.
- We check the quality of the reinforcement. We cover holes and chips in the masonry with putty.
- Moisten the brickwork with water.
- We plaster with a liquid mixture with a layer of up to 5 mm. It is convenient to do this with a wash brush.
- Let's give it time to set. Mix the viscous solution.
- We distribute the plaster evenly over the surface from top to bottom.
- Once the mixture has set, you can begin grouting.
- When drying, we repeatedly moisten the walls with water so that the solution does not dry out or crack.
You can wrap the oven with burlap soaked in water. It perfectly retains moisture and promotes uniform drying.
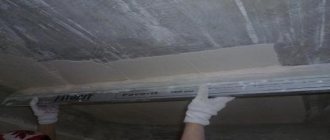
The cladding of an unevenly laid stove requires proper leveling. This is done using special beacons, which are attached to the walls and aligned with them during plastering. In this case, the layer of solution can reach a thickness of up to 8 cm.
Difficulties may also arise when finishing corners. An angled spatula will help with leveling.
The popular method of removal is to fix the corner of a wooden slat on one side. It is necessary to apply the solution, and as it dries, move the strip to the other side of the corner.
It is not recommended to leave corners sharp. This increases the risk of injury to children and adults during operation and repairs in the house. When rearranging furniture, a corner can be chipped or damaged. Therefore, it is better to round the edges using a corner spatula.
Composition of a DIY oven plaster solution
You can prepare the solution for the oven with your own hands. Fortunately, practice has developed many simple mortar compositions for plastering ovens. Above are the basic compositions that beginners can knead.
Before mixing the clay solution, the components are prepared:
- The clay is soaked a day (preferably 4-5) before use. After this, it is filled with additional water, the floating debris is removed, the water is drained, or stirred, passed through a sieve, then allowed to settle and the water is drained. The remaining clay is mixed until smooth. Any lumps will cause cracks. The resulting clay mass is combined with the remaining components.
- Sifted, washed, dried river sand is suitable. The recipes call for dry sand. When using wet sand, less water will be needed.
- Asbestos is fluffed up.
- Lime milk or dough is prepared from lime.
When plastering a stove with your own hands, it is important to maintain the proportions of the components. The clay solution can vary in the ratio of sand and clay, depending on the fat content of the latter. The standard procedure is to first mix the dry components, followed by the addition of liquid ones (clay or lime emulsion, water). The standard procedure is to first mix the dry components, followed by the addition of liquid ones (clay or lime emulsion, water).
Experienced stove makers add 200 g of salt to a bucket of solution. The additive prevents the appearance of cracks and slows down the setting of the mixture, which ensures uniform drying of the coating.
If you plan to heat the stove with coal or peat briquettes, which produce a high temperature, fireclay powder must be included in the composition.
Frequently occurring defects and their prevention
If you lack experience, you may encounter the following problems:
- cracks appear on the coating;
- the plaster layer completely moves away from the brickwork;
- Parts of the mixture fall off from the oven.
To prevent such situations, it is recommended to consider the following points:
- Finishing of a new stove is allowed only 2 months after its construction. During this time, the material will shrink.
- A new stove must be heated regularly so that condensation evaporates from the chimney and walls. Each time the temperature in the furnace and the duration of combustion increase.
- It is important to choose the correct proportion of the solution. The fatter the clay, the greater the sand consumption should be.
- The plastered surface can be painted or whitened only after a month, once the mixture has completely dried and hardened.
- Even damp surfaces can be sanded. The tool is a piece of rough cloth.
- The drying time of the plaster layer is from 3 days. After this time, you can start heating.
You cannot prime a surface that is hot over 300 degrees. This will lead to the appearance of one of the mentioned defects.
Expert advice on repairs
Experienced stove makers and finishers give the following advice on plastering:
- When heated above 300 degrees, the primer will peel off. The plaster may fall off along with it.
- The stove must be heated regularly before finishing.
- The walls can be covered with wet burlap to prevent them from cracking during the drying process.
- The stove needs to sit for 3 days after plastering. The coating should not be pressed through with a finger.
- The oven cannot be fully heated while the plaster is drying. The temperature should increase gradually.
- Whitewashing or painting should be done after a month.
- The vent and view remain open after the first few fires to allow moisture to escape faster.
- When using oily clay, you need to add more sand.
- The raw mixture is sanded using a coarse cloth.
You cannot plaster a newly laid stove. The new structure must be thoroughly dried and waited until it settles. Therefore, the oven without finishing is used for 3-4 months. After this, plastering work is allowed.
Finish paint for stove plaster must be water-based. Mixtures containing drying oil or other solvents may release harmful components and odors into the air during evaporation.
For plastering work, it is better to give preference to mixtures based on natural ingredients that do not contain synthetic additives that can harm health.
Plastering of a new stove is carried out 3 weeks after completion of masonry work
All of the plastering methods listed are more complicated than they might initially seem. Without experience in carrying out such work, it is undesirable to take risks, since expensive materials can be damaged. Therefore, you need to trust plastering of stoves only to specialists.
Was this information useful to you? Share in the comments!
What not to plaster a stove
Many owners of country houses are interested in the question of the acceptability of using Rotband as a mixture for plastering the stove surface.
The clear answer is no. This product should not be used to finish a stove. The reason for this is the high content of gypsum in the composition, which, under the influence of high temperatures, begins to turn yellow and quickly crack.
It will not be possible to putty brickwork with compounds that are used for finishing the walls of a room, such as “Start” and “Finish” putties. Their base is also gypsum.
The most reliable is the clay-sand mixture. Although its preparation requires more time, it will last for years without repair.
Which plaster to choose
There are different types of oven mortar. They differ in composition and quality characteristics:
- Cement-clay mortar (is the most durable).
- Cement-gypsum mortar (complex application technology).
- A mixture of clay and sand (has better thermal conductivity).
In many ways, the choice depends on what is being finished: a bathhouse in a country house or a fireplace in a country house (for the latter it is better to use decorative plaster). But still, furnace experts recommend using a solution of clay and sand, since it can withstand temperature changes, is easy to use and almost does not reduce the efficiency of the furnace. Also, clay is completely harmless to health even with regular heating.
You can buy the mixture for finishing the stove in a store or make it yourself.
How and what to grout the stove after plastering
You can start grouting when the solution has already set to the surface, but has not yet completely dried.
It’s even better to do it with a wooden grater or a plastic one with a soft cloth attachment. One hand holds the grout, the other holds the brush with which the surface is wetted.
The movements are circular, but if there are depressions or bumps, they can be modeled in order to carefully eliminate defects. The pressure on the tool is greater on convex areas and less on depressions.
The result of grouting is a smooth, even surface.
Grouting plaster
Grouting is necessary to obtain a smooth surface.
The thickness of the grouting layer should not be more than 2 - 3 mm. The result should be a smooth and even plane.
The best composition is considered to be a solution containing ground fireclay clay, fine sand and alumina cement (aluminate). It is obtained from a fast-hardening binder after grinding clinker from limestone and bauxite. If it is difficult to find, Portland cement is used.
Chamotte will give the grout thermal and chemical resistance. The surface can be rubbed during the plastering process or separately.
Features of stove plaster repair
There are several reasons for the formation of cracks on the surface:
- Incorrect masonry, due to which the structure heats up unevenly in places. This will require radical repairs - refurbishment of the stove.
- Using ordinary plaster that is not fire resistant. You will have to replace the coating with a heat-resistant one. An alternative is to add fireclay powder to the clay solution.
- The doors were loose. Reinstall with metal mesh reinforcement.
- Failure to comply with plastering technology.
If minor repairs are required without completely replacing the entire coating, then the work order is as follows:
- We clean the layer of whitewash or paint.
- We remove the cracked part of the plaster with a chisel to the brickwork.
- We remove all excess with a metal brush.
- We prime the area. An alternative to primer is cement diluted in water with a liquid consistency.
- Mix the solution. It is better to choose the same composition as was used previously.
- Apply the solution in small portions onto the moistened area.
- Let it set a little and rub it in.
- To secure doors that are loose, take them out. We clear the area from falling pieces of mortar.
- We make new holes for fasteners. For reinforcement, we wall up pieces of wire.
- We wrap the door frame with asbestos cord and put it in place, securely fixing it with wire.
- The clay mixture is applied.
- The treated areas are rubbed and polished.
Attention is paid to the correct proportion of the solution. Failure to do so will again lead to the formation of cracks on the surface.
How to plaster a brick stove with your own hands
You can finish the stove using plaster mortar yourself; you need to know how to properly plaster the stove and follow the sequence of actions.
Preparatory stage
The quality of plastering in most cases depends on how correctly the preparatory work on the surface is done. Good preparation of the stove walls is the key to better adhesion of the plaster mortar to the surface.
The preparation process involves performing the following actions:
- To reconstruct a stove or fireplace, it is necessary to remove old plaster from the surface using a chisel and hammer. Then the wall is cleaned of dust using a regular or iron brush.
- The newly built stove is cleaned of any remaining masonry mortar. Neglecting this step may cause poor adhesion of the plaster to the working surface. As a result, after some time the plaster will begin to lag behind the walls of the oven.
- After cleaning the surface, it is necessary to deepen the masonry joints. Moreover, this step is necessary both for the structure being restored and for a new stove. It is also recommended to remove dust from the seams.
- The next step is to apply a primer to the stove walls. It is best to work with a thin brush so that the buried seams are not left untreated.
- The process of plastering uneven walls should always be accompanied by surface reinforcement. To strengthen the furnace walls, a metal or fiberglass mesh with cells of 1.5 * 1.5 or 2 * 2 mm is used. Reinforcement helps strengthen the plaster on the surface, making it more resistant to temperature changes. The use of reinforcing materials makes it possible to apply a thick layer of plaster, thereby increasing the heat capacity of the furnace. To fix the metal mesh, use nails with a wide head. When using fiberglass mesh, you need to apply a thin layer of plaster to the wall, embed the mesh in it, apply additional mortar and level it. It is recommended to use fiberglass on walls with slight unevenness.
- To preserve or restore corners, it is recommended to use steel or perforated aluminum corners, which are attached to an adhesive solution.
- For large differences, surface evenness is achieved by installing beacons. They are fixed to a gypsum mortar, which allows you to carry out work almost without stopping. If you have enough free time, you can attach the beacons to the clay solution, but it is better to do this with the reinforcing mesh in close contact with the wall.
- The preparatory layer of plaster can be perfectly smooth or rough. The first option is used for whitewashing or painting, the second – for decorative relief plaster. It should be remembered that ceramic tiles and decorative plaster do not require a very thick preparatory layer.
Methods for decorating a stove
After the plaster layer has dried, you can begin decorating the product. Suitable for this:
- painting or whitewashing;
- tiling;
- applying decorative plaster.
Let's look at each option in more detail.
Painting
Of the purchased paints, only water-based compositions are suitable. Oil-based ones darken quickly and are not resistant to heat. Before you start painting, the surface is thoroughly primed.
Whitewashing is more often practiced. It will be easier to achieve a white surface if lime is added to the plaster.
Old masters diluted one part of chalk with two parts of milk, adding 100 g of kitchen salt to 10 liters of whitewash. Paint is applied in two layers. The composition will not begin to burst and will not smear.
If the owners want to get a finish with a blue tint, then add a little blue to the whitewash. To obtain the desired shade of paint, it can be tinted.
The work is performed with brushes of different sizes.
A good addition would be to apply beautiful textured patterns, colors, and ornaments.
Tile laying
Used for lining fireplaces and stoves.
Material – ceramic, terracotta tiles. Tile is not suitable for such purposes because it cannot withstand constant exposure to high temperatures.
To fasten the elements you will need tile adhesive with heat-resistant properties. Conventional adhesive will not withstand such heat, and the tiles will simply begin to fall off.
Tiles will hide uneven corners. It is enough to glue the finished corner parts.
Pasting is carried out with strict adherence to horizontal and vertical levels. The uniform spacing between the tiles is maintained.
The color and texture of the parts are selected based on the style of the building.
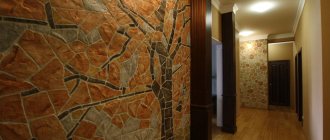
Decorative plaster
The main requirement for decorative plaster is heat resistance.
If this is not available, then you can purchase a mixture for external use, but after plastering, attach gauze around the entire perimeter - this will prevent cracking of the finish.
Acceptable basis of composition:
- mineral (containing lime, clay);
- acrylic;
- silicone;
- silicate;
- heat resistant.
Apply with special spatulas. After drying, it is complemented by painting and varnishing.
Decorative design of the stove
The following compositions are suitable for effective visual design:
- Misan;
- Bayramiks;
- Ortner.
You can use other heat-resistant mixtures.
How to paint a stove after plastering
The plaster is whitened and covered with water-based paint, lime or chalk. The best option is heat-resistant paint, colored varnish or stucco. Since oil-based mixtures tend to darken when exposed to temperature, it is recommended to use nitro enamel or pentaphthalic mixture.
Decorative plaster for stoves and fireplaces
Fireplaces are often finished with heat-resistant decorative plaster. A rough primer or stucco looks great on the stove. For a better effect, you can treat the surface with a water-dispersed varnish-based dye.
You can mix brick flour with water-based paint, and then coat the surface with heat-resistant varnish. To decorate, stamps are pressed into the finish while it is still wet. The surface covered with embossing looks better. This finishing method allows you to save money. The work is done cheaply but looks expensive.
After the plaster layer has dried, you can begin decorating the product.
Tile
The tiles are glued to places that are subject to slight heat. Glue does not adhere well to hot substrates. Therefore, it is better to use tiles. This is the name of a ceramic coating with a tiller. This is a frame on the back side that contains sand or ordinary clay. There are holes in the walls of the pump for fastening tiles using wire or thin metal fittings.
Advantages of finishing with tiles:
- The thermal pad inserted into the boiler retains heat, so the temperature of the walls is maintained longer without additional heating of the furnace.
- Body burns or fires of nearby surfaces are prevented.
- The strong metal fastener holds the tiles well.
- Finishing with such tiles decorates the interior.
On a note!
The tiles are easy to clean, so they can be kept clean at all times.
Popular brands
When purchasing a plaster composition, it is important to pay attention to the following:
- permissible operating temperature limit;
- whether the composition is intended for indoor or outdoor work;
- environmental friendliness of components;
- hardening time;
- resistance to moisture, sudden heating or cooling.
The integrity of the packaging, date of manufacture, and compliance with storage conditions are important.
Heat-resistant plaster for stoves and fireplaces
The following types of brands are the most popular.
PECHFORM PC400 W
Heat-resistant variety. Suitable for lining the flood zone, areas near the hob, side walls of the stove, fireplace.
The maximum permissible operating temperature is 400 degrees. There is no need to additionally putty the surface on top.
With skillful use of rollers and shaped spatulas, you can create a beautiful relief surface.
Can be used for outdoor and indoor work.
Surface material for application:
- brickwork;
- concrete;
- limestone;
- composite slabs.
5 minutes after mixing the solution it is ready for use and remains suitable for application after 2 hours. Do not apply on top of metal parts.
During operation and drying of the composition, the temperature should be from +5 to +30 degrees. Painting is allowed after 2 weeks.
Typhoon Master
Products from a domestic manufacturer. Heat-resistant plaster is used for finishing walls, chimneys of fireplaces, barbecues and barbecues made of brick.
The basis of the composition is fireclay clay. Suitable for outdoor and indoor work.
Has the following properties:
- heat resistance;
- tolerates moisture well;
- plastic;
- convenient for vertical application.
The average mixture consumption per 1 square meter is from 1.6 to 1.8 kg.
Kalina Master
Fireproof plaster. Contains Portland cement. It is characterized by increased strength. Excellent resistance to high temperatures. Quickly sets to the surface. Resistant to mechanical damage.
A layer of solution increases the heat transfer of the furnace by up to 15%.
Pechnik
The base is fireclay clay. Suitable for masonry and finishing of stoves. Hardens quickly. It is used in working with old and new furnaces. Convenient to apply.
Tolerates high temperatures well. The fire resistance level reaches 6000.
It does not collapse when the product shrinks, it is plastic.
Heat-resistant adhesives
Act as a connecting substance for fastening tiles to the surface of a stove or fireplace.
Two types are in greatest demand.
Terracotta
Sold dry. The main raw material is refractory kaolin clay. Does not lose properties at +400 degrees (permissible limit).
It is distinguished by its plasticity, ease of installation, and good adhesion. Used for leveling walls and plastering. All components of the composition are environmentally friendly. It hardens quickly, within an hour after mixing.
The recommended layer thickness is up to 1 cm.
Hercules
Heat-resistant glue. Used for laying fireplaces, stoves, barbecue complexes made of refractory bricks. Suitable for fixing tiles.
Packaged in bags of 5, 12 and 25 kg.
Operating temperature range from –50 to +1200 degrees.
Why not like a wall?
Plastering of stoves and fireplaces is carried out in accordance with the general procedure for plastering work, see Fig., but taking into account the operating characteristics of the structure being finished.
The procedure for performing plastering works of different levels of complexity and quality
Firstly, regular significant alternating stresses due to thermal shocks are the normal operating mode of the furnace. Which is bad for simplifying and speeding up the work: you cannot leave the walled metal in the layer of stove plaster. Its TKR (thermal expansion coefficient modulus) is much greater than that of stove bricks, masonry compositions for stoves and plaster.
Secondly, the structure of the stove under the plaster heats up to more than 140 degrees, and the heat resistance limit of conventional plaster compositions is 120. The composition for plastering the stove must withstand heating above normal at a maximum of 160 degrees based on a forced firebox, so its heat resistance limit is needed at least 200 degrees. Because
“warm” and “cold” spots and invisible traces from grouting recesses in the set mortar with fresh flowing plaster will become centers for the propagation of cracks. The latter is not obvious, but 100% adhesion between a mixture that has just begun to set, which can still be pressed with a finger, and a fresh, fluid mixture is impossible. That is, again, the requirements for both the speed and quality of technical operations are becoming more stringent.
Thirdly, there is a welcome feature of plastering a stove - in a room with stove heating, an optimal humidity of approx. 55-60%. As the stove cools down, it absorbs excess moisture from the air, and when it heats up, it releases the missing moisture. This, by the way, is a huge advantage of stove heating, even as an additional one.
All plaster mixtures, both simple 2-component and complex, are divided into those intended for surfaces below and above the level of waterproofing of the building. And both of them additionally - for maximum humidity up to 60%, 60-75% and above 75%. And all of them together are also divided according to the category of durability of the surface being finished, I, II or III.
Total 18 options for each; It won’t take long for an experienced specialist to get confused here. But the stove and the room with it are always of the highest category of durability because... Repairing both separately is very complicated and not always technically feasible. Only a metal stove can be installed in the basement; humidity is mentioned, and for each specific plaster mixture, the choice of variant of its composition comes down to the only correct one.
Manufacturers
Below is a list of trusted manufacturers of stove plaster.
Plitonit
Plitonit is a German-Russian enterprise. Produces mixtures for masonry and finishing of fireplaces and stoves.
In assortment:
- heat-resistant compositions for masonry, repair of furnace structures;
- mixtures with reinforcing components for the construction of fireboxes;
- heat-resistant adhesives;
- plaster.
A striking example of a plaster composition is SuperKaminOgneUpor. The hardening time is half an hour after mixing the solution. There is no need to wet the brick before application. Doesn't crack. Resistant to moisture.
Concord East
The company has existed since 2000. Produces building materials and paints and varnishes.
The range includes:
- primers;
- PVA glue;
- water-based, acrylic, oil-based, latex-based paints;
- Bustilat;
- ready-made putties;
- heat-resistant oven plasters.
Stove plaster "Emelya" is one of the company's trademarks.
Wolfshoher
The family German company Wolfshäuer Tonwerke was founded back in 1856 by Lorenz Wolf, after whom the company is named. Has official representative offices in Russia.
The plant produces fireclay bricks for laying stoves, chimneys, and ceramic pipes. There is also an assortment of stove plaster.
BOSSNAB
The company is located in St. Petersburg. Engaged in the production and sale of plaster for fireplaces, stoves, as well as glue for facing work. The main raw material is red clay.
Terracotta
Domestic manufacturer of mixtures for plastering, cladding and finishing of various surfaces, including fireplaces. All compositions are safe for health.
Mixtures for ovens can withstand heating temperatures up to +1300 degrees.
The main raw materials are kaolin clay and fireclay powder.
RATH
An Austrian company with representative offices in different European countries.
Produces building materials with heat-resistant, fire-resistant properties. These include stove plaster.
Vetonit
A subsidiary of Weber Corporation, which has production in 64 countries. The central office is located in France.
An example of a product is Vetonit mortar for brickwork. The base is fireclay clay, cement, sand.
A competent approach to choosing a ready-made mixture will simplify the plastering process and avoid mistakes when mixing the solution. If you have experience in carrying out such work, then it will not be difficult for the master to make the plaster yourself and carefully apply it to the surface.
Basic rules for applying plaster to a stove
And although facing work is not a tricky business, you still need to take into account the basic rules that will help you successfully complete the task.
- The oven must be thoroughly dried before starting work.
- If facing work needs to be carried out on an old stove, then the first step will be to clean the surface of the old plaster. Do not ignore this step and under no circumstances apply fresh mortar over the old cladding.
Cleaning old plaster
- If the plaster is being prepared for painting, choose only water-based paint. If the paint contains drying oil or other components, then when the oven heats up, this smell will spread very strongly throughout the room. Even with prolonged use, it will not fade.
- Use only natural materials that will not harm the health of the residents of the house.
Finishing the stove with tiles
You can give the stove an attractive look by finishing it with tiles. There are special tiles for stoves that are heat-resistant, but they cost a lot. There are special tiles, but they are laid during the construction of the stove (they cost even more). For the most part, ordinary ceramic tiles are used for stove cladding. If it is of normal quality and laid correctly, nothing happens to it. There are two restrictions:
- use tiles of small formats, as it has been noticed that they hold up better;
- do not use gypsum-based tiles - they greatly reduce heat transfer.
Furnaces are plastered for lining mainly with cement compounds. When clay dries, it shrinks very much, which is why the tiles inevitably fall off. Moreover, it is recommended to use the same composition for plastering and gluing tiles - this guarantees good adhesion.
A few more technological points that relate to laying tiles near furnace castings and other metal elements. The gap between the edges of the tile and the metal should be about 5 mm. This gap should be left empty, without mortar. It is subsequently laid with asbestos cord, and covered with tile adhesive on top, and grouted. This way, when heated, the metal will not tear or squeeze out the tile.
Example of tiling a stove door
First technology: with pre-plaster
Craftsmen who finish brick stoves advise first plastering the stove. After the plaster has dried, you can glue the tiles using a special heat-resistant adhesive. If you adhere to this technology, then the preparatory stage will be exactly the same as for plastering (described above):
- unstitch the seams by 1 cm;
- nail/weave a mesh;
- we wet the oven;
- Apply and level the plaster.
Gluing tiles to a plastered stove
After the plaster has dried, the tiles are glued using conventional technology. Some craftsmen place the tiles on a heated stove, others - on a warm one. There are styling options without heating. The technology is no different from conventional finishing work, the only difference is that the seams are made larger - from 3 mm and they try to leave them unfilled.
An example of tiling a stove
To maintain the seams, the same crosses are used. They are then filled with gypsum grout, which is more elastic and less prone to cracking. In this case, the seams compensate for thermal expansion.
Technology two - straight to glue
If the surface of the stove is initially smooth, but the appearance of the bricks is disappointing, you can try gluing the tiles directly onto the brick. Only it must be clean, without any dirt or dust. Take heat-resistant glue for lining stoves or fireplaces (there are such). Dilute strictly according to the instructions, also according to the instructions, apply the composition to the tiles and glue it to the brick.
There is one trick: if the tile format is such that it overlaps several bricks, the glue should be on only one of them. The rest remain empty. The solutions have a high degree of adhesion and hold well even in this situation. And this method allows you to bypass the different magnitudes of thermal expansion of different materials (the seams expand more, which is why tiles glued to two bricks can tear). But this furnace lining technique has a disadvantage: voids filled with air do not conduct heat well, and heat transfer drops significantly. In this case, there is one way out: buy tiles the size of a brick. It is difficult to find the required sizes, but some craftsmen cut smaller ones from large-format ones, with the required dimensions.
Find or cut tiles to fit bricks
There is a technology that combines the two described above. The stove is lined with masonry mesh with 50*50 mm, wire diameter 0.5-1 mm. They nail the mesh with staples - powerful ones from a construction gun, or using finishing nails. The mesh should fit tightly. The tiles are laid on this base without prior plastering. The disadvantage of this technology is the high consumption of expensive glue.
Tile adhesive on stove
What tile adhesive can be used in this technology? The following heat-resistant brands performed normally:
- Plitonite VT;
- Retainer;
- Emelya glue, suitable even for finishing with torn stone;
- Ceresit 17;
- Fireproof;
Torn stone glued to Emelya glue
The procedure for plastering a fireplace
On the surface with the installed reinforcing mesh we apply the first layer of mortar, the thickness of which should be 3-5 mm. and no more. Applying a base layer of plaster does not provide for perfect leveling of the surface.
At this stage, it is necessary to apply special pads to the corners. They must be made of steel. Since the working furnace has a high temperature, corner pads made of other materials simply will not withstand it and will begin to melt. As a result, deformation of the entire structure will occur. After applying this layer of the mixture, it must be dried for 2-4 hours.
At the second stage of the procedure, we apply the composition to completely level the plane. At the same time, you need to try to make the layer not very thick. Otherwise, the structure will take a long time to dry and this may have a bad effect on its finish. At the second stage, we especially carefully seal the corners, trying to carefully round them.
Now we leave the fireplace for some time until the plaster solution has completely dried. If cracks appear during drying, there is no need to be alarmed. This is easy to fix: use a knife to open the cracks, spray them with water, and then rub them with the same plaster mixture. Now you can apply decorative plaster with any texture that you chose in the store.
Purchased heat-resistant mixtures
Ready-made stove plaster can also be used for finishing. There are many varieties of such mixtures. But the most popular are “Pechnik” and “Terracotta”. The advantage of such plasters in comparison with those prepared by hand is a high degree of heat resistance. “Pechnik” and “Terracotta” are able to withstand temperatures up to 200 degrees.
Whatever mixture is used for plastering the stove, purchased or homemade, there is no need to prepare a large amount of it at once. The volume of a single serving should not exceed 8-10 liters. In any case, the solution needs to be developed in a maximum of 2-2.5 hours.
Preparatory work
The clay for the solution is taken as oily clay and mixed in half with sand.
Preparatory measures come down to choosing the components of the solution that is optimally suited for the given conditions and for the specific type of stove surface. Particular attention is paid to the relationship between these components and the following important points:
- with very oily clay, more sand components are added to the mixture;
- it must be soaked beforehand;
- after all the water is absorbed, add a little more until the liquid covers the clay with a top of 100-150 mm.
Upon completion of this procedure, the mixture of clay and water is mixed to the state of very thick sour cream, which, when prepared, has good plasticity.
Preparatory activities
Before you start plastering the stove itself, its surface should be thoroughly cleaned. Under no circumstances should the solution be applied to smoked or dusty bricks. Otherwise, he won’t last long in the future. After cleaning, the stove should be heated. But there is no need to put too much firewood or coal into the firebox. Plaster for stoves and fireplaces is applied only to a warm surface.
It is impossible to finish the stove immediately after finishing its laying. You need to wait at least two weeks. The masonry must be thoroughly hardened before plastering.
Before you start applying the mortar, among other things, you should select 10 mm seams between the bricks. In this case, the heat-resistant mixture for plastering stoves will adhere to the surface better. You also need to drive small nails into the masonry, onto which the reinforcing mesh will subsequently be stretched.