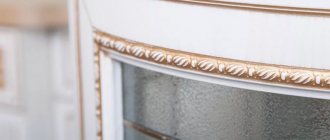
Tips for repainting an old wall
One of the easiest ways to make old furniture look new is to paint it.
This way it will have an attractive appearance, moreover, the work will not take up much of your time. In order to get started, we will need to choose a certain type and color of paint. If the furniture is made of simple material, it is quite acceptable to use absolutely any paint. In the case where you want the final result to be shiny, use enamel varnish paint. To achieve a matte surface finish, use an oil version. One of the best options for painting is acrylic (preferably water-based). Aerosol cans have proven themselves to be good for home work with furniture. When working, they lie well and evenly on the surface and do not create drips. If you are painting old garden furniture, then it is recommended to use paints and varnishes
They are well suited for metal objects, but do not forget to pay attention to the fact that they have an anti-corrosion effect. When painting aluminum objects, buy special paint for them.
In order not to confuse anything in the types of material and paints, it is best to check with a consultant before purchasing this or that product choice.
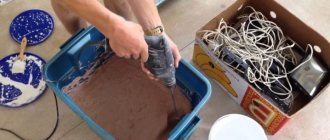
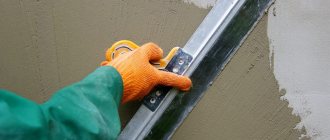
Speaking directly about the paint application itself - here you can use a brush, roller or spray gun
Please note that before applying paint, you will need to degrease the furniture and carefully inspect it for any damage. If necessary, replace fittings, locks or handles before starting work
Next, get rid of the old varnish and sand the entire surface with sandpaper. It is best to use fine-grain paper for this job. Alternatively, you can use a grinder instead. She will also be able to cope with the task perfectly.
- Another important point before applying paint will be the work of applying primer. If necessary, use putty to eliminate problem areas. When the primer is completely dry, apply alcohol or vodka to the surface to completely degrease the object.
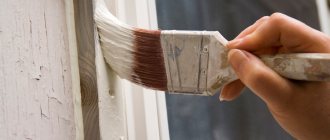
- The final stage will be applying paint to the surface. This is done slowly and carefully, the coloring itself is carried out in one direction of the brush. It is best to apply several layers of paint - then the result will be much better. It is recommended to use painted furniture no earlier than a week after work.
Step-by-step instructions for the restoration of a Soviet wall
Restoration consists of the following stages:
- Replacement of accessories and minor repairs.
- Surface preparation : removing old coating and sanding.
- Primer coating . Degreasing the surface.
- Elimination of chips and other irregularities using putty. Primer coating.
- Applying varnish or paint in several layers.
- Decoration.
How to properly varnish old furniture?
- The first and most important point in this work will be the correct selection of premises. It must be well ventilated and it is strictly forbidden for there to be places with open fire nearby. Before starting work, the old varnish is removed, all imperfections associated with cracks, depressions or other nuances are completely eliminated using putty and sanding.
- After preparing the surface, we must apply a primer. Next, apply a thin layer of varnish, using a brush or spray to speed up the work process and reduce the cost of effort. If you choose the spray can option, it is recommended to practice on some old sheet of wood beforehand in order to understand the principle of its operation and its intricacies.
Spraying of varnish is carried out at a distance of approximately 25-30 centimeters from the surface to be treated
In this case, movements should be in a horizontal direction. It is important to know that the drying time of the varnish is approximately 48 hours unless some other time is indicated on the product packaging. Remember that the first layer of varnish is first applied, after which it is carefully processed with fine sandpaper. All dust that arises during work is removed using a regular damp cloth.
Next, apply a second layer and let the surface dry completely. Only if necessary we can apply a third layer, but such situations are extremely rare. Usually two layers of varnish are enough for a beautiful appearance and quality.
We use self-adhesive film
Self-adhesive film will help quickly renew shabby tables and worn-out kitchen units made of chipboard. The variety of textures and colors of the material will allow you to create a new style of furniture and fit it into the modern interior of your home.
For work you need to prepare: self-adhesive film, knife, soft rag.
Algorithm of actions:
- furniture unwinds into its component parts;
- surfaces are thoroughly cleaned and degreased.
- Secret: water with the addition of liquid dishwashing detergent will help clean surfaces. A solution with vinegar will help degrease furniture;
- the prepared surfaces are covered with self-adhesive film.
- Important: film cutting is carried out taking into account 10 mm allowances. Before pasting, the furniture is lightly moistened with water from a spray bottle. This will help you easily correct folds and distortions during operation;
- The pasted surfaces are smoothed with a soft cloth. If a bubble remains under the film, puncturing it with a needle will help remove it.
Related article: Fashionable colors in the interior: 4 main trends of 2020
Stages of restoration
Acclimatization. To prevent the elements of wooden furniture from becoming deformed after restoration, you need to let it “get used” to its environment
Air temperature and humidity are important for wood
The optimal temperature for the room in which furniture restoration work will take place should vary from 18 to 25 degrees, air humidity - no higher than 75%
You should also pay attention to the harmful effects of direct sunlight and heat from radiators
Dismantling of elements. For better processing, it is better to disconnect all furniture parts from each other and work with them separately. You need to use tools as carefully as possible without damaging the wood.
If it is important to keep the elements and fastening system in their original form, it is better to disassemble them and lay them out in order
Cleaning. Each element must be cleaned in the most gentle way possible - with a soft brush wrapped in a cloth, a vacuum cleaner and non-aggressive chemicals.
Removing dents and scratches. To do this, use special wax pencils, “liquid wood” or steam from a regular kettle. These options are suitable for small, shallow damage; otherwise, the entire module may need to be replaced.
Repair of fastenings. This implies complete or partial replacement of fasteners. Restoration of the top layer of wood. To do this, you may need to glue a sheet of plywood to the old surface.
Coloring. First, a primer is applied, then painted with alcohol-containing paints. Varnishing and polishing. Decoration and intentional aging of furniture. Assembling elements into a finished product.
If everything is done carefully and correctly, the value of the furniture after restoration with your own hands will not be lost. Work should be carried out slowly, carefully, using all the recommendations of the chemical manufacturers and allowing the necessary time for their exposure.
Restoring chipboard furniture with your own hands will allow you to control the entire process step by step, make adjustments at any stage and ultimately get a completely exclusive item.
Without extra money for new furniture, you can easily restore what is available in your home, at your parents’, or at your grandmothers’. Soviet furniture is famous for its quality, and the atmosphere and comfort that familiar interior items create from childhood cannot be bought for any money.
Rules for caring for restored furniture
In order for the Soviet wall to serve you for a long time, it is important to ensure optimal conditions in the room. This is a temperature range of 15-20 degrees Celsius and a humidity of 50-65 percent.
It is better not to place such furniture next to heating elements. It is necessary to ensure a minimum distance to them of no closer than 0.5 m. Even direct sunlight can change the color of the coating. Therefore, it is recommended to periodically rearrange the furniture so that sunlight hits different parts of the wall.
If you have old furniture left in your house from your relatives, do not rush to throw it away, because it can be remade. A little imagination and simple building materials will allow you to give a second life to the Soviet wall. Moreover, this furniture can become a real highlight of your interior. And not just old and unnecessary trash. Your main weapon is imagination, paints, stickers and our article.
How to use Soviet furniture in a modern interior
Architect and designer Marina Lapteva very accurately noted: “the older the thing, the more attractive it is.” But that is why old furniture should be used sparingly and appropriately, like a precious find.
Just one high-quality and beautiful Soviet set (or a small set) can be made the dominant feature in the interior, highlighted with the help of lighting. Let the rest of the furnishings be modern, laconic, and support the chosen style.
Let's give examples.
Draped Viennese chairs or armchairs (an ideal find) together with a coffee table will create a cozy oasis in an interior with a tropical, colonial or marine style. The covering can be changed. The best thing about these chairs is the authentic shape.
A spacious buffet - the pride of Soviet families - can be made the accent of the kitchen-living room if you are decorating the interior in a classic or Provence style. To do this, a bulky dark set needs to be painted in a single, delicate color (characteristic of the French provincial landscape), with a lace pattern, or in a classic bronze shade.
Cabinet structures on thin black legs can complement the decor in the Art Nouveau style. Plus, with the help of such shelving you can beautifully zone a fashionable spacious room.
But an old chest of drawers or pencil case will become a useful thing in the most modern children's room. The facade can be made bright, painted with lace or a stencil. And in numerous shelves you can compactly place your child’s favorite treasures.
Two best ways to use the Soviet wall
The Soviet wall of the 50-60s is a legacy worthy of attention. If only because it is durable, has many storage systems and is designed entirely in the same style.
At the same time, it has only one drawback: it is difficult to fit into the fresh interior of the living room - freedom and lightness are important in modern style.
However, such a complete set will be useful in a modern home.
Firstly, the wall can be lightened (trend minimalism welcomes light colors) and used in an office or library. Numerous shelves and secretaries are ideal for storing valuable documents and corporate souvenirs.
Secondly, you can save only the cabinets, install sliding doors and stylishly decorate the dressing room.
And the mezzanine can easily be turned into a box-seat for the hallway.
Features of the restoration of the Soviet wall
Previously, the Soviet wall was an attribute of any home. It was prestigious and beautiful. But time takes its toll, and furniture loses its former appearance, not to mention changing fashionable furniture trends. But don’t rush to throw it in a landfill. There is an excellent solution - restoration or alteration.
If desired, the Soviet wall can be restored or updated, extending its life for another ten years. But you will have to work hard. After all, the process is labor-intensive.
The restoration process consists of elementary stages and can be done with your own hands, even without experience.
Remaking an old wall: changing the design
Covering old furniture with self-adhesive film is the easiest option for changing the decor. Today, film is available both plain and colored, in different colors, textures and shades. There is no point in gluing a film with a wood pattern; otherwise, it is in trend today. But plain or patterned ones are what can turn an old wall into new furniture. The steps are simple, but the work requires accuracy. But the result is excellent. See two photos. The first one shows an old Soviet chipboard wall before renovation, the second one shows it after.
Updating an old furniture wall - before and after
Now about how it was updated. Compacted furniture self-adhesive film was used, cream color, matte surface. The open part of the old wall was closed with glass doors; a translucent matte film was used for the glass. The edging is furniture layout (also self-adhesive) chrome color. The order of work is as follows:
- Everything that can be removed, you remove and disassemble. Remove old fittings.
- Surfaces must be clean and free of grease. This is easier to achieve with a soft cloth soaked in dishwashing detergent. Then everything is washed off with warm water and a small amount of vinegar. Wipe with a dry cloth.
- Cut out the details. It is better to cut the film 8-10 mm larger. The remains are then cut off with a paper knife.
- Spray the part to be glued with water from a spray bottle. On a wet surface, the film can be moved if something goes wrong. You can even peel it off without damaging it.
- After removing the protective layer from the film, carefully lay it out. Having leveled it, begin to smooth it with a soft cloth from the middle to the edges. Try not to have any bubbles. To do this, you need to move gradually, without jumping from place to place.
- If there is still a bubble, you can pierce it with a thin needle approximately in the middle. Then expel air from the edges of the bubble to the hole and rub the puncture site.
- Having glued the film, take a clean thin cotton cloth, spread it on top and iron it with a warm iron (medium heat).
- We glue the trim and install new handles.
This is the sequence of work with every detail. It’s the same with glass, you just need to glue it to the inner surface. After assembly you have a renewed wall. This technique can be used for any item: chest of drawers, bedside tables, wardrobe, kitchen set, etc.
With lighting, the updated wall looks magical
For example, after a successful experiment with a wall, we remodeled an old cabinet in the same way and added it to the right. Now the entire wall is occupied. You can update your kitchen set in the same way: apply self-adhesive film and replace the handles.
There is a second way. It is a modification of the proposed method, but it is simpler and not so labor-intensive. Only the doors are covered, not with film, but with non-woven wallpaper. The wallpaper is glued with PVA glue. To prevent the edges from riding up, the parts are cut 5 mm smaller on all sides. It turns out a kind of edging. Everything looks good (example in the photo below).
A simple renovation of an old Soviet-era wall: paste suitable non-woven wallpaper on the doors
What's good about this method: it's easy to change the decor. Tired of the old appearance, they tore off the wallpaper and put on new ones. Despite the fact that the method seems frivolous, the appearance is maintained for several years. Its author even tried it on a kitchen set. Only the wallpaper on top is coated twice with PVA glue. In this case, the cabinets can be washed
It is important to apply a layer of varnish evenly, without sagging, there are no other difficulties
Sometimes wallpaper is varnished. But before you do this, try it on a scrap piece: see how they react to it.
When choosing a varnish, you need to remember that acrylic and cellulose varnishes remain transparent after drying, while polyurethane varnishes turn yellow after time. Also, polyurethane is almost not softened by solvents: it can only be removed mechanically (from wood - cleaned with sandpaper).
Ideas for updating an old wall and other things
Since the principle of working with the surface of old furniture will be approximately the same, it is not necessary to focus exclusively on it. This way you can bring other important household items back to life.
Here are some useful ideas that may come in handy at work.
- With a little work on the surface of the old cabinet, you can give it a new life, and such a new thing will become a beautiful item in your home interior.
Transforming an old cabinet into a beautiful new piece of furniture
- An old chair like this will be a bright accent in the design and decoration of your home.
Bright new chair made from old material
- A desk with drawers that hasn't been used for a long time will be transformed into a modern workspace. It can be decorated to your personal taste.
Converting an old desk with a drawer into a new workspace
- A bulky sofa can be turned into a beautiful and comfortable soft ottoman, which can be placed in the hallway without any problems.
Bulky sofa in a new role
- The former table on wheels will become a fashionable, stylish cabinet that can be moved to any desired point in the house.
Design of an old table on wheels
- Even earlier, a rough and uncouth chest of drawers, after gluing, will become a modern, light and functional piece of furniture.
Beautiful decoration of a chest of drawers with your own hands
- An old, seemingly unnecessary nightstand will turn into a wonderful bedside table that will decorate the design of your bedroom.
Decorating a bedside table in the interior
- The dressing table, which at first could simply be written off, will turn out to be an excellent work desk, also with the presence of bedside tables.
An old dressing table in a new attractive form
- With a little work on an old carved sofa back, you can end up with a wonderful addition to a mini-sofa.
How to use an unnecessary sofa back in room design
- Decorate a nondescript cabinet with a tabletop and a door - you will get a good and useful full-fledged cabinet for various items.
DIY Closet Improvements
- Use paint to turn an unnecessary coffee table into a real work of art with unforgettable oriental motifs.
Design and decoration of an old table
- If you have some fabric left and an old chair, feel free to turn it into a new design project that will undoubtedly be a success.
Upholstering a chair to update the look
- Work with a nondescript bedside table, after which it will be a highlight in the interior design of one of your rooms.
Option for designing a cabinet to acquire a new look
- A large chest of drawers can easily be updated and converted to one of the French motifs.
Updating an old chest of drawers to a modern design
- You can easily transform your grandparents' old wardrobe into a modern one using regular wallpaper.
Old wardrobe with a modern twist
Dresser update
The old chest of drawers had stood for who knows how many years in the attic, but it was very strong and reliable, it had not dried out one bit, only the polish was cracked. It is much stronger than modern products. This is a feature that is inherent in old, Soviet-era furniture. It's not very detailed (to put it mildly), but after standing in poor conditions for several decades, it remains strong. Remaking a chest of drawers is more complex: two techniques were used: painting, and then decorating using polyurethane moldings and wallpaper.
This is what it was in the beginning: an old thing that had been collecting dust in the attic for a long time
Step 1. Remove the fittings and remove the old coating. In some places the polishing was scraped off, in others it was sanded with sandpaper. The chips were covered with wood putty and waited until it dried. At the final stage, everything was cleaned with fine-grain sandpaper. At the same time, the chest of drawers became the same as in the photo below.
This is after it was puttied and leveled with sandpaper
Step 2. Installation of polyurethane moldings. When choosing moldings, make sure that they are not bulky: too thick ones will look very rough on a small chest of drawers. They should be no wider than 5 cm and as narrow as possible when looking at them in profile.
The purchased polyurethane moldings were carefully cut, the corners were filed at 45°. (Read here how to properly file the corners of moldings). The pattern match must be perfect. We glue them on PVA. For reliability, you can additionally secure it with screws with wide heads. A small recess is made under them, after the self-tapping screw is screwed in, the hole is covered with putty. Try to ensure that the putty immediately lays down perfectly (you can correct it with a wet finger), since it is problematic to clean off dried putty.
Moldings are glued and mounted on self-tapping screws
Step 3. Everything is treated with a primer. You can use PVA glue diluted with water in a ratio of 1:2. After the primer dries, paint (two layers). For this case, water-based acrylic paint was chosen. The color is coffee with milk, although it looks completely different in the photo. Color rendering is inaccurate.
This is after the second application of paint. Cute
Step 4. For decoration, wallpaper was selected whose coating was made using the silk-screen printing technique. Pieces are cut to the size of the inside of the frames from the moldings and glued to PVA. After the glue has dried, the entire chest of drawers is coated twice with water-based varnish.
This is the decor for the chest of drawers
Step 5. And the last to be installed are new legs (furniture wheels) and handles.
We install the handles and legs)) The updated chest of drawers is completely different from the one you saw in the first photo.
As you can see, there are no difficult jobs. Everything is really elementary. But all processes require accuracy - the appearance depends on it. You can also update an old wardrobe in the same way. Get a set for the room. Stylish and original.
When updating furniture, the worst thing is if the surface is varnished. The varnish takes a long time and is difficult to remove. If the surface is smooth and the polishing is not damaged, you can apply primer for complex surfaces and paint after drying. This greatly speeds up the process of painting lacquered furniture.
If you have children and a summer house or yard, you may be interested in reading how to make a playground with lots of photos. You can read about making a sandbox here.
Changing the color
The easiest way to change the style and appearance of old furniture is to paint it. The work will go quickly and accurately if you prepare the necessary tools in advance: sandpaper, primer, brushes, roller, acrylic paints.
Algorithm of actions:
- furniture is disassembled into its component parts, fittings are removed;
- all surfaces are thoroughly sanded and then treated with a primer;
- Using a wide brush or roller, the prepared furniture elements are painted with acrylic paints.
Secret: you can speed up the painting process if you use spray paint.
- After the painted surface has completely dried, it is coated with colorless varnish (two or three layers).
A modern look for old chipboard furniture can be created using the idea of contrasting paint in several colors. For example, the body of the chest of drawers is painted in a dark shade, and the inner surface of the sections is painted in light shades. For those who master artistic painting techniques, the idea of painting with a gradient transition will help create a new style for old furniture.
A look from a different angle - how to create a new interior with old furniture
Is it possible to save large cabinet furniture from the Soviet heritage and create an exclusive interior to your liking? Let's show 4 examples in which this desire is realized.
Example 1. Scandinavian living room
Massive wood-colored furniture will be an excellent dominant feature in such an interior. The main thing is that the furniture comes with an abundance of light and space.
Therefore, even old objects, dark, bulky and primitive in appearance, can be left unchanged.
Move the patterned oriental rug from the wall to the floor and be sure to save it, and decorate the walls themselves in white, light blue or a special “Scandinavian white” tone (white mixed with yellow and gray). Plus, you can add bright pillows to the interior to match the style of the carpet, old sets in the shape of fish, and be sure to “let in” natural diffused light (get rid of old curtains and dark lampshades).
2. Bedroom in Provence style
The basis for creating a style is furniture with smooth, thin legs, natural or lightened, which does not clutter the interior and is a little reminiscent of cozy country life. Complete the decor with simple country-style textiles, and make the basic color scheme light and monochromatic.
Shades of Provence that soothe the eyes - blue, pistachio, beige.
3. Oasis in retro colors
To create such an environment, only beautiful, rare sets can be used. But the color scheme of the interior should be refreshed. In a retro interior, white-gray and brightly colored objects (in particular, red) look interesting.
4. Cottage in European country style
In the interior of a country dacha, favorite items from the Soviet past always look beautiful - linen tablecloths and century-old wooden furniture. However, old furniture can be visually made expensive and rare - with the help of professional painting, patination, and decoupage.
As you can see, in cases where massive furniture is used, it is better for the wall decoration to be simple, light, and non-marking.
Padding
The classic version of updating upholstered furniture is to cover it with fresh material. The old fabric is dismantled and a new one is installed in its place.
This should be done with great care so as not to touch the delicate shock absorber filler.
Depending on the dimensions of the furniture and the features of its design, the new material is secured with nails or staples. The most common fabrics for upholstery are currently recognized as: velor, tapestry, jacquard, courtesan, flock.
Remaking and restoring pieces of old furniture is a useful creative outlet, testing your own abilities and a chance to save on buying new things.
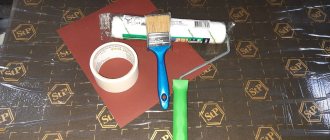
Required materials and tools
To work you need to prepare the following tools:
- drill;
- screwdriver;
- hammer;
- pencil and ruler.
The selection of the necessary building material completely depends on the chosen restoration method.
The selection of the necessary building material completely depends on the chosen restoration method. The standard set of materials is as follows:
- primer;
- sandpaper;
- varnish or paint;
- alcohol;
- decorative elements;
- accessories.
When did the best furniture appear in Soviet history?
The first Soviet interiors began to appear in the 1920s and 30s, and these were communal apartments with very simple furnishings. Bulky, roughly designed “Stalinist Empire style”, but noticeably reliable cabinets and tables - this is what minimalism looked like then.
Sets from the 1930s-50s are more reminiscent of the usual Soviet style, ostentatious, authentic. Everything created then indicated the prosperity of the houses and was carefully preserved. Therefore, the living room could combine the incongruous: a massive wall, ostentatiously filled with books and crystal, compact curved chairs, a sofa bed.
But items from that time are already more compact and convenient, adapted for small apartments. And at the same time, they are also characterized by the strength of a real solid mass.
And the best legacy that these years have left:
- Viennese (the same ones with curved backs) chairs, armchairs, tables - lightweight cabinet furniture on thin high legs, from the countries of the Eastern Bloc, stylish even by the standards of our time.
But not only that!
The rooms of the 1970s and 80s were already more individual, sometimes furnished under the influence of disco. The character of those interiors was created not by furniture, but by design details - new posters, records, bright colors. And laconic sets came into use, which opened up space for design ideas - coffee tables, low armchairs.
In typical furniture of this era, parts made of plastic and chipboard appeared - beautiful, cheap and, alas, impractical in comparison with an array of materials.
Remaking old furniture through varnishing
If Soviet furniture is made of valuable wood, then, as we said above, it is better to cover it with a fresh layer of varnish than to paint it over. How to update old furniture through varnishing?
Firstly, when remaking or restoring Soviet furniture with your own hands, it is best to use oil varnishes. They are suitable for all types of wood and form very durable, shiny and moisture-resistant coatings. The only negative is the long drying period (up to 12 hours). For comparison: shellac varnish dries in 1-2 hours, and nitro varnishes dry in 30-40 minutes.
General rules for remaking old furniture:
- The varnish can be applied with a brush or a piece of thick, lint-free cloth folded 2-3 times;
- The varnish is applied in 3-5 layers, and after applying each new layer, the drying time should be increased;
- Excess varnish should be squeezed out on the edges of the jar, and the brush can sometimes be washed in an alcohol solution.
How to update old furniture with craquelure varnish
We also want to give you an example of a special varnishing method, which is performed using a special varnish - craquelure.
Today, for remodeling old furniture, there are many varieties of craquelure varnish: with a patina effect, gilding, etc. The most common one is applied in a thick layer over the base layer of paint, after which it is coated with a different color to highlight cracks. Also, craquelure varnish can consist of two components: the first is applied to age the surface being treated, the second is applied to create decorative cracks.
Restoring Soviet furniture using craquelure is perfect for lovers of antiquity and country style. As, indeed, our next method is decoupage.
How to update an old nightstand
In the photo gallery below you can see the process of restoring an old polished bedside table. First, the old polish was removed from it, puttyed, sanded and after processing it was painted twice with acrylic paint. Then paper with an interesting design was glued to the doors (it was a gift paper bag). Once dry, the whole thing was coated with two coats of semi-gloss acrylic varnish.
The sequence of work is not difficult if you know how to do it. All processes will repeat the sequence of actions that you saw in the example of updating the chest of drawers. The result is also impressive.
Remodeling furniture with your own hands is a painstaking task, but the result is worth it. Below is a photo of a bedside table restored using a simple method: it is covered with embossed wallpaper, and varnish is applied twice on top.
You can hang embossed wallpaper, and to prevent it from getting dirty, cover it with a double layer of transparent varnish